RICE LAKE Cargo Lift Scale Series Wired to Wireless Conversion

Wired to Wireless Conversion Instructions
 Manuals can be viewed or downloaded from the Rice Lake Weighing Systems website at www.ricelake.com/manuals
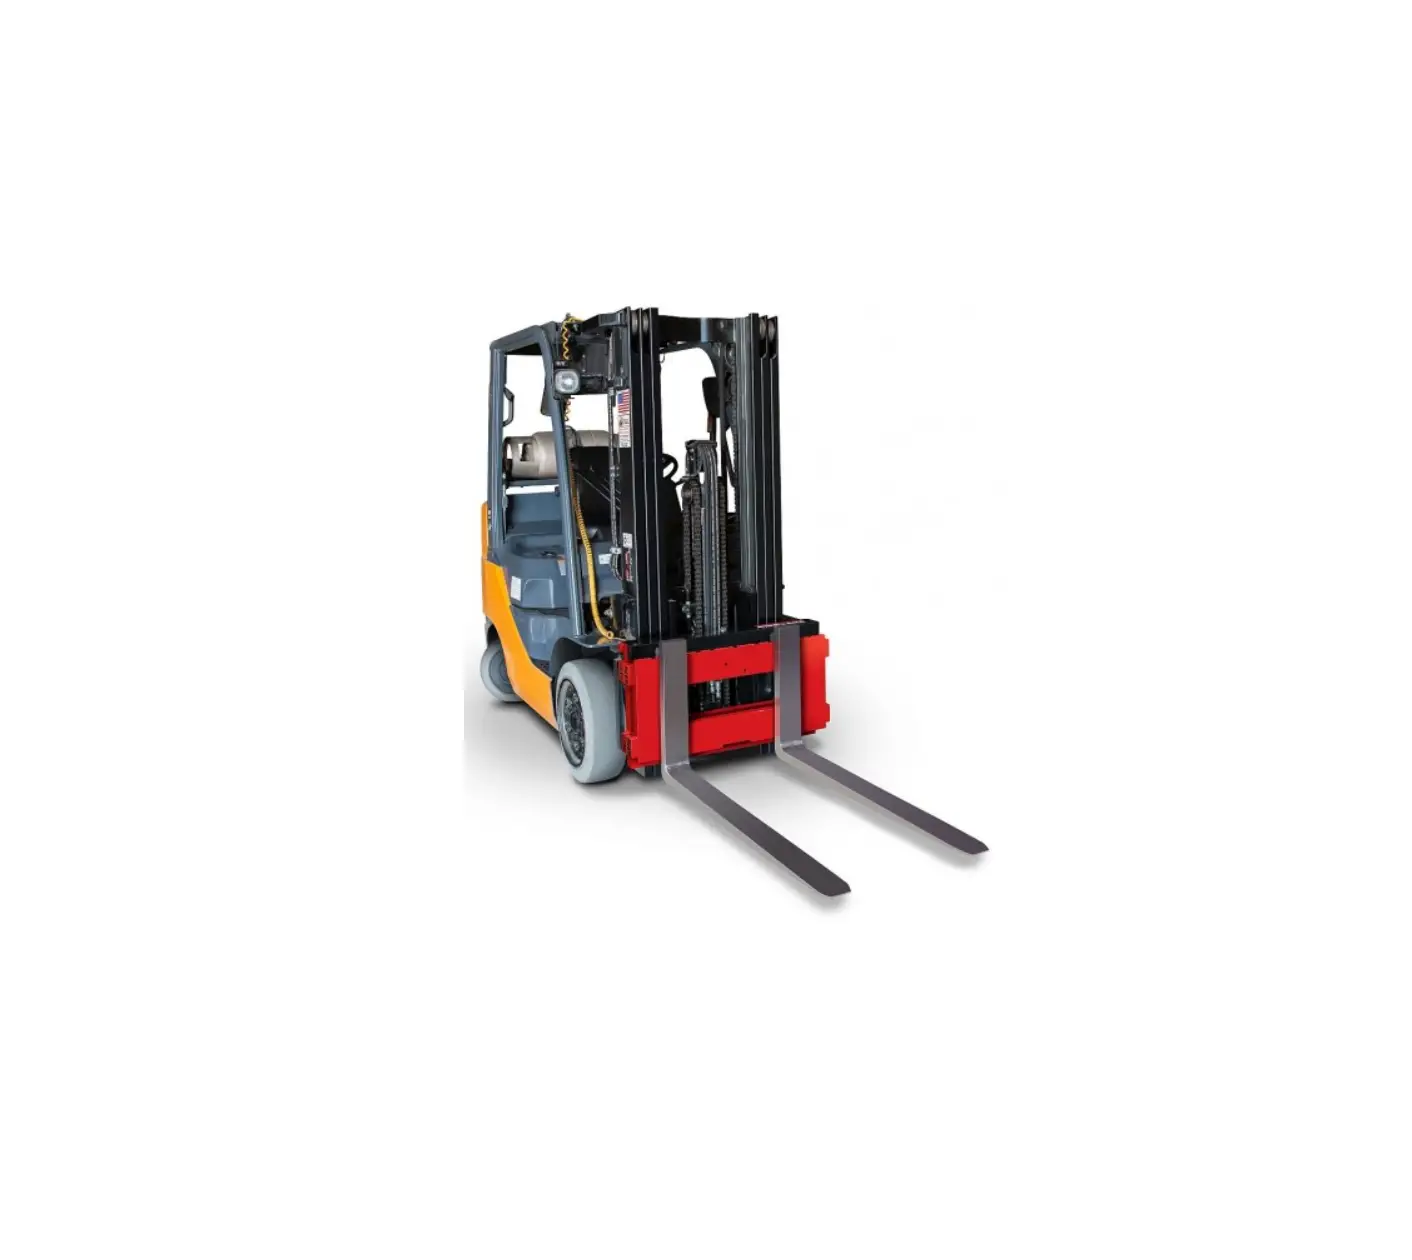
The CLS Series Cargo Lift Scale has the capability to go from wired to wireless operation with a few steps. The wireless option attaches onto the back of the indicator and collects data from the junction box without the use of a coiled wire cable.
The conversion kit contains the following items:
- Angle/battery box assembly (PN 167282)
- Wireless sub-assembly box (PN 98289)
- Lithium-Ion battery (PN 96343)
- Lithium-Ion battery charger (PN 96344)
Wireless communication between the indicator and the junction box which is located on the forklift and is powered by a lithium-ion battery housed in a battery box.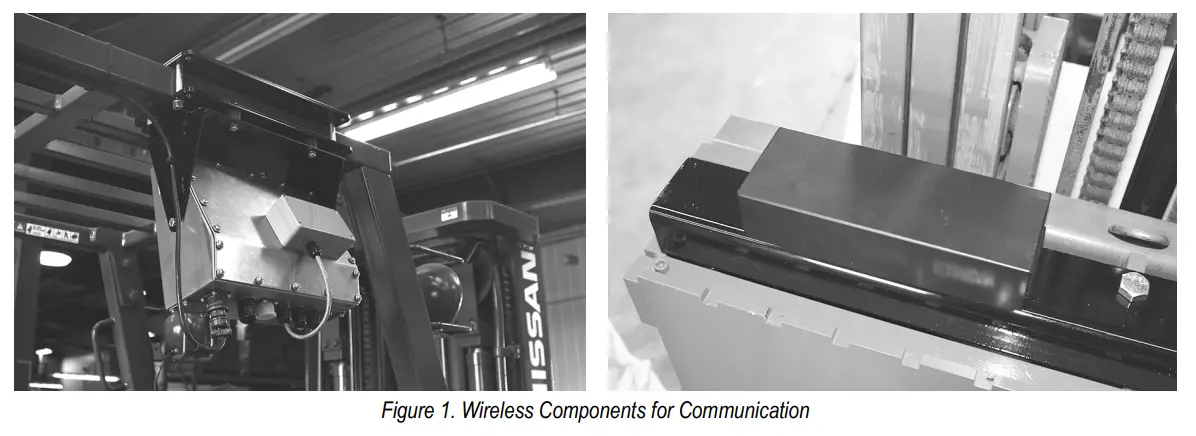
To convert the unit from wired to wireless:
- Remove the angle bracket and the wired cable connecting the indicator to the forklift scale.
- Install and wire from the wireless sub-assembly box to the indicator.
- Install the angle/battery box assembly to the top of the carriage.
Remove Wired Cable
To remove the wired cable from the forklift to the indicator:
- Cut cable ties that are securing the coiled wire between the bottom of the scale and the top of the mast of the forklift.
- Disconnect the cable from the indicator.
- Remove top cover plate from the forklift to access the junction box located beneath.
- Disconnect the wired cabling from the junction box.
Install and Wire the Wireless Sub-Assembly Box to Indicator
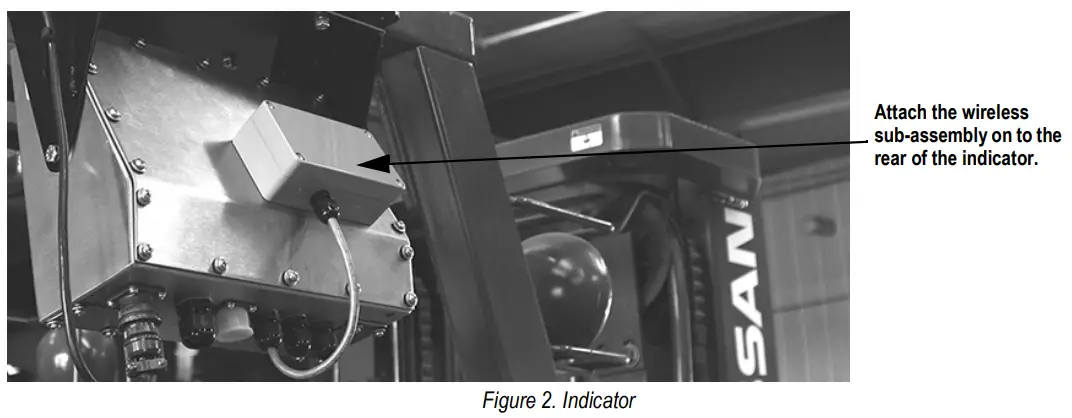
- Use the attached screws and screw the wireless sub-assembly box onto the back of the indicator.
- Open the rear of the indicator.
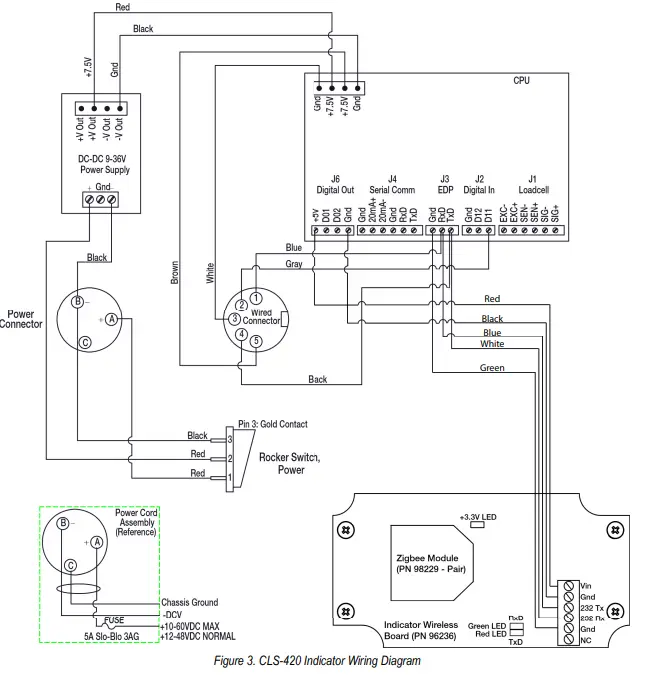
- Run the wire through bottom cord grip of indicator and wire into the connections

CLS-420 Wiring Diagrams
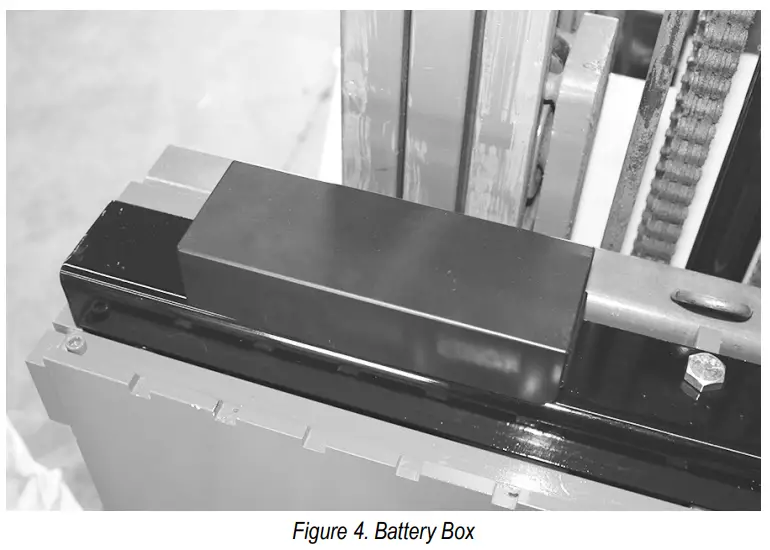
Installing the Angle Cover Plate and Battery Box Assembly
To install the angle cover plate and battery box assembly:
- Attach pigtail from angle cover plate and battery box assembly to junction box.
- Secure angle cover plate and battery box assembly to top of carriage.
- Install battery.
- Following for battery option.

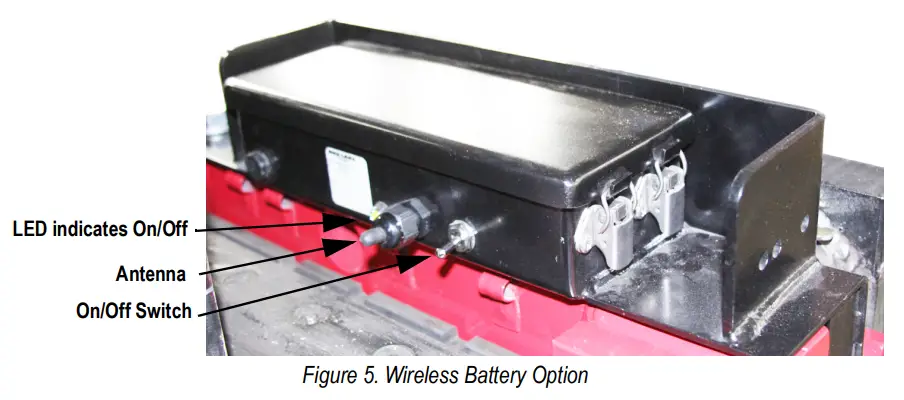
Wireless Battery Option
Wireless technology eliminates the need for the coiled interface cable. The reinforced battery box is welded onto the cover plate. There is an On/Off switch to conserve the life of the battery and an LED to indicate when the battery is on. Battery life is approximately 24 hours of continuous use, with only eight hours to fully charge.
The wireless technology operates using a paired set of IEEE 802.15.4 wireless modules. It operates in unlicensed bands including 2.4 GHz, 900MHz and 868 MHz. One module is in the battery angle bracket assembly, the other is in the wireless junction box connected to the indicator.
If multiple units are being installed, make a note of the original components supplied on each pallet. They will only operate in combination with each other.
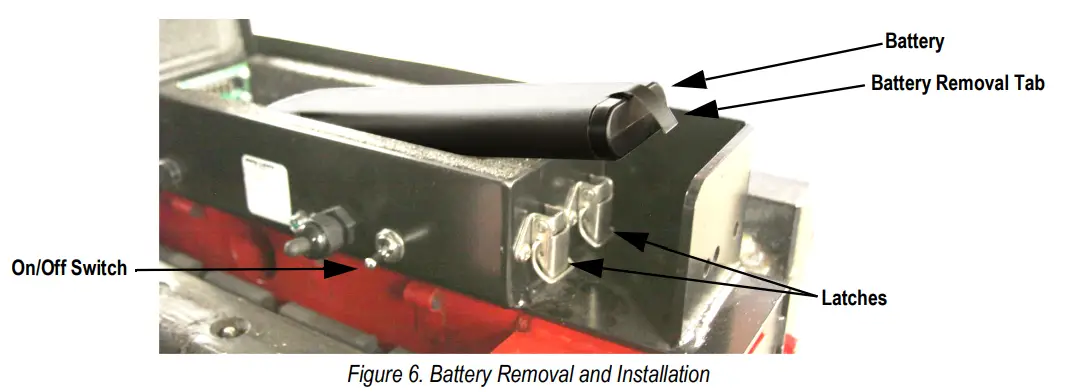
Battery Removal and Installation
To replace the lithium-ion battery that powers the unit:
- Place the On/Off switch in the Off position.
- Release latches and raise the cover.
- Grasp a tab on the end of the battery and pull up.
- Insert a new/charged battery into the battery case.
- Close the cover and engage the latches.

The CLS scale uses a supplied lithium-ion battery to supply power to the indicator when using a wireless version of the CLS420. The lithium-ion battery is located on the top of the cover plate in a painted enclosure.
Table 1. Battery Replacement Parts
| Part No. | Description |
| 96343 | Lithium-Ion Battery |
| 96344 | 2-Bay Battery Charger |
| 96345 | 10-Bay Battery Charger |
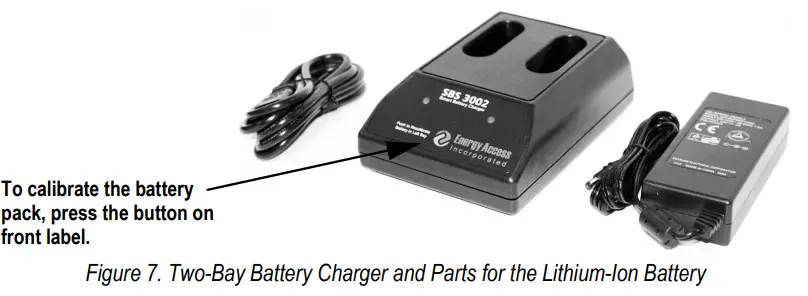
Charging the Lithium-Ion Battery
The lithium-ion battery comes with a two-bay, level-3 stand alone smart battery charger, a DC power jack and AC power cord.
The average charge time for the battery is eight hours each.
Use the following steps to charge the battery prior to use:
- Insert the plug end of the power cable into the DC power jack on the battery charger and the AC plug into an outlet.
- Insert battery into the bay.
- There is one LED indicator in front of each bay which will illuminate to indicate the status of the battery as follows:
Table 2. Battery Charging LED Signals
| Signal | Description |
| Off | No Battery |
| Green Flashing | Fast Charging |
| Green Solid | Fully Charged |
| Yellow Flashing | Recalibrating |
| Yellow/Green Alternating | Recalibrating |
| Yellow Solid | Standby |
| Red Flashing | Error |
Calibrating the Lithium-Ion Battery
To keep the battery fuel gauge as accurate as possible, it is necessary to run the pack through a recalibration cycle on a monthly basis. To recalibrate, place the battery in the left bay of the charger and press the button on the front label, See Figure 7 on page 5. This initiates the recalibration sequence in the left bay only. The process can take up to nine hours to complete and a recommended recalibration must be done once a month to keep the battery accurate.
Lithium-Ion Battery Specifications
Table 3. Battery Specifications
| Nominal Capacity | 6600 mAh | |
| Nominal Voltage | 11.1 V | |
| Charging Method | Constant Current | |
| Constant Voltage | ||
| Charging Voltage | 12.6 V | |
| Charging Current | 4.0 A | |
| Charging Time | 100% at 8 hours | |
| Ambient Temperature | Charge | 0º±40ºC (32º-104ºF) |
| Discharge | -20º±60ºC (-4º-140ºF) | |
| Storage | -20º±50ºC (-4º-122ºF) | |
| Weight (Maximum) | 430 g | |
| Dimensions (Maximum) | Depth | 22.80 mm |
| Length | 214.0 mm | |
| Volumetric Energy Density | 466 Wh/I | |
| Gravimetric Energy Density | 167 Wh/kg | |
| Maximum Hours of Charge | 24 hours | |
| Nominal Capacity | 6600 mAh | |
© Rice Lake Weighing Systems Specifications subject to change without notice.
Rice Lake Weighing Systems is an ISO 9001 registered company.
230 W. Coleman St. • Rice Lake, WI 54868 • USA
U.S. 800-472-6703 • Canada/Mexico 800-321-6703 • International 715-234-9171 • Europe +31 (0)26 472 1319