Bosean BH-4S Portable Multi Gas Detector User Manual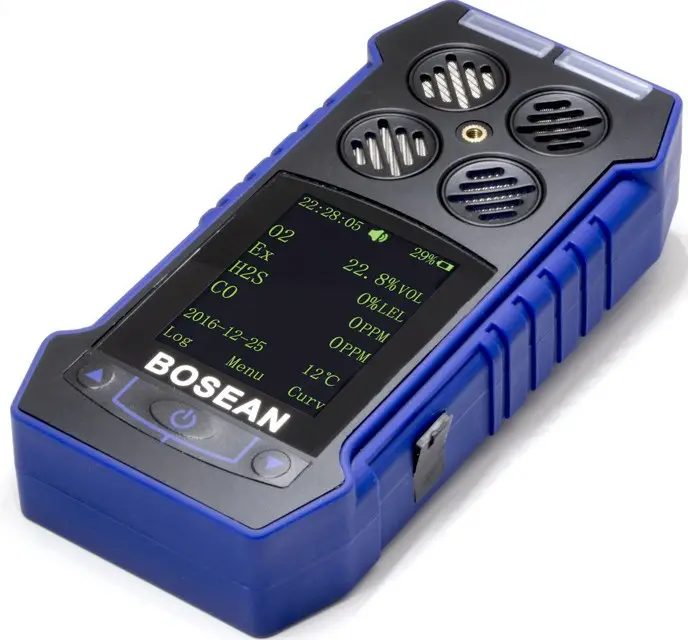
Brief Introduction
BH-4S portable multi-gas detector could detect combustible gas, O2 and other two types toxic gases continuously and simultaneously. It is widely used in the area where explosion-proof is required or toxic gas leaks, like underground channels or mining industry, so as to protect the workers’ life and avoid damage on the relevant equipments.
Main features
- Natural diffusion sampling method and high-sensitivity sensor, with high sensitivity and repeatability.
- 32-bit built-in MCU, high reliability and self-adaptation ability.
- Full functions, easy operation.
- CSTN colorful LCD, more intuitionistic, abundant and clear indication.
- Compact design, easy carrying.
- High strength engineering plastics and compound anti-slippery rubber; high strength, water-proof, dust-proof and explosion-proof.
Structure & Function
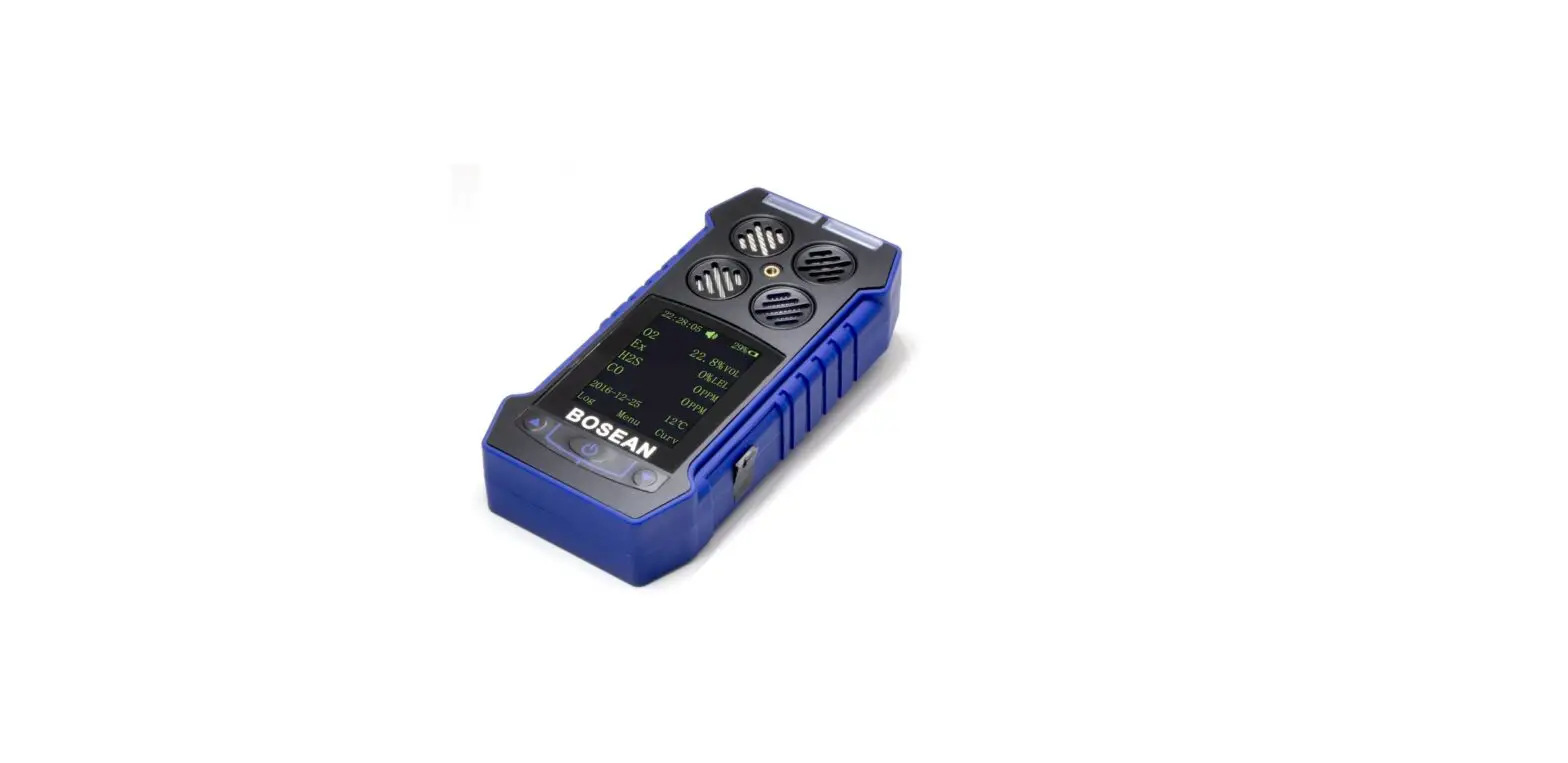
Appearance
Fig. A

| No. | Name | No. | Name |
| 1 | Alarm light | 4 | Buzzer |
| 2 | Button | S | Sensors |
| 3 | LCD screen |
Detector structure: the main shell, circuit boards, batteries, display, sensors, chargers of the components. 2.3 Principle: Electrochemical and Catalytic sensor.
Technical Data
| Target Gas | Range | Low alarm | High alarm | Resolution |
| LEL | 0 100%LEL | 20%LEL | 50%LEL | 1%LEL |
| H2S | 0 100ppm | 10ppm | 35ppm | 1ppm |
| CO | 0 999ppm | 50ppm | 150ppm | 1ppm |
| Oz | 0 30%voI | 19.5%voI | 23.5%voI | 0.1%voI |
| Other gases needed, please contact supplier | ||||
- Gas sampling method: Natural diffusion
- Detecting gas: Combustible gas, H2S, CO, O2
- Accuracy: ≤±5% F.S.
- Response Time: ≤30s
- Indication: LCD displays real-time and system status; LED, audio and vibration alert for gas leakage, fault and low voltage.
- Working environment: -20℃~50℃, <95%RH (no dew)
- Power Source: DC3.7V Li-on battery, 2000mAh
- Charging time: 6h~8h
- Working time: ≥ 8h continuously (without alarming)
- Gas Sensor Life: 2 years
- Explosion-proof grade: Ex ib IIB T3 Gb
- Protection Grade: IP65
- Weight: Appr. 400g (with battery)
- Dimensions: 130mm×67mm×30mm(L × W × H)
Operation & Function
Turn on
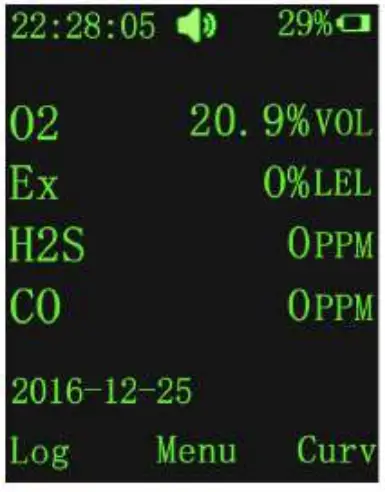
Press the button ![]() for 3s and then release it. After the buzzer gives short sound once, the detector is turned on. After 10 seconds, it enters detecting status. At this time, it displays the concentration of O2, H2S, CO and Combustible gas in the environment as figure 1.
for 3s and then release it. After the buzzer gives short sound once, the detector is turned on. After 10 seconds, it enters detecting status. At this time, it displays the concentration of O2, H2S, CO and Combustible gas in the environment as figure 1.
Turn off
Under power on status, press ![]() button for more than 3s, With the buzzer issued a “beep” sound, the LCD screen prompts the user to shut down the interface shown in Figure 2, the user through the ▲ ▼ keys to select whether to shut down, if you choose to shut down, the screen no longer display any information, the detector into the shutdown state.
button for more than 3s, With the buzzer issued a “beep” sound, the LCD screen prompts the user to shut down the interface shown in Figure 2, the user through the ▲ ▼ keys to select whether to shut down, if you choose to shut down, the screen no longer display any information, the detector into the shutdown state.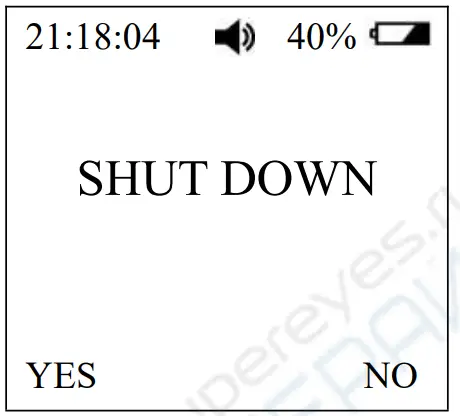
Button function
Detector in the normal detection state as shown in Figure 3:
- Press
 any key to open the back light (user can set back light time)
 - Press ” ” key to enter the menu;
- Press “▲” key to enter the alarm record;
- press “▲ ▼” key to select the alarm log to view the alarm record
- details.
- Press “▼” key to enter the gas concentration curve display
- interface;
- press “▲ ▼” key to view the different gas type concentration value curve.
When the detector detects the gas concentration is lower than the pre-set low alarm value (Note: when the concentration of oxygen is higher than the low alarm value and lower than the high alarm value), the detector is in the normal state, No alarm at this state.
When the detected gas concentration is higher than the preset low alarm value and less than the high alarm value (Note: when the oxygen concentration is lower than the low alarm value), the detector is in a low alarm state, the buzzer sends out every 1s “beep, beep” alarm sound, the red light flashes synchronously, and the gas concentration value on the screen changes the color to yellow, the back light and the vibrator are also open, indicate low alarm; press ” ![]() ” key to mute, but still shows the alarm information. Until the new alarm is triggered, the buzzer is resumed and the alarm light, the vibrator are restored. When the detector detects the gas concentration value below the low alarm value, the gas concentration value color turns green, the alarm signal will be released automatically. Alarming state shown in Figure 4.
” key to mute, but still shows the alarm information. Until the new alarm is triggered, the buzzer is resumed and the alarm light, the vibrator are restored. When the detector detects the gas concentration value below the low alarm value, the gas concentration value color turns green, the alarm signal will be released automatically. Alarming state shown in Figure 4.

When the detected gas concentration is higher than the pre-set high alarm value, the detector is in the high alarm state, then the buzzer sends every 1s “Di Di Di Di, … Di Di Di Di” And the red indicator light flashes synchronously, the change of the gas concentration value is displayed on the screen. The color becomes red, the back light and the vibrator are also on, indicate high alarm; press “![]() ” key to mute, but still Display alarm information. Until the new alarm is triggered, the buzzer is resumed and the alarm light, the vibrator are restored. When the detector detects the gas concentration value below the low alarm value, the gas concentration value color turns green, the alarm signal will be automatically released. the alarm signal will be released automatically. Alarming state shown in Figure 5.
” key to mute, but still Display alarm information. Until the new alarm is triggered, the buzzer is resumed and the alarm light, the vibrator are restored. When the detector detects the gas concentration value below the low alarm value, the gas concentration value color turns green, the alarm signal will be automatically released. the alarm signal will be released automatically. Alarming state shown in Figure 5.

When the detected gas concentration is higher than the test range, the buzzer sounds “beep, beep”, the LCD screen is on, the vibrator is on, and the screen Display the maximum range of gas, indicating over range. Press the ” ![]() ” key to release the alarm.
” key to release the alarm.
Normal monitoring interface under the first line shows the time, alarm signs ![]() ( it occurs when there is alarm, yellow color with low alarm, red color with high alarm), the buzzer instructions (normal
( it occurs when there is alarm, yellow color with low alarm, red color with high alarm), the buzzer instructions (normal ![]() , mute
, mute ![]() ), battery percentage, battery power, date and temperature,
), battery percentage, battery power, date and temperature,
Note: The alarm sound above can be manually cleared by pressing the ” ![]() ” key. After clearing, the alarm information is still displayed normally. If the alarm is triggered again, the corresponding alarm sound information can be issued again.
” key. After clearing, the alarm information is still displayed normally. If the alarm is triggered again, the corresponding alarm sound information can be issued again.
Use and set functions
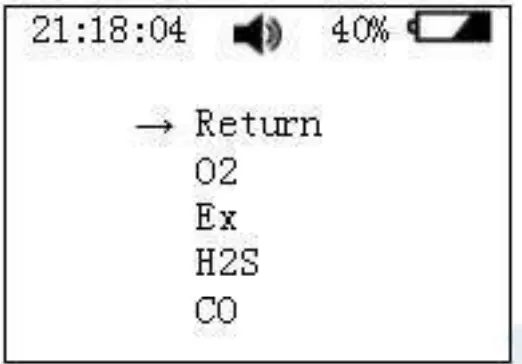
The detector has a total of alarm record function, gas concentration curve display, gas parameters setting, calibration, zero calibration, language settings, information viewing, back light settings, time settings and other functions. Press the ” ![]() ” button to enter the function selection, in the function selection interface to move the cursor to “return” words, continue to press ”
” button to enter the function selection, in the function selection interface to move the cursor to “return” words, continue to press ” ![]() ” to return to the normal monitoring interface as shown in Figure 6.
” to return to the normal monitoring interface as shown in Figure 6.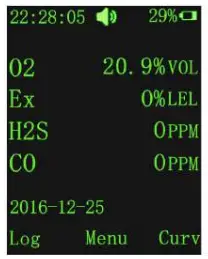
Alarm record and alarm curve
Alarm record function:
Detector in the normal detection of the main interface, press ▲ to enter the alarm recording interface, the record includes the alarm sensor name, alarm type, alarm value, alarm time. As shown in Figure 7: This feature can view the gas alarm history, easy checking.
As shown in the following table:
| Sensor | Type | Value | No. | Remark |
| O2 | ↑(H) | 30 | 1/4(Current/Total) | |
| Ex | ↑(H) | 80 | 2/4(Current/Total) | |
| H2S | ↑(H) | 58 | 3/4(Current/Total) | |
| CO | ↓(L) | 127 | 4/4(Current/Total) | |
| 2016-06-16 12:15:35 Alarm time | ||||
The alarm log value is the maximum alarm value in the alarm interval (O2 is the lowest). The maximum number of record groups is 500.
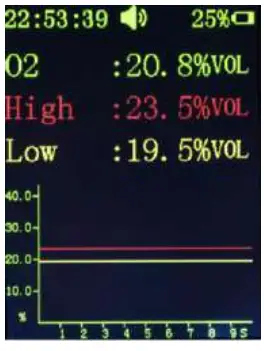
Curve display function:
The detector in the normal detection of the main interface, press the ▼ to enter the curve display interface, this time through the ▲ ▼ button to view each channel sensor gas concentration curve. Each channel sensor has a curve display. Oxygen as an example:
|
| Description |
| The abscissa X axis is the time, the current record within 9s of the curve | |
| The vertical axis Y is the sensor value, data of the sensor can be seen from the Y axis | |
| Note: the axis and the data is green, the data curve is blue, the low alarm line is yellow, high alarm line is red. | |
Detector menu settings
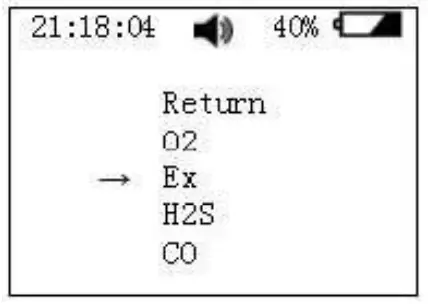
In the normal detection mode, press ” ![]() ” key to enter the menu, then press ▲ ▼ key to select the setting of gas parameters, calibration, calibration zero, language settings, information view, back light settings, time setting function. These function menus can be displayed cyclically and can be selected by cursor movement
” key to enter the menu, then press ▲ ▼ key to select the setting of gas parameters, calibration, calibration zero, language settings, information view, back light settings, time setting function. These function menus can be displayed cyclically and can be selected by cursor movement
The menu function is as follows:
| Description | Operation | |
| Return | Press ▲ ▼ key to move the cursor to the return function, press ” | |
 | Setting | Four sensor parameters can be set, including the gas type, unit selection, high alarm and low alarm, range settings. |
 | Calibration | Can be calibrated for the sensors |
 | Zero | Zero calibration |
 | Language | Choose language |
 | Information | Soft version and date of manufacture |
| Back light | Setting the time of back light | |
 | Time set | Set the date and the time |
Parameter setting of the detector
| Display | Description |
|
|
|
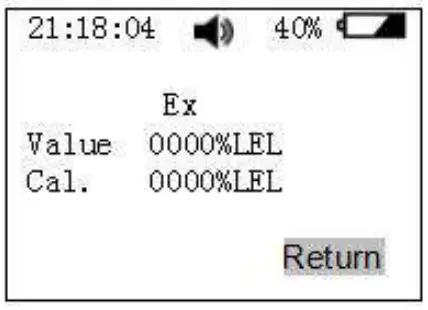
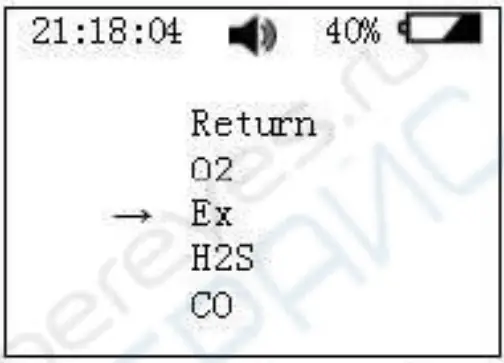  | Gas parameters setting Parameter settings include gas type, unit select, high alarm and low alarm, range settings. As an example with Ex, as shown in Figure 10, use the A key to select the gas type (Ex),press the % to enter Ex gas parameter settings, As shown in Figure 11, use the A T key to modify the parameter, after done, press the return. If no special requirements, alarm value parameters should not be modified. |
   | Zero Calibration In the menu function interface, select the Zero, press”
|
 | Language In the menu function interface, select the language, press the ” |
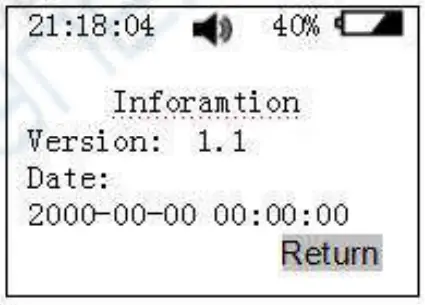 | Information In the menu function interface, select the information, press the ” |
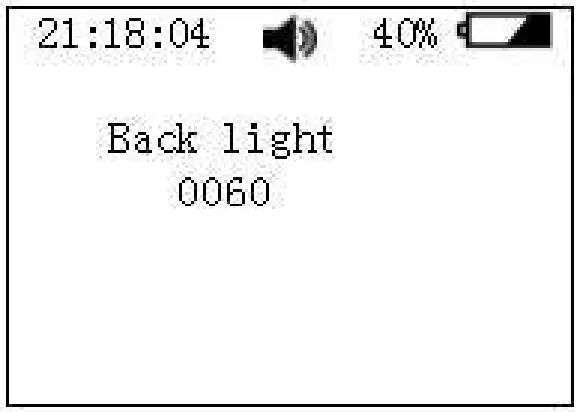 | Back light In the menu function interface, select the light, enter the back light settings interface as shown in Figure 17, press the ” |
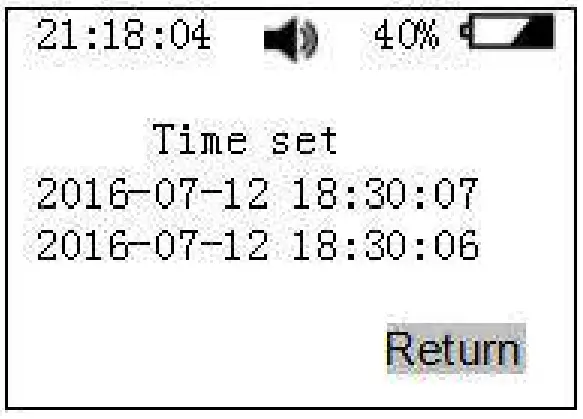 | Time set In the menu function interface, select the time, enter it as shown in the figure 18, press the ” ” key to move the cursor, use the▲▼key to set the current system time, press the▼key return to the main menu. |

Alarm information
The following table shows the details of each alarm:
| Alarm type | Display |
| Low alarm: Slowly tweak the alarm tone The alarm indication is yellow The red alarm light flashes vibrating | 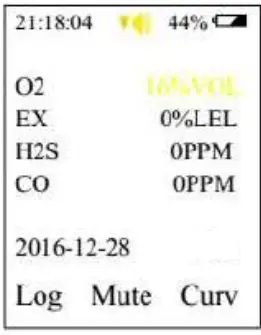 |
| High alarm: Abnormal harsh tone of the drop alarm sound The alarm indication is red The red alarm light flashes vibrating | 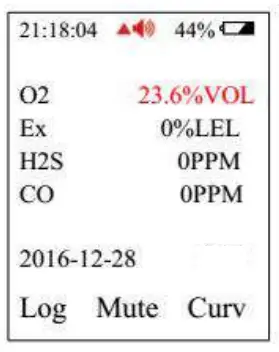 |
Charging
Please charge the detector when it shows low battery or thedetector can’t be turned on due to low battery. Before charging, please turn off the detector. After you connect the charger correctly between the detector and AC power source, the detector will be turned on automatically. When the battery mark on the screen is full and doesn’t change any more, it means the charging is completed. Please pull off the charger.
Warning: During charging status, the detector can’t detect the gas leakage. Please do not try to charge it at testing places to avoid fire or explosion. Please do not charge it when the detector is working to avoid potential damage. Note: Make sure full charge for at least once within 3 months since production date.
Possible fault and corresponding solution
| Possible fault | Possible reason | Corresponding solution |
| The detector can’t be turned on | Too low battery | Please charge it in time. |
| The detector dies | Please contact the | |
| manufacturer of dealer | ||
| Fault of electric | Please contact the | |
| circuit | manufacturer of dealer | |
| No response to the gas | Warm up is not | Wait till warm up is |
| finished | finished | |
| Fault of electric | Please contact the | |
| circuit | manufacturer of dealer | |
| Sensor is overdue | Please contact the manufacturer or dealer to | |
| replace the gas senor | ||
| Uncalibrated for long | Please calibrate it in time | |
| time | ||
| Battery voltage is | Please charge it and reset | |
| time | ||
| Strong electromagnetism | Please reset time | |
| disturb | ||
| Too much zero drift | Please calibrate or | |
| replace the gas sensor | ||
| Gas sensor drift | Calibrate zero point | |
| Sensor fault | Please contact the manufacturer or dealer to replace the gas senor |
Notices
- Falling down from high places or strong shake is prohibited.
- The detector may not work properly at interferential high-concentration gas.
- To avoid incorrect result or possible damage to the detector, please operate and handle the detector in accordance with the manual.
- The detector should be not stored or used neither under the circumstance with caustic gas (such as Cl2), nor under the other rugged circumstances, including excessive high or low temperature, high humidity, electromagnetic field and strong sunshine.
- If there is dust on the surface of the detector after a long-term use, please clean it lightly with clean soft cloth. The surface may be scraped or destroyed with caustic solvent or hard things.
- To assure the testing accuracy, the detector should be calibrated periodically. And the calibration period should be less than one year.
- Please put the used Lithium batteries to the appointed places or send to our company. Don’t discard them into the dustbin at random.
Standard accessories
- Suit case packaging: 1pc
- Charger: 1pc
Calibration cap: 1pc - Communications cable: 1pc
- User manual: 1pc
CUSTOMER SUPPORT
Henan Bosean Electronic Technology Co.,Ltd.
No.228,West 4th Ring,National High-Tech zone,Zhengzhou,China
Tel: +86 371 86533226
Fax: +86 371 86533226
E-mail: [email protected]
Website: www.bosean.com


