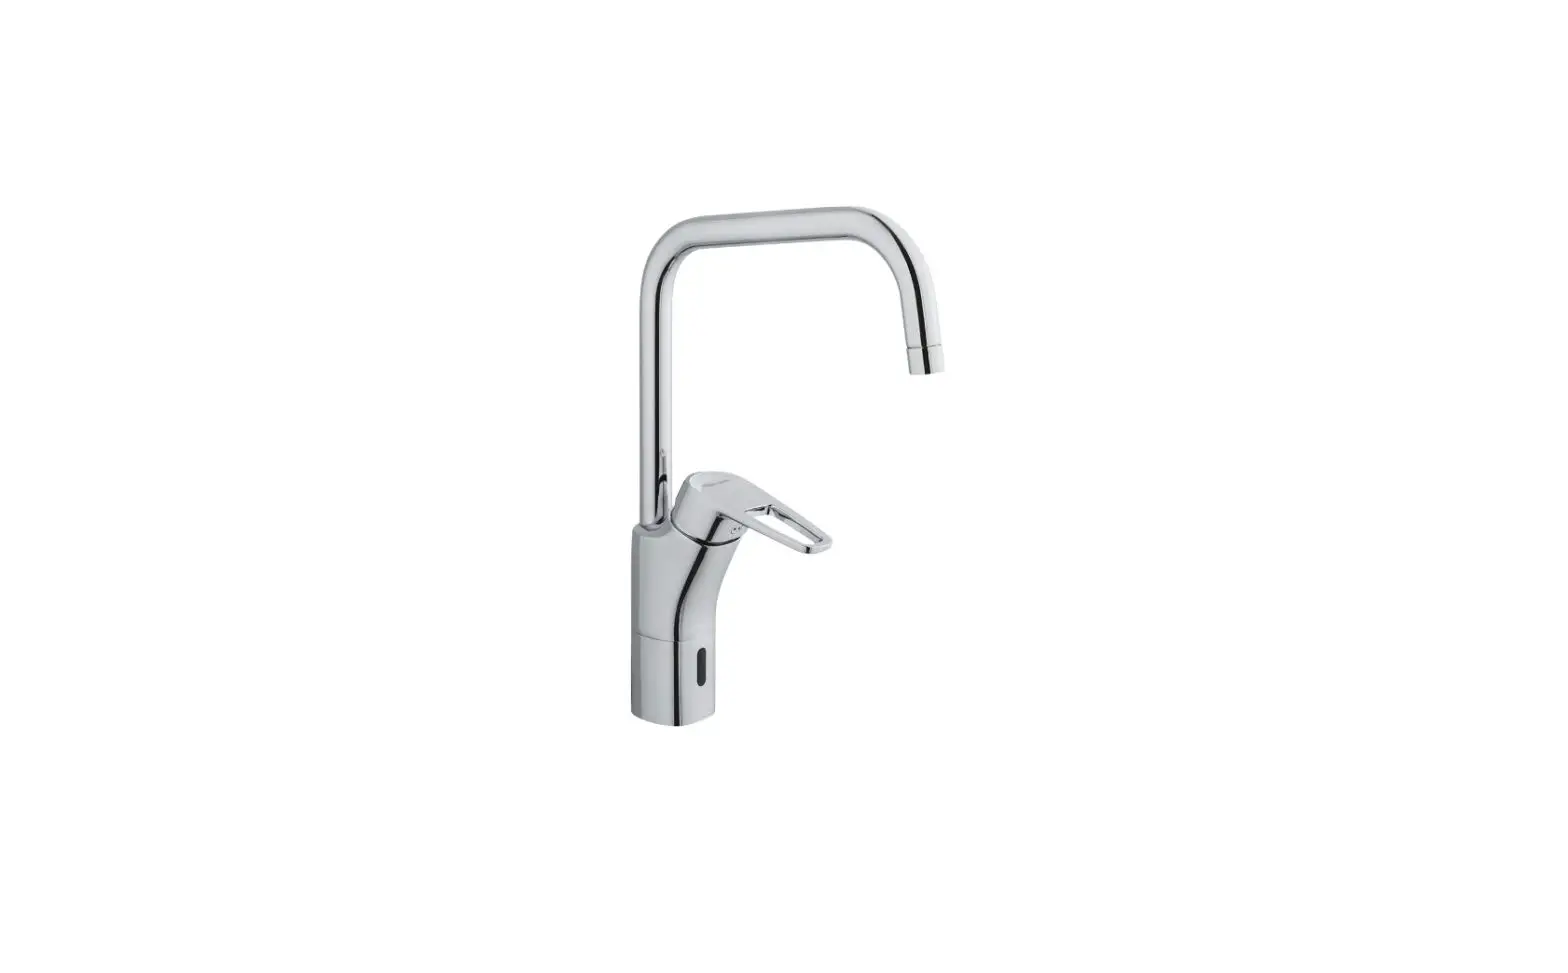
FM Mattsson SILJAN duo Kitchen Mixer Instruction Manual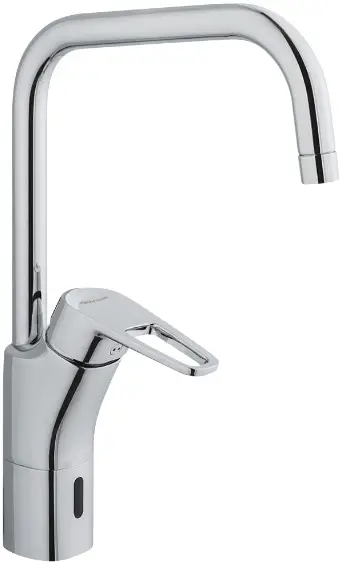
General
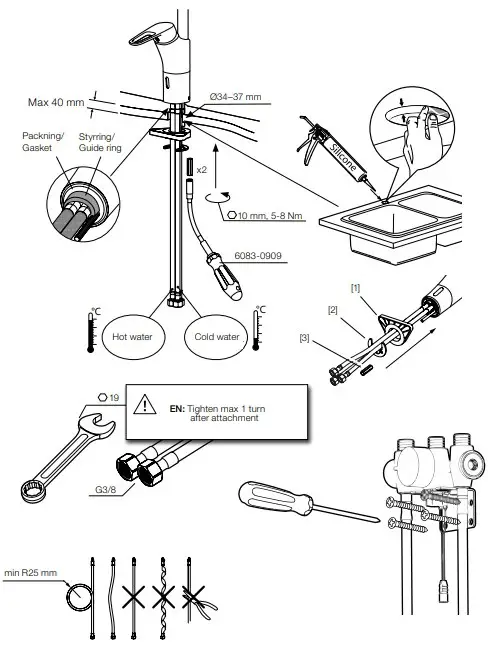
Installation
We recommend that you entrust an authorised plumber.
NOTE! For new pipe installations, the pipes must be flushed clean before the mixer is fitted.
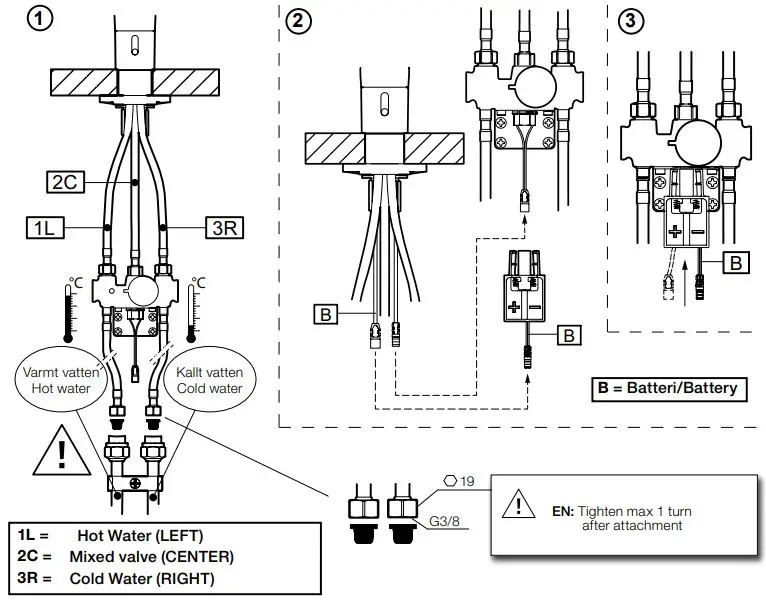
When connecting mixers that are equipped with Soft PEX® coupling pipes, the connection point should be firmly secured using pipe clamps. See pictures under the respective product.
The mixer comes with battery operation. If mains operation is preferred, the battery must be replaced with an AC adapter (available as an accessory).
Automatic calibration of the sensor is performed with the mixer connected to the power supply. The calibration is indicated by a yellow flashing LED. During this time there should be no movements immediately in front of the sensor.
Electrical installation
Installation of external power supply should be performed according to local regulations in each country.
If there is risk of freeze damage
If the mixer will be subjected to external temperatures lower than 0 °C (e.g. in an unheated holiday home), the mixer should be disconnected and stored in a heated space.Cleaning
The surface finish is best preserved by cleaning with a soft cloth and mild soap solution, followed by rinsing with clean water and polishing with a dry cloth. Do not use lime dissolvents, acidic or abrasive cleaners. To remove lime spots, mix 4 parts warm water with 1 part 12% household vinegar and wash the mixer with a soft cloth or sponge. Rinse with clean water.
Tightness check
Tightness checks should be made according to the industry rules in the respective country.
Damage arising as a consequence of stress corrosion cracking arising due to the water’s or the ambient environment’s nature as well as incorrect fitting is not covered by the product liability.
Recycling
Disused products can be returned to FM Mattsson for recycling.
Function
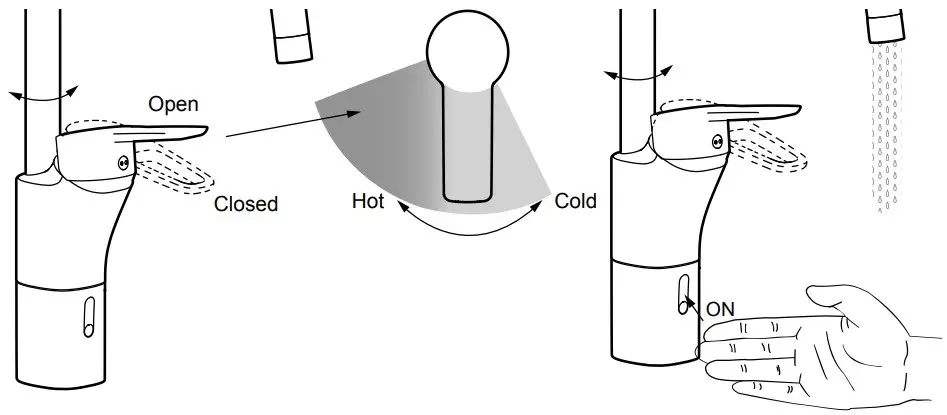
Siljan Duo is a combination of a regular kitchen mixer and a sensor- maneuvered faucet.If you use the lever, it works just like any other ordinary mixer. But with the sensor function, you can obtain a non-contact flush start with restricted flow, by holding your hand in front of the sensor. The duo function starts when your hand is nearby the front of the sensor, hygienic and user-friendly. The Flushing continues for 8 seconds, but can be stopped if you put your hand nearby the sensor again. You can choose if you want 4,8 or 12 sec of flushing time Cleaning Mode – The mixer can easily be turned off through the sensor for 5 minutes during cleaning. If you are disturbed by involuntary start of flushing, you can change to another program which can give a shorter detection range on the sensor, which means that you have to get closer to the sensor in order for it to start. The temperature of the water from the sensor is controlled by a knob under the sink.
Technical information
| Standard | EN 15091/ EN 817 | |
| Operating pressure | 50–1000 kPa 100–500 kPa* | |
| Test pressure | 1600 kPa | |
| Max. hot water temperature | 80 °C (60 °C)* | |
| Cold water temperature | ≈10 °C | |
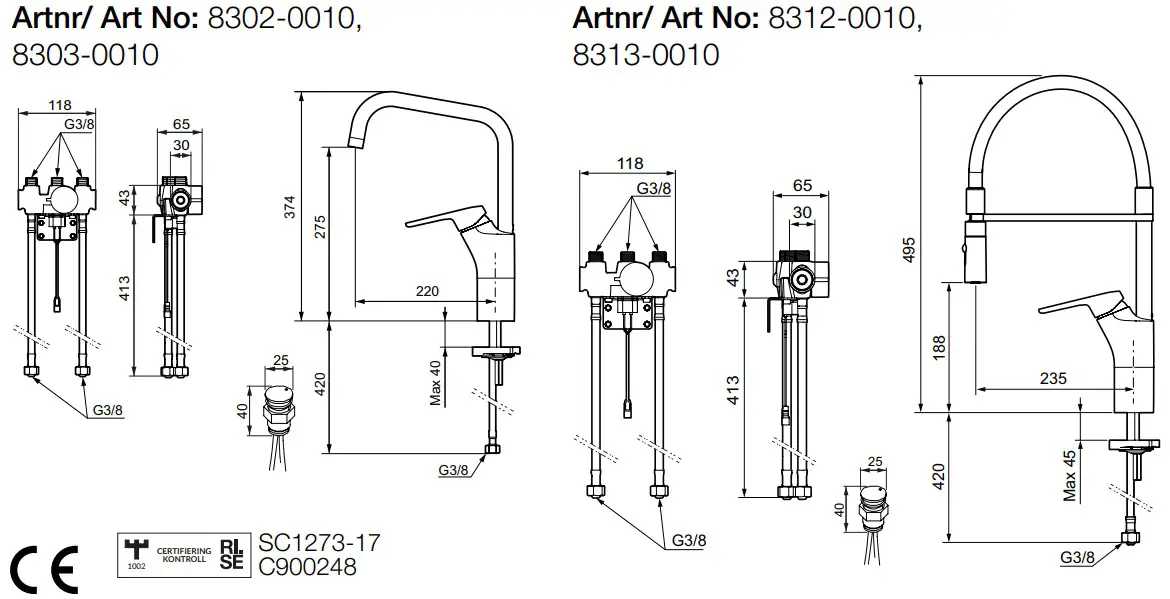
| Backflow protection | SS-EN 1717 | EB 8302-0010 8303-0010 8312-0010 8313-0010 |
| Connection | G3/8 Soft PEX® | |
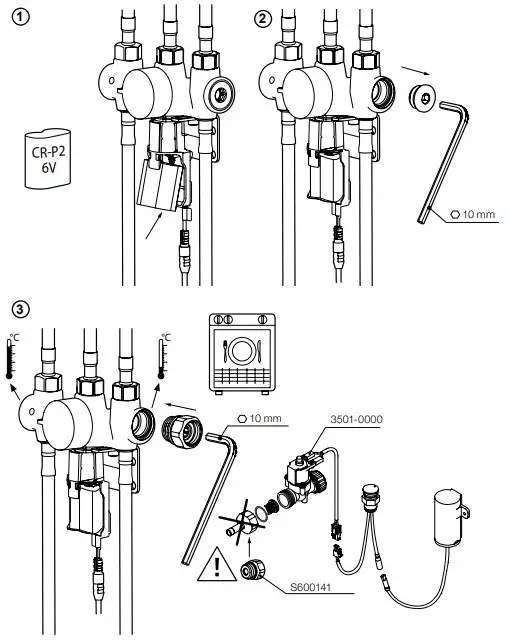
| Battery type | CR-P2 6V Lithium | |
| External power supply | 12V AC/DC, 50Hz, >7W | |
| Sensor | Aktiv IR / Active IR | |
| Enclosure class sensor | IP67 | |
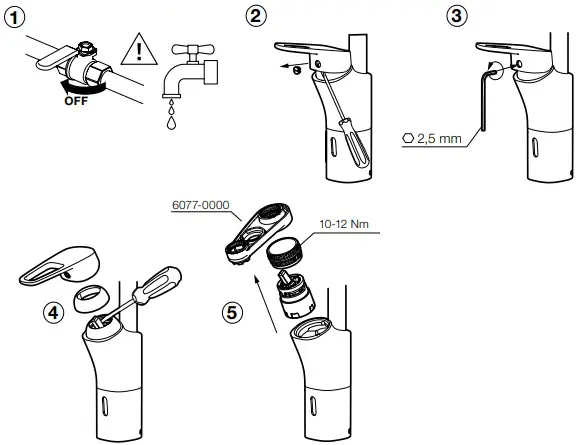
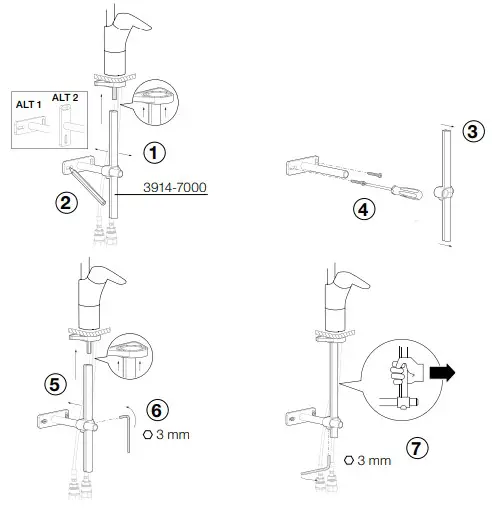
Fitting
Mains operation

Dishwasher
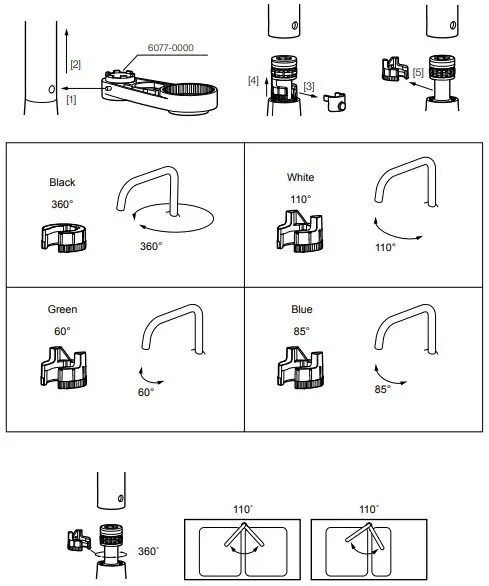
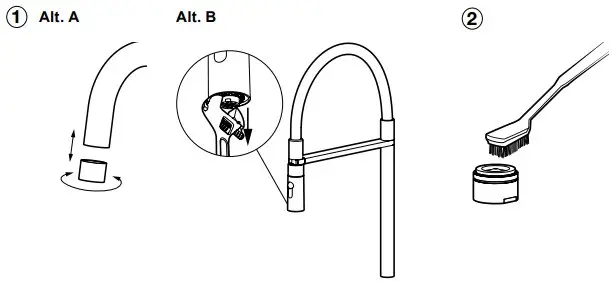
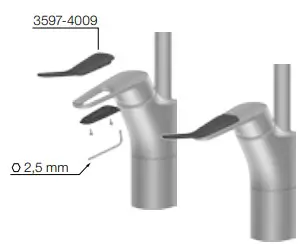
Swivel spout
Temperature limiter
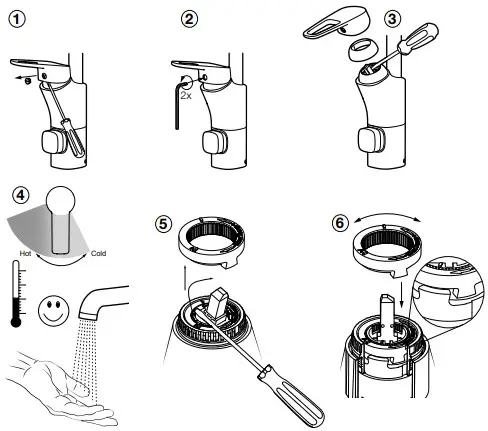
Flow limiter
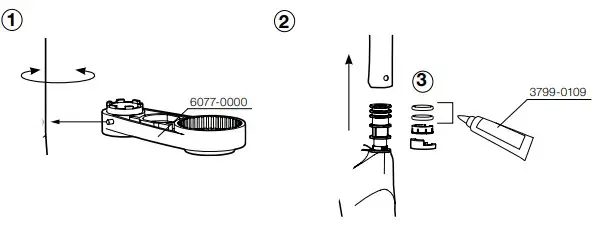
Replace O-rings
Cleaning the aerator
Cartridge replacement
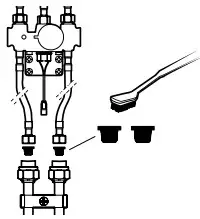
Cleaning the inlet filters
Suspended/turned off flushing
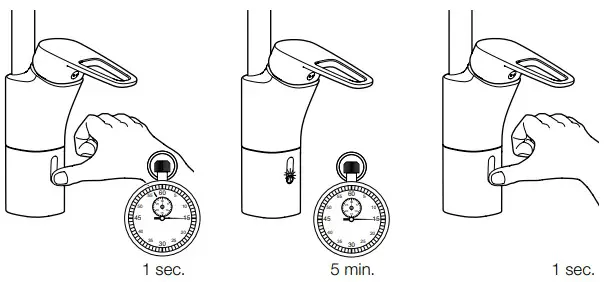
Press and keep your finger on the lower part of the sensor window for 1 second to turn off the sensor function for 5 minutes. The sensor makes a yellow flash as long as it is turned off. To cancel, put your finger back for 1 second.
Battery replacement

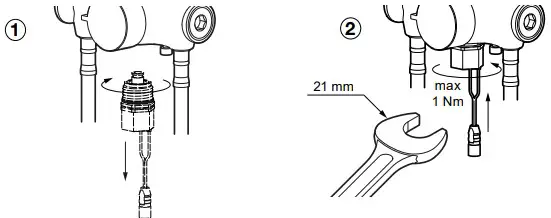
Solenoid valve replacement
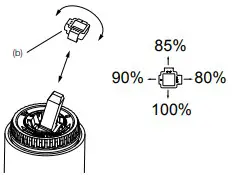
Programming/change programme
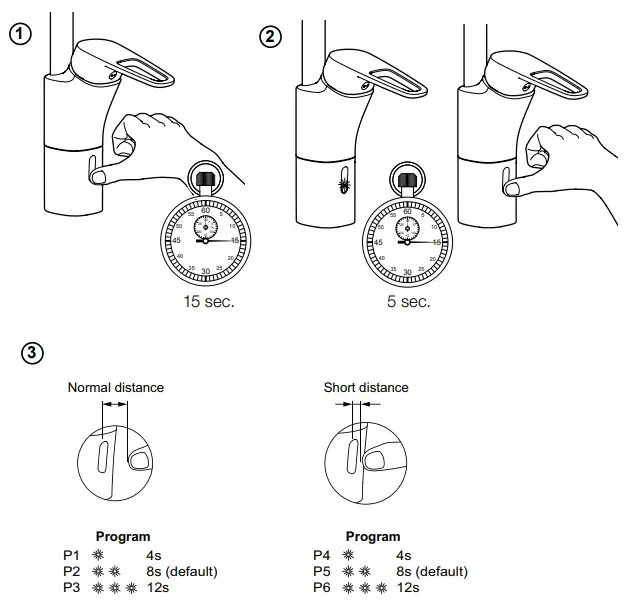
- Press a finger against the lower part of the sensor for 15 seconds.
- Remove your finger, then replace it after exactly 5 seconds.
- While the red light is flashing, select a program by removing your finger immediately after the numbers of flashes that corresponds to yout chosen program (1-6). For example, if you want to select program 1, remove your finger after 1 flash.
Fitting Accessories
Troubleshooting
| Leakage | |||
| Leakage from spout connection | Defective O-ring | Replace O-ring | 15 |
| Drips from the spout or the lever attachment when th | Defective cartridge. | Replace cartridge. | 16 |
| Function | |||
| The mixer produces too little water. | 1. Blocked inlet filters 2. Clogged aerator. 3. Defective/blocked solenoid valve. | 1. Clean the inlet filters 2. Clean the aerator 3. Replace the solenoid valve. | 16 15 18 |
| The lever is stiff/loose. | Dirt/particulates in the cartridge. | Replace cartridge. | 16 |
| The sensor flashes red | Supply voltage is too low. | Check battery/voltage | 11, 18 |
| The sensor flashes red quickly 2 times and then flashes yellow 3–10 times at start-up | Nothing wrong, normal start-up sequence | None | |
| The sensor flashes yellow when the mixer is activated. The mixer delivers water as usual. | The battery is low; the mixer will only deliver water a few hundred times more. | Replace the battery as soon as possible | 18 |
| The sensor flashes red when the mixer is activated. The mixer does not deliver water | The battery level is critically low, so the mixer has stopped delivering water. | Replace the battery to maintain function | 18 |
| The sensor flashes red slowly on start-up | 1. Solenoid valve not connected 2. Faulty solenoid valve connected | 1. Check the connection to the solenoid valve 2. Replace the solenoid valve | 18 |
| The mixer does not react. No light comes on and the mixer delivers no water. Yellow light does not flash on start-up. | 1. No voltage supply. 2. Faulty sensor | 1. Check battery or AC adapter 2. Replace sensor | 11, 18 |
| The mixer does not react. No light comes on and the mixer delivers no water. | Faulty solenoid valve | Replace the solenoid valve | 18 |
| The mixer repeatedly flashes red, giving two short flashes followed by one longer red flash. No function | The voltage supplied to the mixer is too low. | Check battery or AC adapter | 11, 18 |
| The water pressure from the mixer is too low. | Clogged filter on solenoid valve | Clean the filter on the solenoid valve, e.g. using a toothbrush. | 16 |
| The sensor repeatedly flashes red- yellow slowly on start-up. | The sensor is not approved when the final test is performed | Replace sensor | |
| The mixer delivers water spontaneously | Hygiene flushing is activated | Check the programming of the sensor. See instructions | 19 |


