![]()
COU1600OL
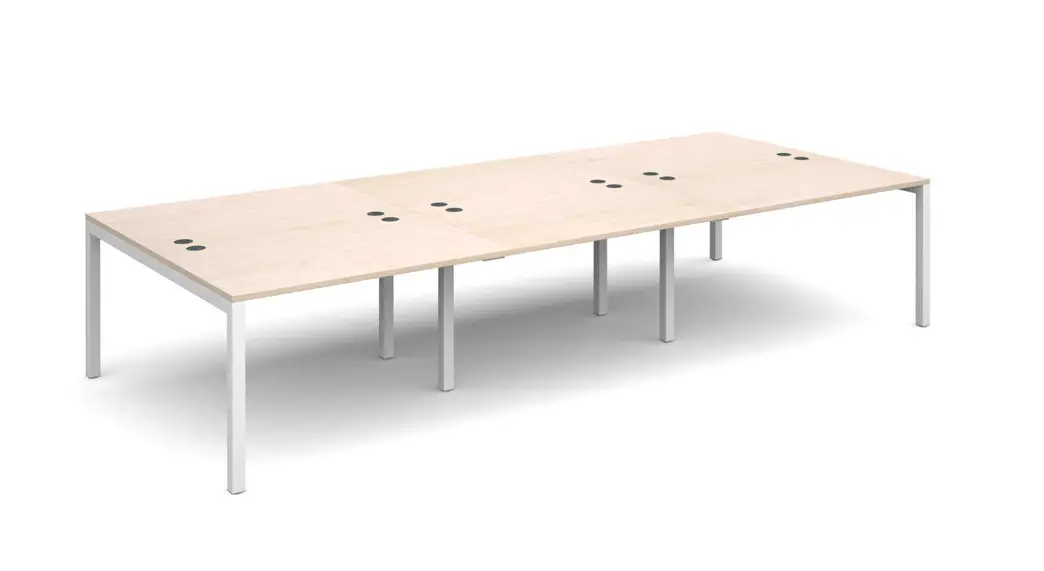
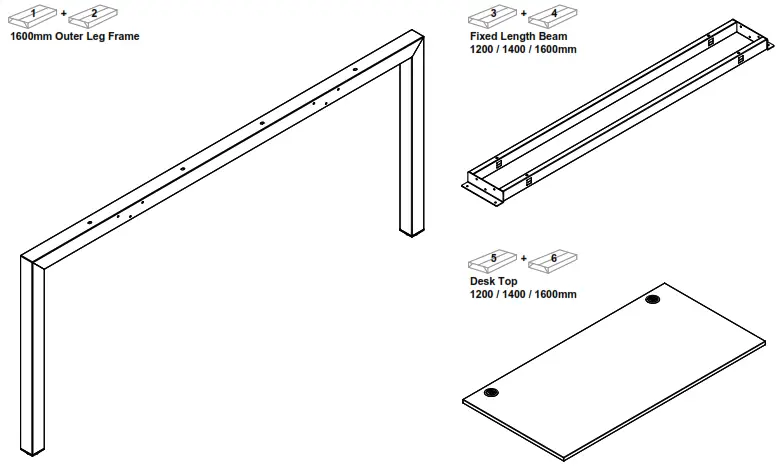
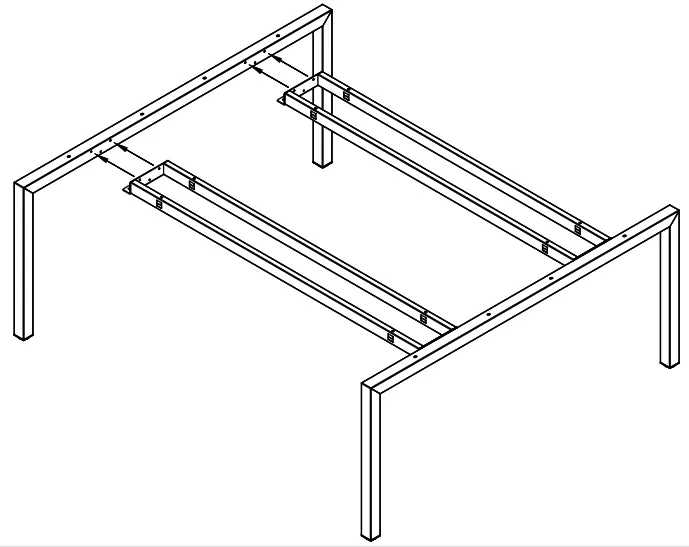
Connex 1600mm Outer Leg Frame

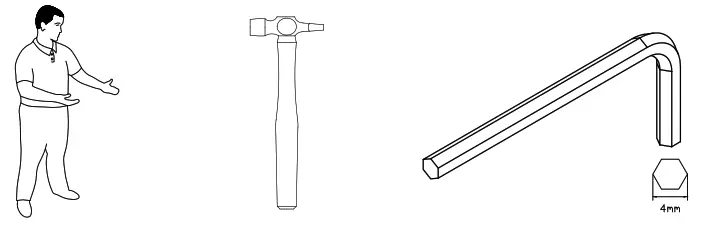
TOOLS REQUIRED FOR ASSEMBLY
DON’T STRUGGLE 2 MAN LIFT
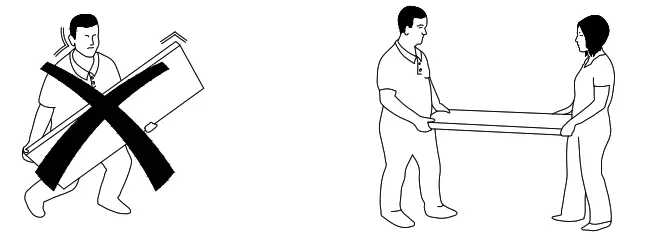
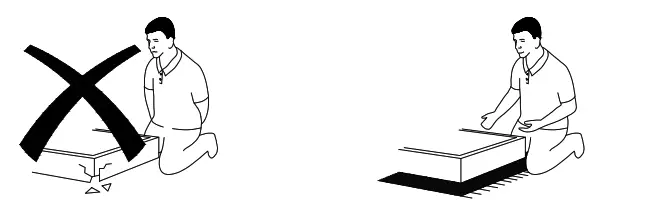
ALWAYS HANDLE ITEMS WITH CARE
IF UNSURE CALL FOR ASSISTANCE
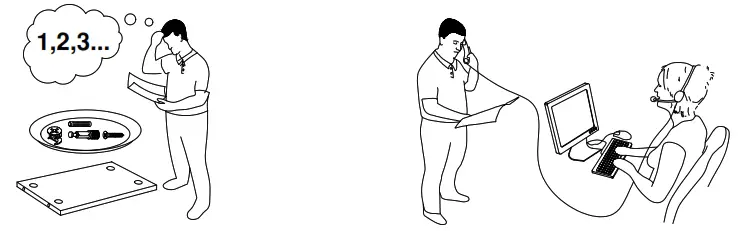
KEEP FITTINGS AWAY FROM CHILDREN

![]() Please check that you have all the Components!
Please check that you have all the Components!
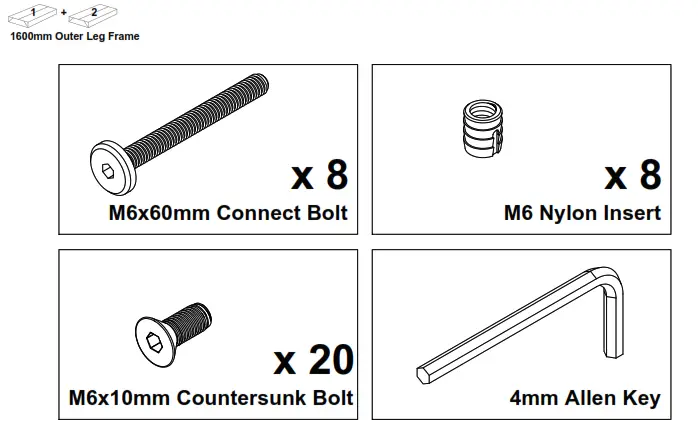
![]() Please check that you have all the Fittings! (Fittings supplied with leg frames)
Please check that you have all the Fittings! (Fittings supplied with leg frames)
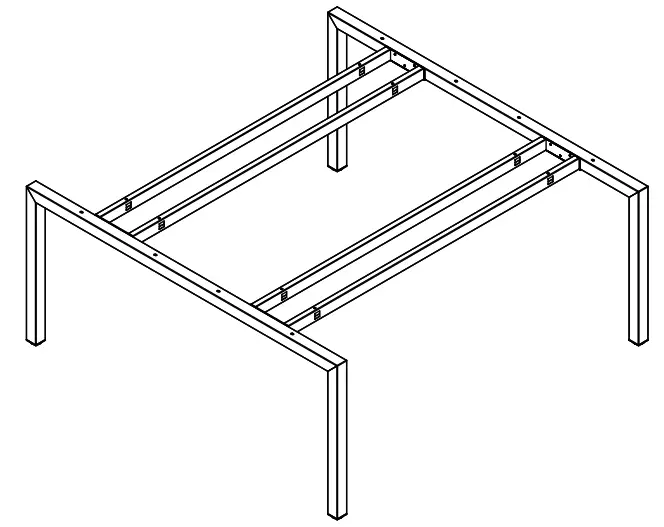
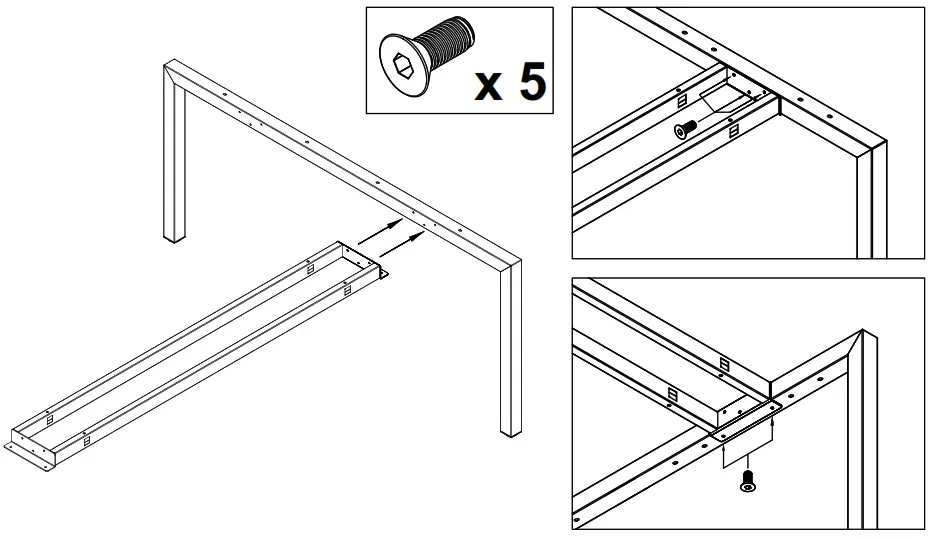
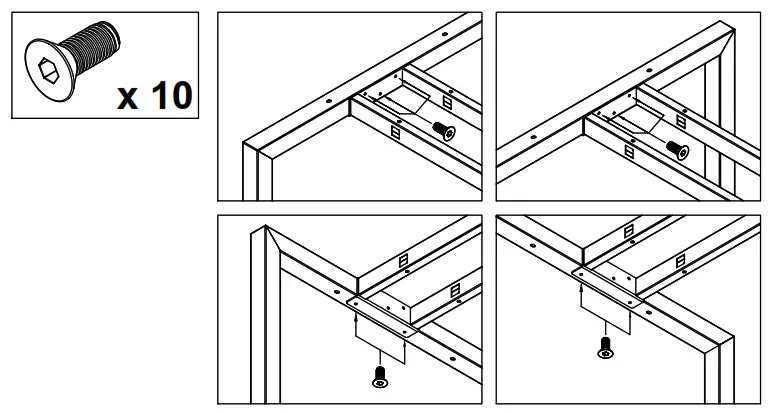
Step 1
Attach the first beam to the end leg using the M6 bolts provided.
Loosely thread the bolts into the face of the leg before threading the bolts to the underside of the leg.
Once all bolts are threaded you can fully tighten them using the 4mm Allen Key.
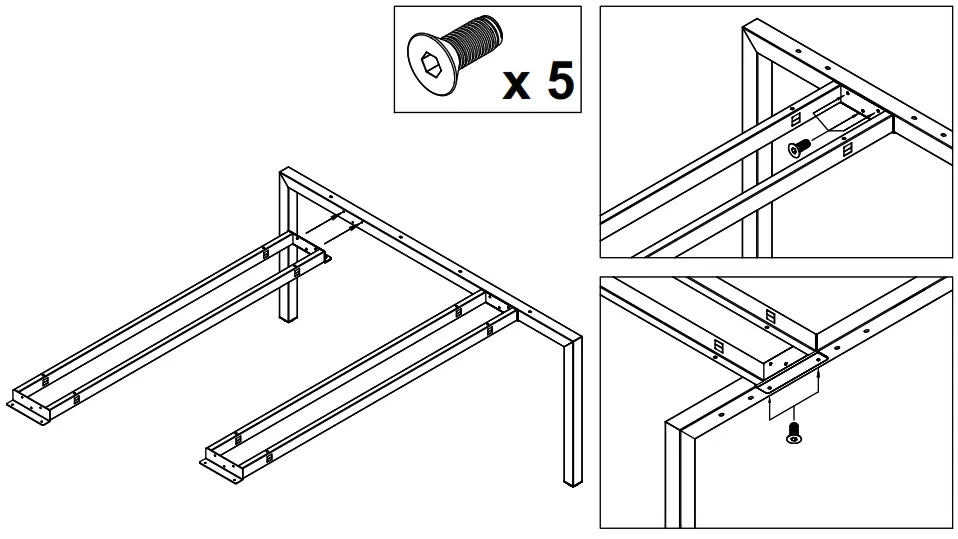
Step 2
Attach the second beam to the end leg using the M6 bolts provided.
Loosely thread the bolts into the face of the leg before threading the bolts to the underside of the leg.
Once all bolts are threaded you can fully tighten them using the 4mm Allen Key.
![]() If you are assembling this as part of a larger configuration please refer to the intermediate leg frame assembly instructions before proceeding with the next steps.
If you are assembling this as part of a larger configuration please refer to the intermediate leg frame assembly instructions before proceeding with the next steps.
Step 3
Attach the remaining outer leg frame using the same method as before. Attach the beams to the end leg using the M6 bolts provided.
Loosely thread the bolts into the face of the leg before threading the bolts to the underside of the leg.
Once all bolts are threaded you can fully tighten them using the 4mm Allen Key.
![]() If horizontal cable management is being added please refer to the drop-down cable tray assembly instruction before proceeding with the next steps.
If horizontal cable management is being added please refer to the drop-down cable tray assembly instruction before proceeding with the next steps.
This will make the installation process much easier than trying to install the cable trays once the desktops are attached.
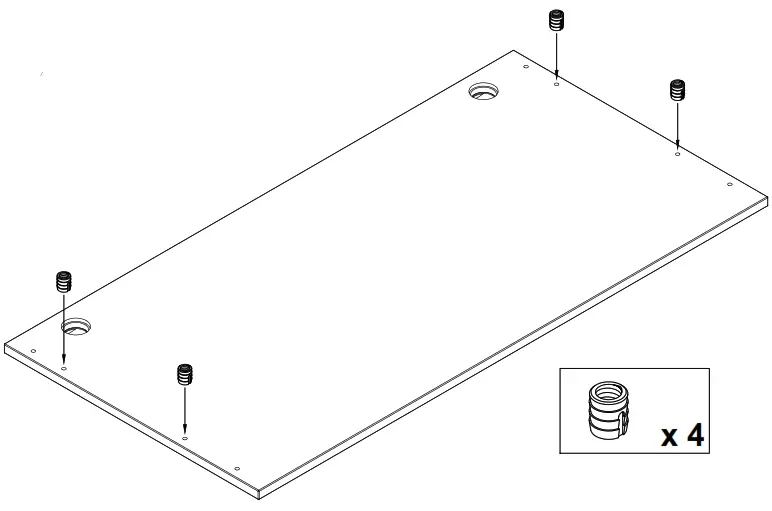
Step 4
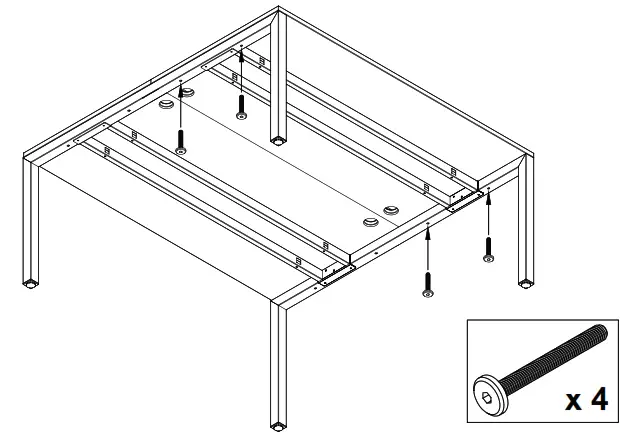
Insert the nylon inserts into the pre-drilled holes on the underside of the desktop.
The illustration below shows which pre-drilled holes should be used.
Repeat this step for all desktops.
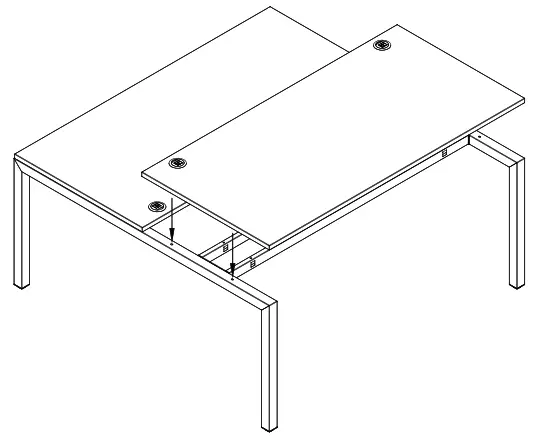
Step 5
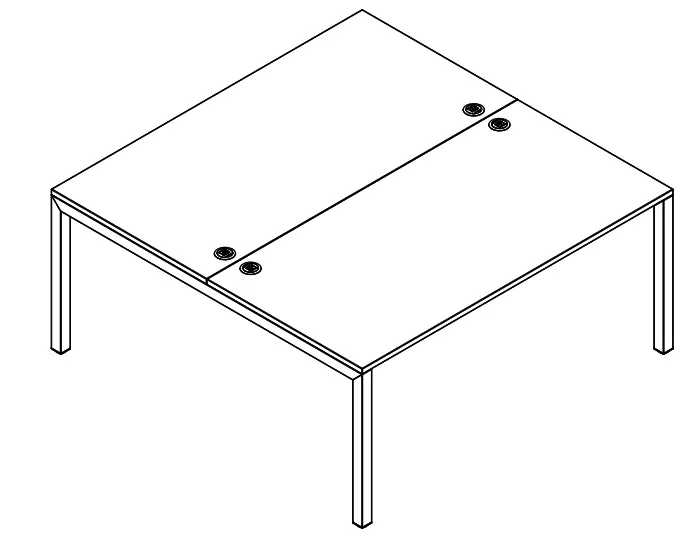
Position the first desktop on the frame aligning the nylon inserts with the slotted holes.

Step 6
Attach the desktop using the 60mm connect bolts as shown.
Loosely thread all the bolts to ensure that no bolts become cross-threaded before fully tightening.
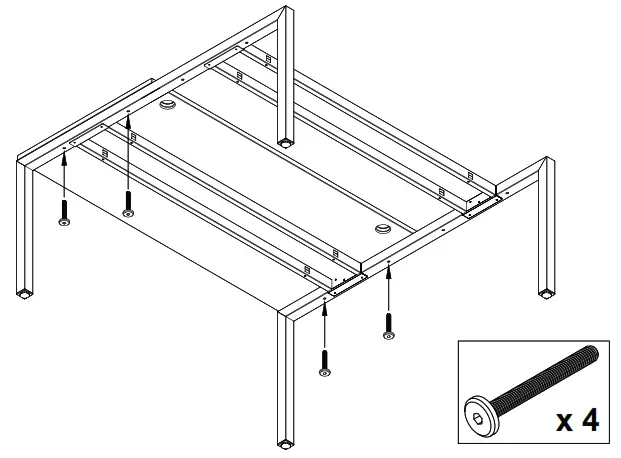
Step 8
Attach the desktop using the 60mm connect bolts as shown.