![]() BlazeCut 3D Printer Fire Suppression System
BlazeCut 3D Printer Fire Suppression System
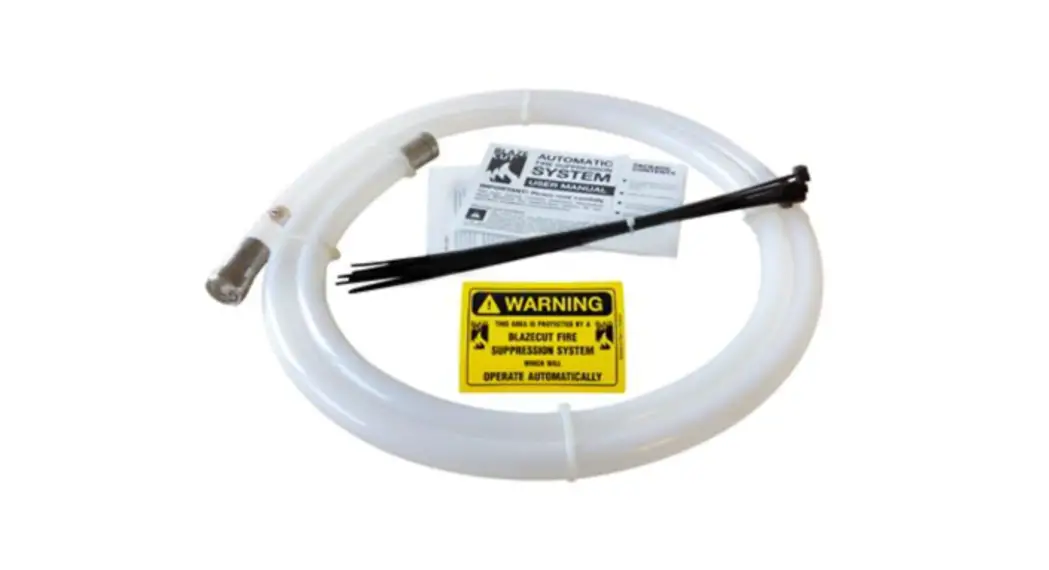
Instruction Manual BlazeCut Fire Extinguisher
Installation Manual 2.0
June, 2022
Copyright 2022 3D UPfitters LLC
Short Blazecut Installation
 If your BlazeÇut isn’t as wide as the 3D printer enclosure, then installation is pretty easy: Enclosures from 3D UPfitters come with the holes predrilled in the top in the optimal position. Simply use the included connectors we’ve designed for this purpose and use the M4 screws and nuts to attach the BlazeCut to the underside of the top.
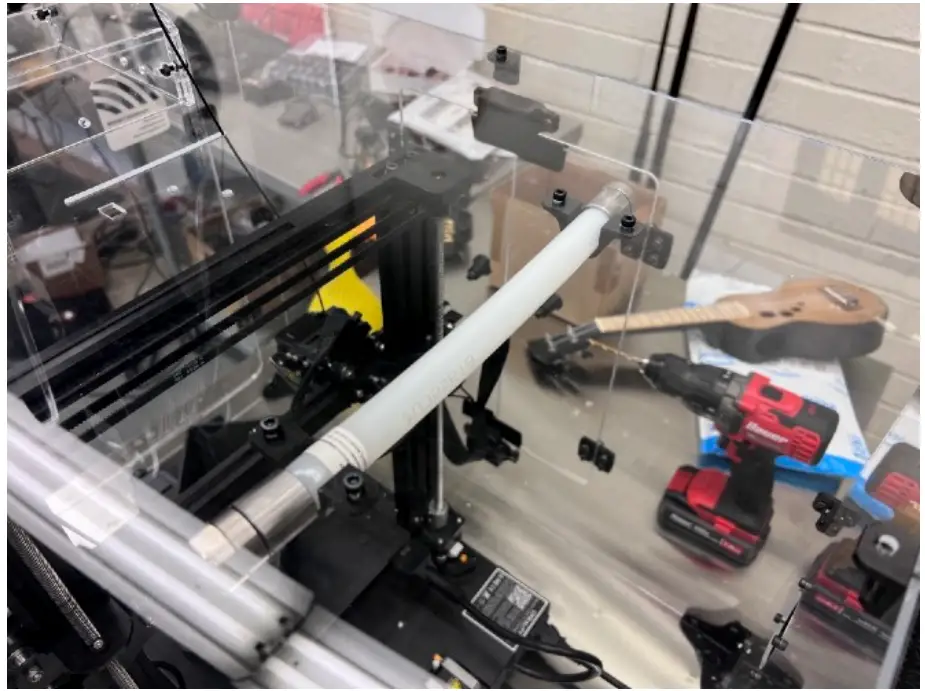
If you are installing your BlazeCut in your own enclosure, then the included 3D UPfitters exclusive connectors/screws will allow you to put it anywhere. Typically, though you’d want to place it directly above the parts of the 3D printer most likely to catch on fire.
Long Blazecut Installation (T100E)
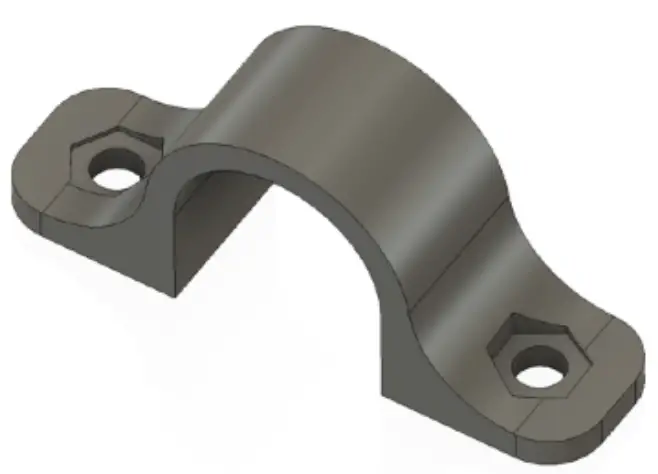
If the BlazeCut is much wider than the enclosure If your enclosure doesn’t have a support bar, the easiest thing to do is use the zip tie attachment points on the 3D UPfitters connectors as shown below: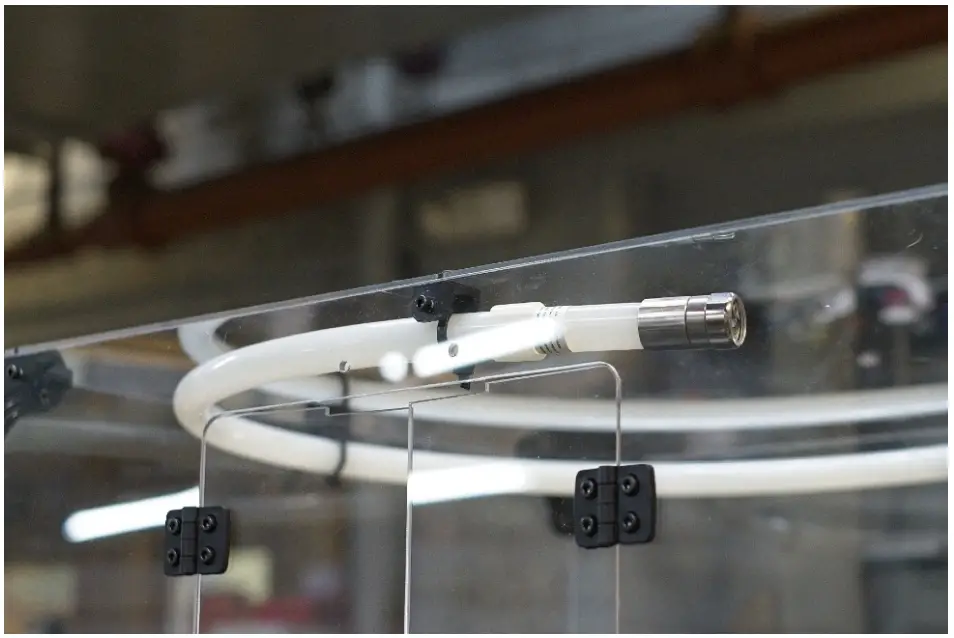
Support Beam
If your enclosure has a support beam or isn’t flat on the top you’ll can either let the tube hang below the support beam, OR use this handy modification to float the tube just below the support beam. Visit the product page for the BlazeCut for a link to the STL so you can print it yourself. Note you should use ABS or PETG so the connector will withstand the heat inside the enclosure. 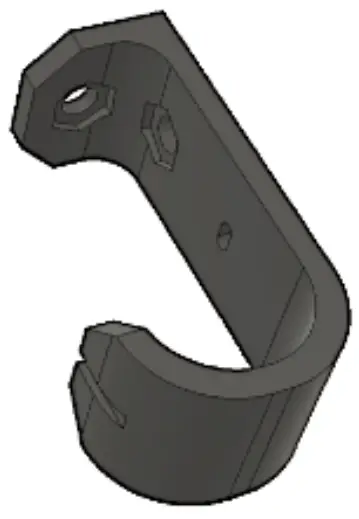 The above piece replaces the existing mid-panel connectors, OR you can drill your own holes and place them anywhere.
Here’s an example of a customer who located their BlazeCut off to the left: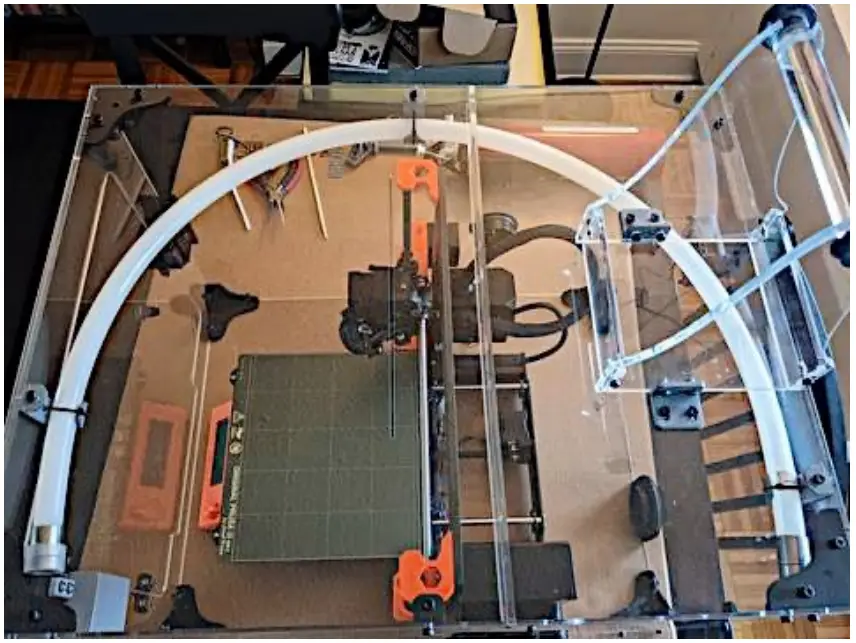 Copyright 2022 3D UPfitters LLC
![]()


