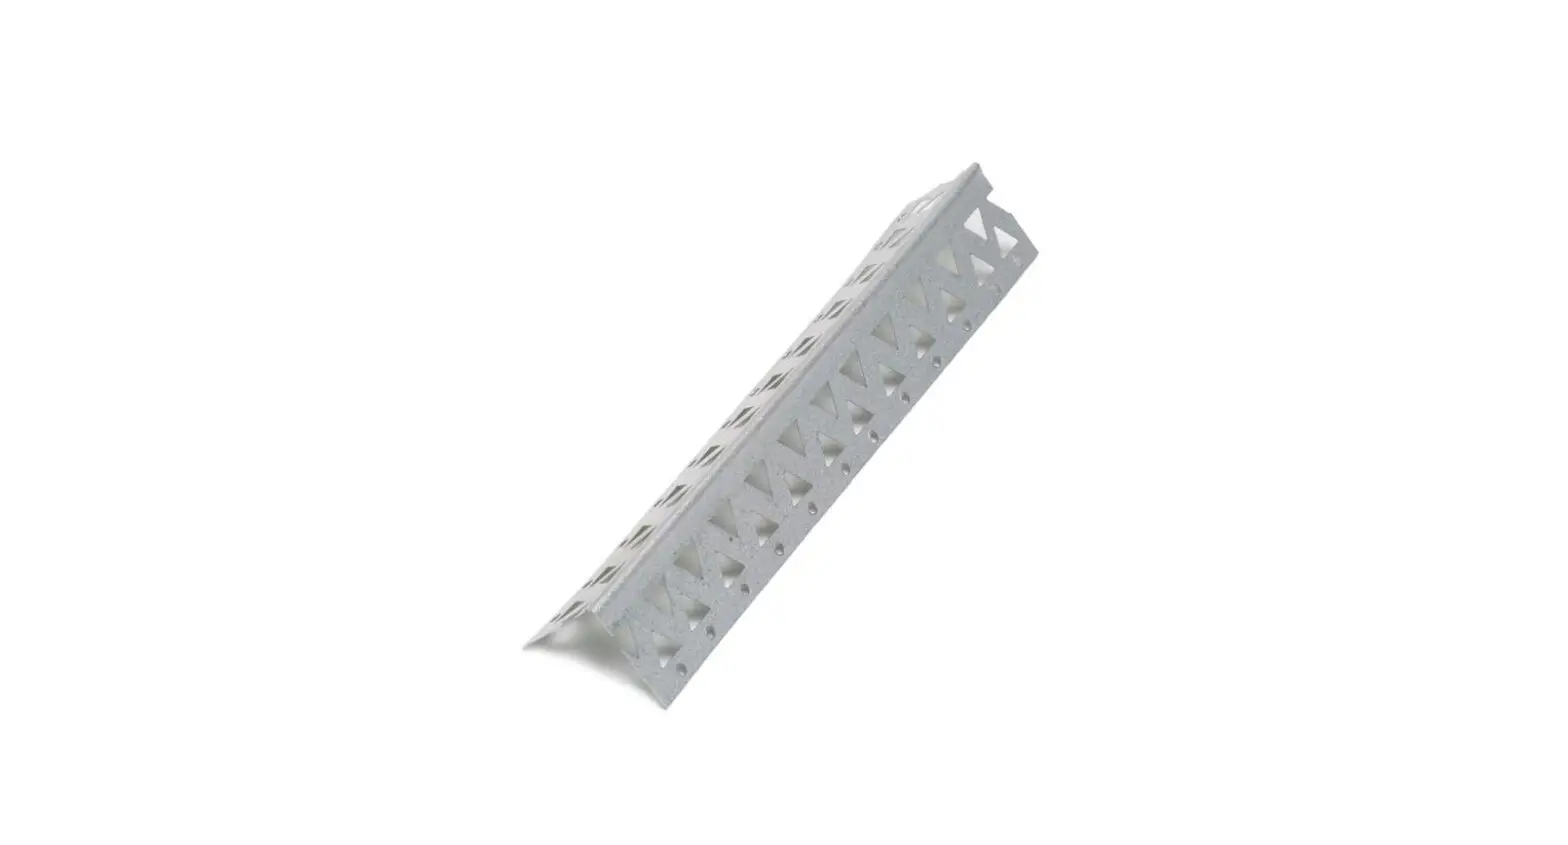
Gibraltar NAIL-ON CORNER BEAD
Installation Instruction
Measure & Cut
Measure 1/2 inch shorter than the floor-to-ceiling distance. Make two cuts toward the centerline, using tin snips. Use one continuous length, do not splice.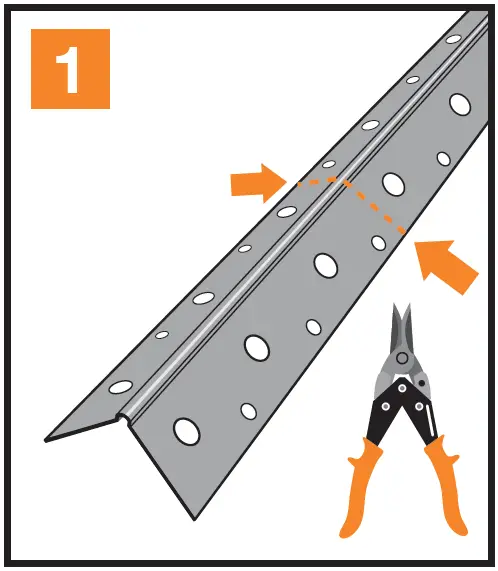
Center & Affix
Hold corner bead firmly in place and affix with drywall nails or screws, every 10 to 12 inches. Slightly dimple each fastener.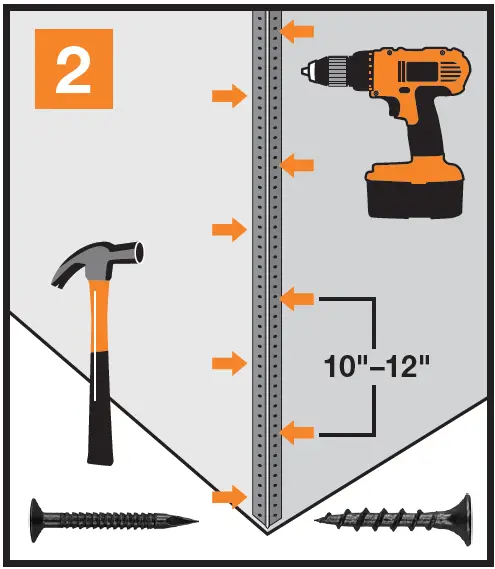
First Mud
Using a 4″- 6″ drywall knife, apply a generous coat of drywall joint compound to each side. Feather the compound 4″ – 5″ from the corner. Allow drying.
Second Mud
Using a 6″- 10″ drywall taping knife, apply a thinner coat of drywall joint compound to each side. Feather the compound 8″ – 10″ from the corner. Allow drying.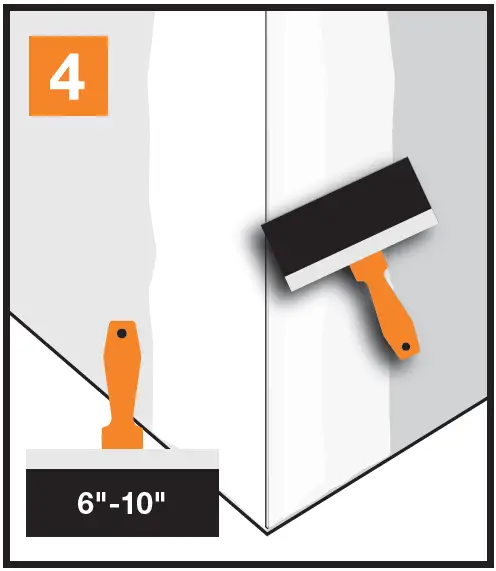
Skim Coat
Apply a thinner third coat of drywall joint compound to each side, feathered 10″ – 12″. Allow to dry.
Top View
Overlapping drywall sheets form the corner. The feathering of the drywall joint compound smoothly covers the nails & corner bead.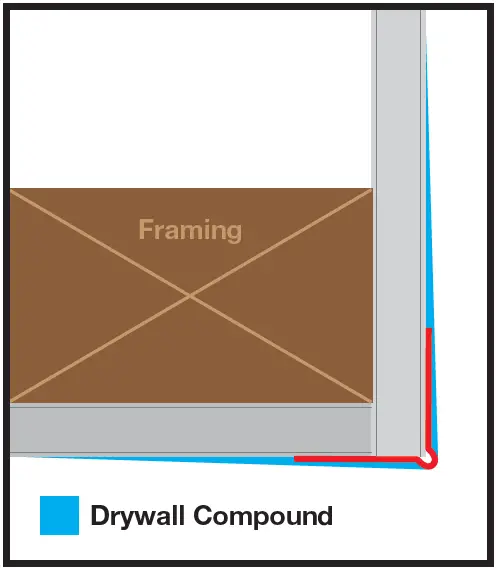
NAIL-ON BULL NOSE CORNER BEAD
Measure & Cut
Measure 1/2 inch shorter than the floor-to-ceiling distance. Make two cuts toward the centerline, using tin snips. Use one continuous length, do not splice.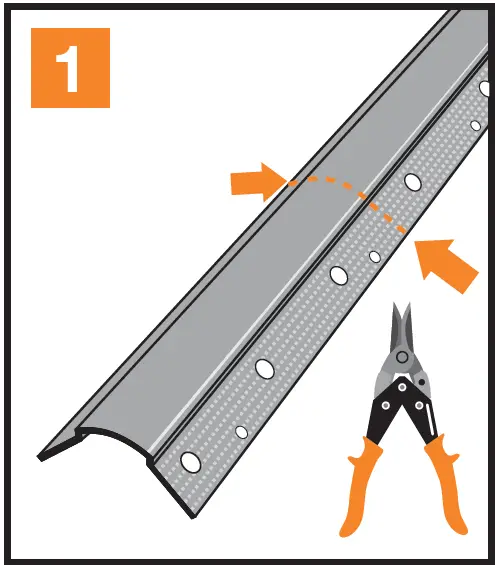
Center & Affix
Hold corner bead firmly in place and affix with drywall nails or screws, every 10 to 12 inches. Slightly dimple each fastener.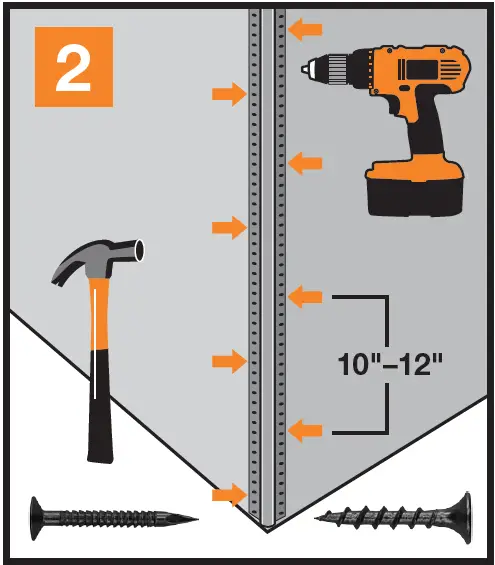
First Mud
Using a 4″- 6″ drywall knife, apply a generous coat of drywall joint compound to each side. Feather the compound 4″ – 5″ from the corner. Allow to dry.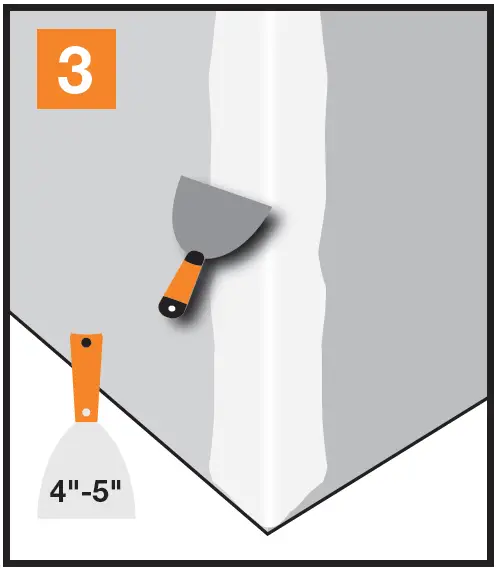
Second Mud
Using a 6″- 10″ drywall taping knife, apply a thinner coat of drywall joint compound to each side. Feather the compound 8″ – 10″ from the corner. Allow to dry.
Skim Coat
Apply a thinner third coat of drywall joint compound to each side, feathered 10″ – 12″. Allow to dry.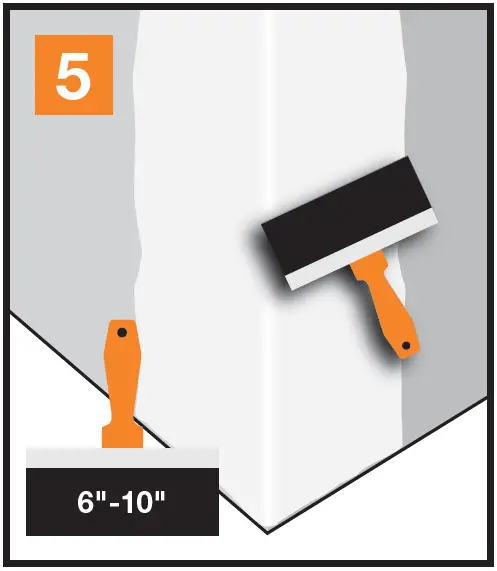
Top View
Drywall sheets are flush with the corner. The feathering of the drywall joint compound smoothly covers the nails & corner bead.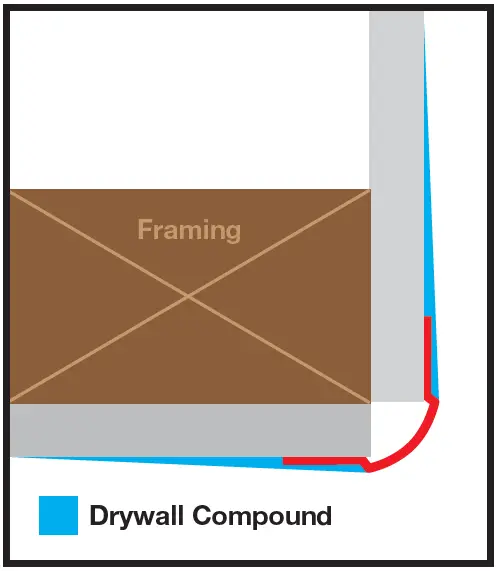
PAPER-FACED OUTSIDE CORNER BEAD
Measure & Cut
Measure 1/2 inch shorter than the floor-to-ceiling distance. Make two cuts toward the centerline, using tin snips. Use one continuous length, do not splice.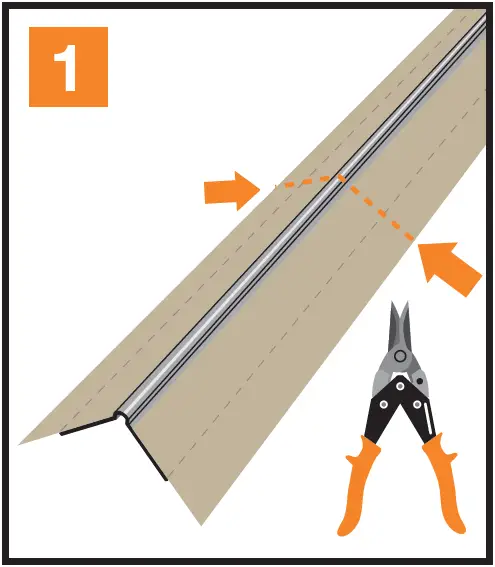
Apply Mud
Thin Joint Compound with water. Apply a generous, uniform layer 2″ on both sides.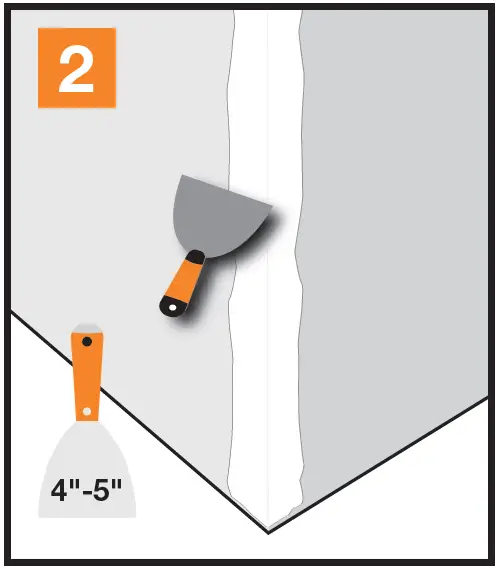
Set the bead
Using light, even pressure set the bead centerd on the corner and tight to the ceiling. Smooth out any bubbles with a drywall knife.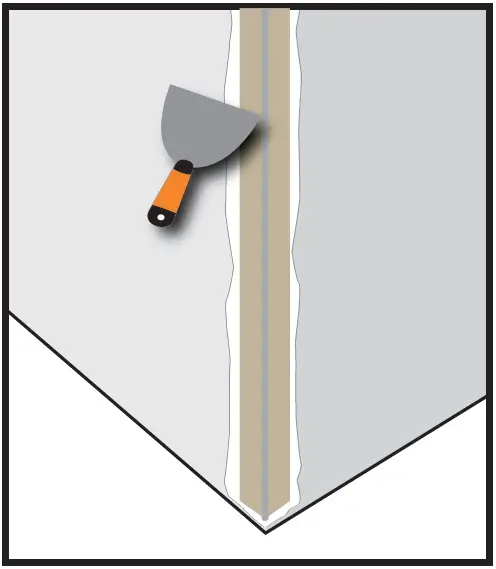
Top Coat Mud
Using a 6″- 10″ drywall taping knife, apply a top coat of drywall joint compound to each side. Feather the compound 8″ – 10″ from the corner. Allow to dry.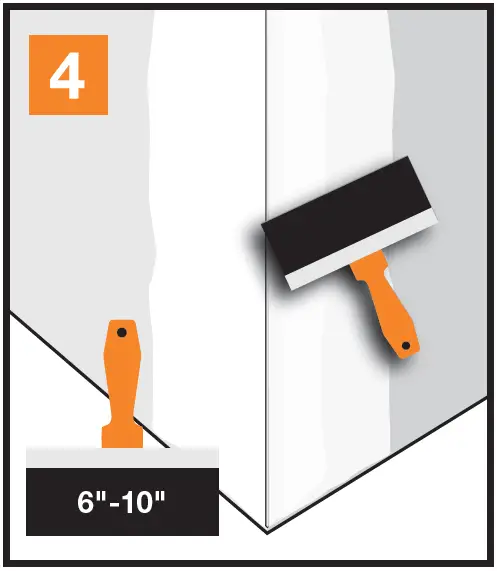
Skim Coat
Apply a thinner third coat of drywall joint compound to each side, feathered 10″ – 12″. Allow to dry.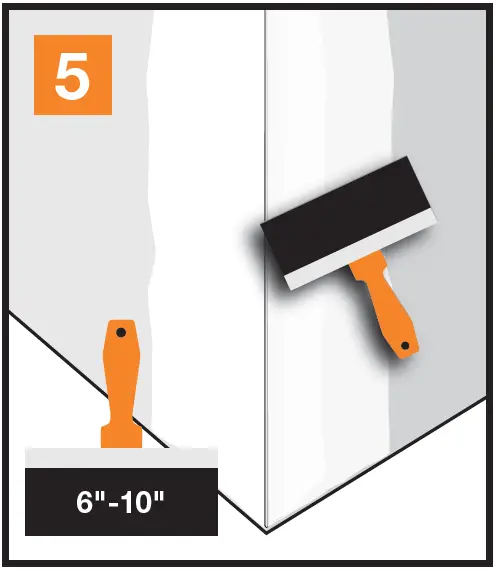
Top View
Overlapping drywall sheets form the corner. The feathering of the drywall joint compound smoothly covers the nails & corner bead.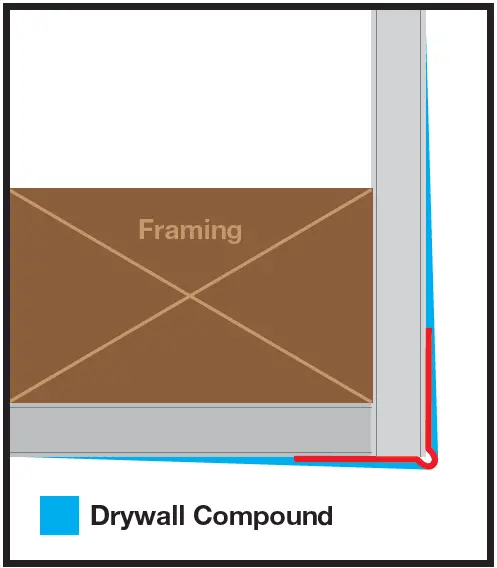
PAPER-FACED INSIDE CORNER BEAD
Measure & Cut
Measure 1/2 inch shorter than the floor-to-ceiling distance. Make two cuts toward the centerline, using tin snips. Use one continuous length, do not splice.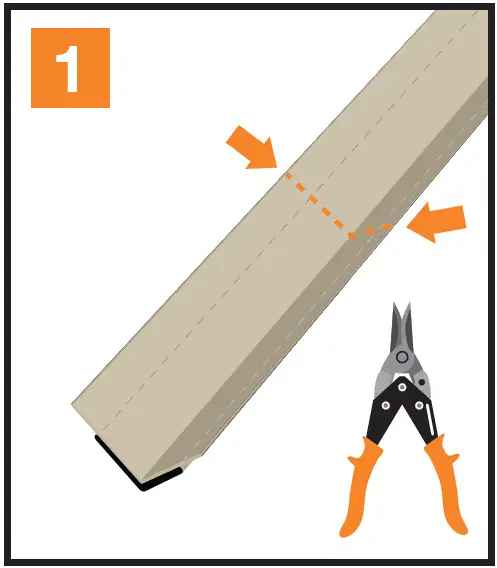
Apply Mud
Thin Joint Compound with water. Apply a generous, uniform layer 2″ on both sides.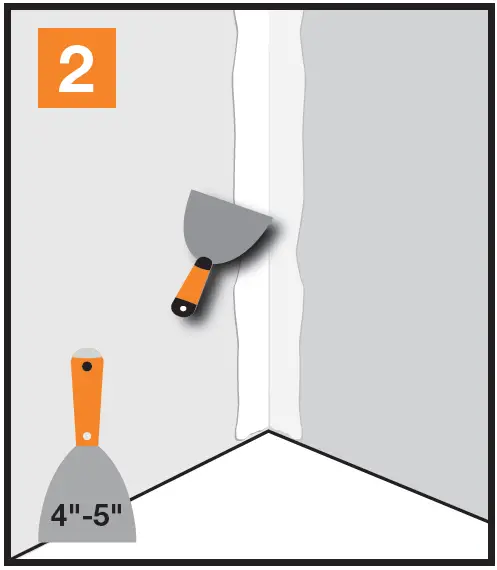
Set the bead
Using light, even pressure set the bead centerd on the corner and tight to the ceiling. Smooth out any bubbles with a drywall knife.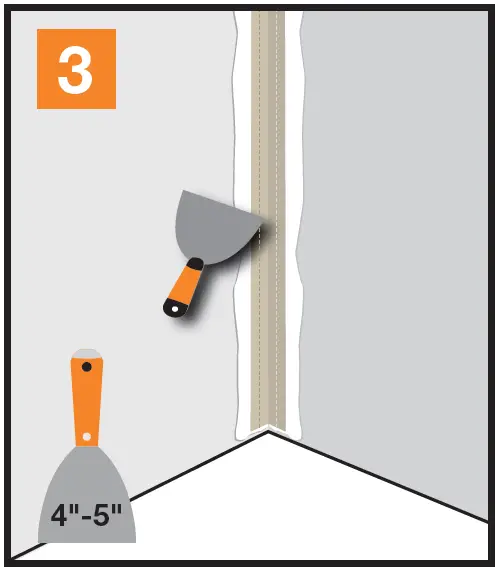
Top Coat Mud
Using a 6″- 10″ drywall taping knife, apply a top coat of drywall joint compound to each side. Feather the compound 8″ – 10″ from the corner. Allow to dry.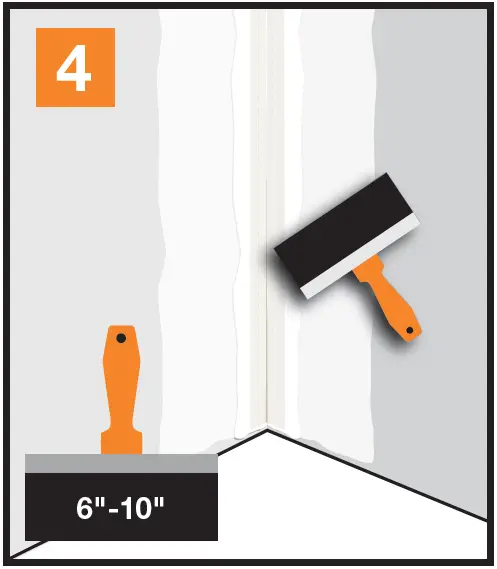
Skim Coat
Apply a thinner third coat of drywall joint compound to each side, feathered 10″ – 12″. Allow to dry.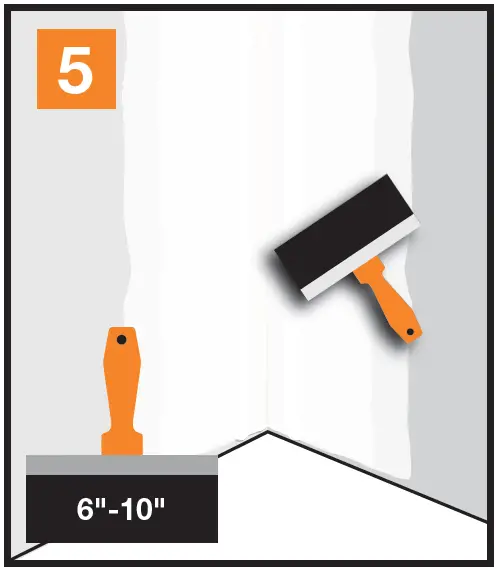
Top View
Overlapping drywall sheets form the corner. The feathering of the drywall joint compound smoothly covers the nails & corner bead.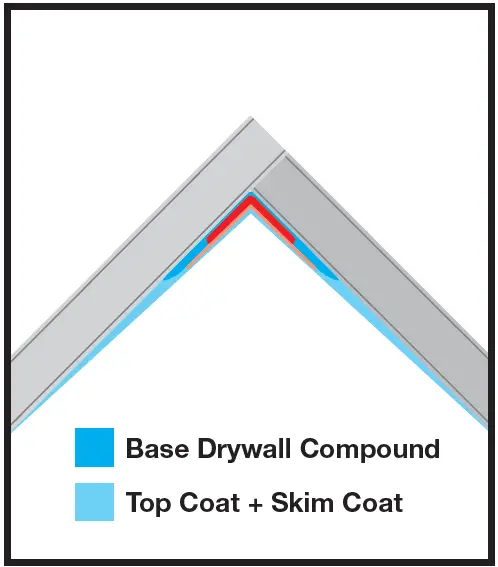
DRYWALL ARCH, CORNERS & TRIMS
2-Way Bullnose Corners efficiently mitre inside corners such as door and window frames.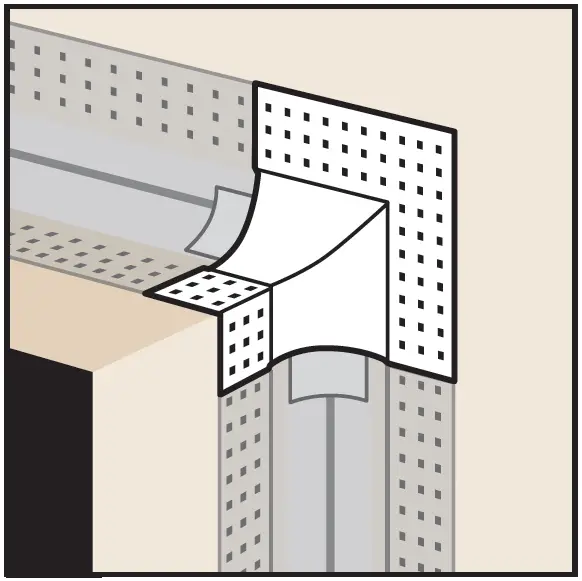
3-Way Bullnose Corners join drywall where three panels intersect.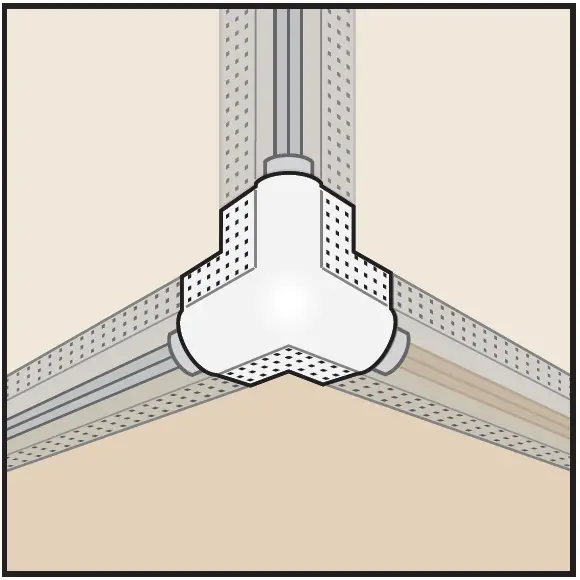
Archway Cornerbead is slotted (kerfed) to fit smoothly around a curved surface.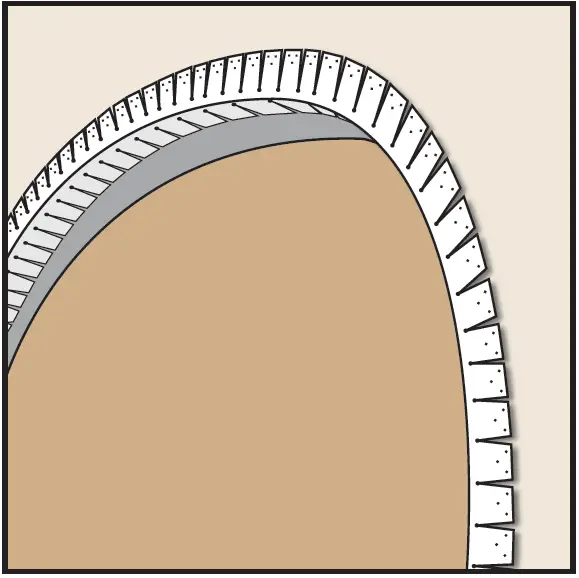
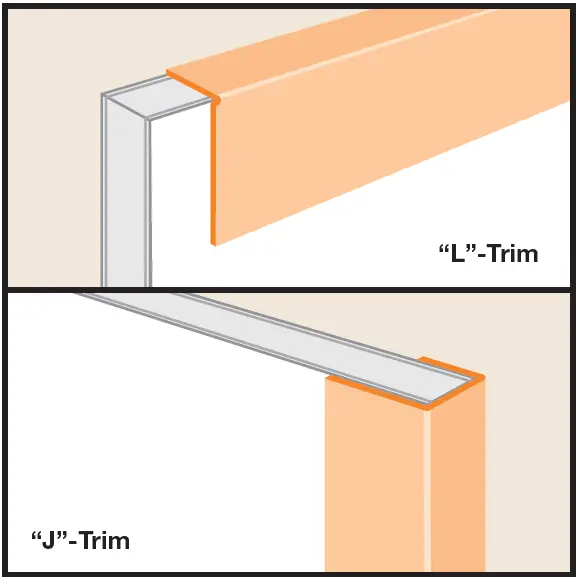
- “L” Trim is used where drywall abuts suspended ceilings, beams, plaster, masonry and concrete walls.
- “J” Trim is used to finish rough drywall panel ends at window and door openings.