![]() SKK-9MCV Bespoke 27 in. Front Load Washer and Dryer
SKK-9MCV Bespoke 27 in. Front Load Washer and Dryer
Installation Guide
![]() CAUTION
CAUTION
- Risk of personal injury. The dryer is large and heavy. Have at least two people move the dryer. Otherwise, it may result in personal injury or death.
- Risk of product damage during installation. The dryer must be firmly installed on top of the washer. Do not install the washer on top of the dryer. Otherwise, it may result in personal injury, death, or property damage.
- Risk of electric shock. You must disconnect the power cord before installing the product. Otherwise, it may result in severe personal injury or death.
- When installing the dryer on top of the washer, make sure the drain hose in the rear is connected directly to a drain and not to a water tank.
![]() NOTE
NOTE
This Stacking Kit is compatible with Samsung BESPOKE front-load washers and dryers released after 2022.
Check the compatibility of the stacking kit before installing it. You can check the compatible washer and dryer models at the Samsung website (www.samsung.com).
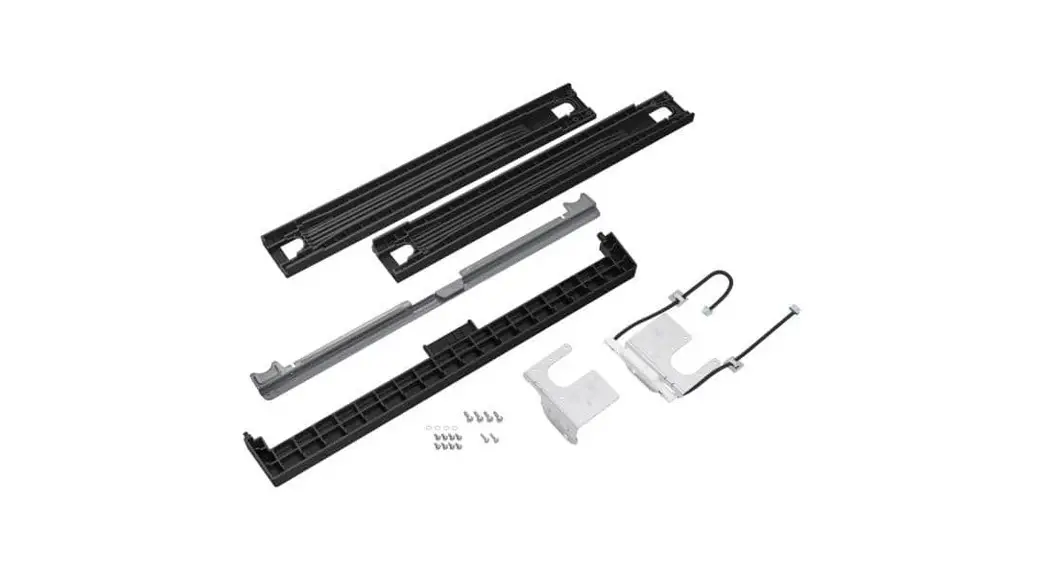
Accessories
| Hex-head screws (4) 6002-001431 (M5, L16) | |
| Washers (4) DC60-00044A (ID5, OD10) | |
| Phillips-pan head screws (8) 6002-000213 (M4, L12) | |
| Phillips-pan head screws (2)6002-000215 (M4, L16) | |
| Installation guide | |
| Left side top cover bracket | |
| Right side top cover bracket (with a multiconnection cable attached) | |
| Front cover | |
| Bracket guide | |
| Stacking guide (L/R) |
Installation
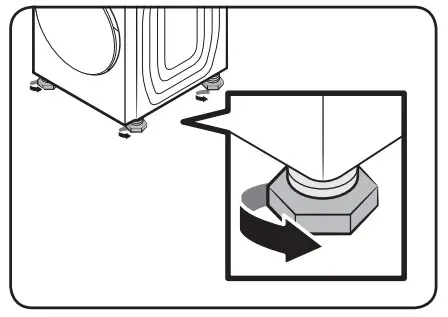
STEP 1
Tighten the four leveling feet of the dryer all the way.
- Level the dryer using a level.

STEP 2
Slightly pull out the installed washer to gain access to its rear.
Unfasten the two screws attached to the back of the washer.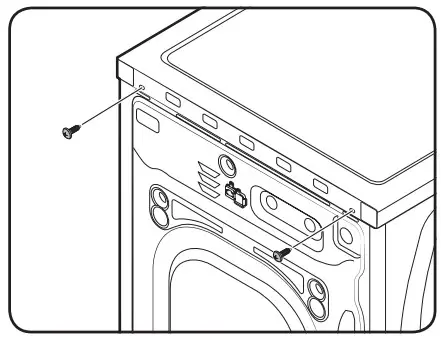
STEP 3
Check the capacity of your washer (5.0 cf and over or 4.6 cf and less) and locate the correct assembly holes on the top cover bracket (L/R).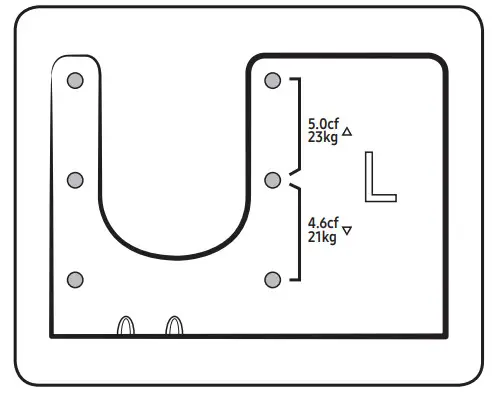
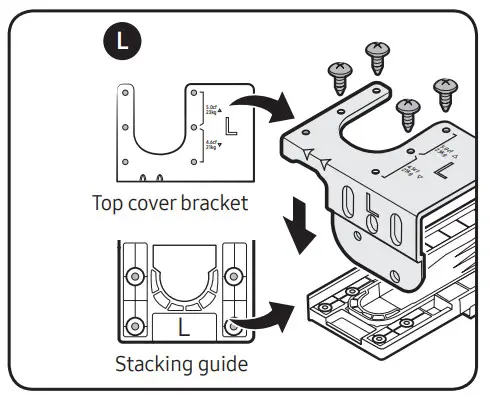
STEP 4
Fasten the top cover brackets (L/R) to their corresponding stacking guides (L/R) using four M4 x L12
Phillips-Pan head screws.
- Check and make sure each top cover brackets are on the correct sides (left/right) of the stacking guides before fastening them.

STEP 5
Position the assembled stacking guides (L/R) on the curved edges of the washer’s top cover. Fasten the assembled stacking guides (L/R) using four washers and M5 x L16 hex-head screws. 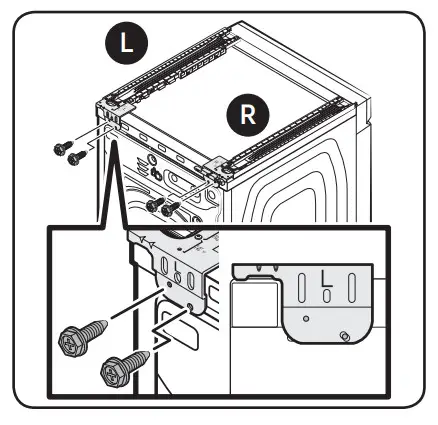
STEP 6
Assemble the bracket guide to the stacking guides at the front end and check the alignment. Remove the release liner from the double-sided tape attached to the bottom of the stacking guides and attach the stacking guides to the washer as shown in the figure.
Then, disassemble the bracket guide from the stacking guides.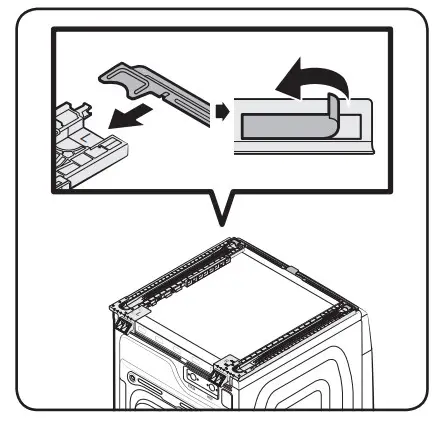
![]() CAUTION
CAUTION
- Make sure the bottom curvature of the stacking guide is aligned with the curvature of the washer’s top cover.
- Attach the stacking guides after making sure they are perfectly parallel with the washer’s top cover.
- After attaching the stacking guides, reattach the bracket guide and double-check to make sure the stacking guides are parallel.
STEP 7
Have at least two people lift the dryer and place it on the stacking guide, and then push the dryer until the rear two legs are properly locked into the stacking guide’s U-shaped slot.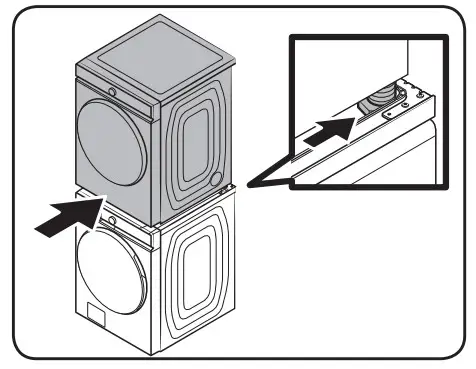
STEP 8
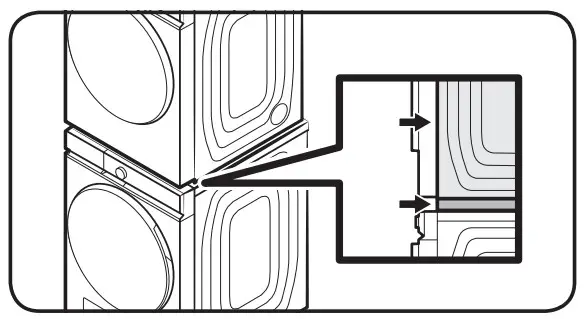
If installed correctly, the front edges of the stacking guides should be perfectly aligned with the front edges of the dryer’s side frames.
- Check to make sure the front edges of the dryer’s side frame are not sticking out past the stacking guides.

STEP 9
Attach the bracket guide to the stacking guides and secure it in place using the M4 x L16 Phillips-Pan head screws, as shown in the figure.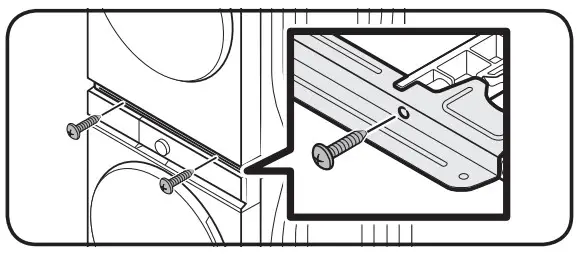
STEP 10
Hold the front cover with the letter ‘UP’ facing upward.
Align the hooks on the front cover with the holes on the stacking guides as shown in the figure. Then, fully insert the hooks to attach the front cover to the staking guides.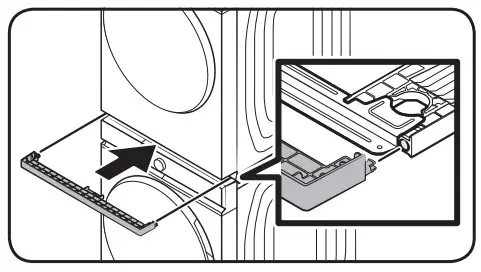
STEP 11
Open the connector port covers on the dryer and the washer. Then, connect the multi-connection cable on both ports and close both connector port covers.
Attach each wire holder to the designated slots on the dryer and the washer.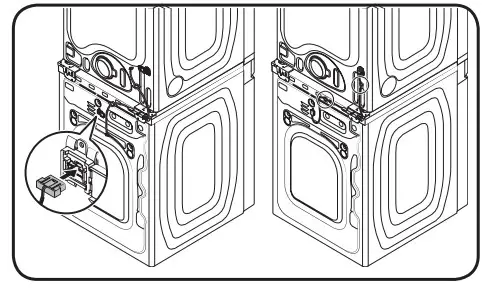
 DC68-03859G-00


