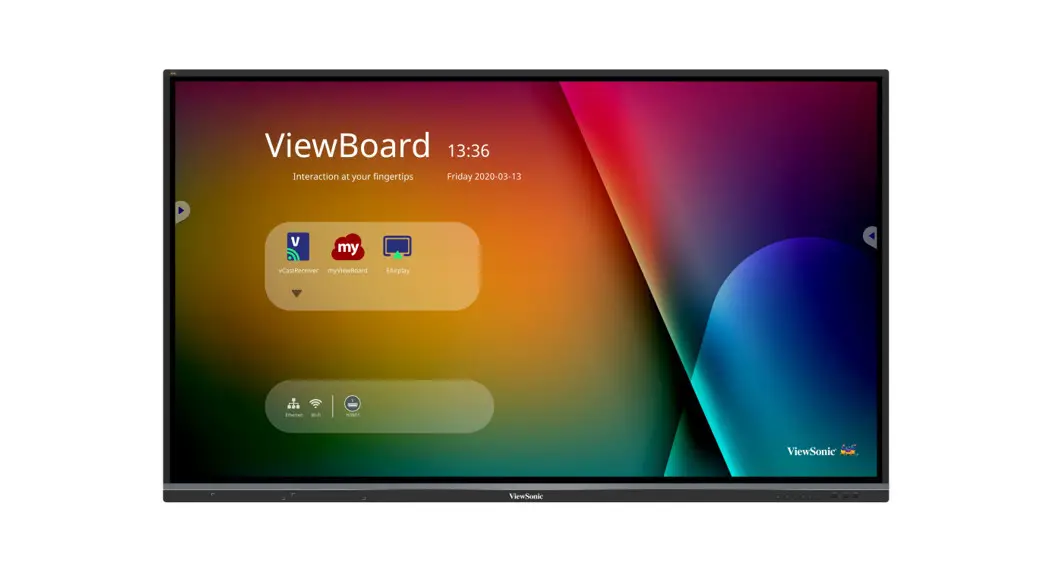
![]() ViewBoard IFP50-3 series
ViewBoard IFP50-3 series
Commercial Touch Display
quick Start Guide
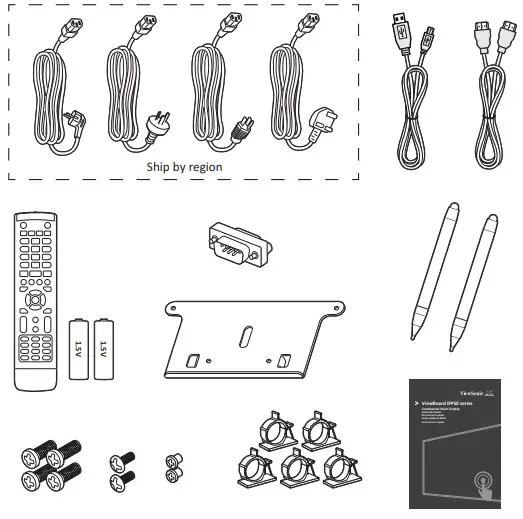
Package Contents
|
|
Wall Mount Kit Specifications (VESA)
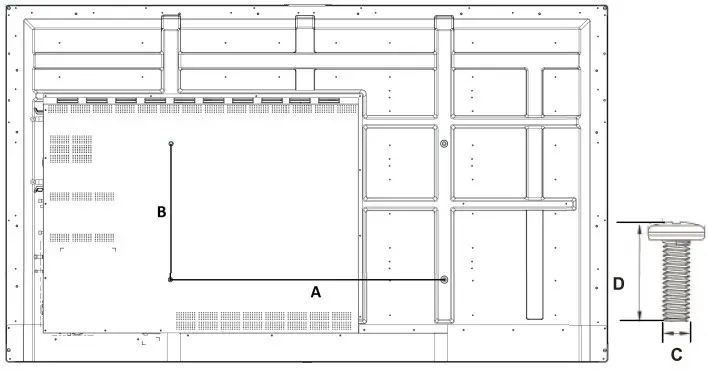
| inch | VESA Spec. (A x B) | Standard Screw (C x D) Quantity | |
| IFP5550 – 55″ | 400 x 200 mm | M8 x 25 mm | 4 |
| IFP6550 – 65″ | 600 x 400 mm | M8 x 25 mm | 4 |
| IFP7550 – 75″ | 800 x 400 mm | M8 x 25 mm | 4 |
| IFP8650 – 86″ | 800 x 600 mm | M8 x 25 mm | 4 |

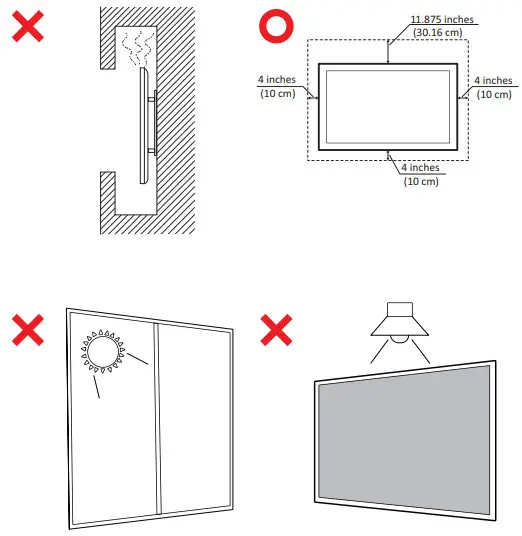
Installation Environment Attention
Control Panel Overview

| Item | Description |
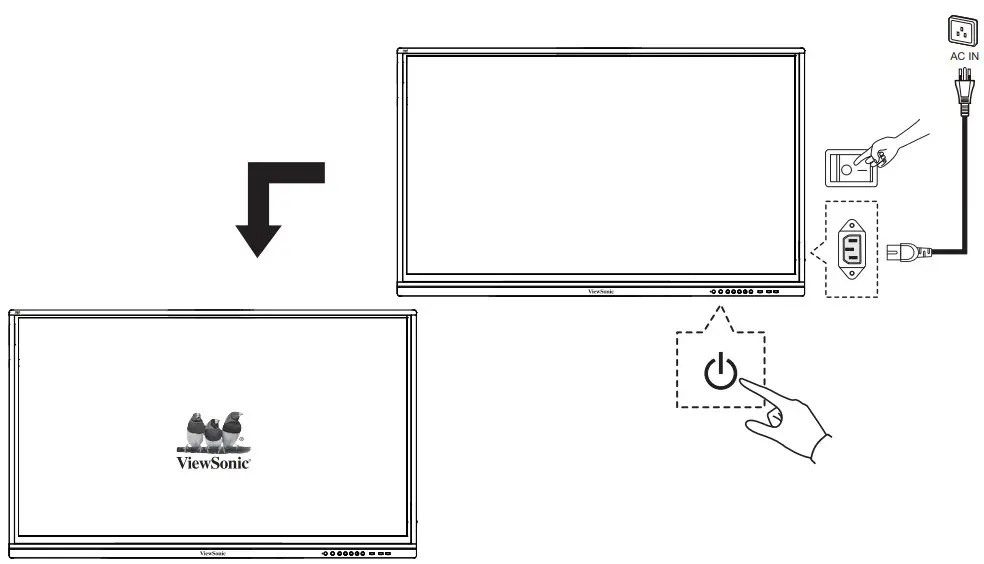
| 1 | Press the key to turn on the device Press the key to turn off/on the display backlight only Press and hold the key to turn off the device |
| 2 | Back to Embedded player main interface |
| 3 | Return to Embedded player previous level |
| 4 | Call up the function menu |
| 5 | Decrease volume |
| 6 | Increase volume |
| 7 | USB port for Embedded Player and internal PC |
| 8 | Receives signals from the remote control |
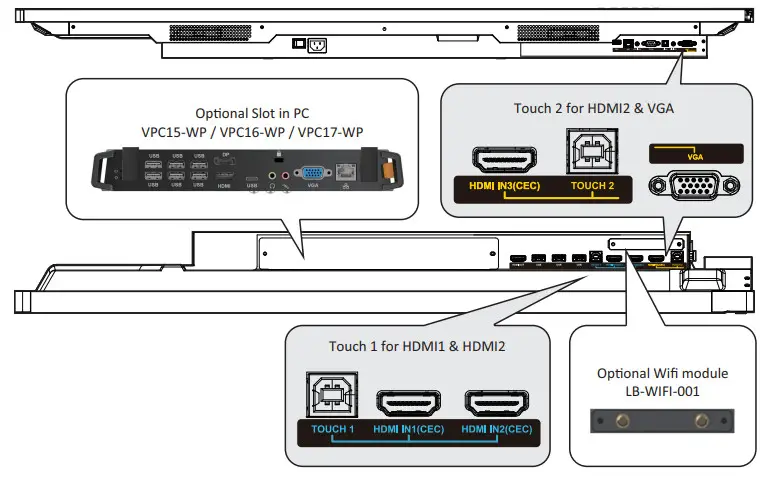
I/O PORT
Remote Control Overview
| 1. Press to turn the display ON/OFF 2. 3. DISPLAY Display information of the current input source 4. P.MODE Blank screen 5. FREEZE Freeze screen 6. Numeric button Numeric input button 7.-/–ALT+TAIB Press to switch between PC applications 8.0 Numeric input button 9. Close current PC window 10. INPUT Source selection button 11. MENU Press to display Menu 12.RED+ ALT Screencapture 13.GREEN+ TAB PC Tab’ button 14. YELLOW+DESKTOP Switch to slot in PC desktop 15.BLUE+BACHSPACE PC ‘Backspace button 16. START/ D. MENU PC ‘Windows’ button 17. PC ‘Menu’ button 18. 19. 20. 21. | 22. ENTER Enter button. Press it to select options. 23. Writing software startup 24.ESC / EXIT / D. SETUP Shortcut button to exit dialog boxes 25. EPG Back 26. FAV / SPACE PC Space button 27. CH.+/ CH. – CH+: PC previous page CH–: PC next page 28.VOL- / VOL- Increase / Decrease volume 29. F1 Windows F1 Function 30. F2 Windows F2 Function 31. F3 Windows F3 function 32. F4 Windows F4 Function 33. F5 Windows F5 Function 34. F6 Windows C6 unction 35 .F7 Windows F7 Function 36. F8 Windows C8 function 37. F9 Windows F9 function 38. F10 Windows F10 Function 39. F11 Windows F11 Function 40. F12 Windows F12 Function | 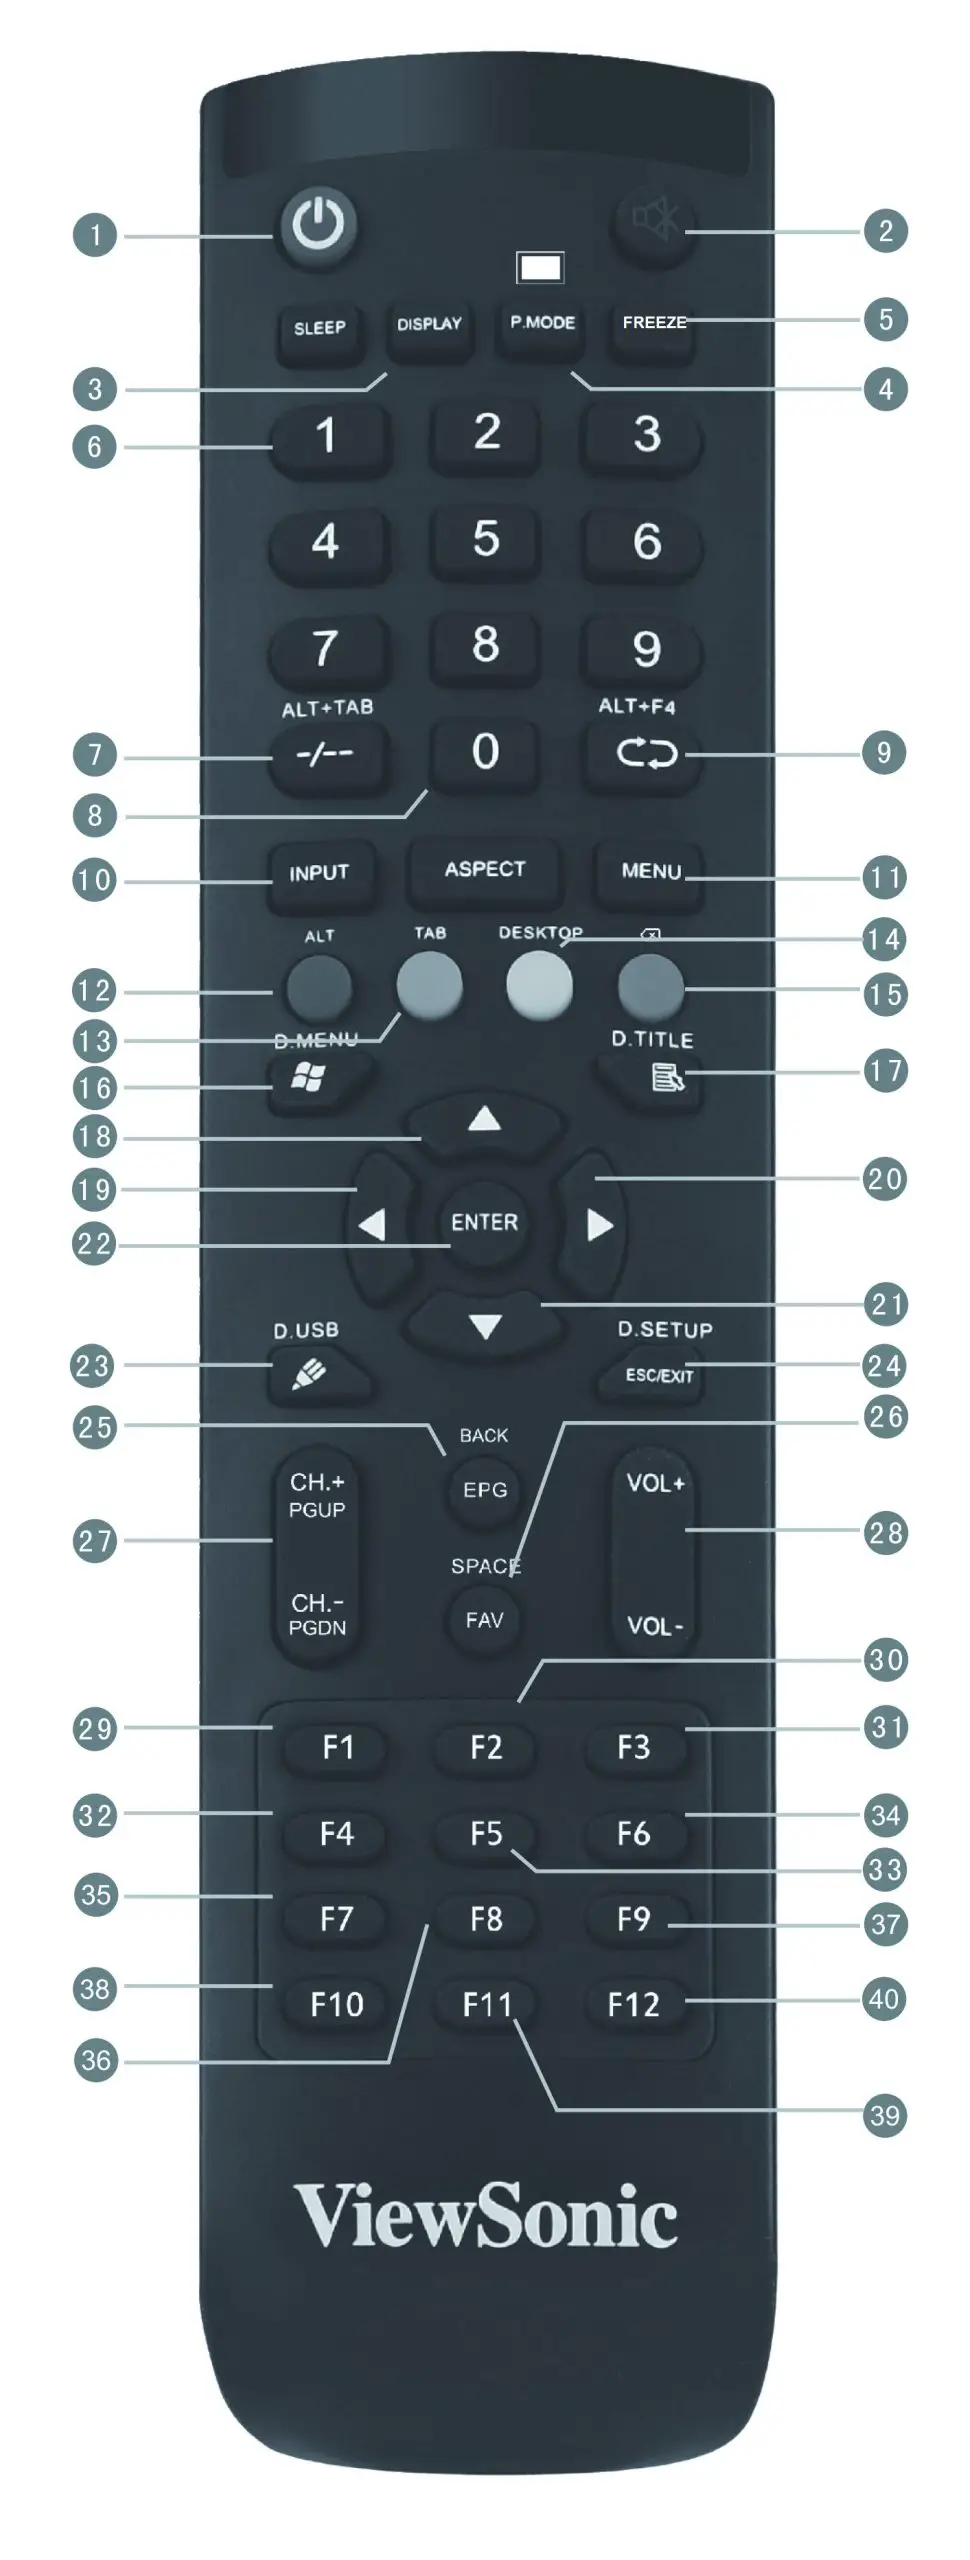 |
Connecting an External PC
- To display video and sound from an external PC follow the instructions below:
Note: External PCs can also be connected to the display via HDMI cable.
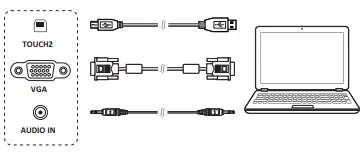
• Connect a VGA cable (15-pin) from your external PC to the VGA IN port on the display.
• Connect an audio cable from the AUDIO OUT port on your external PC to the AUDIO IN port on the display. - Connect a USB cable to the external PC from the TOUCH OUT port of the display. Note: For optimal results, select 1920x1080p as the external computer’s input resolution.
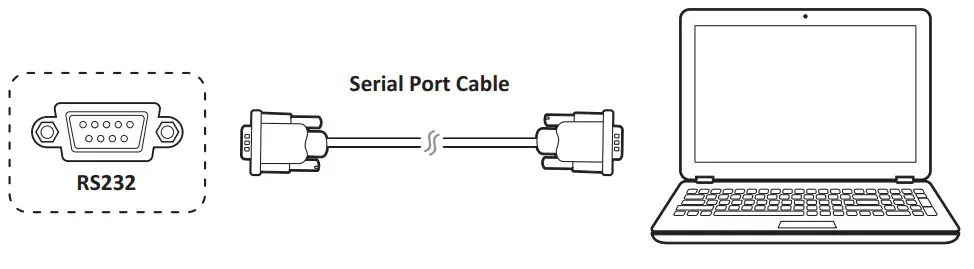
RS232 Connections
When you use an RS232 serial port cable to connect your display to an external computer, certain functions can be controlled by the PC, including power on/off, volume adjustment, and more.
Connecting USB Peripherals
- USB Peripherals: Plug the USB device cable into the USB IN port.
- Networking and modem cables: Plug the router cable into the LAN IN port. 3. Microphone: Plug the microphone cable into the MIC port.

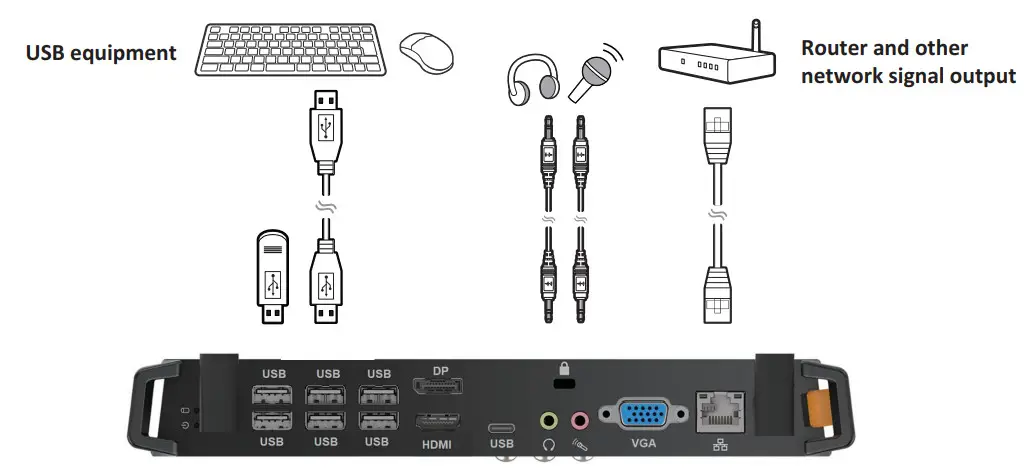
HDMI Connections

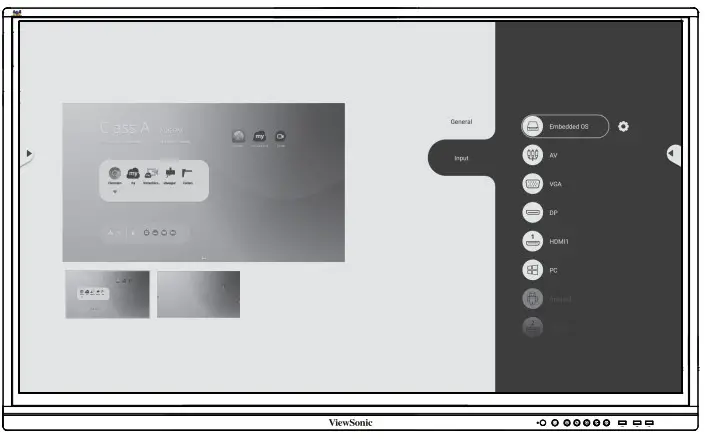
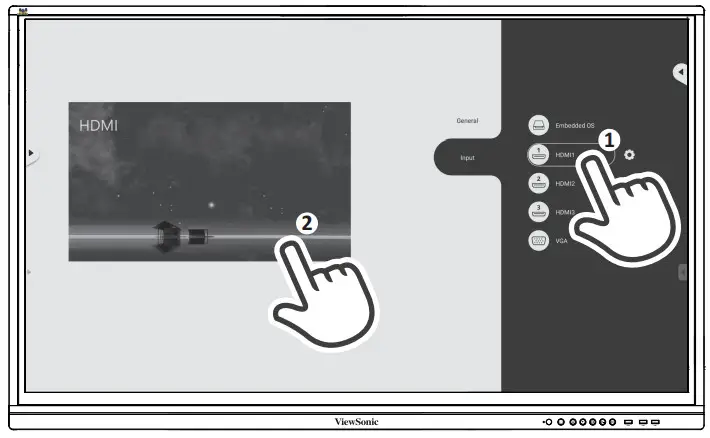
Start to Use


Compliance Statement
FCC Compliance Statement: This device complies with part 15 of FCC Rules. Operation is subject to the following two conditions: (1) this device may not cause harmful interference, and (2) this device must accept any interference received, including interference that may cause undesired operation. Industry Canada ICES-003 Compliance: CAN ICES-3 (B)/NMB-3(B)
![]() ViewSonic Corporation (US/Canada/Latin America)
ViewSonic Corporation (US/Canada/Latin America)![]() : www.viewsonic.com/support/product-registration
: www.viewsonic.com/support/product-registration
![]() united states
united states![]() 1-800-688-6688
1-800-688-6688![]() [email protected]
[email protected]
Canada![]() 1-866-463-4775
1-866-463-4775![]() [email protected]
[email protected]
Puerto Rico & Virgin Islands![]() http://www.viewsonic.com/la/soporte/servicio-tecnico
http://www.viewsonic.com/la/soporte/servicio-tecnico
Latin America![]() http://www.viewsonic.com/la/soporte/servicio-tecnico-la/
http://www.viewsonic.com/la/soporte/servicio-tecnico-la/
https://www.viewsonic.com/us/customer-service#
IFPSO-3 series_QSG_1b_ENG_20200210
Copyright 0 2019 ViewSonk Corporation. All rights reserved.