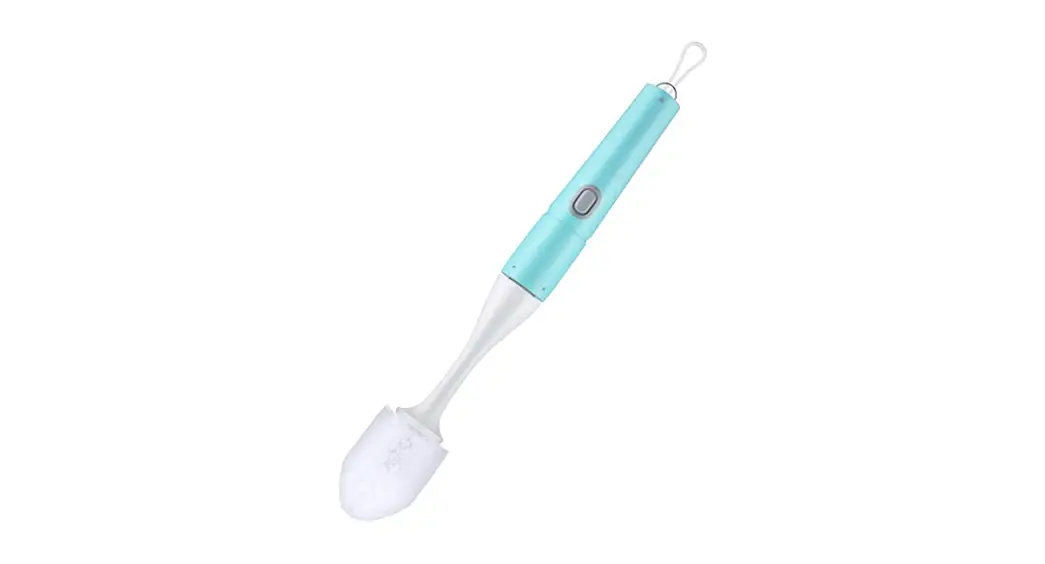
CORDLESS TOILET BRUSH
User manual
Please read this manual carefully before using it and keep it for future reference.
DIAGRAM
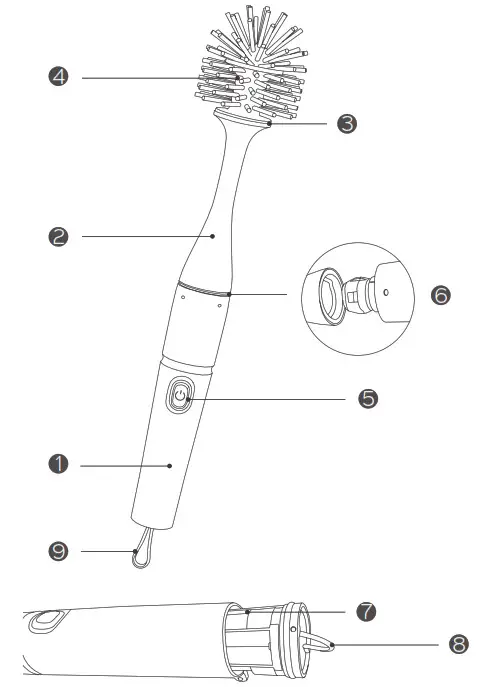
1. Main handle
2. Connecting rod
3. Connecting rod head
4. Toilet brush head
5. Power button
6. Handle connection
7. Battery tank
8. Battery tank pull ring
9. Rope
SPECIFICATION
Running time: 60-70min
Voltage: DC9V
Rotating speed: 280RPM ± 10%
Waterproof level: IPX4
Number of Batteries Required: 6 AA batteries(not included)
INSTALLATION INSTRUCTIONS
1. Hold the Battery tank pull ring and pull out the battery tank.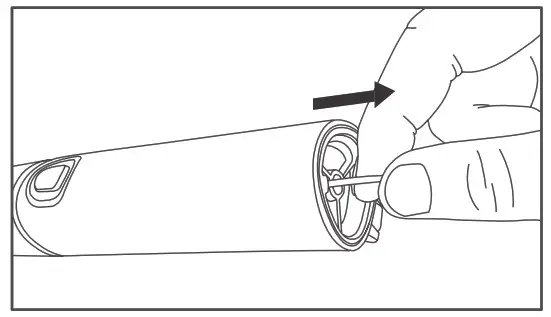
2. Install 6 AA batteries (not include) in the battery tank. Push the battery tank back into the main handle.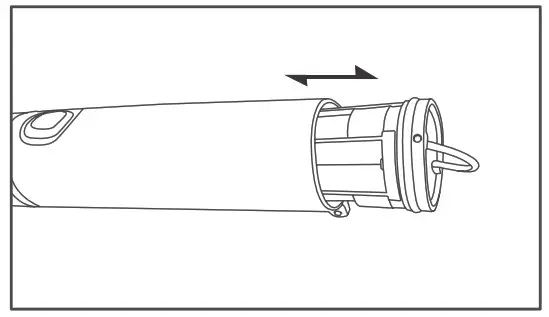 Caution: Pay attention to the installation direction of the battery tank. The install direction is to make the slot near the hook like the picture shown. And then pull the battery tank back into the main handle.
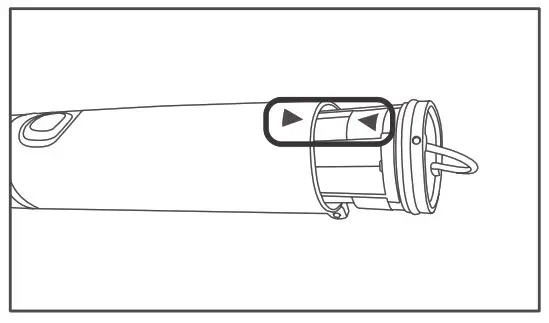
3. Screw the toilet brush head into the connecting rod head.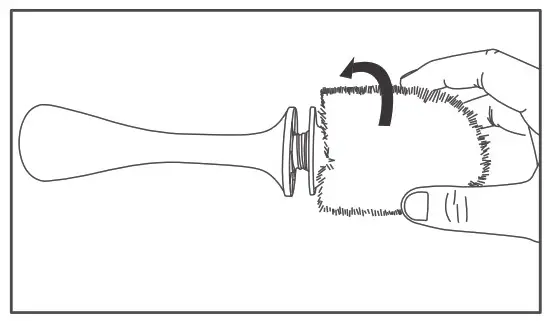
4. Connect the Main handle and the connecting rod.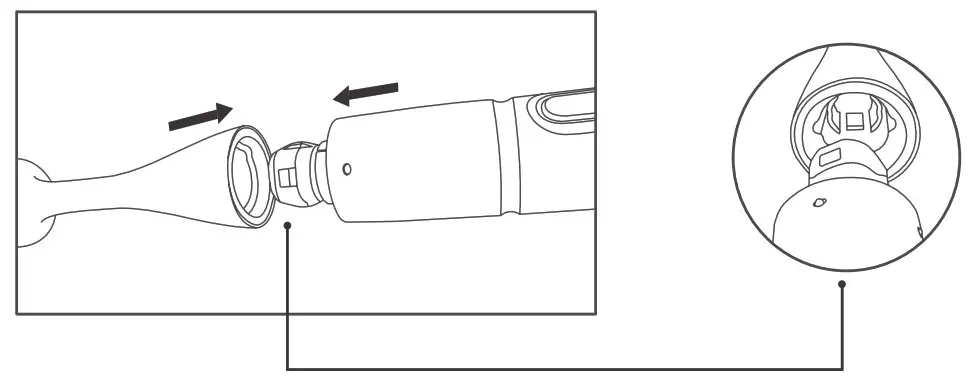
HOW TO CLEAN THE TOILET
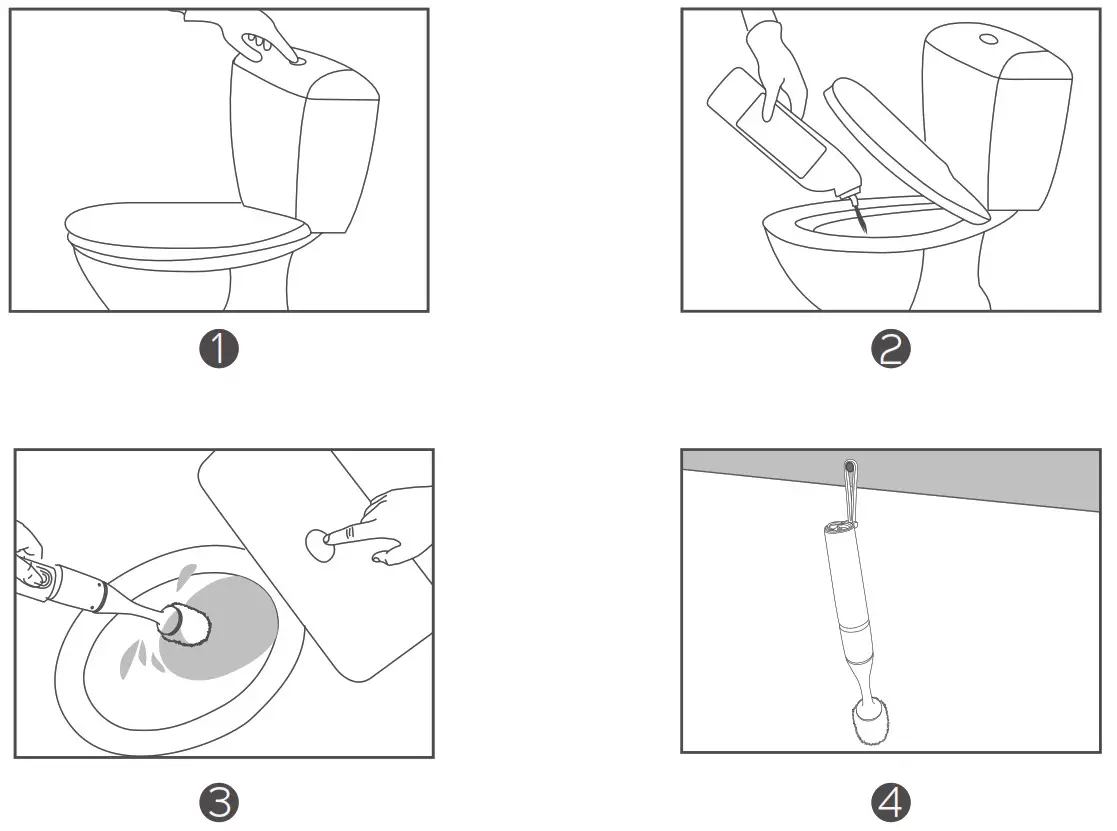
1. Flush the toilet with the seat lid closed.
2. Apply toilet detergent to the inside of the bowl, including the grooves and rim, and wait a few minutes for a better cleaning effect.
3. Press the power button and scrub inside of the toilet bowl with the toilet brush, particularly need to clean the stains at the waterline, grooves, and rim.
4. Flush toilet, rinse the brush in water and hang the brush in a dry area after use.
WARM TIPS
1. Before turning on the brush, please make sure to use proper eyewear and gloves to avoid eye and skin contact from splatter.
2. It is recommended to wash the toilet regularly, at least once a week.
3. When cleaning the brush, if there is water residue in the connecting rod, you can screw out the brush head and pour out the water.
4. Clean all surfaces of the unit with a soft cloth. Do not immerse it in water or drench with water.
FAQ
| Question | Solution |
| Press the power button and the brush didn’t work | Make sure the battery is properly installed and the battery has power. Make sure the connection is correct. |
| The brush head is hard to replace | Pull the connecting rod out vertically or Screw out the brush head. |
| Dirt is difficult to remove | It can be used with detergent to assist in decontamination |
| The rotating power of the brush head is getting weaker and weaker | You can replace new batteries to ensure an adequate power supply |
FCC STATEMENT
Operation is subject to the following two conditions: (1) This device may not cause harmful interference, and (2) this device must accept any interference received, including interference that may cause undesired operation. Note: This equipment has been tested and found to comply with the limits for a Class B digital device, pursuant to part 15 of the FCC Rules. These limits are designed to provide reasonable protection against harmful interference in a residential installation. This equipment generates, uses, and can radiate radio frequency energy and, if not installed and used in accordance with the instructions, may cause harmful interference to radio communications. However, there is no guarantee that interference will not occur in a particular installation. If this equipment does cause harmful interference to radio or television reception, which can be determined by turning the equipment off and on, the user is encouraged to try to correct the interference by one or more of the following measures:
• Reorient or relocate the receiving antenna.
• Increase the separation between the equipment and receiver.
• Connect the equipment into an outlet on a circuit different from that to which the receiver is connected.
• Consult the dealer or an experienced radio/TV technician for help.
CUSTOMER SERVICE
Please note that this product is provided with a 12-month warranty from the date of its original purchase. If you encounter any problems while using the product, please feel free to contact our support team. We will try our best to meet your satisfaction.


