![]() HUD-HC-EPTZ-USB EASY VIEW Camera 4k ePTZ
HUD-HC-EPTZ-USB EASY VIEW Camera 4k ePTZ
User Manual
EASY VIEW Camera 4k ePTZ Product Content & Operation
![]() ATTENTION
ATTENTION![]()
This manual introduces the functions, installation, and operation for this camera in detail. Please read this manual carefully before installation and use.
Cautions
- Avoid damage to the product caused by heavy pressure, strong vibrations or immersion during transportation, storage, and installation.
- Do not expose the product to rain or moisture.
- To prevent the risk of electric shock, do not open the device. Installation and maintenance should only be carried out by qualified technicians.
- Do not use the product beyond the specified temperature, humidity, or power supply specifications.
- Wipe it with a soft, dry cloth when cleaning the camera lens. Wipe it gently with a mild detergent if needed. Do not use strong or corrosive detergents to avoid scratching the lens and affecting the image quality.
- This product contains no parts which can be maintained by users themselves. Any damage caused by dismantling the product by user without permission is not covered by its warranty.
Electrical Safety
Installation and use of this product must strictly comply with local electrical safety standards.
Install
- Do not rotate the camera head violently, otherwise, it may cause internal mechanical failure.
- This product should be placed on a stable desktop or another horizontal surface. Do not install the product obliquely, otherwise, it may display an inclined image.
- Ensure there are no obstacles within the rotation range of the holder.
- Do not power on before completing installation.
- Magnetic Interference
Electromagnetic fields at specific frequencies may affect the video image. This product is Class A. It may cause radio interference in household applications. The appropriate measure is required.
CAMERA DETAILS
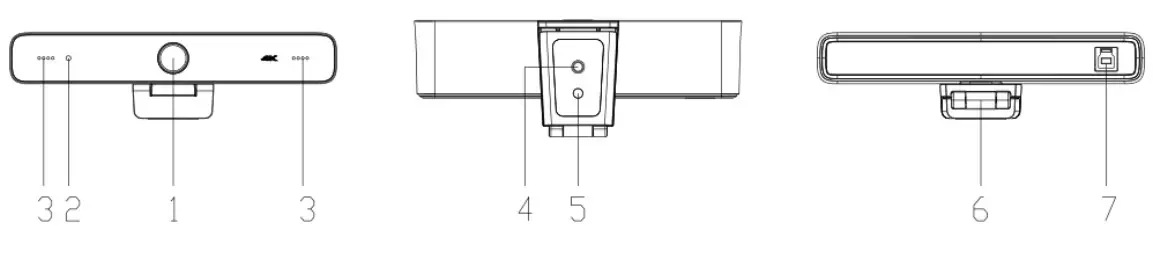
| 1. Camera Lens | 4. Tripod fixing hole |
| 2. Indicator light | 5. Positioning hole |
| 3. Built-in MIC | 6. Bracket |
| 7. USB-B 3.0 Connector | |
1.1 INCLUDED ACCESORIES.
ITEMS
IR Remote Control
USB 3.0 Cable
User Manual
REMOTE CONTROL
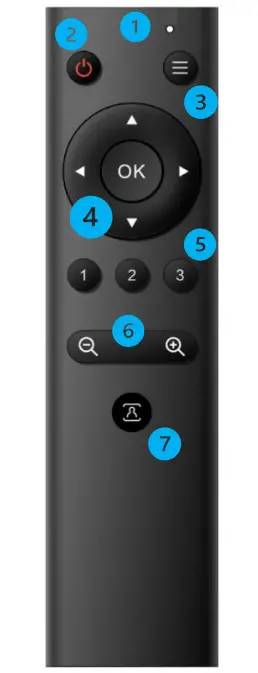
- Infrared indicator light
- Stand By
The device enters standby mode after pressing it once and wakes up after pressing it again. - Menu Button
Enter/exit the OSD menu or return to the previous menu. - Pan/Tilt Control
Up: press◀ Down press▲
Left: press▼ Right: press◀
Press and hold the up/down/left/right key, and the pan/tilt movements will keep running.
【OK】:Camera lens back to the middle position; Enter next menu - Number key
Number keys 1, 2, and 3:to preset position settings.
Note: Short press for 1s [preset position recall]; long press for 3s [preset position setting]
Long press for 5s [preset delete] - Zoom Control
【 】: press【 】key to zoom in
【 】: press 【 】key to zoom out - Auto Framing Function Key
OPERATING THE CAMERA
3.1 CAMERA CONNECTION 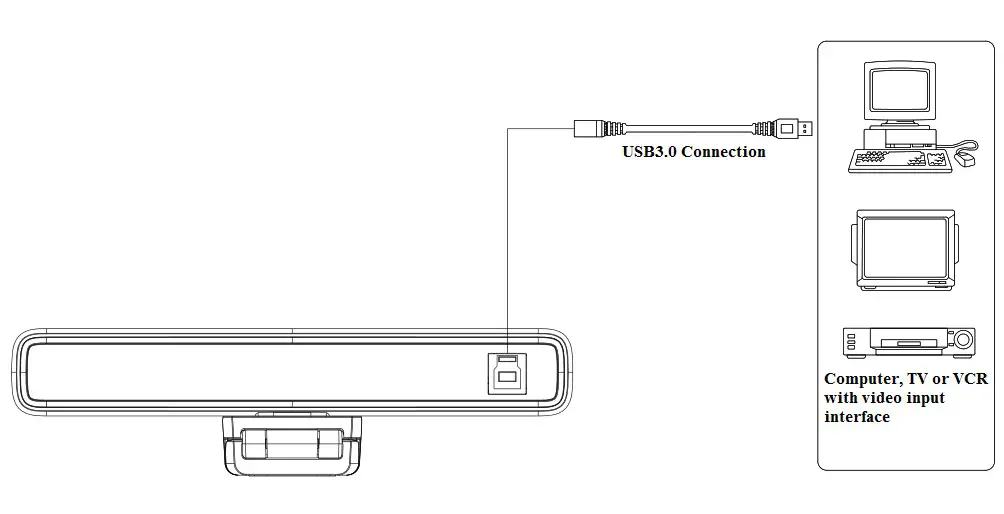
3.2 APPLICATION
- In this manual, “press the key” refers to a click rather than a long-press, and a special note will be given if a long-press for more than one second is required.
- When a key combination is required, do it in sequence. For example, “【*】+【#】+【F1】” means press“【*】” first and then press“【#】” and last press“【F1】”. 1. Infrared indicator light
 1. Flashing (red): Sending instructions
2. No flashing: do not send instructions
2)Standby, Menu Setting 1. Standby button
 : turn on or turn off the camera image
2. Menu key: call up the camera OSD menu
3) Pan/Tilt Control Rotate up: press【 ▲】key rotate down: press【▼ 】
Rotate to the left: press the【◀ 】key
Rotate to the right: press the【 ▶】key
Middle position: press【OK】key
Long press the up, down, left, and right rotation buttons, it will continue to rotate from slow to fast until the end of the stroke; release it halfway to stop the rotation.
4)Preset position setting, calling, deleting 1. Save the preset position: Long press (within 3s5s) one of the keys 1 to 3, and a preset position corresponding to the number key will be saved.
2. Call the preset position: directly press the number keys 1 to 3 to call the saved preset position.
3. Delete preset position: Long press (5s) one key 1 to 3 to delete a saved preset position corresponding to the number key.
Note: If the number key is not preset, it is invalid.
5)Zoom Control 1. Zoom in: press the 【 】key
2. Zoom out: press 【 】key
3. If you long press these two buttons, it will continue to zoom in/out; release it halfway to stop zooming.
6) Auto Framing Function On/Off Turn on/off Auto Framing Function
 1. Flashing (red): Sending instructions
 1. Standby button
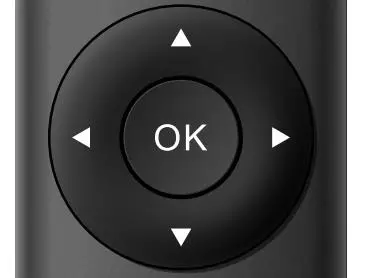 Rotate up: press【 ▲】key rotate down: press【▼ 】
 1. Save the preset position: Long press (within 3s5s) one of the keys 1 to 3, and a preset position corresponding to the number key will be saved.
 1. Zoom in: press the 【
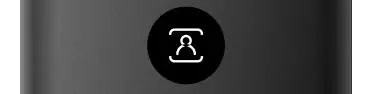 Turn on/off Auto Framing Function
3.3 MENU INTRODUCTION
3.3.1 MAIN MENU
Press 【MENU】 key under MJPG, YUY2, NV12, or H264 compression encoding format output to display the menu, using the scroll arrow to point at or highlight the selected items. 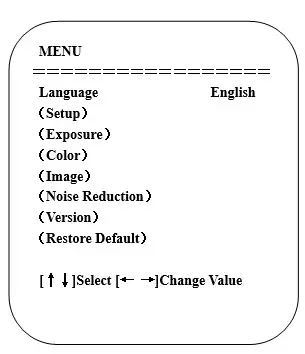
Language
Language Setting press the【← →】keys to select a Language
System Setting
Move the pointer to (Setup) in the Main Menu, click the【HOME】key and enter the (System Setting) as shown below: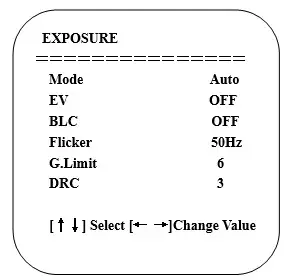
Image Style: default / standard / clear / bright /soft can be set.
Intelligent zoom: on / off
LDC: On/OFF
Exposure Setting
Move the pointer to EXPOSURE in the Main Menu, click the【HOME】and enter the (EXPOSURE SET) as follows:
Mode: Auto, Manual, Shutter priority, and Brightness priority.
EV: On/Off (only available in auto mode)
Compensation Level: -7~7 (only available in auto mode when EV is ON)
BLC: ON/OFF for options (only available in auto mode)
Anti-Flicker: OFF/50Hz/60Hz for options (only available in Auto/Iris priority/Brightness priority modes)
Gain limit: 0~15(only available in Auto/ Iris priority /Brightness priority mode)
WDR: Off, 1~8
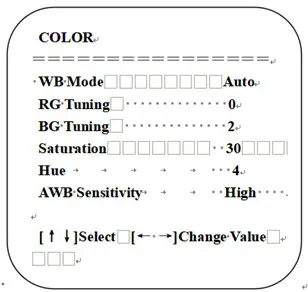
Color
Move the pointer to the (COLOR) in the Main Menu, click the【HOME】and enter the (COLOR sub menu) as follow:
WB Mode: Auto, Manual, One Push, Specified color temperature
Saturation: 0-50
AWB Sensitivity: high/middle/low (only available in automatic mode)
Chroma: 0~8
RG Tuning: -10 – 10
BG Tuning: -10 – 10
Red Gain: 0-255
Blue Gain: 0-255
Color Temperature: 2400K~7100K
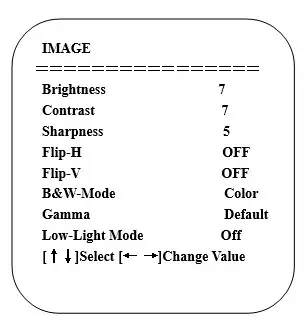
Image
Move the pointer to the (IMAGE) in the Menu, click the【HOME】and enter the (IMAGE sub menu) as follow:
Brightness: 0~14
Contrast: 0~14
Sharpness: 0~15
Flip-H: On/Off
Flip-V: On/Off
B&W Mode: color, black/white
Gamma: Default/0.34/0.39/0.47/0.5
Minimum Illumination: On/Off
Noise Reduction
Move the pointer to the (NOISE REDUCTION) in the Menu, click the【HOME】and enter the (NOISE REDUCTION) as follow:
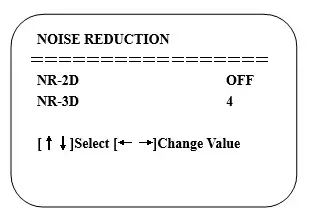
2D Noise Reduction: Auto, close, 1~7
3D Noise Reduction: Close, 1~8
Version
Move the pointer to the (VERSION) in the Main Menu, click the【HOME】and enter the (VERSION) as follow: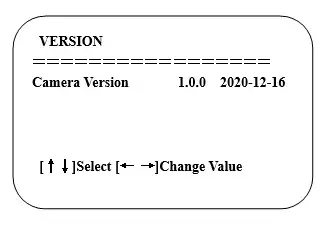
Restore Default
Move the pointer to the (RESTORE DEFAULT) in the Main Menu, click the【HOME】and enter the (RESTORE DEFAULT) as follow: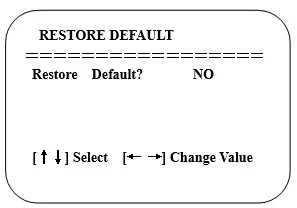
Note: If the address of the former remoter is not 1 but another one from 2, 3, 4, the corresponding camera address will restore to 1 when all parameters or system parameters are restored. The user should change the remoter address to 1 (press No.1 according to the camera so to get normal operation)
Restore default: YES/NO. Color style and video format cannot be restored to the factory default
MAINTENANCE & TROUBLESHOOTING
4.1 CAMERA MAINTENANCE
- Please power off the camera and disconnect the power adapter and wall socket if it is not used for a long time.
- Use soft cloth or tissue to clean the camera cover.
- Wipe it with a soft, dry cloth when cleaning the camera lens. Wipe it gently with a mild detergent if needed. Do not use strong or corrosive detergents to avoid scratching the lens and affecting the video quality.
4.2 TROUBLESHOOTING
No video output
- Check whether the USB cable is correctly connected, and the power indicator light is ON
- Check whether the machine could do a self-check after restarting
- Restart your computer
- Check whether the video output cable or video display is normal
- Check whether the camera is properly recognized by your PC
Flickering image issue
- Check the USB cable quality and whether it is properly connected
Product Content & Operation – Version 1.0


