![]() HUNTING TRAIL CAMERA
HUNTING TRAIL CAMERA
24MP
KAHUTRCA810B
User Guide
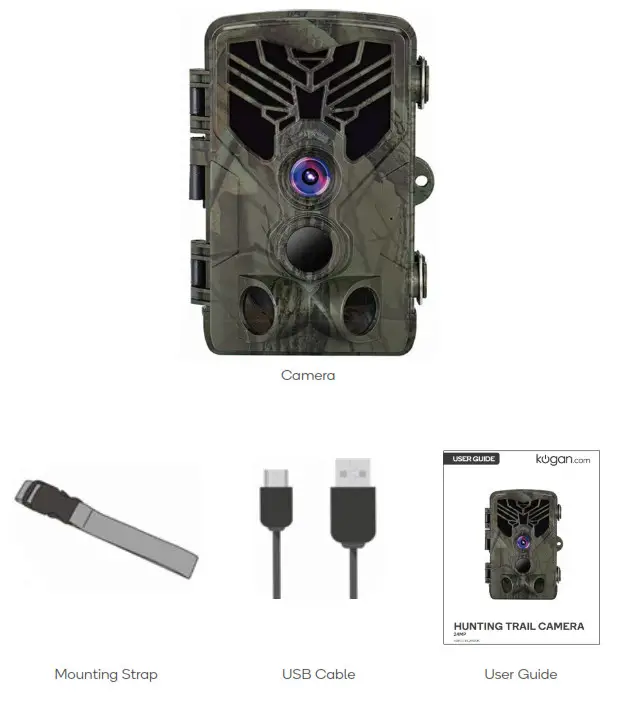
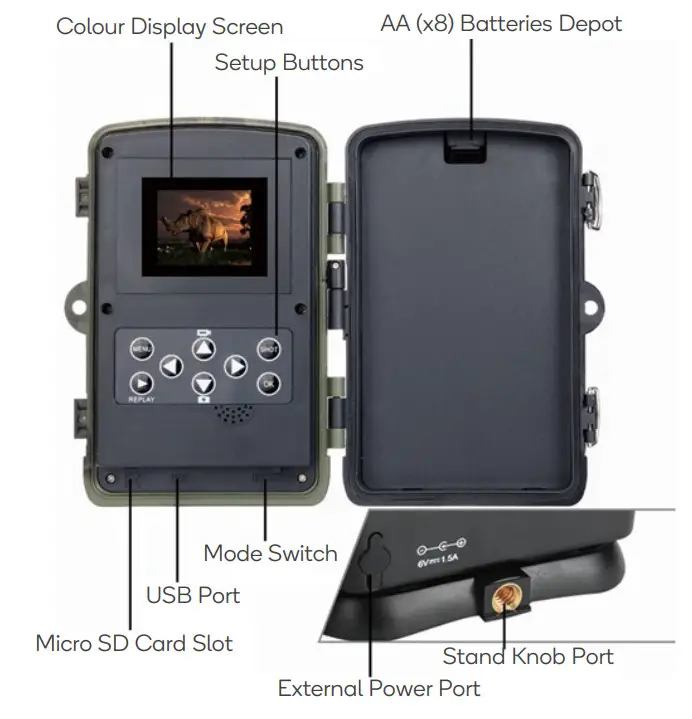
COMPONENTS
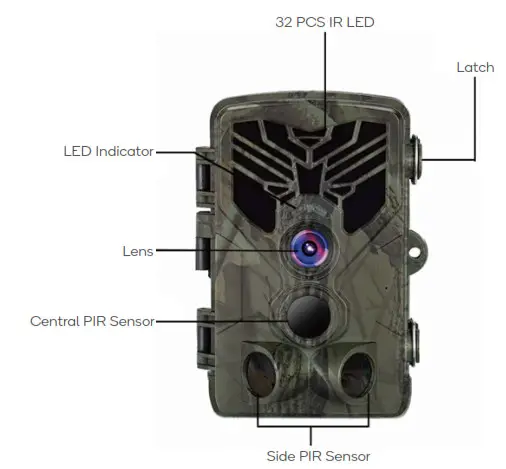
OVERVIEW
INSTALLATION
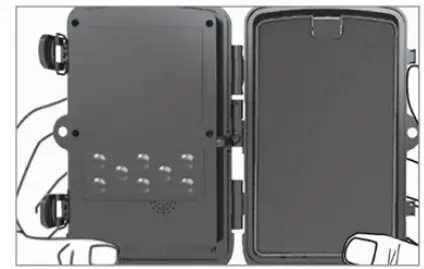
Using AA-Alkaline Batteries
- Pull the gap lightly and open the battery compartment.

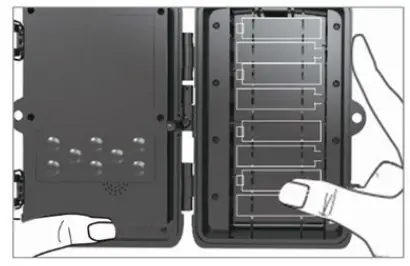
- Refer to the battery icons located on the inside of the battery compartment. Insert the batteries with correct polarity (+/-).

- Close the battery compartment tightly to ensure water and dust resistance.


Note: Installing any AA battery in the wrong direction may cause the batteries to leak acid or explode, causing camera failure and damage to the battery compartment.
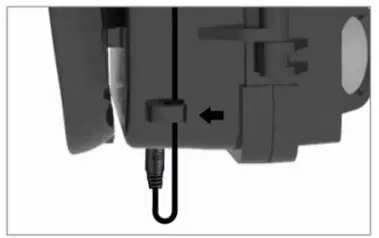
Using DC6V Power Supply
- Remove the rubber port cap at the bottom of the camera. Plug a universal DC6V cord into the bottom port.

- Run the cord to the side of the camera where there is a hook provided behind the hinge of the camera door. This will support the power cord and take pressure off the connection point.

- When not in use, replace the rubber port cap at the bottom of the camera to protect the DC6V universal plug-in port.

Note: The device supports only a DC6V power supply.


Memory Card Installation
- Insert the microSD card with the contacts facing down. The microSD card should slide in freely with little resistance. Continue pressing the card inward until you hear a click. This means the microSD card is locked in place and ready for use.

- To remove microSD card, press the card inwards to release.

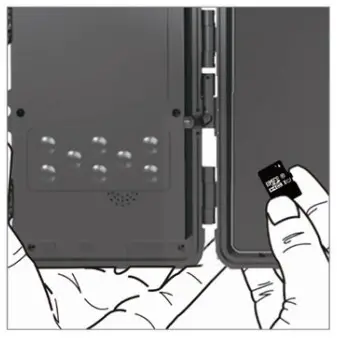
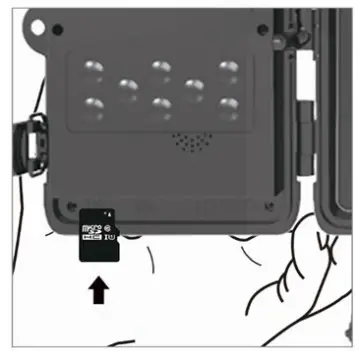
Note: The device is compatible with microSD cards up to 32GB.
OPERATION
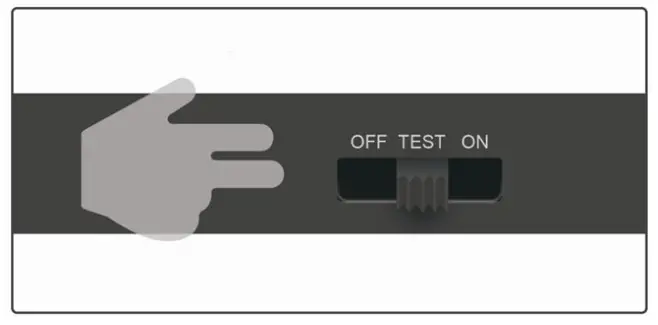
Quick Start
Slide the mode switch from OFF to TEST position to activate the camera and view the user setup screen.
Operating Buttons
There is a control panel with 8 keys when you open the camera.
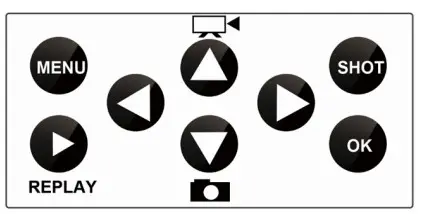
| MENU | Open the Settings menu using the MENU button. |
| REPLAY | Press this button to start the replay mode. |
| Change to the manual recording mode for videos. | |
| Change to the manual recording mode for taking photos. | |
| SHOT | Manually take a video or photo depending on the set recording mode. Video recordings are ended by pressing the SHOT button. |
| Press it to start the video, press it again to stop. |
Auto Recording Mode
After entering settings, slide the power switch to ON to enter auto recording mode. The motion indicator will flash red for about 5 seconds, after which the camera will start working. It will automatically take pictures or record videos when a person or animal enters the area of the PIR sensor.
Caution: To avoid potential false triggers due to temperature and motion disturbances, do not aim the camera at a heat source (e.g. the sun, heated stone or metal) and remove nearby tree branches and twigs. The ideal direction to aim at is an open place to the north without nearby heat sources.
Note: It is recommended to place the camera at a height of 1–2 metres.
Menu Settings
| Settings | Options | Description |
| Photo Resolution | 24MP, 20MP,16MP, 12MP, 8MP, 5MP, 3MP | Photo size |
| Photo Series | 1/2/3/10 | Number of photos taken sequentially |
| ISO | Auto,100, 200, 400 | Camera exposure level |
| Delay | 1/5/10/30 seconds/minute | Delay between shots |
| Camera ID | 0-0-00-0-0 | Camera ID |
| Video Resolution | 1920 x 1080P (default), 1280 x 720P, 848 x 480P, 720 x 480P, 640 x 480P, 320 x 240P | Video size |
| Video length | 3 seconds to 10 minutes | Time length of video |
| Record audio | ON, OFF | Whether sound is captured or not |
| Mode | Camera, video, camera and video, interval | Image, video, image + video, image taken at set interval |
| Endless Capture | ON, OFF | If this mode is on, when the memory card is full the oldest photos or videos will be overwritten with the new ones to keep the recording uninterrupted. |
| Language | English, French, German, Chinese and Japanese | Camera menu language |
| Time-lapse interval | 5/30/60 minutes | Taking picture or video for every 5/30/60 minutes constantly |
| TV Mode | NTSC, PAL | AV output mode |
| Date/Time | 2018-09-0316:37:25 | YYYY-MM-DD HH:MM:SS |
| Timer | ON, OFF | Enable operation only during set period |
| Password | **** | 4-digit password (universal password: 1314) |
| Format | SD Card | Format memory card and delete all files |
| Default settings | Factory reset | Restore factory defaults |
Slide the switch to ON to resume operation after changing the settings.
Note: Images and video can only be played back/previewed while in test mode, not while auto recording.
TROUBLESHOOTING
| Problem | Possible Solution |
| Camera does not capture subject of interest. | •Check the PIR sensitivity for warm environmental conditions. Set the Sensor Level to “Low”; for cold weather use, set the sensor to “High”. •Set your camera up in an area where there are no heat resources in the camera’s field of view. •In some cases, setting the camera near water will make the camera to take images with no subject in them. •Aim the camera over ground. •Set the camera on stable and immovable objects, i.e., large trees. •At night, the motion detector may detect beyond IR illumination range. You can reduce distance by adjusting sensor sensitivity. •The rise or setting of the sun can trigger the sensor; reorient the camera. •If a person or animal moves quickly, it may move out of the camera’s field of view before the photo is taken. Move camera further back or redirect camera. |
| Camera stops taking images. | •Ensure that the memory card has enough memory storage. If the card is full, camera will stop taking images. •Check batteries to make sure that alkaline, NIMH or lithium AA batteries power is enough for camera to work •Make sure that the camera power switch is at the “ON” position and not at the OFF or TEST modes. •Format the memory card when you use it for the first time or use another memory card. |
| Night vision flash range does not meet expectation. | •Although the camera will operate well with AA (x4) batteries, AA (x8) batteries will improve performance and provide better battery life during night vision. •Ensure that batteries are fully charged. •High-quality 1.5V NIMH or lithium rechargeable AA batteries can offer superior flash range than alkaline batteries. •To ensure accuracy and quality of night-time image, mount the camera in a dark environment without obvious light sources. •Having surfaces for the flash to bounce off (trees, walls, ground, etc.) within flash range is important to get good night-time images. In an open field, there will be nothing for the light to reflect on and the images will be poorer. |
SPECIFICATIONS
| Power | AA (x4) or AA (x8) alkaline/lithium batteries external DC6V (3.5 x 1.3mm jack) |
| Connectivity | AV out (video cable not included) |
| Water resistance | IP65 |
| Photo recording | |
| Photo resolution | 24MP |
| File format | JPG |
| Time lapse mode | 5/30/60minutes |
| Multi-shot mode | Up to 9 photos per detection |
| Stamp (photos and video) | Date, time, temperature (*CPT) and moon phase |
| Capture mode | Colour by day, black and white by night |
| Video recording | |
| Video resolution | 1920 x 1080/30fps (FHD) |
| File format | AVI |
| Sequence length | Adjustable from 10 to 90 seconds |
| Capture mode | Colour by day, black and white by night |
| Audio | |
| Sound recording | ON/OFF |
| Memory storage | |
| Support | External only: microSD card up to 32GB |
| Detection system | |
| Motion sensor | 2 x PIR |
| Detection angle | 120° |
| Detection range | Adjustable from 1 to 80ft |
| Trigger speed | 0.3 seconds |
| Delay between each detection | Adjustable from Instant to 30min |
| Night time illumination system | |
| LEDs | 32 pcs |
| Flash range | <90ft |
| Exposure | Automatic infrared level adjustment |
| Optical field of view | 120° |
| Dimensions | 135mm x 90mm x 76mm |
| Operating temperature | -20°C to +70°C |
NOTES……………..
Need more information?
We hope that this user guide has given you the assistance needed for a simple set-up.
For the most up-to-date guide for your product, as well as any additional assistance you may require, head online to help.kogan.com.
![]()


