BOLY BG662-W4K Trail Camera User Manual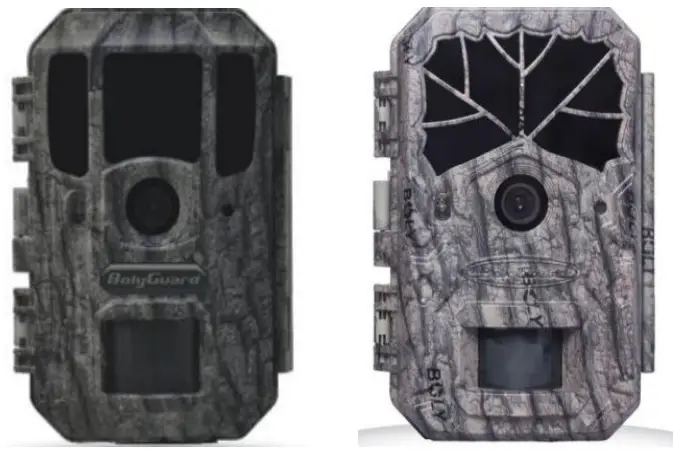
Getting Started
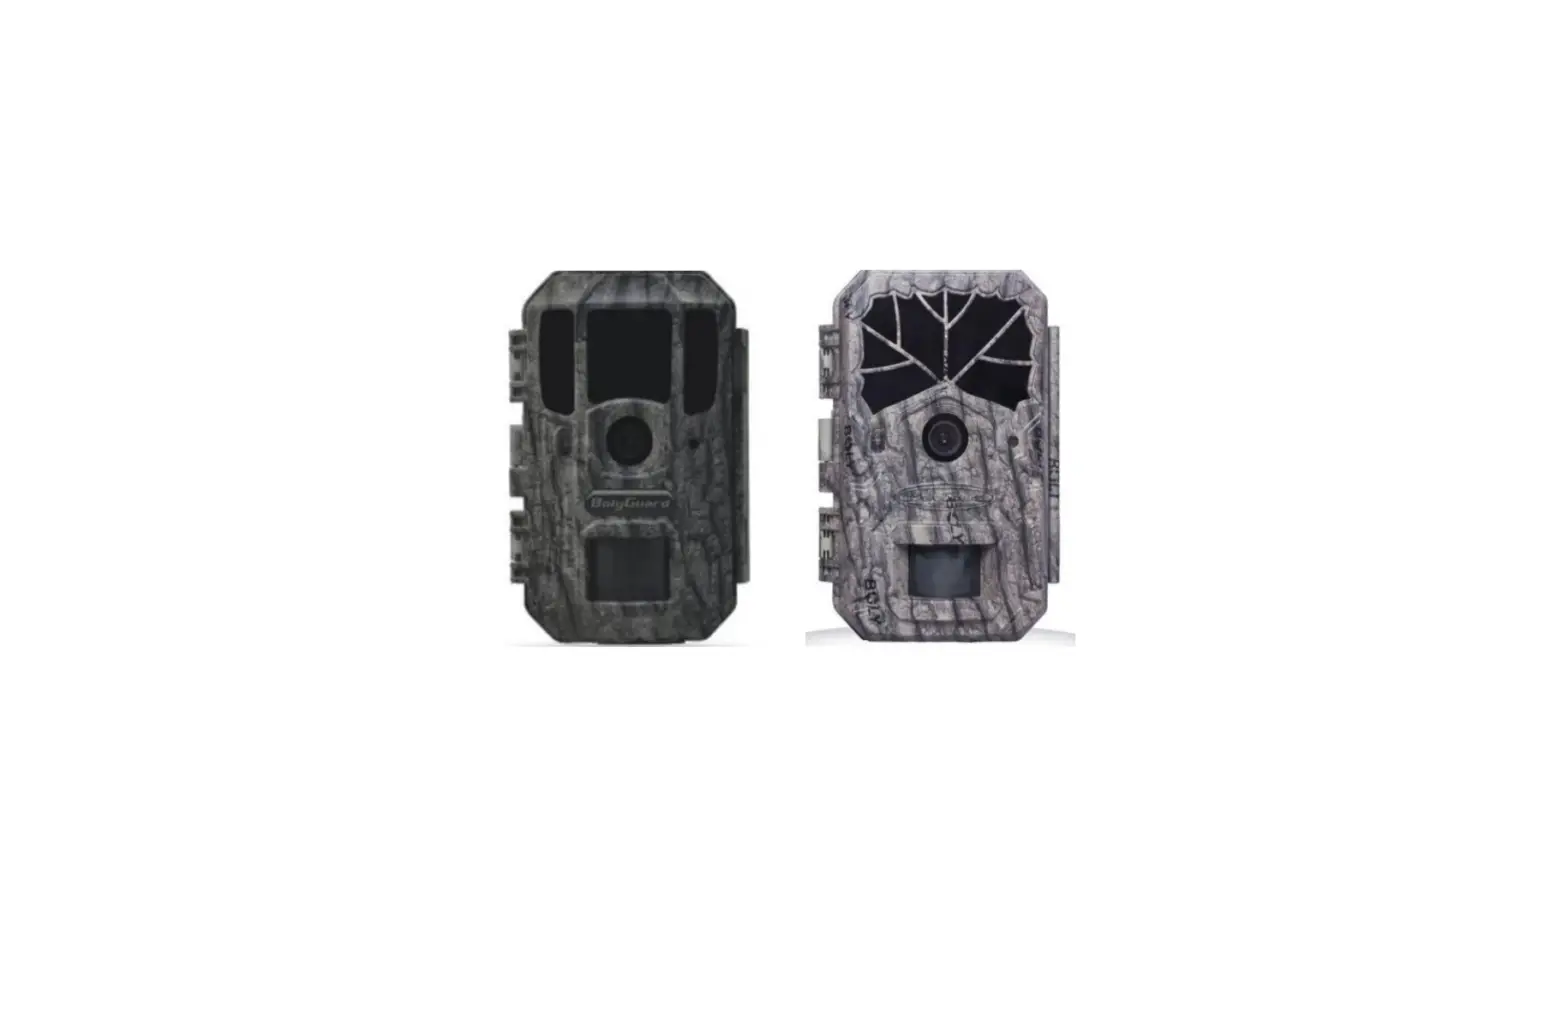
Product View
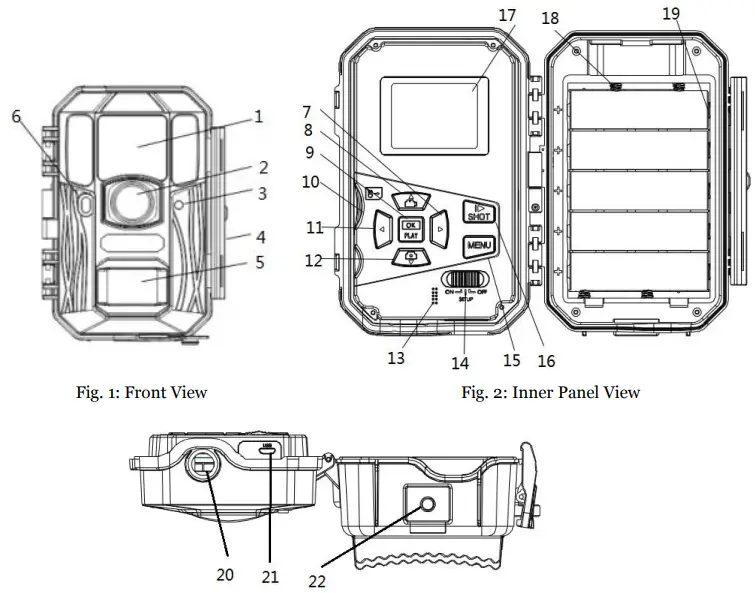
Fig. 3: Bottom view
| 1 | Infrared LED | 2 | Lens | 3 | Microphone |
| 4 | Lock | 5 | PIR | 6 | Indication LED |
| 7 | Right | 8 | Up/Video | 9 | OK/Play |
| 10 | SD Card Slot | 11 | Left | 12 | Down/Photo |
| 13 | Speaker | 14 | Power Switch | 15 | Menu |
| 16 | Shot | 17 | LCD display | 18 | AA Battery Tray |
| 19 | 18650 Battery Tray | 20 | DC In | 21 | USB Port |
| 22 | Screw Hole |
Camera Operations
Power Supply
2.1.1 Powered by Batteries
- 4 or 8 AA batteries
High-density, high-performance rechargeable or non-rechargeable Alkaline batteries are recommended. You can also use NiMH batteries as well, each battery should be above 1.5V. - 5 X 18650 batteries Need to use Pointed Head 18650 Battery. It can be charged by external power supply(DCor Solarpanel).
Power Supply
A DC 6-Volt, 2 A external power supply adaptercan also be used to power the camera (not included).
SD Card Information
To take full advantage of the latest technologies,which have fast transfer speeds and long durability for extensive shooting in the most extreme out door conditions. Some SD cards are Secure Digital High Capacity (SDHC) PRO cards, which only work with SDHC compatible devices. Please check that your product is compatible with SDHC cards.
- Insert the SD card into the camera before turning on the camera
This camera supports up to a 64GB capacity SD card, and has no built-in internal memory. The camera will not function without the SD card properly inserted into the camera. - Make sure the SD card is unlocked before inserting it into the camera
- If you experience any problems with an inserted SD card, try reformatting the SD card through the camera’s main settings option.
Camera Modes
The different modes are according to the position of the power switch. The three basic operation modes as below:
OFF Mode:
Switching the camera to the OFF position turns the camera off. The camera will still consume a small amount of power while in “OFF” mode. It is recommended to remove the batteries if the camera will not be used for a long period of time.
ON Mode:
Switching the camera to ON position turns the camera on. When movement occurs within the monitored region, the camera will take pictures or record videos automatically according to the previous programmed settings. After switching the camera to the ON position, the motion indication LED (red) will blink for about 10 seconds. This time interval is for you to position the camera for automatic surveillance operation.
SETUP Mode:
Switching the camera to the SETUP position allows you customize your camera settings or play back pictures and videos the camera has taken on the LCD display. The camera will automatically shut down after a few minutes of no operation.
Manual Image / Video Capturing
Place the camera in SETUP Mode and press SHOT to manually capture photos or record video. Press SHOT again to stop video capture.
Manage Images and Videos
Place the camera in SETUP Mode and press Playback/Preview to view images or videos. The latest image or video will be shown on the LCD screen.
To view:
Press ▲ or ▼ to view the previous or next image or video.
To delete:
Find the image or video you want to delete. Press the Delete key. Press OK to delete, or press MENU again if you decide not to delete the image or video.
Quickly Change Camera Mode
Place the camera in SETUP Mode and press ▲ or ▼ to quickly change the camera mode.
Trigger Modes
There are 3 trigger modes for the cameras.
PIR trigger: PIR trigger is constantly working when the camera is on. The camera takes photos/videos only when motion is detected.
Time lapse: The time lapse default setting is OFF by default. If the timer trigger interval is manually set to a non-zero value, the cameras start to work at a preset interval.
PIR & Timer trigger: If you want both PIR trigger and time lapse, you need to set PIR trigger to “ normal, high or low ” sensitivities according to the external environments. Be sure to also set the time lapse to a desired non-zero value.
The cameras will capture pictures or videos in preset time intervals even if there is no motion detected, and will capture pictures and videos when motion is detected.
Time Lapse and PIR Trigger cannot be set to off at the same time.
Additional PIR settings to note:
PIR Interval
This setting indicates how long the PIR sensor will be disabled after each camera triggering. During this time the PIR sensor will not react to any detected motion.
Remote Display & Settings
Basic Key Function & Display
To update the camera settings, place the power switch to the ON position.
MENU: Enter the program menu in Preview Mode Delete or Send an image/video in Playback
▲▼►◀:Move between menu options(OK to select) OK / PLAY: Save parameter settings and play videos SHOT: Capture a photo or record a video manually When the camera is on, the screen will activate and display the following:

Camera Setup Options
To view the camera settings menu, you need to enter the SETUP Mode, and press MENU.
Use ▲ or ▼ keys to select the sub-menu.
Use ►keys to select the different options.Press “OK” to save the settings.
After changing EACH setting in SETUP Mode, you must press OK or the camera will retain the previous setting.
| Menu Options | Descriptions |
| Photo Burst | Choose the number of photos taken after the camera is triggered: 1 Photo, 2 Photos, or 3 Photos. If Pic+Video is selected, Photo burst defaults to 1 photo, regardless of entered value. Default: 1 Photo |
| Video Length | Choose the duration of the video recording: Valid values extend from 5 to 180 seconds with a one second delay. Press the ► or ◀ keys to decrease or increase the video length. Default: 10 seconds |
| Set Clock | Set the cameras date and time. The date format is month/day/year. The time format is hour: minute: second. |
| Time Lapse | The camera can capture images or videos at a preset time interval regardless of motion detection. Changing this setting to a non-zero value turns on Time Lapse mode and the camera will take photos at the set interval time – Values range from 5 minutes to a maximum of 8 hours. |
| If PIR Trigger/Sensitivity and Time Lapse options are BOTH OFF, the camera will not capture any photos or videos. Default: OFF | |
| PIR Trigger/ Sensitivity | This setting is for the sensitivity of the PIR sensor. There are four sensitivity parameters: High, Normal, Low and Off. It is recommended to use HIGH sensitivity in areas with little environmental interference or warmer, humid temperatures or climates. Use LOW sensitivity for areas that have a lot of interference. The sensitivity of the PIR is affected by temperature. Higher temperatures lead to lower sensitivity. If PIR Trigger/Sensitivity and Time Lapse options are BOTH OFF, the camera will not capture any photos or videos. Default: Normal |
| PIR Interval | This setting indicates how long the PIR sensor will be disabled after each camera triggering. During this time the PIR sensor will not react to any detected motion or scheduled timer functions. The PIR Interval can be set between zero seconds to a maximum of 1 hour. Press LEFT or RIGHT to decrease or increase the desired PIR Interval time. Default: 5 seconds |
| Work Day | Choose the days of the week you want the camera to work. This setting is only available in Hunting Mode. Default: All |
| Work Hour | This setting allows the camera to be active only during the set period of time per day. If activated, the camera will NOT take pictures or video outside of the specified working hour, regardless of any other setup option settings. The values are set to military time that range from 00:00 to 23:59. Default: OFF |
| Camera Name | You can set 10 Characters for your camera in order to distinguish which photo is taken by which camera Default: OFF |
| Recycle Storage | In hunting mode, when the SD card is full, the first images or videos will be covered by new getting pictures or videos. So that you don’t need to retrieve your memory card manually. But in SETUP mode, SD can’t recycle storage. Default: OFF |
| Format SD | All information on the SD card will be deleted. Make sure you made a backup of important data on the SD card. |
| Default Settings | Restore all settings back to the default values. |
| Version | Shows firmware and IMEI (International Mobile Equipment Identity) information of the camera. |
| Password Set | Power-on password, set up after you need to enter your pre-set password to enter the camera, composed of four digits. Default: OFF |
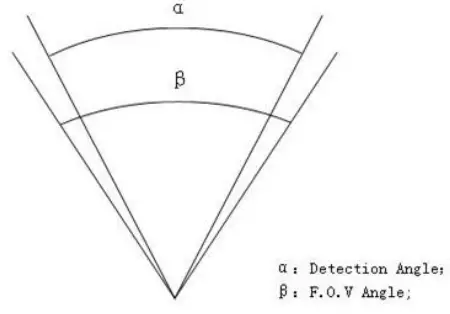
PIR Detection Zone
The PIR’s detection range can reach 70ft in an open environment. The following picture shows this camera’s PIR detection range compared to standard PIR detection range.
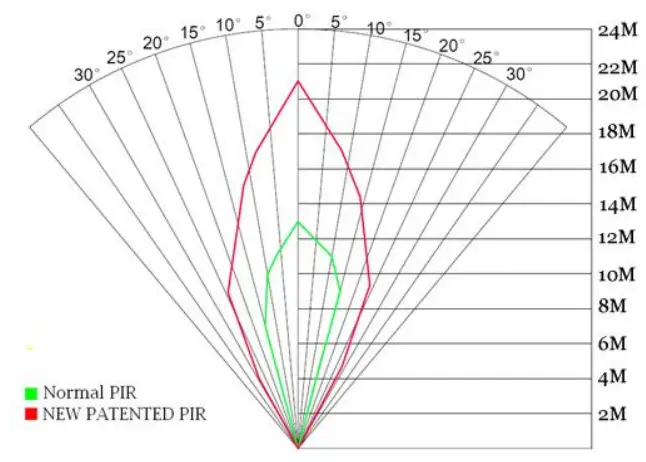
The PIR detection angle (α) is smaller than the field of view angle (β). The advantage of this design is to reduce empty picture rates and capture most, if not all, motion detected.
Technical Specifications
| Detection Range | 100ft. |
| Illumination Distance | 100ft. |
| LED Type | 940nm |
| LED Number | 4pcs |
| Aperture | ƒ/ 2.4 |
| Memory Card | 64GB Max |
| Display Screen | Built-In 2″ LCD |
| Sound Recording | Yes |
| Operating Ambient | -20℃ ~ + 60 ℃ |
| Relative Humidity | 5% to 90% Noncondensing |
| Dimensions | 145.1*103.8*82mm |
| Unit Weight | 0.40Kg |
| Power Supply | 4 or 8 AA Batteries 5 Pointed Head 18650 Batteries 6V,2A External Power Supply |
| Standby Power Consumption | <0.3mA(<7mAh/Day) |
| Compliances | FCC, CE, RoHS |
Parts List
| Part Name | Quantity |
| Camera | 1 |
| USB Cable | 1 |
| Belt | 1 |
| User Manual | 1 |
| Warranty Card | 1 |
| Mounting Bracket | 1 |
Version 1.0


 Digital Trail Camera User Manual")


