![]()
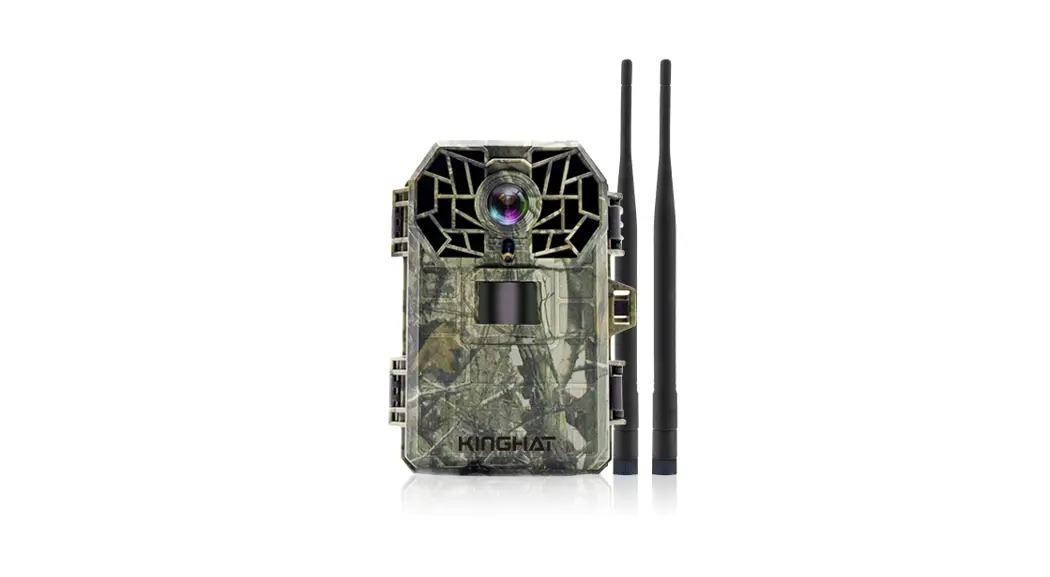
HH-762 (4G) Digital Trail Camera 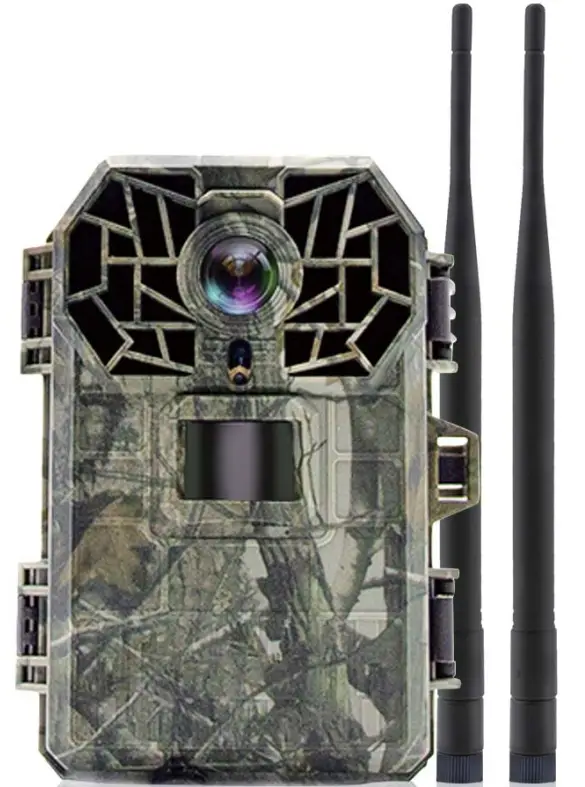
Preface
Welcome to using the HH-762 series of digital trail cameras, we are greatly honored that the HH-762 series of digital trail cameras can get your trust.
In order to make you use our products conveniently and have a general understanding, we make the operating instructions specifically for you. Including the characteristics of the product, structure characteristics, technical characteristics, keypad operation function, simple instructions, troubleshooting, maintenance, etc. This is your essential guide when using this product. Before using, please read the instruction carefully, I believe it will greatly help you to use the product effectively.
In addition, if you have any questions when you use this product, please inquire by phone or email, we will serve you wholeheartedly.
GENERAL INFORMATION
1.1. Product use and scope of use:
HH-762 is a high-definition, waterproof product specially designed for the outdoor. It can be used for anti-theft, security around houses, animal monitoring and observation, and outdoor hunting. Its concealment, waterproof and dust-proof design can realize the intelligent monitoring of suspicious persons and animals under outdoor conditions, and automatic photographing or taking videos for recording and evidence collection. Equipped with 4G communication module, cloud server real-time push, remote setting, camera status query, and other functions.
1.2.Product features:
- 55-degree camera lens, 5-megapixel high definition CMOS image sensor, up to 1920 x 1080p video recording.
- high resolution of 5MP, 8MP, lamp, 12MP, 16MP, 20MP, and 30MP can be selected;
- Sending MMS and mail on 4G;
- The trigger time can reach 0.4 seconds;
- Built-in 2.0 inch HD display;
- Support SD card capacity up to 64GB;
- Dust-proof and waterproof grade: IP66;
- Operating temperature range: -20°C – 70°C;
- Built-in 42 pieces of infrared lamps;
- Date, time, temperature and phase can be printed on the photo;
- In the “Photo +video” mode, the camera can capture pictures and video at the same time each time it is triggered;
- After 3 minutes, the power will be turned off automatically when there is no key operation;
- Extremely long battery standby time (in standby mode, it can last 4 months with 8 M batteries);
- The serial number setting function allows you to print the code on the photo. This helps multiple camera users to identify the location when viewing photos;
- Password lock protection can be set;
- Automatic switching between day and night, color photos taken in the day time, black and white photos taken at the night time;
1.3. Working environment and conditions:
Operating temperature range: -20°C – 70°C, working both indoors and outdoors.
1.4. Principle
It is equipped with a 4G communication module and is pushed in real-time by a cloud server. It is equipped with a high-sensitivity PIR infrared sensor. When a human body (or animal) moves, the temperature change of the external environment will be triggered by induction and automatically captured. Picture or record high-definition video. This camera can realize more applications by setting the timing, interval, and other functions.
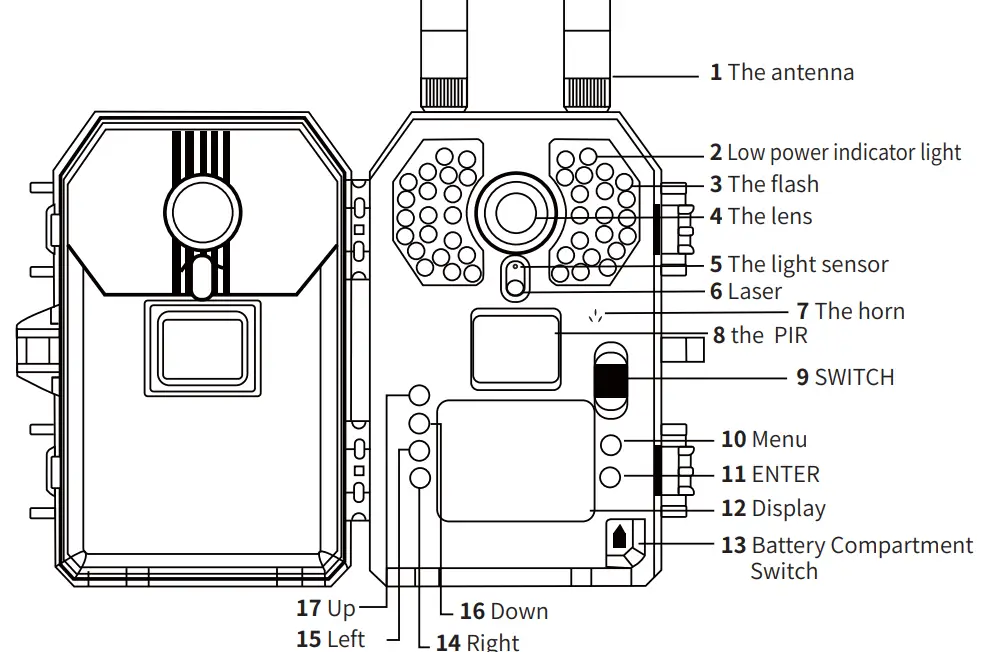
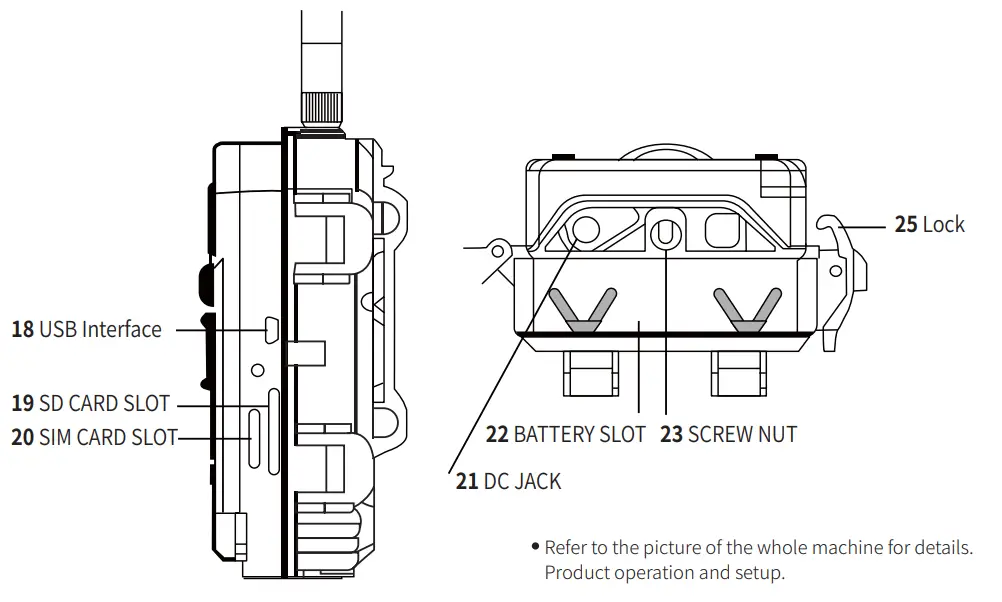
1.5. Product structure
QUICKSTART
2.1. The battery
Press and hold the “Battery compartment switch” figure 13 to release the “BATTERY SLOT” figure 22. Recommend using an 8*AA high-performance alkaline battery, Ensuring that the positive and negative poles of the battery match the symbol mark of the shell. If you don’t use the camera for a long time, please remove the battery in the camera to avoid possible damage to the camera due to leakage. In addition, the camera can also work on an external DC power supply (8V/2A), solar cells, etc. In “TEST” mode, when the battery power is low, the display will show “low power”.
2.2. Insert SD card
This camera has no built-in memory, so it cannot work without an SD card, which can support up to 64GB capacity. Before the SD card is inserted into the SD slot, please check whether the card capacity exceeds 64GB and make sure that the card has been tested.
2.3. Set the “TEST” mode
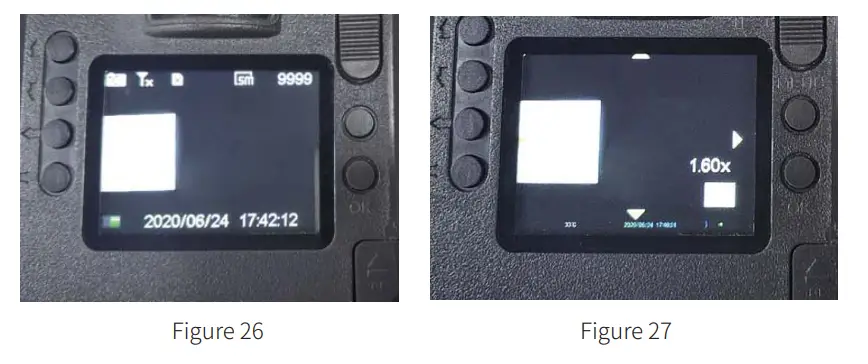
Switch the switch to the “test” position and enter the setting mode. In this mode, like a normal digital camera, you can capture pictures or video, or enter the menu to set parameters. There are four shortcut function keys on the keyboard, as shown in Figure 26:
- Short press the “up” button to set the camera recording
- Short press the “down” button to set the camera snapshot
- Short press “left” to turn on laser positioning
- Short press “right” to set the manual photo, and the picture or video (depending on the Setting of the camera) will be saved into
- the SD card.Short press “OK” to browse and playback pictures /videos on the display screen, and use “up” and “down” to guide.
- When browsing pictures, you can zoom in or out by short pressing left” or “right”. as shown in Figure 27 :
- When browsing pictures and videos, you can also press “MENU” to delete one, delete all, slide, or protect as your own wishes.

2.4. Enter real-time mode
When the position of the switch is “on”, it will enter the real-time mode. The monitoring indicator will flash white for 15 seconds. At the same time, it will start to work without manual operation. When the animal enters the PIR sensing area, it will start to take photos or record videos immediately. If the animal wanders away from the PIR sensing area, the camera will turn off the power and enter standby mode. instruction: In general, it is recommended that you place your camera from 3 to 6 feet off the ground. To avoid potential false triggers due to temperature and monitoring interference, please don’t aim your camera at a heat source (e.g. the sun) or near a tree trunk. Ideally, move north or south, away from the branches near the front of the camera.
ADVANCED SETTINGS
The tracking camera has factory Settings, you can change the settings as needed, please make sure the camera is in the setting mode.
| How to get into 4G | Press the menu key, press left or right can enter |
| 4G | Turning on 4G will automatically search the network |
| Operator setting | Select the country’s card network |
| MMS Settings | MMS sending can be set with ON |
| Email Settings | Select OK can send photos via email |
Way to send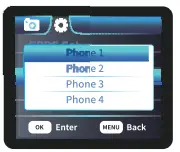 | Set the MMS receiving phone, the receiving mailbox, one to four phone Numbers, and one to four email Numbers |
Send the number | the maximum number of photos sent is 99. If the set quantity is 10, only 10 photos can be sent in a day. The order of photos is in the order of taking photos. |
Daily | turn on the time setting, if it s 9 o’clock, it will send a message to your cell phone or email at 9 o’clock every day to remind you of the current situation of the camera, power, etc. |
| If you want to send MMS/email, select the network, open MMS/email, set the number/mailbox to send, and send the number of messages per day | |
| FTP setup Support sending server | |
| GPRS Settings Support general defaults | |
3.1. parameter setting
Short press “MENU” to enter or exit the menu. Move the mark by short pressing “UP/DOWN”, change the setting by short pressing “LEFT/RIGHT” and confirm the change by short pressing “OK”. It is customary to remember to save the change by short pressing “OK”, otherwise you will lose your new settings.
| Parameter | Settings (bold default) | Describe |
| Model | Photo Video Photo+video | Choose to take a picture or video. In”Photo+ vide& mode, first, take a picture, then take a video |
| language | English | English, Francais, Deutsch, Espanol, italiano, Japanese, atiScP3Z, W,StcP3Z, Portugues, pyccknn, Nederlands, Swendish, Polski |
| Photo Resolution | 30MP 20MP 12MP MP lamp 8M P 5MP | Select the required image pixel, SMP – 30MP is optional, the image quality will be better with higher resolution, but the occupied space of the SD card is larger, so it will take a long time for larger files to be written to the SD card, which will slightly reduce the shutter speed. |
| Video Resolution | 1080P 720P WVGA VGA | Select the video resolution (pixels per frame), the video quality of the higher resolution will be better, but the created file will occupy a larger space capacity of the SD card. |
| Capture series | 1 2 3 | In the photographing mode, set the continuous photographing function, it will number the photos in the order of triggering each time |
| Video Length | Los | Options: From Ss to 10min |
| PIR interval | The 60S | Options: From 5s to 24H Select the shortest time interval for the camera to wait and the PIR will be triggered as soon as the animal appears. In the selected compartment, the camera will not capture or take pictures, which can prevent the SD card from storing too many redundant pictures. |
| PIR sensitivity | High Medium Low | Select the sensitivity of PIR, high sensitivity is suitable for indoor and less interference environments, and medium and low sensitivity is used in outdoor or more interference environments. Temperature also affects sensitivity. Use high sensitivity when the ambient temperature is hot, low sensitivity is suitable for cold weather. |
| Set system time | OK | Short Press “ENTER” to set the date |
| Date stamp | On Off | if you want to have a date/time water print on each picture, you can choose “date/time”. Select “date”, the water print on the picture has only the date. Select “off”, there will be no watermark on the picture. |
| Time setting | On Off | If you want the camera to work at a specific time of the day, you can choose one. For example, if the start time is set at 18:35 and the end time is set at 8:25, the camera will be functional from 18:35 of the day to 8:25 of the next day, otherwise, the camera will not be triggered to take photos or video. |
| Time interval | Or Off | if you choose “no”, no matter whether the camera detects any animal or not, it will automatically capture pictures or video according to the interval you set, which helps to observe the growth process of cold-blooded animals like snakes or flowers. |
| Password | On Off | Set a password to protect the camera from unauthorized users |
3.2. Files formatting
The pictures and videos of the camera are stored in the folder “\ DCIM \100MEDIK in the SD card. The image file’ s name is saved as DCIM0001.JPG, and the video file’s name is saved as DCIM0001.MOV. In “on” mode, you can use the USB cable to download these files to the computer, or you can put the SD Card in the card reader and insert it into the computer, and you can browse the files without downloading them to the computer. MOV video files can be played on most multimedia devices, such as Windows Media Player, Quick Time, etc.
WARRANTY
We are proud of our products. We always keep our promises. We provide superior warranty periods and service. If you buy our products, you will enjoy the warranty. We guarantee that our products are free from defects in materials and workmanship during the original purchase date. This warranty does not cover damage caused by users, such as misuse, abuse, improper operation or installation, or repair by unauthorized technicians.
During the warranty period, we will repair your camera free of charge or replace it with the same or similar model according to our choice. This warranty only applies to the original retail buyer of our authorized distributor. Please ask for a warranty card when purchasing. Any replacement product provided under the original warranty shall be warranted in the warranty period of the original product.
This warranty only applies to malfunctions caused by defects in materials or workmanship in normal use. Normal wear of the product is not included.
If you return the product within the warranty period, please contact your seller or our dealer.
Appendix I: TECHNICAL PARAMETERS
| Model | Parameters |
| Image sensor | 5 megapixel color CMOS |
| Lens | F=3.0; FOV=55°; with auto IR-CUT |
| Infrared lamp | 42pcs 850nm infrared lamp |
| LCD display | 2.0-inch HD color display |
| Keypad | Six keys, one three-way switch |
| Memory | SD card (up to 64GB capacity supported) |
| Image size | 5M/8M/10M/12M/16M/20M/30M |
| Video size | 1080P, 720P, WVGA, VGA |
| PIR sensitivity | High, Medium, and Low |
| PIR sensing distance | 65 feet /20 meters (at 25°C) |
| PIR sensing angle | 55° |
| Working mode | Day and night |
| Triggering time | 0.4 seconds (when using a 2GB SD card) |
| Trigger interval | 5s”-24h |
| Number of consecutive photos | 1–.3 |
| Video length | 5r-10min |
| Photo + video | Take a picture first and then take a video |
| Playback Zoom in | 1-8 times |
| The timestamp | On/off |
| Time | On/off, timing Settings |
| Password | 4-digits |
| Device serial number | 4-digits |
| Audio | On/off |
| Language | English, Francais, Deutsch, Espanol, Italiano, Japanese, litiVPA, Marta3t, Portugues, McCann, Nederlands, Swedish, Polski |
| Supply voltage | 8 x M batteries or DC adapter: 12v/2A |
| Standby current | <0.1mA |
| Standby time | 4 months (8 DAA) |
| Automatic shutdown | When the keyboard has no operation, it will automatically shut down after 3 minutes |
| Power consumption | 150m/(+850mA when the infrared lamp is light on+ ), at DC 12V |
| Low battery alarm | 7.4V |
| Interface | USB, SD card slot, DC socket |
| Install | Strap or tripod |
| Waterproof grade | IP66 |
| Working temperature | -20°C—+70°C |
| Working humidity | 5%ir-95% RH |
| 4G communication | Support |
| GPS | Support |
| SIM card | Support |
| Apps | Support |
| Cloud server | Support |
| Name of the camera | Support |
| Password | Support |
| Speaker and microphone | Support |
| Product Dimension | 140’105’75mm |
Appendix II: PACKAGE CONTENT
| Name of attachment | Quantity |
| Digital camera | 1 |
| USB cable | 1 |
| Camera strap | 1 |
| User manual | 1 |
Appendix III: FAQ
| Question | Answer |
| Forget password | Use the universal password: OPEN |
| Night video is difficult to | After the camera is turned on, the prompt It is |
| obtain at low voltage | difficult to obtain night video under low voltage” appears, indicating that the power is very low. When the battery voltage is lower than 8.5V, the infrared lamp cannot be turned on. At night, the camera cannot capture pictures and videos. The power consumption of the infrared lamp is very large, exceeding the normal current. It is recommended that you set the recording time to be shorter or as required. In the daytime, the camera does not need to turn on the infrared lamp, but can still record videos. |
TROUBLESHOOTING
- Can’t start the machine: Replace 8 pieces of new alkaline 1.5V batteries, and ensure that the positive and negative poles of the batteries are installed correctly.
- The machine does not take photos or record video: Please check whether the battery is low battery. If the TF card with the ferrule is used, please replace the ferrule. It is recommended to use the SD card.
- Card error \ video playback stuck \ video does not play smoothly on the computer:
1) Please format the SD card with the camera system menu “format”.
2) Please confirm whether the speed of the SD card is up to class 10.
3) Please try to replace an SD card or copy the file to the computer’s hard disk to play. - 4G cannot communicate: Please confirm whether the antenna is installed in place, APN and other parameters are set correctly and whether the SIM card supports.
- Forget the password: Please unlock with a backup password: OPEN.
- ON mode can only be entered when 4G is turned off, and ON MODE can only be entered when 4G is inserted into THE SIM and searched to the network.
- In general, it is recommended that you place your camera from 3 to 6 feet off the ground. To avoid potential false triggers due to temperature and monitoring interference, please don’t aim your camera at a heat source (e.g. the sun) or near a tree trunk. Ideally, move north or south, away from the branches near the front of the camera.
| EIP: | BAND2: 22.24 dBm BAND4: 22.74 dBm BAND12: 22.80 dBm |
| Antenna Type: | External antenna |
| Antenna Gain: | 0.11dBi for LTE BAND2 1.49dBi for LTE BAND4 0.06dBi for LTE BAND12 |
 An FCC ID warning
Any changes or modifications not expressly approved by the party responsible for compliance could void the user’s authority to operate the equipment.
Note: This equipment has been tested and found to comply with the limits for a Class 8 digital device. pursuant to part 15 of the FCC Rules. These limits are designed to provide reasonable protection against harmful interference in a residential installation. This equipment generates uses and can radiate radio frequency energy. if not installed and used in accordance with the instructions. may cause harmful interference to radio communications. However. there is no guarantee that interference mil does not occur in a particular installation. If this equipment does cause harmful interference to radio or television reception. which can be determined by turning the equipment off and on. the user is encouraged to Otto correct the interference by one or more of the following measures
-Reorient or relocate the receiving antenna.
-Increase the separation between the equipment and receiver.
-Connect the equipment into an outlet on a circuit different from that to which the receiver is connected.
-Consult the dealer or an experienced radio/IV technician for help. This device complies with part 15 of the FCC Rules. Operation is subject to the fabling of two conditions: (1) This device may not cause harmful interference. and (2) this device must accept any interference received. including interference that may cause undesired operation. ‘This equipment complies with RF radiation exposure limits set forth in bran uncontrolled environment This equipment should be installed and operated with a minimum distance of 20 centimeters between the radiator and your body –
![]()
Shenzhen Kinghat Technology Co., Ltd.
Add A401, B401, Building A,B, Mingjinhai Gushu Industrial Zone,
Fuxing Community, Xixiang Street, Baoan District, Shenzhen, China


