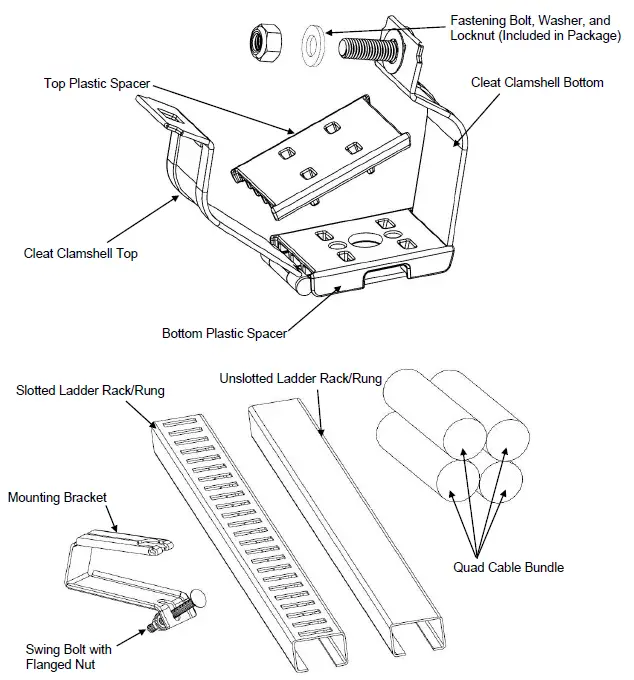
PANDUIT 1005512 Stainless Steel Quad Cable Cleat
TO REDUCE THE RISK OF INJURY, USER MUST READ INSTALLATION INSTRUCTIONS BEFORE ATTEMPTING TO INSTALL
NOTE: In the interest of higher quality and value, Panduit products are continually being improved and updated. Consequently, pictures may vary from the enclosed product.
NOTE: Updates to this Installation Instructions may be available. Check www.panduit.com for the latest version of this manual.
Preparing for Order
| Step | Picture | Description |
| 1 |  | Contact Panduit Sales for assistance with cleat and hardware selection. |
| 2 | 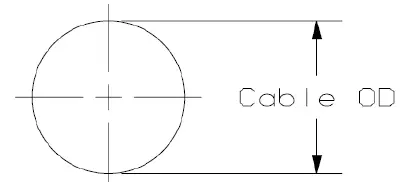 | Measure actual diameter of the cables. Select a cleat part number based on the actual diameter of the cables. |
| 3 | 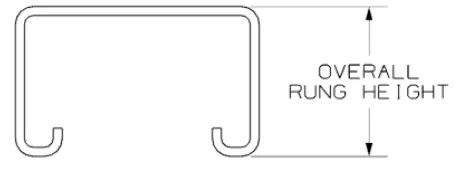 | If using a mounting bracket to secure cleat, measure height of the ladder rung and reference chart below. If using a bolt to secure cleat, procure M8 or 5/16” bolts, washers, and nuts with sufficient length to pass through the ladder rung. |
| Rung Height | Mounting Bracket Part Number |
| 15mm (.59”) or less | CBH15L50-V6 |
| 15mm (.59”) to 20mm (.79”) | CBH20L50-V6 |
| 20mm (.79”) to 25mm (1.01”) | CBH25L50-V6 |
| 25mm (1.01”) to 30mm (1.16”) | CBH30L50-V6 |
Cable Cleat Nomenclature
- Start on Page 3 if installing by Mounting Bracket.
- Start on Page 6 if installing with Mounting Fasteners.
Mounting Method 1: Mounting Bracket
| Step | Picture | Description |
| 1 | 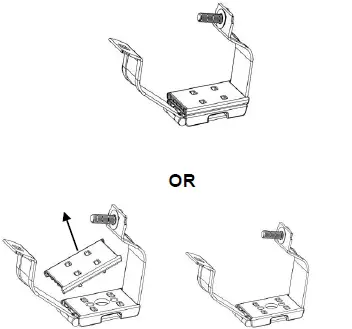
| Measure the cable diameter. Refer to the chart on page 8. In some instances, the top spacer will need to be removed before installation. |
| 2 | 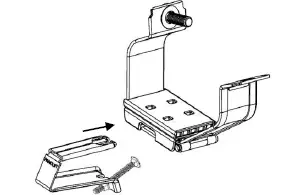 | Insert mounting bracket into slot in bottom plastic spacer of cable cleat. |
| 3 | 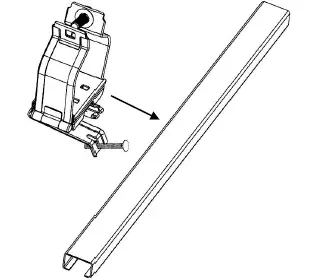 | Slide cleat and mounting bracket over rung in the desired position on the rung. |
| 4 | 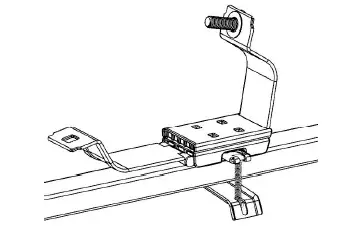 | Rotate swing bolt until the carriage head rests within the matching opening in the top of the mounting bracket. Tighten flange nut to 60 in- lbs [6.8Nm]. |
| 5 | 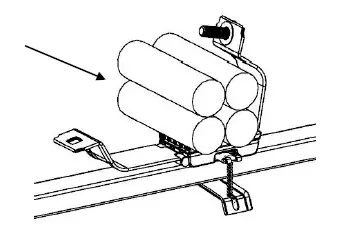
| Open top clamshell and place quad cables in the opening in a quad configuration. Close top clamshell around the cables. |
| 6 | 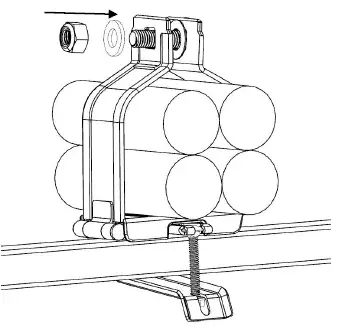 | Assemble included nut and washer onto the securing bolt. Tighten to 15 ft-lbs [20.3Nm]. In some cases, the flanges of the shells will come together before the torque is met. In other cases, there will be a gap between the flanges after the torque is met. |
Mounting Method 2: Mounting Fasteners
| Step | Picture | Description |
| 1 |  | Remove top plastic spacer to allow access to the bolt hole. |
| 2 | 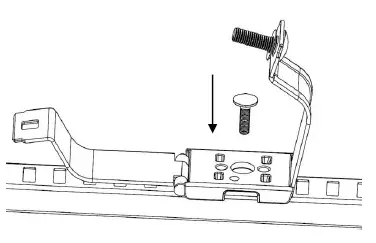
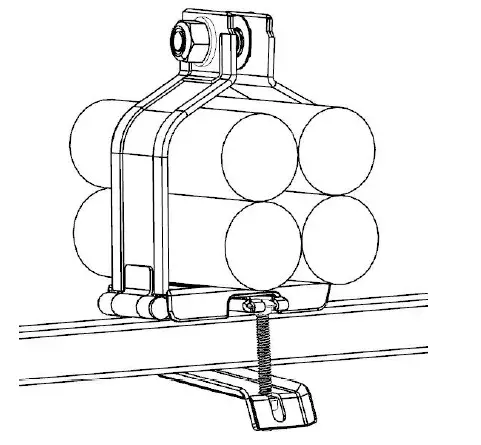
| Position cleat over the appropriate hole or slot in the rung. Assemble securing bolt through the hole in the bottom of the cleat. A carriage bolt is shown however in some circumstances a hex bolt might be used. Locking nuts and/or washers are recommended if fasteners could become loose over time. |
| 3 | 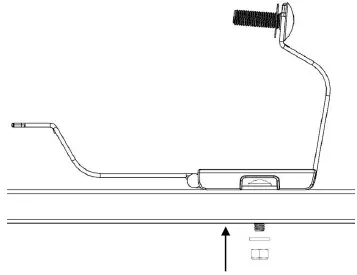 | Tighten securing bolt to 120 in-lbs [13.6Nm]. |
| 4 | 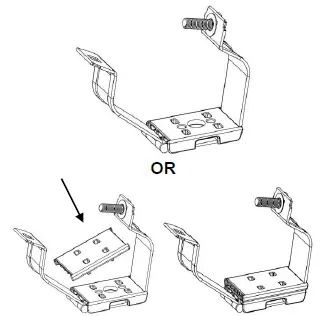
| Measure the cable diameter. Refer to the chart on page 8. In some instances, the top spacer will need to be re- installed before installation. |
| 5 | 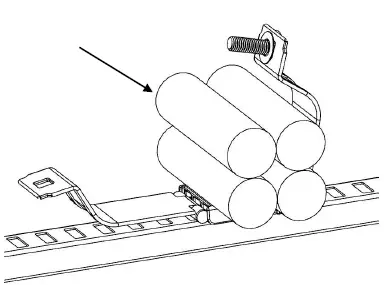 | Open top clamshell and place cables in the opening in a quad configuration. Close top clamshell around the cables. |
| 6 | 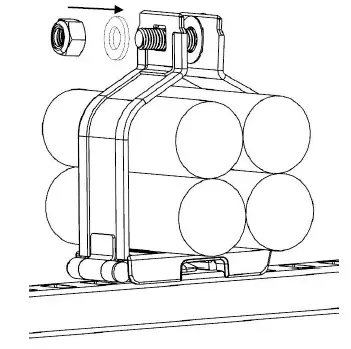 | Assemble included nut and washer onto the securing bolt. Tighten to 15 ft-lbs [20.3Nm]. In some cases, the flanges of the shells will come together before the torque is met. In other cases, there will be a gap between the flanges after the torque is met. |
Spacer Decision Table
| Part Number | Cable Range | With Top Spacer | Without Top Spacer |
| CCSSQD2226-X | 22 – 26mm | 22 – 24mm | 24 – 26mm |
| CCSSQD2529-X | 25 – 29mm | 25 – 27mm | 27 – 29mm |
| CCSSQD2834-X | 28 – 34mm | 28 – 31mm | 31 – 34mm |
| CCSSQD3339-X | 33 – 39mm | 33 – 36mm | 36 – 39mm |
| CCSSQD3844-X | 38 – 44mm | 38 – 41mm | 41 – 44mm |
Email:
[email protected]
EU Website:
www.panduit.com/emea
EU Email:
emeatoolservicecenter
@panduit.com
Panduit Corp.
USA Technical Support
Tel: 800-777-3300
Panduit Europe • EMEA Service Center
Tel: +31 546 580 452 • Fax: +31 546 580 441


