![]()

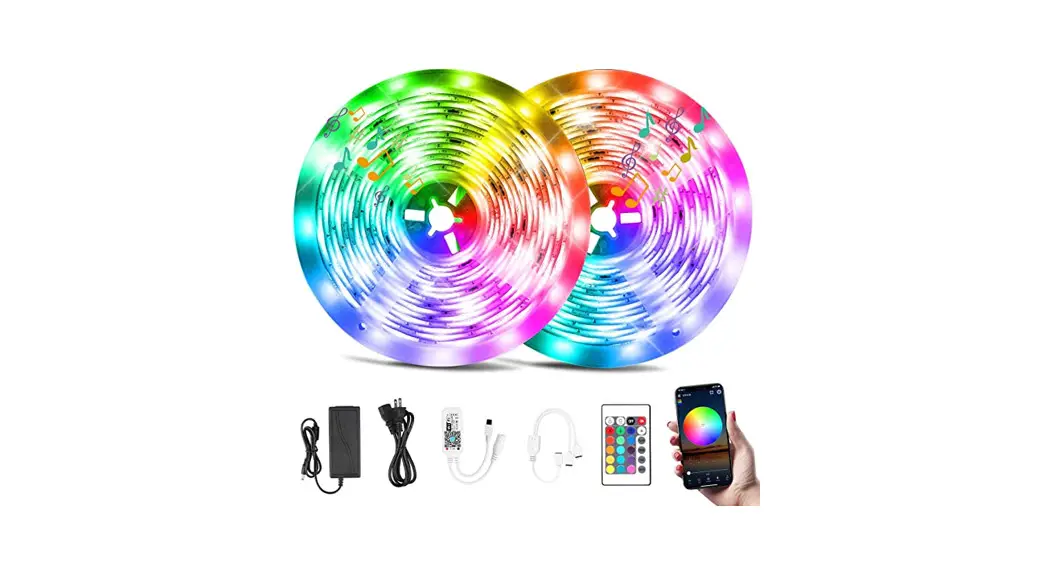
Addressable LED Strip Light
UK,DE,FR,IT,ES
USER MANUAL
Colorful Music Smart strip User Guide
Wireless control:
http://www.easytrack.net.cn/download_Mgc/000LANQIRUI
 Sea&Mew Consulting 97 Avenue d’Alfortville. 94600 Choisy-le-Roi Siyu Gao [email protected] | Sea&Mew Accounting Ltd Electric Avenue Vision 25. London. Enfield EN3 7GD Billy Han [email protected] |
![]()
After Dusk, True Color Still
Email: [email protected]
24/7 HOURS CUSTOMER SERVICE
Thank you for choosing ROMWISH LED Strip Lights Please read this User Manual before installation.
Specifications:
| Input | AC100-240V 50/60Hz |
| Output | DC24V |
| Color | RGBIC |
| Controller | IR Remote & APP |
| Warranty | 12 Month |
ATTENTION
- Please do NOT plug into power for long when rolled up, and keep it unfolded when testing.
- Please install the light on a smooth, clean, and dry surface. Do NOT plug into power during installation.
- Please ensure no hidden nails or other metals between the light and wall to prevent any short circuit.
- Please Note the anti-static during the installation and use of this product. Do not bend it and keep away from sharp objects.
- Do not connect other brand adapters & controllers to ROMWISH strip lights.
- The strip light can be cut off along the cutting mark, remember to cut off the power when cutting.
- Children must be under the supervision of guardians when using this strip light.
- If you get multiple strips and want to control them separately, please disconnect the unwanted devices via the APP, the rest will be under the control.
Installing Steps
STEP 1:
Clean the surface of the object where the strip needs to be installed.
STEP 2:
Peel off the tape from the back, then paste the strip in the correct place at one time.
STEP 3:
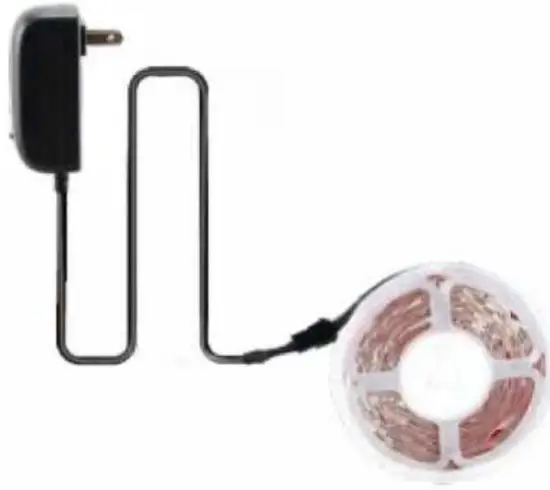
- Connect the 1 Roll light strip:
It has a Female Connector, and the adapter is Male Connector. Please correspond to the jack, then connect the AC adapter to a power socket.
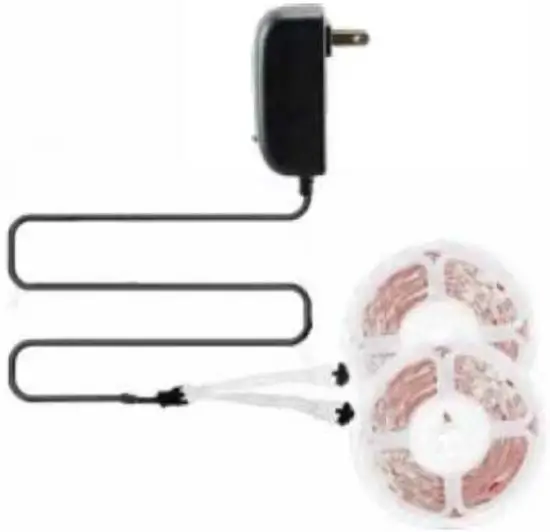
- Connect the 2 Rolls led strip lights to the AC adapter, and you get 2 ways to connect:
A. Connect them by 2-in-1 wire connector included. B. Strip to strip directly connect.
The 2 Rolls led strip has both Female Connect. and Male Connector, you can connect them directly.
- A: Connect the 3 Roll led strip lights:
Connect them by 3-in-1 wire connector included
B. Strip to strip directly connect:
The 3 rolls led strip has Femail Connect and Male Connector can connect directly
 B. Strip to strip directly connect.
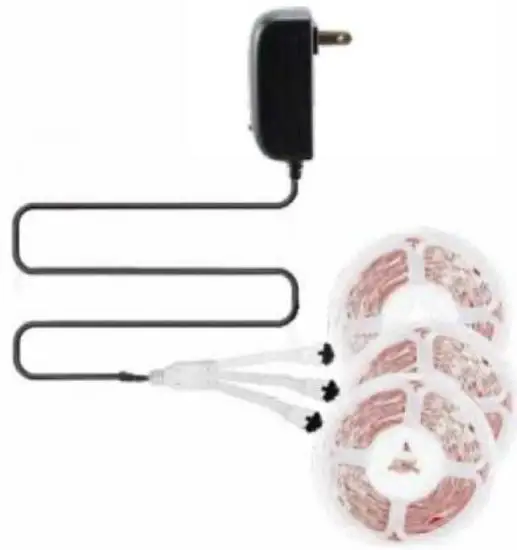
Attention:
You can cut off the strip by every 5 LEDs along the cutline if you need.

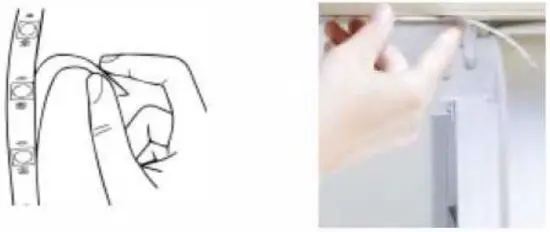
Accessories:
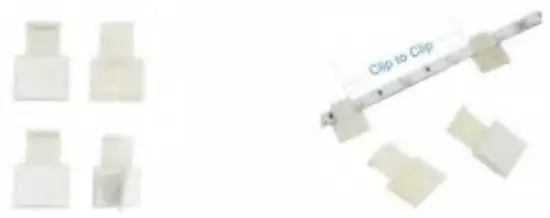
Clip: You can use this clip to fix the strip light if the strip is not sticky enough and fall off, just peel off the cover of the tape and do it as shown above.
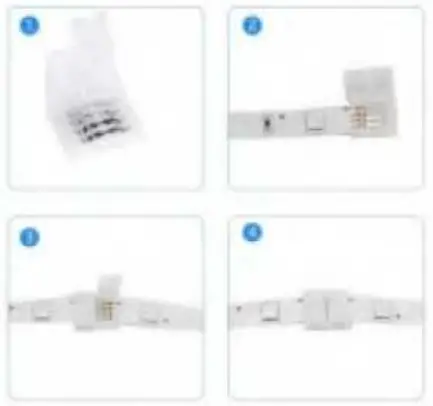
Connector: If you cut off the strips and want to reconnect, you can fix the ends of the strips together with the connector without soldering.
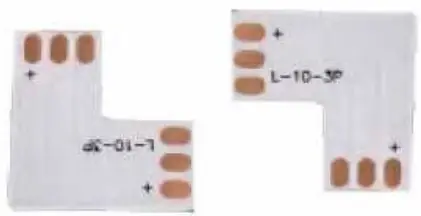
90-degree circuit board:
This is for reconnecting the strips with an angle of 90 degrees, you can refer to the picture about this.
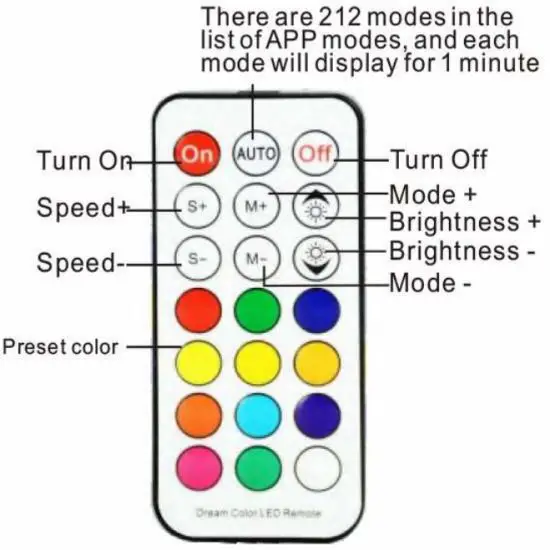
(Please take out the plastic slice before you use the remote.)
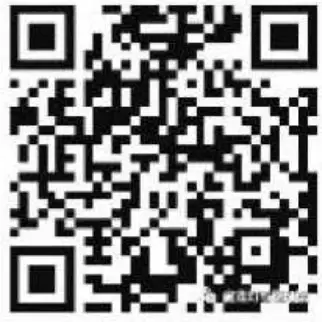
Installation video tutorial
Scan the QR code or search and subscribe to “ROMWISH” on Youtube to get the installation video on how to use the LED strip light.

This device complies with part 15 of the FCC Rules. Operation is subject to the following two conditions: (1) This device may not cause harmful interference, and (2) this device must accept any interference received, including interference that may cause undesired operation. Any changes or modifications not expressly approved by the party responsible for compliance could void the user’s the party responsible for compliance could void the user’s authority to operate the equipment.
Note: This equipment has been tested and found to comply with the limits for a Class B digital device, pursuant to part 15 of the FCC Rules. These limits are designed to provide reasonable protection against harmful interference in a residential installation. This equipment generates uses and can radiate radio frequency energy and, if not installed and can radiate radio frequency energy and, if not installed and used in accordance with the instructions, may cause harmful interference to radio communications. However, there is no guarantee that interference will not occur in a particular installation. If this equipment does cause harmful interference to radio or television reception, which can be determined by turning the equipment off and on, the user is encouraged to try to correct the interference by one or is encouraged to try to correct the interference by one or more of the following measures:
- Reorient or relocate the receiving antenna.
- Increase the separation between the equipment and receiver.
- Connect the equipment into an outlet on a circuit different from that to which the receiver is connected.
- Consult the dealer or an experienced radio/TV technician for help.
*RF warning for Mobile devices:
This equipment complies with FCC radiation exposure limits set forth for an uncontrolled environment. This equipment should be installed and operated with a minimum distance of 20cm between the radiator & your body.


