CREALITY BLouch Auto Bed Leveling Sensor for 3D Printer
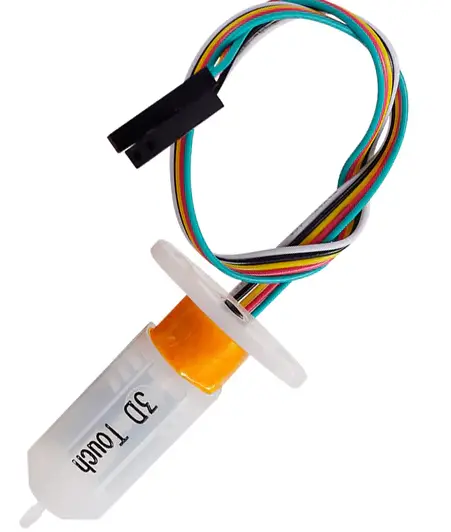
Packing List
Circuit Principle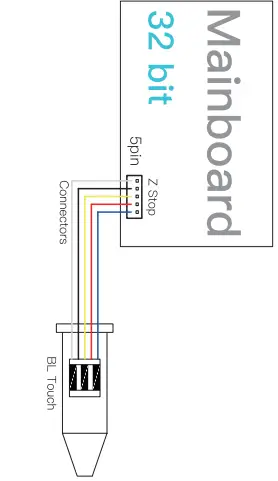
Application:
Ender-3 Series | Ender-5/5S/5Pro | CR-10| Ender-6 (No rack)
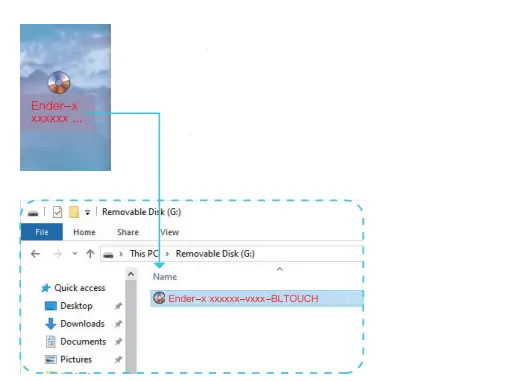
Update Firmware
- Right-click the mouse to format SD card. (To make surethe firmware can be flashed successfully, please format the SD card before flashing the firmware)
- Firmware download (before downloading firmware, please confirm your printer model, motherboard version, and hard-ware configuration-whether it comes with filament sensor or not).
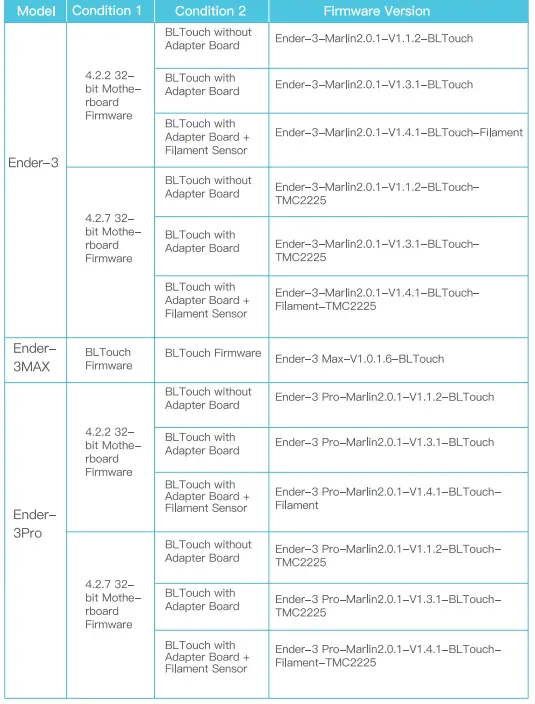
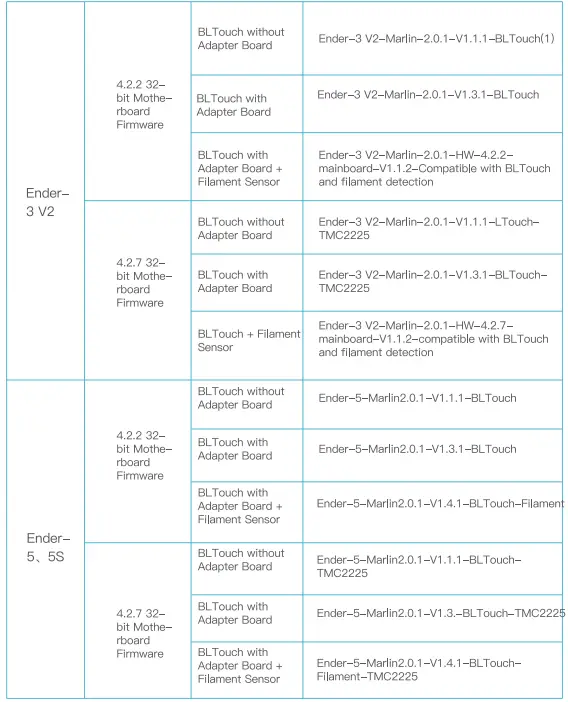
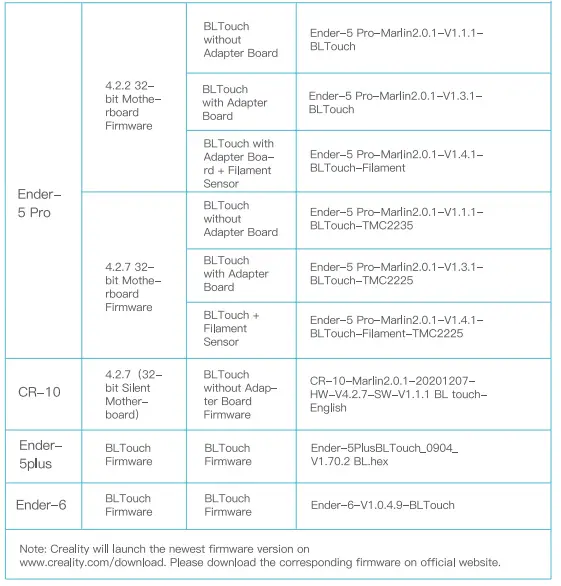
 Each printer model corresponds to the BL Touch firmware, please check appendix 1.
Note: Every machine has different firmware files.
File download website: https: www.creality.com/download/ - Copy the firmware to the SD card.
Note: the SD card can only hold one firmware file.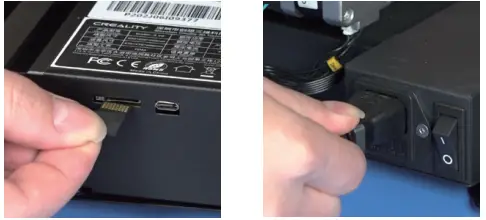
- Insert SD card.
- Insert the power cord and press the switch.

- Wait for the firmware to complete upgrade. (about 10 seconds.
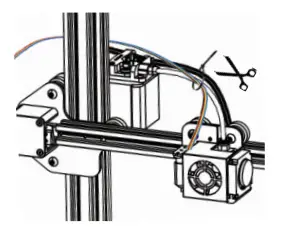
Install BL Touch
- Insert connectors into 5 Pin Port.
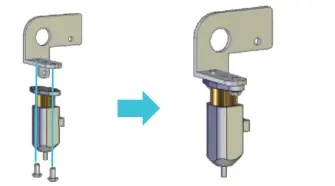
- Install BL Touch on the rack with 2 M3*6 screws.
- Loosen all fan cover screws, install the BL Touch rack on the corresponding position with 2 M3*8 screws.
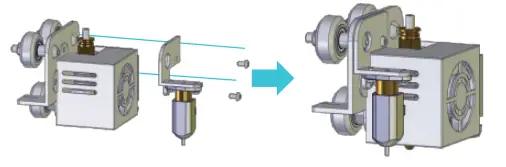
- Tie the BL Touch cable together with other printer cables like the above picture shown.
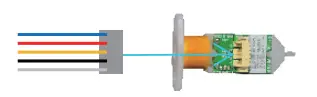
Circuit Wiring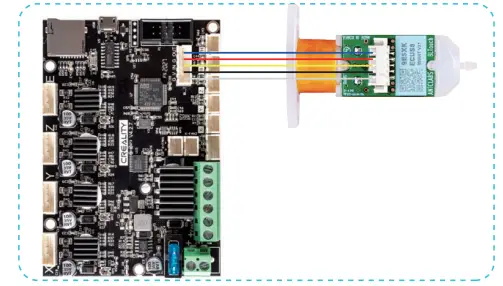
Steps
To get the Z offset Value
Operation: Prepare–Auto HomeMove Axis Move Z-Please stop to move Z axis when the distance between the nozzle and the printer bed is about 0.1mm (the height of a sheet of A4 paper). Ihis value shows Z offset value.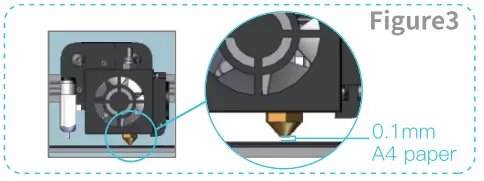
SHENZHEN CREALITY 3D TECHNOLOGY Co., LTD.
Add: 18F, JinXiuHong Du Building, Meilong Blvd., Longhua Dist., Shenzhen, China 518131 Official Website: www.creality.com Tel: +86 755-8523 4565 E-mail: [email protected] [email protected]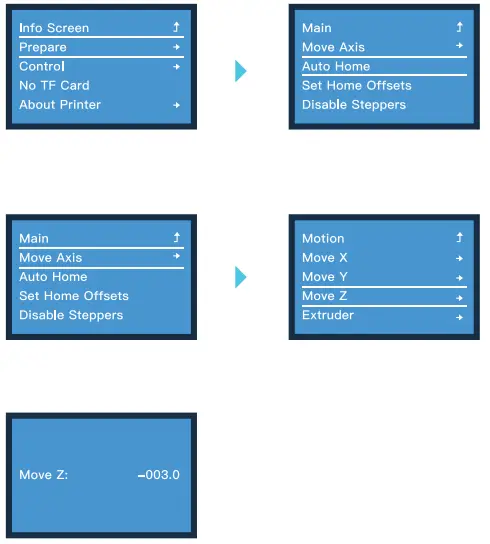 Input the Z-axis compensation value(Z offset value) Record the Z offset value, then follow below steps and save settings:
Prepare Auto home Control Bed Leveling Probe Z offset Input the Z offset value Store Settings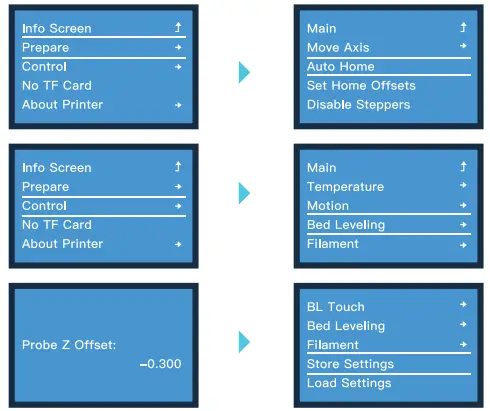
Select Bed Leveling, then choose Level Bed.
Operation: Control-Bed Leveling-Level Bed. (Different 3D printers may have different numbers of touching points for automatic leveling. The picture here shows that Ender-3 has 9 points for leveling.)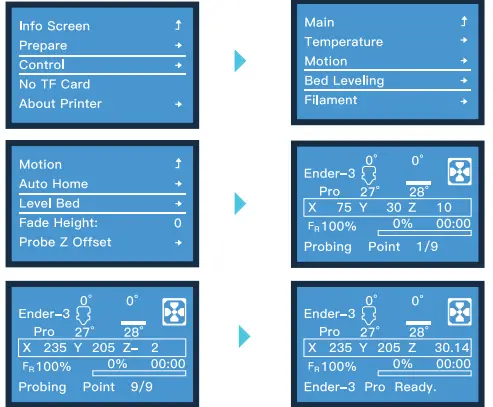
Model Printing
After the automatic leveling, user can do a trial print to verify the leveling. Operation: Print from SD CardModel Test (Name and file of the testing model shall be prepared by user.)
Example: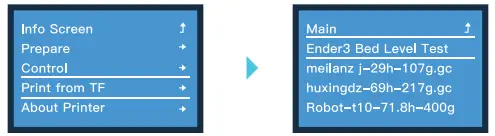
Test passed: leveling is completed and you can print now;
Test failed: If model printing fails, please fine-tune Probe Z Offset again and save settings until the print- ing effect is good.
If leveling fails, please reset Z-offset value as “0” and restart leveling. Otherwise, the nozzle may hit printing platform.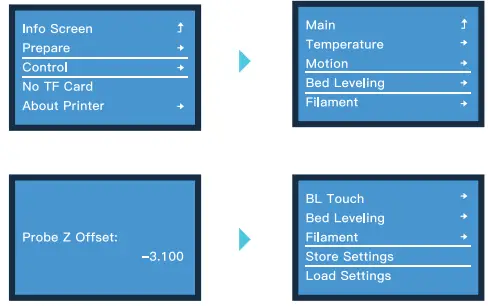
Note: Every machine has its own operation interface.
Software Settings
- Open Slicer.
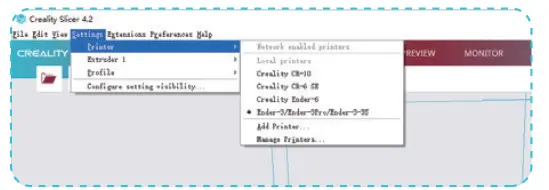
- Settings Printer Manage Printers.
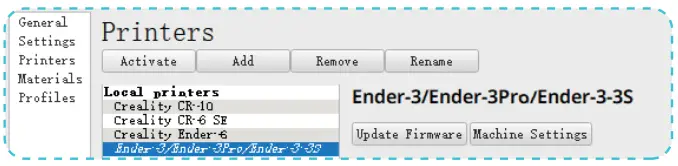
- Machine Settings.
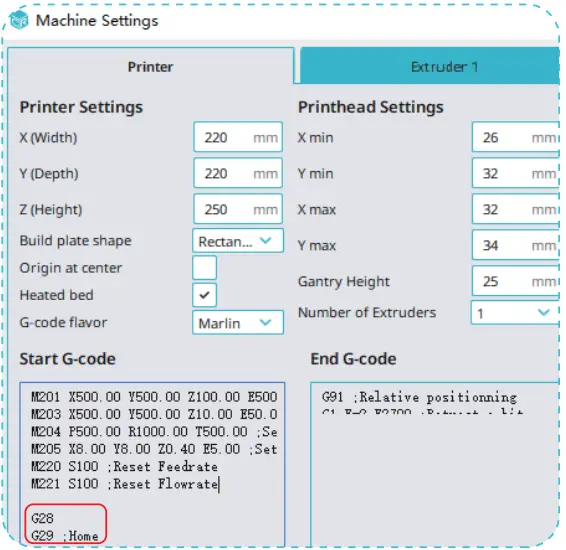
- Change “G28” to “G28G29”
 Appendix 2