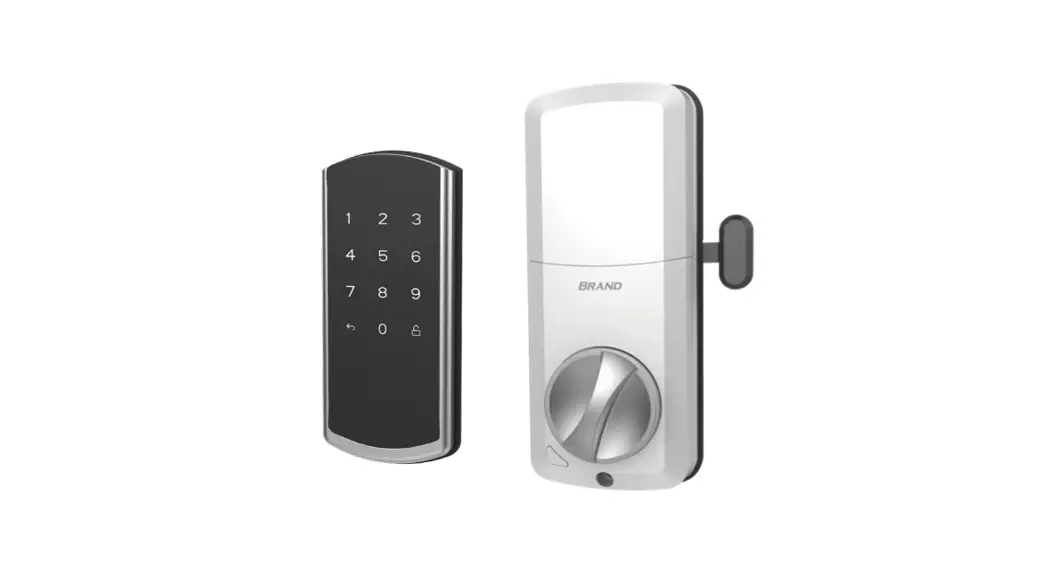
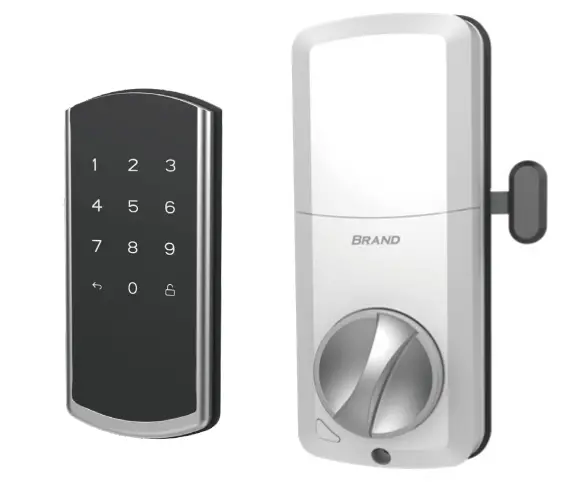
Quick Start Guide
Model: D1000
PLEASE READ THESE INSTRUCTIONS CAREFULLY BEFORE USING THIS PRODUCT AND KEEP THIS MANUAL FOR FUTURE REFERENCE.
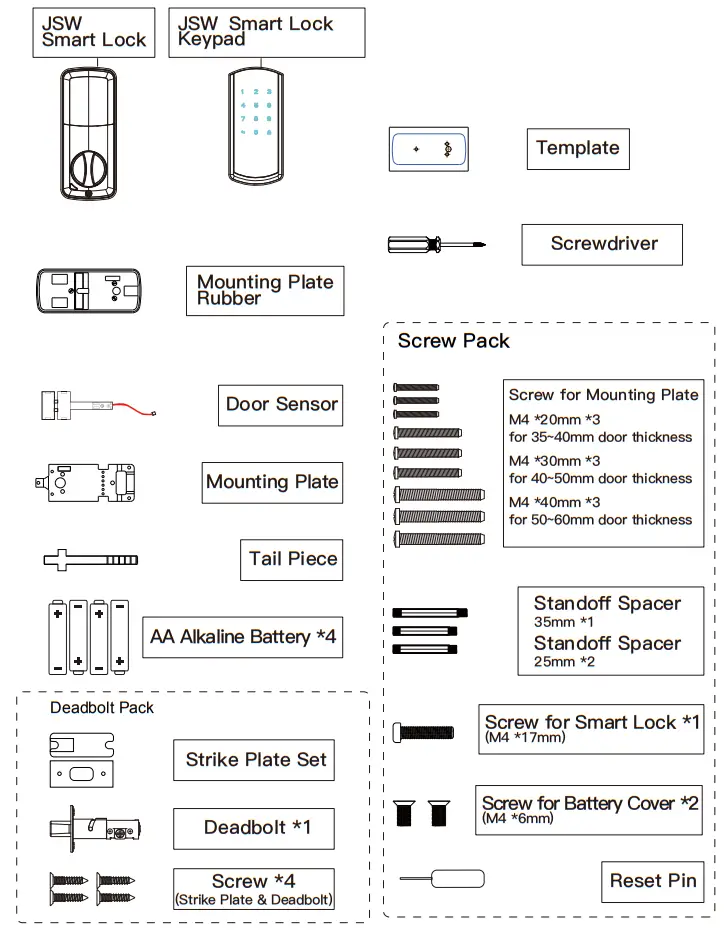
Kit Content
Specification
| Smart Lock | |
| Model Name | D1000 |
| Unlock Options | Password/BT5.0(BLE) |
| Battery Life | 10 Unlocks/Day for 1 year |
| Power Supply | AA Alkaline Battery *4 |
| Emergency Supply | USB 5 V+/- 0.2V |
| Low Power Alarm | 4.8V +/- 0.1V |
| Password Capacity | 100 sets |
| Password Length | 6 ~ 12 digit numbers |
| Phantom Password | YES |
| Door Open/Closed Detection | YES |
| Auto-Lock | YES |
| Keypad Lockout | 3 min |
| Event Record | 1000 |
| Working Temperature | -20℃-+50℃ |
| Working Humidity | RH10%~95% |
| High-Temperature Alarm | 65℃ |
Preparation
Check Points
- The distance between the door handle and the deadbolt.
- The door thickness.

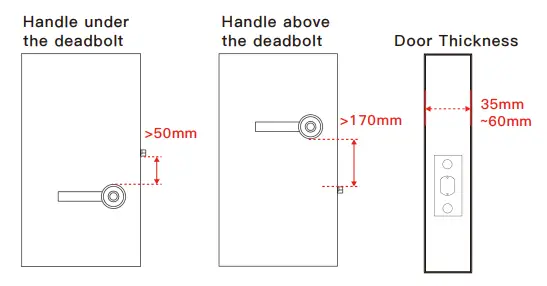
Door thickness & Tailpiece length
Please adjust the length of the tailpiece based on the door thickness.
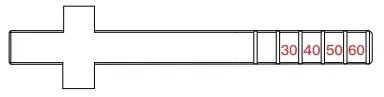
For example:
Please cut 1 part of the slice on the tailpiece with the tool if the door thickness is between 50mm~59mm.
| Door Thickness (mm) | Tailpiece (slice |
| 30-39 | 3 |
| 40-49 | 2 |
| 50-59 | 1 |
| >60 | 0 |
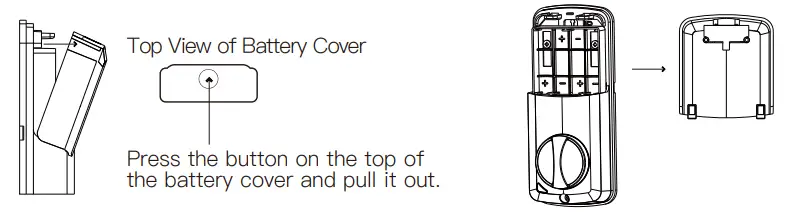
Remove the battery cover from the Smart lock
Remove the current lock
Skip this step if using the original deadbolt.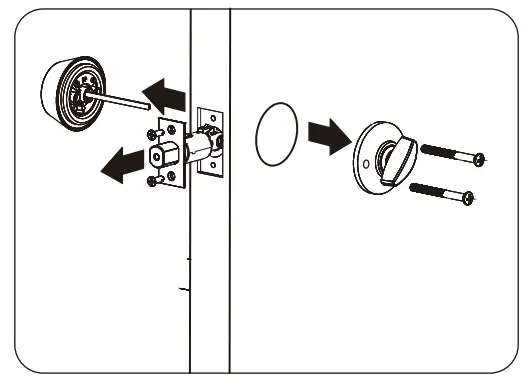
Adjust the deadbolt length
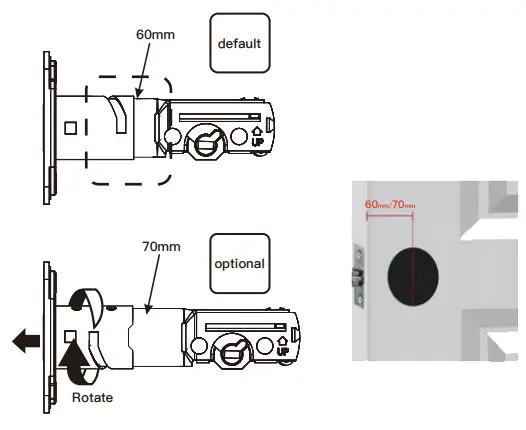
Please measure the distance from the center of the drilled hole to the door frame.
- 60 mm
- 70 mm
Installation
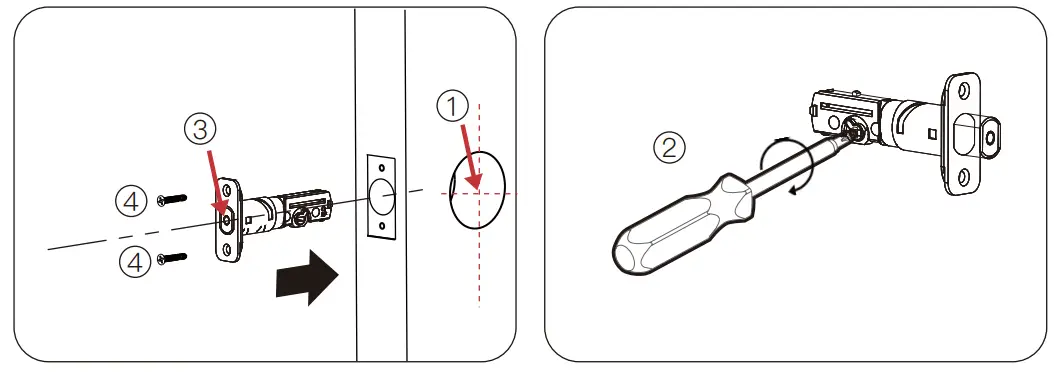
Step 1: Install the deadbolt
(Skip this step if using original deadbolt)
- Adjust the bolt length and make sure the “+” hole of the deadbolt is in the middle of the door hole.
- Twist the”+” and ensure the plate line up the bolt.
- Deadbolt must be in the retracted position.
- Screw: Bolt screw *2


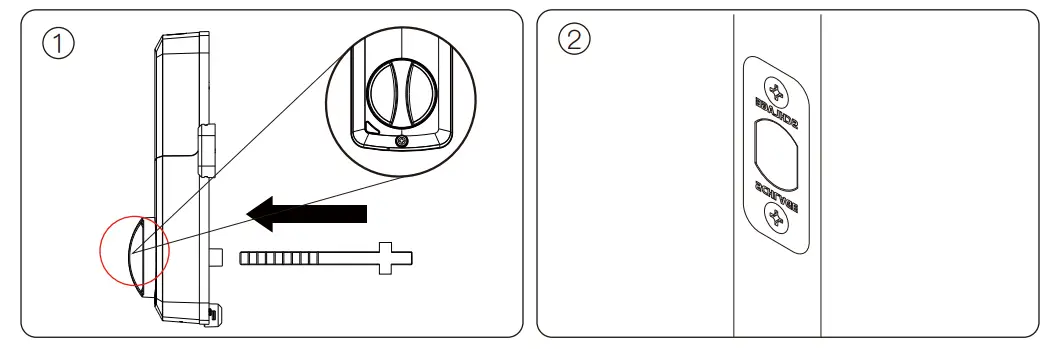
Step 2: Drill the fixing hole on the door
(optional)
Position the template to the deadbolt hole and drill a fixing hole.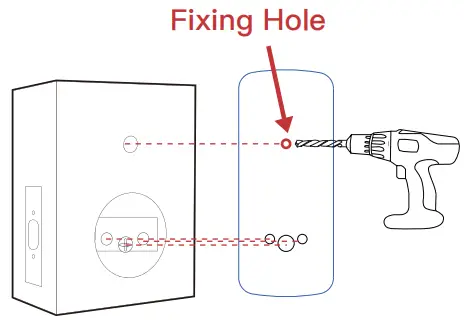
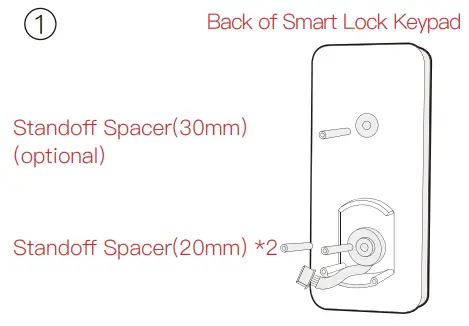
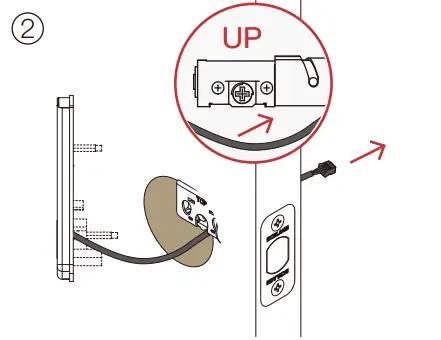
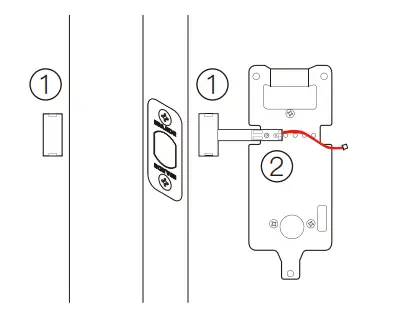
Step 3: Install the keypad on the outside of the door
- Screw the standoff spacer into the keypad.
- Run the cables through the hole BELOW the deadbolt.
- Turn the “+” hole and ensure the deadbolt extend-retract smoothly.


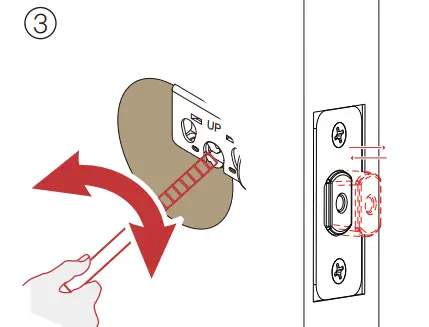
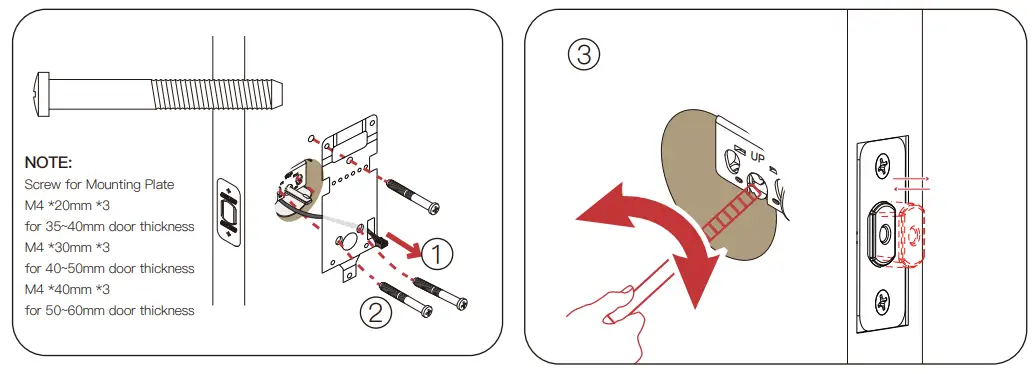
Step 4: Install the mounting plate
- Run the cable through the rectangle hole on the right.
- Screw: Mounting plate screw *3.
- Turn the “+” hole and ensure the deadbolt extend-retract smoothly.

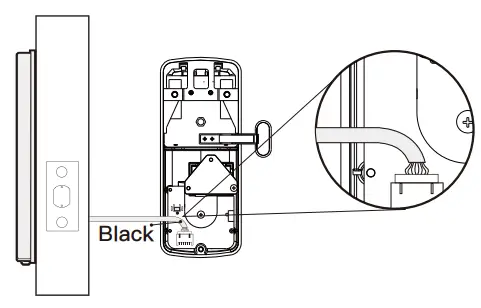
Step 5: Install the door sensor
Ensure the sensor is close to the frame.
- Tape the sensor on the door.
- Fasten the sensor onto the mounting plate.

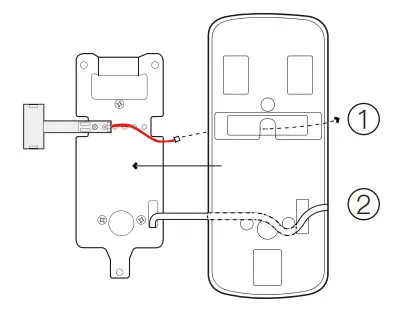
Step 6: Fit in the mounting plate rubber
- The door senor cable goes through the hole in the middle.
- The keypad cable goes through the rectangle hole on the right.
Step 7: Insert the cable connector onto the smart lock
Step 8: Insert the tailpiece
- Ensure the thumb turn is in a vertical position.
- The deadbolt must be in the retracted position.
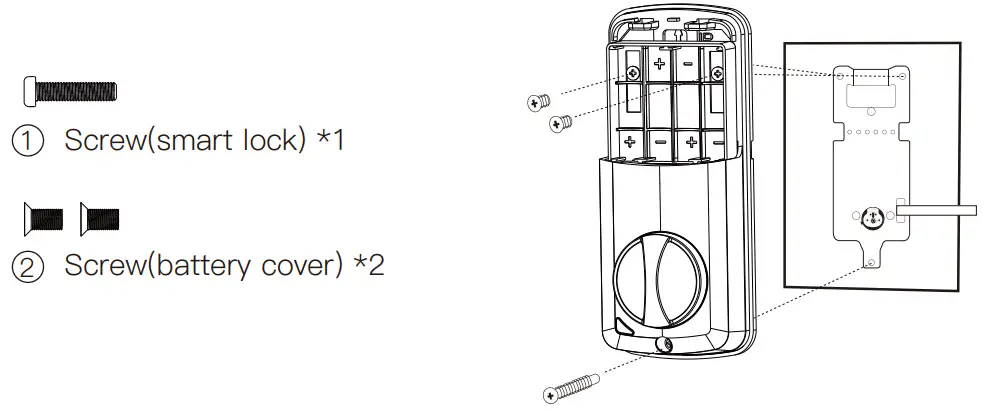
Step 9: Mount the smart lock onto the door
Please screw the Smart Lock in the following order:
- Screw the Smart Lock.
- Screw the battery cover.

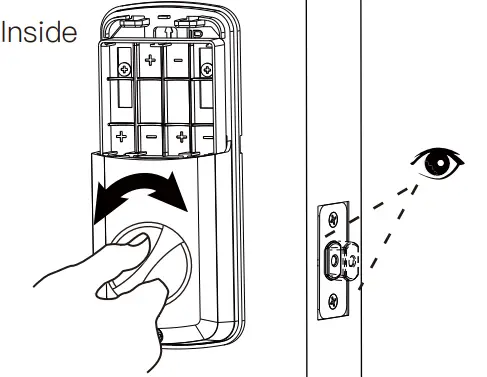
Step 10: Test the smart lock
Step 11: Insert the batteries and put the battery cover back on.

APP Guide
Please download and install the “ J-LOCK” APP to your smartphone. Search the app in the App Store or Google Play Store.

http://www.omguard.com.cn/jlockapp/
FCC WARNING
Any changes or modifications not expressly approved by the party responsible for compliance could void the user’s authority to operate the equipment.
This equipment has been tested and found to comply with the limits for a Class B digital device, pursuant to part 15 of the FCC Rules. These limits are designed to provide reasonable protection against harmful interference in a residential installation. This equipment generates, uses, and can radiate radio frequency energy and, if not installed and used in accordance with the instructions, may cause harmful interference to radio communications. However, there is no guarantee that interference will not occur in a particular installation. If this equipment does cause harmful interference to radio or television reception, which can be determined by turning the equipment off and on, the user is encouraged to try to correct the interference by one or more of the following measures:
- Reorient or relocate the receiving antenna.
- Increase the separation between the equipment and receiver.
- Connect the equipment into an outlet on a circuit different from that to which the receiver is
- Consult the dealer or an experienced radio/TV technician for help.
This device complies with Part 15 of the FCC rules. Operation is subject to the following two conditions:
- This device may not cause harmful interference.
- This device must accept any interference that may be received, including interference that may cause undesired operation.
The device has been evaluated to meet general RF exposure requirements. The device can be used in portable exposure conditions without restriction.
Canada Statement
This device contains license-exempt transmitter(s)/receiver(s) that comply with Innovation, Science, and Economic Development Canada’s license-exempt RSS(s). Operation is subject to the following two conditions:
- This device may not cause interference.
- This device must accept any interference, including interference that may cause undesired operation of the device.
The device meets the exemption from the routine evaluation limits in section 2.5 of RSS 102 and compliance with RSS-102 RF exposure, users can obtain Canadian information on RF exposure and compliance.


