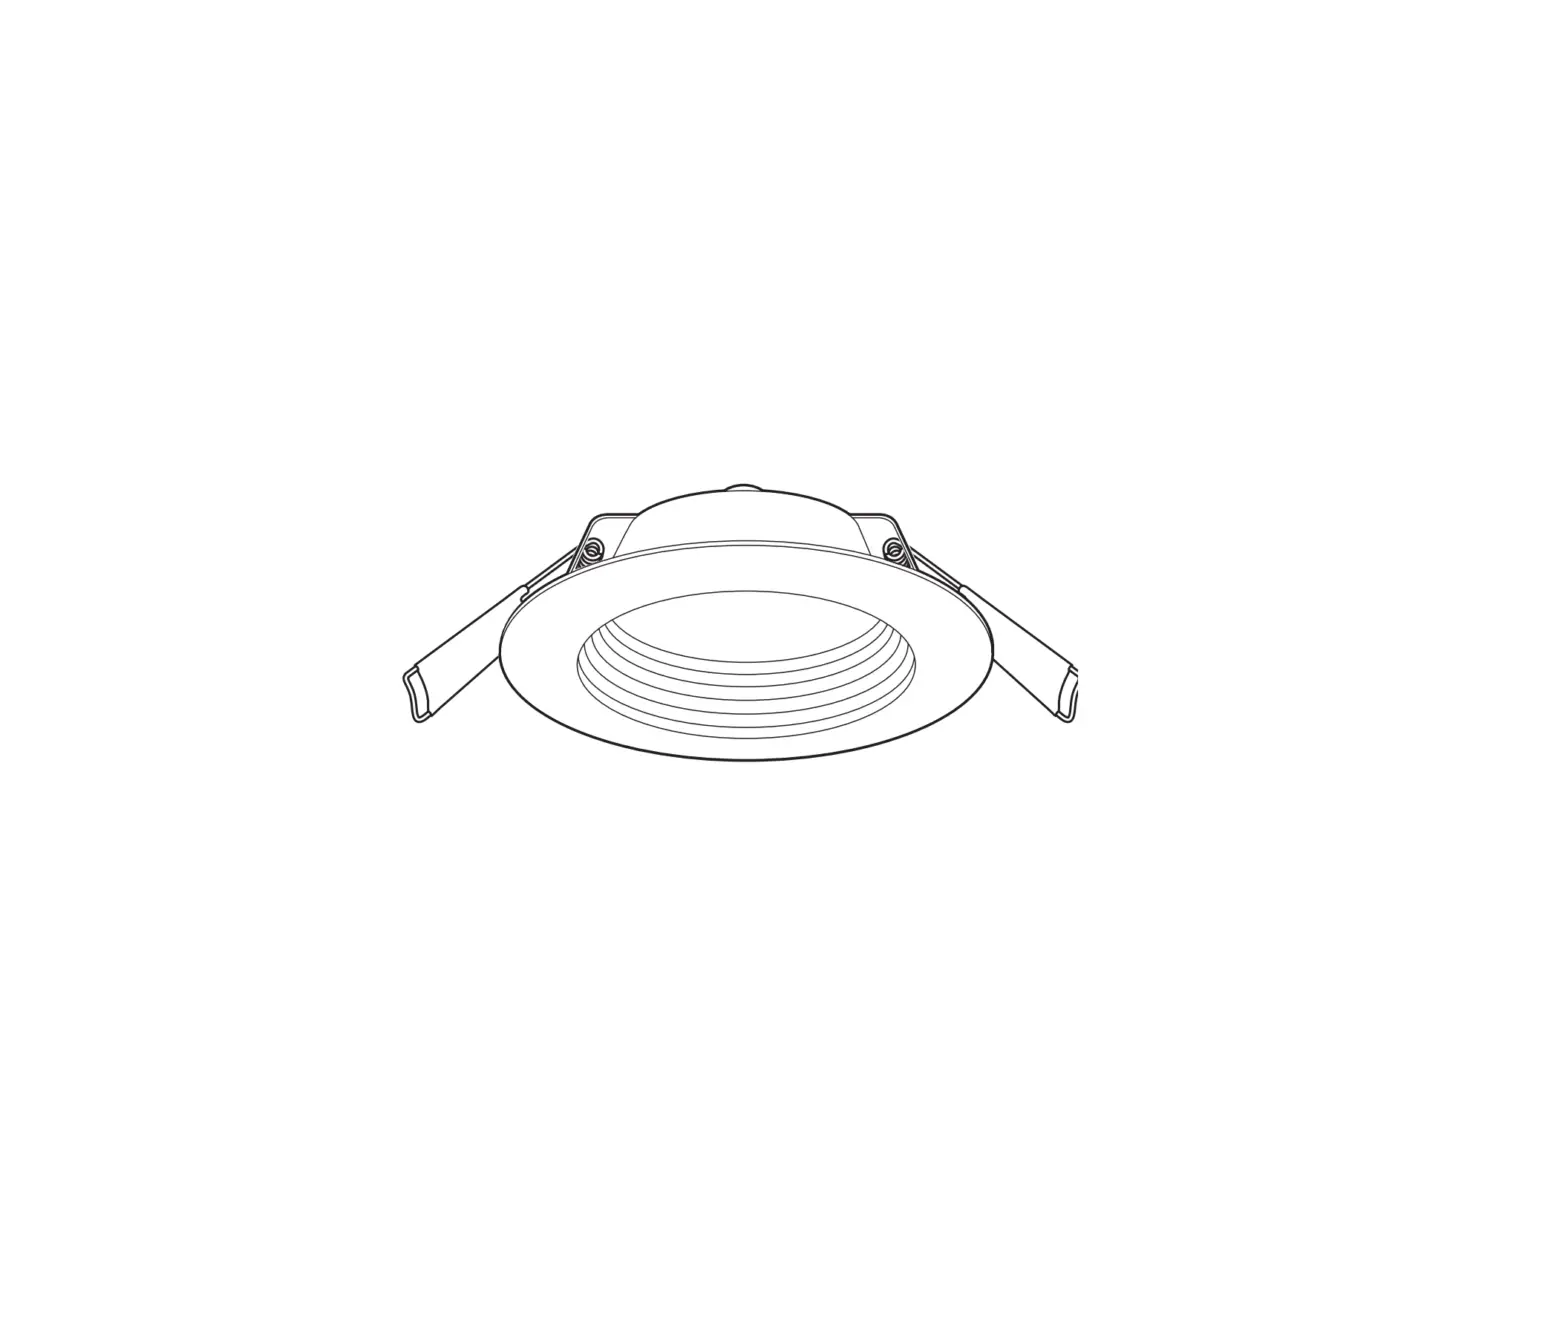
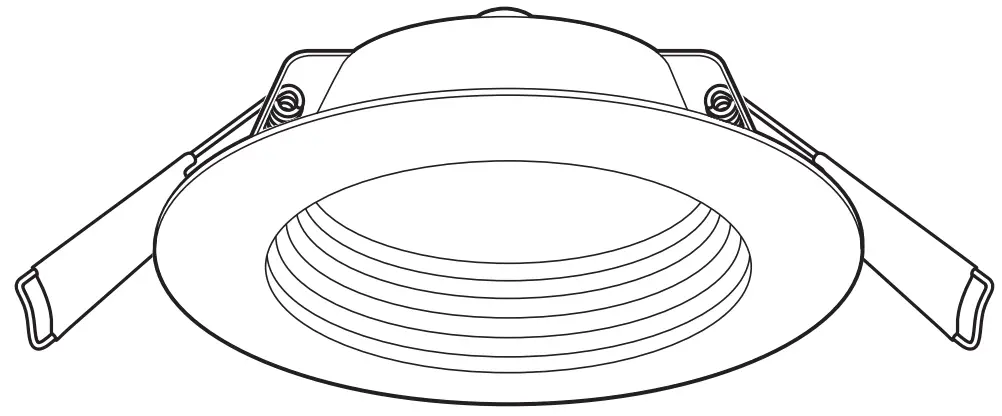
Commercial Electric 91535, 91536 Integrated Deep Baffle LED Recessed Light
THANK YOU
We appreciate the trust and confidence you have placed in Commercial Electric through the purchase of this recessed light. We strive to continually create quality products designed to enhance your home. Visit us online to see our full line of products available for your home improvement needs. Thank you for choosing Commercial Electric!
Safety Information
IMPORTANT SAFETY INSTRUCTIONS. SAVE THESE INSTRUCTIONS.
Most electrical accidents are caused by carelessness or ignorance. Review these basic electrical guidelines before you begin this installation.
- Use tools with insulated handles and ladders made of wood or fiberglass.
- Keep dry-chemical fire extinguishers in the kitchen, basement, and workshop.
- Never disable grounding devices. Ensure all appliances that require grounding are properly grounded, and that the electrical system itself is properly grounded.
- Meet or exceed all electrical code requirements that cover the work you are doing.
- Always work with enough light to see what you are doing. It is easy to make a mistake when you work in dim light.
- Certified Airtight per ASTM E283-04.
- When in doubt about the safety of any electrical repair or test, call in a professional.
- This fixture is IC rated for direct contact with insulation.
- This fixture is intended for indoor or wet location use.
- Do not modify this fixture. If any modifications are made, it may render the product unsafe and void the warranty
![]() WARNING: Before touching any wire, use a voltage tester to ensure it is not live.
WARNING: Before touching any wire, use a voltage tester to ensure it is not live.
![]() WARNING: When you check for voltage in a receptacle, check both outlets as each may be controlled by a separate wiring circuit.
WARNING: When you check for voltage in a receptacle, check both outlets as each may be controlled by a separate wiring circuit.
![]() WARNING: Before working on a circuit, go to the main service panel and remove the fuse or trip the breaker that controls that circuit. Tape a sign to the panel warning others to leave the circuit alone while you work.
WARNING: Before working on a circuit, go to the main service panel and remove the fuse or trip the breaker that controls that circuit. Tape a sign to the panel warning others to leave the circuit alone while you work.
![]() WARNING: CONSULT A QUALIFIED ELECTRICIAN TO ENSURE CORRECT BRANCH CIRCUIT CONDUCTOR.
WARNING: CONSULT A QUALIFIED ELECTRICIAN TO ENSURE CORRECT BRANCH CIRCUIT CONDUCTOR.
![]() WARNING: Changes or modifications to this unit not expressly approved by the party responsible for compliance could void the user’s authority to operate the equipment. This device complies with part 15 of the FCC rules. Operation is subject to the following two conditions: (1) this device may not cause harmful interference, and (2) this device must accept any interference received, including interference that may cause undesired operation.
WARNING: Changes or modifications to this unit not expressly approved by the party responsible for compliance could void the user’s authority to operate the equipment. This device complies with part 15 of the FCC rules. Operation is subject to the following two conditions: (1) this device may not cause harmful interference, and (2) this device must accept any interference received, including interference that may cause undesired operation.
NOTE: This equipment has been tested and found to comply with the limits for a Class B digital device, pursuant to Part 15 of the FCC Rules. These limits are designed to provide reasonable protection against harmful interference in a residential installation. This equipment generates, uses and can radiate radio frequency energy and, if not installed and used in accordance with the instructions, may cause harmful interference to radio communications. However, there is no guarantee that interference will not occur in a particular installation. If this equipment does cause harmful interference to radio or television reception, which can be determined by turning the equipment off and on, the user is encouraged to try to correct the interference by one or more of the following measures:
- Reorient or relocate the receiving antenna.
- Increase the separation between the equipment and receiver.
- Connect the equipment into an outlet on a circuit different from that to which the receiver is connected.
- Consult the dealer or an experienced radio/TV technician for help.
FCC Responsible Party
Globe Electric
2264 East 6th Street
San Bernardino, CA 92410
Warranty
5-YEAR LIMITED WARRANTY
The manufacturer warrants this lighting fixture against defects in materials and workmanship for a period of five years from the date of purchase. If within this period the product is found to be defective in material or workmanship, the product must be returned, with a copy of the bill of sale as proof of purchase, to the original place of purchase. The manufacturer will, at its option, repair, replace, or refund the purchase price to the original purchaser or consumer. This warranty does not cover light bulbs or the fixture becoming damaged due to misuse, accidental damage, improper handling and/or installation, and specially excludes liability for direct, incidental, or consequential damages. As some states do not allow exclusions or limitations on an implied warranty, so the above exclusions and limitations may not apply. This warranty gives you specific rights and you may also have other rights that vary from state to state.
Contact the Customer Service Team at 1-877-527-0313 or visit www.HomeDepot.com.
Pre-Installation
PLANNING INSTALLATION
Compare all parts with the Hardware Included and Package Contents sections. If any part appears missing or damaged, do not install this product and contact the Customer Service Team at 1-877-527-0313.
TOOLS REQUIRED
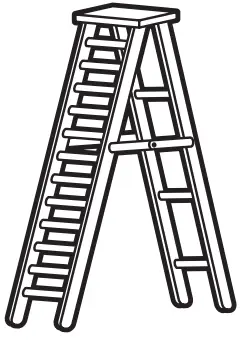
- Ladder

- Safety goggles

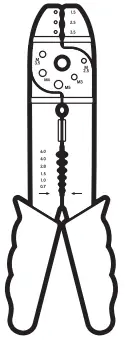
- Wire strippers

- Pencil

- Gloves

- Drywall saw

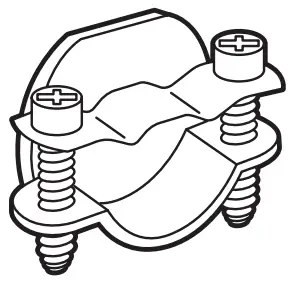
- Cable clamp


PACKAGE CONTENTS
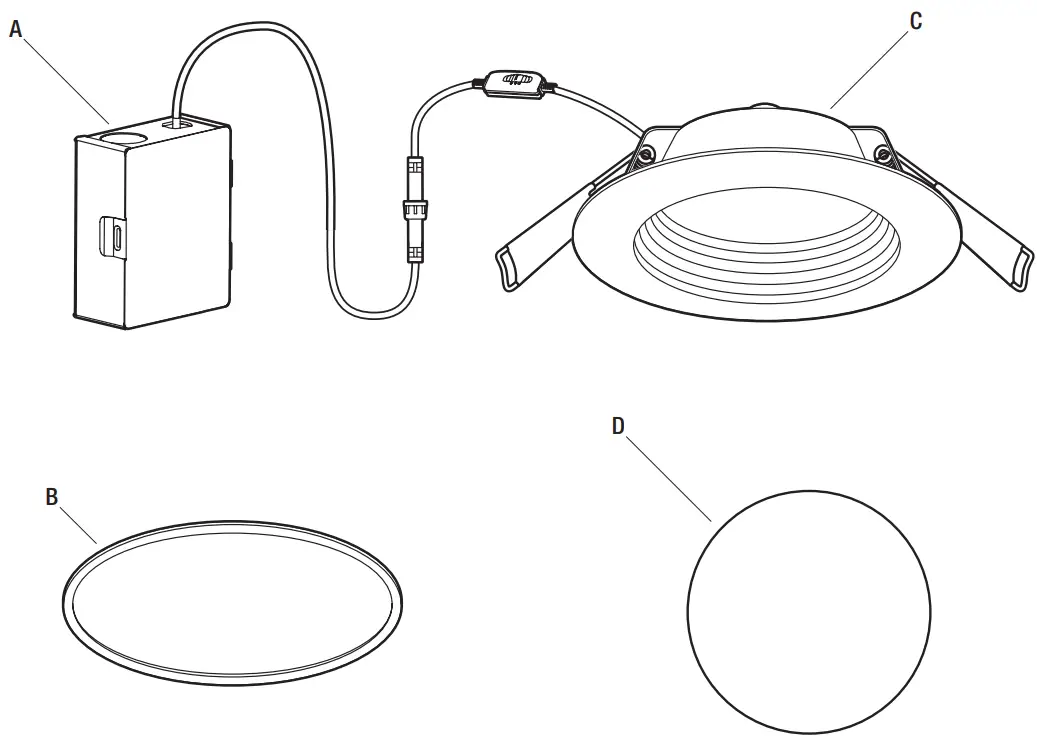
| Part | Description | Quantity |
| A | Junction box | 1 |
| B | Foam gasket | 1 |
| C | Light panel | 1 |
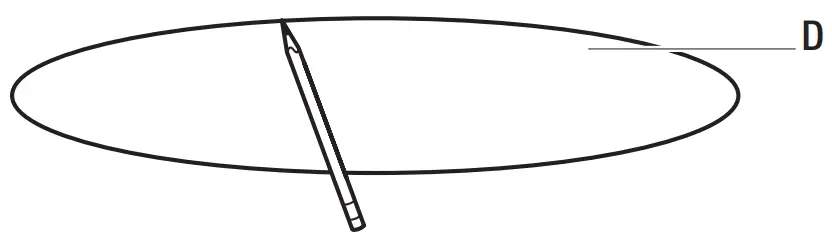
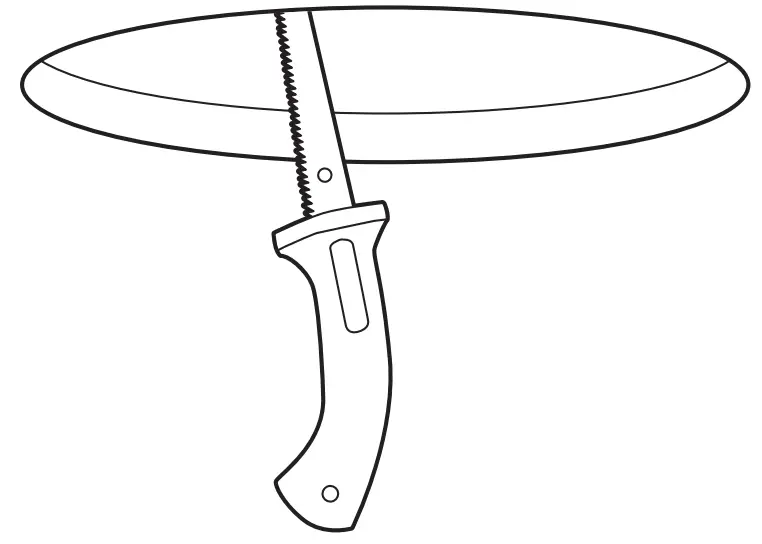
| D | Template | 1 |
Beam angle

Installation
Turning off the power
- Place the wall switch in the off position.
- Turn off the main power at the breaker panel or remove the fuse from the fuse box.
Preparing the installation location
- Use the template (D) to mark the desired installation location.
- Use a drywall saw to cut the opening marked by the template.


Connecting the wires
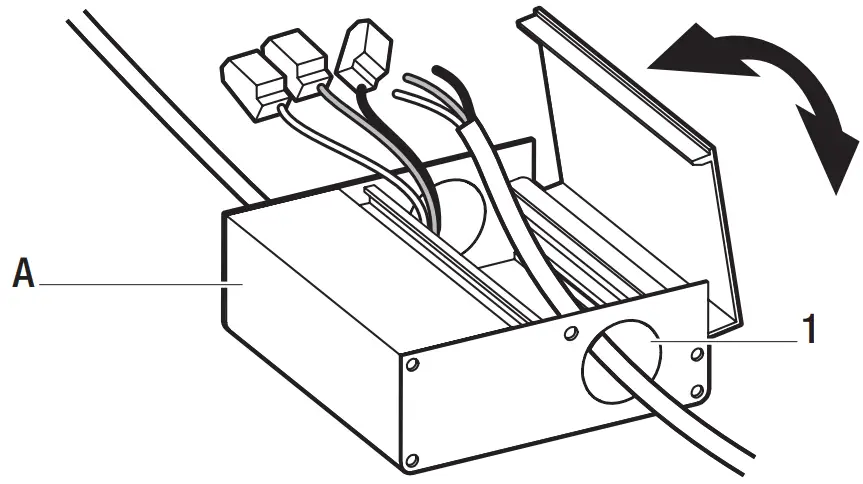
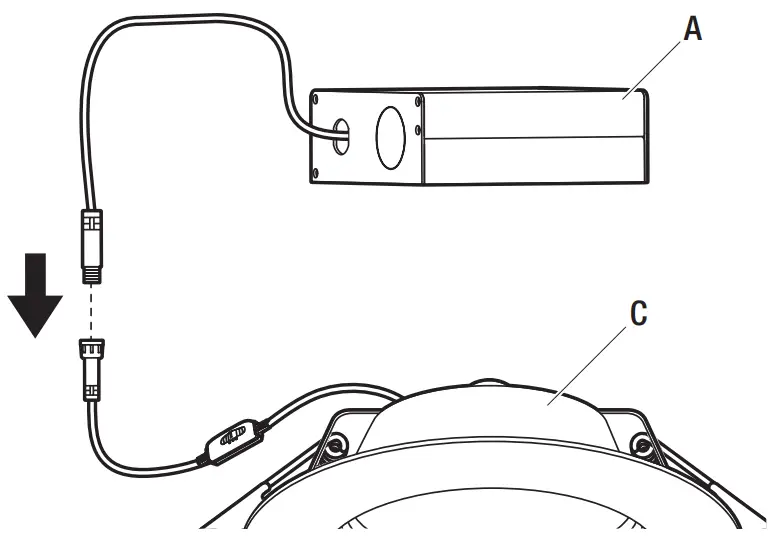
- Unplug the connector cable separating the junction box (A) from the light panel (C).
- Open the junction box (A) cover and remove the knockout (1) on the side panel.
- Insert the electrical supply cable through the knockout (1). Using the quick-connect push terminals, connect the green ground wire from the junction box (A) to the ground wire from the supply circuit, the black wire from the junction box (A) to the black wire from the supply circuit, and the white wire from the junction box (A) to the white wire from the supply circuit.
- Secure the wire in the knockout hole using a cable clamp (not provided).
- Place all wiring and connections into the junction box (A) and close the cover.
- Plug the connector cable from the junction box (A) into the connector cable from the light panel (C).


Selecting the brightness
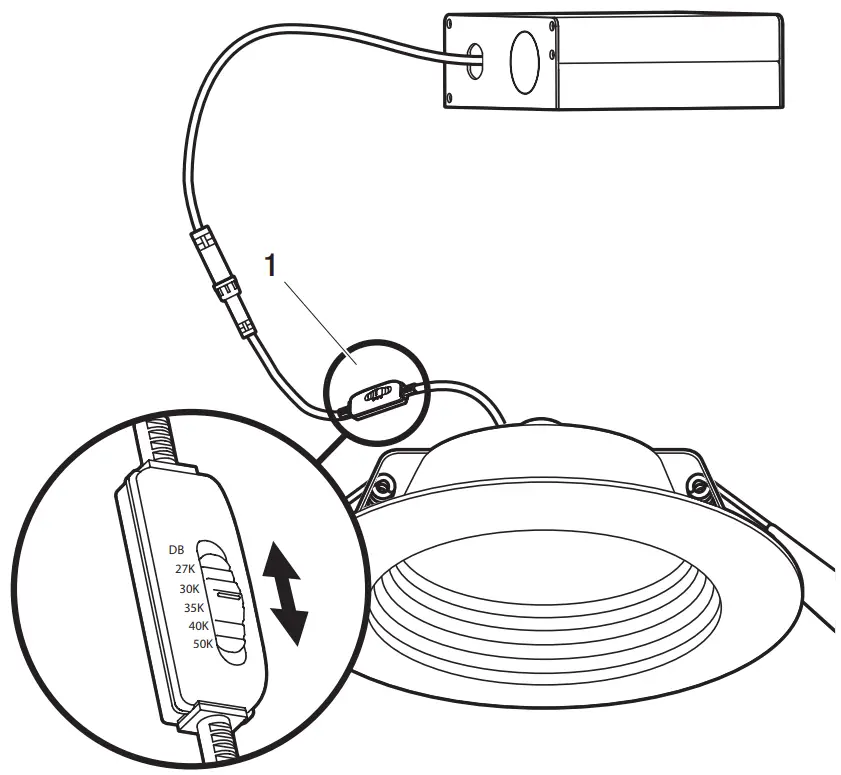
- Use the CCT switch (1) on the connector cable to select 2700K, 3000K, 3500K, 4000K, 5000K, or DB (Duo Bright). Duo Bright feature allows for color adjustments to be made to the light with a standard dimmer.

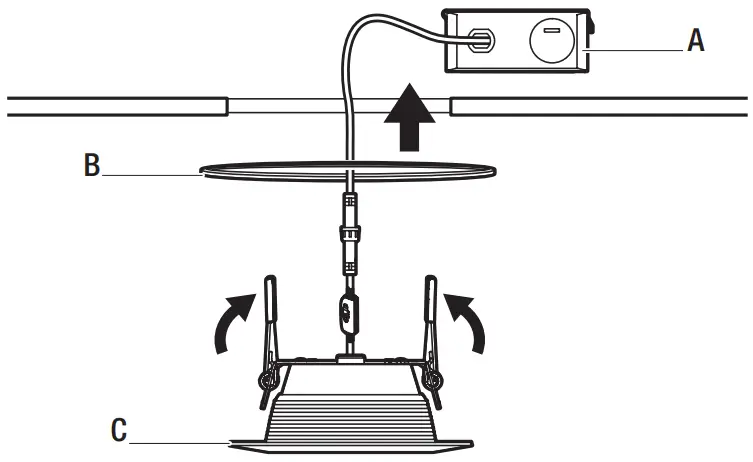
Installing the junction box and light panel
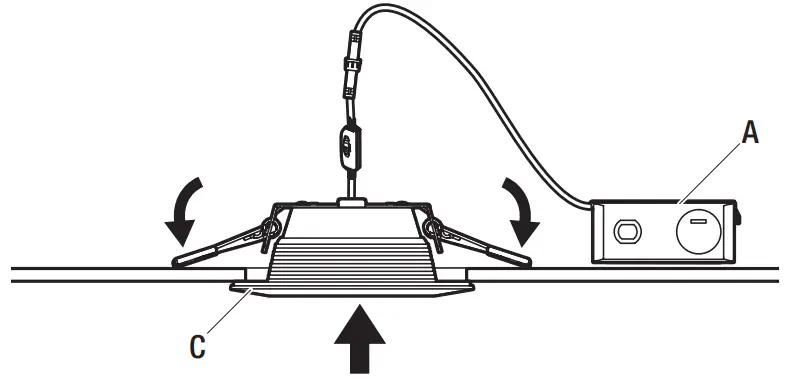
- Insert the junction box (A) through the mounting hole.
- Push the spring-loaded clips on the light panel (C) upward and insert the light panel base into the mounting hole.
Release the clips. The light panel (C) will be pulled flush to the ceiling. - For airtight installations, install the foam gasket (B) between the light panel (C) and the ceiling.


Care and Cleaning
- To clean the fixture, first disconnect the power to the fixture by turning off the circuit breaker of by removing the fuse at the fuse box.
- Use a dry or slightly dampened, clean cloth (use clean water, never use a solvent) to wipe the surface of the fixture.
- Allow the fixture to dry completely before power is restored.
Customer Support
Questions, problems, missing parts? Before returning to the store,
call Commercial Electric Customer Service
8 a.m. – 7 p.m., EST, Monday-Friday, 9 a.m. – 6 p.m., EST, Saturday
1-877-527-0313
Retain this manual for future use