![]() INSTALLATION MANUAL
INSTALLATION MANUAL
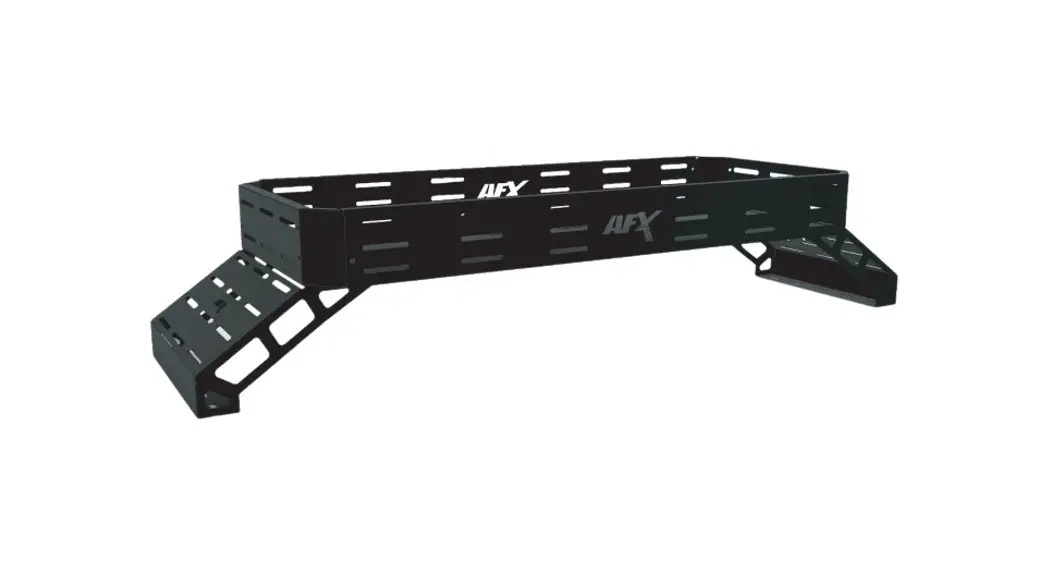
UNIVERSAL OVERBED CARGO RACK
CAN AM DEFENDER 2018-2022
POLARIS RANGER 2016-2021
ACC122-D
ACC122-R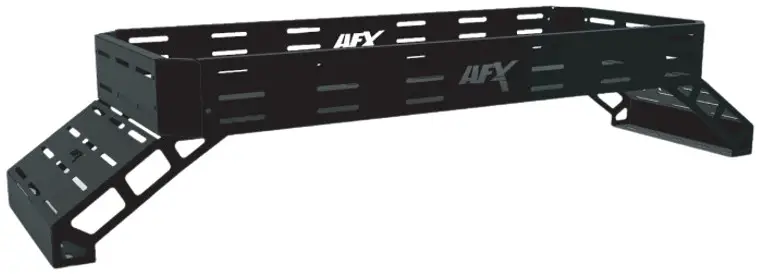
THANK YOU!
FOR PURCHASING AT AFX MOTORSPORTS
HOW TO INSTALL
Pieces included: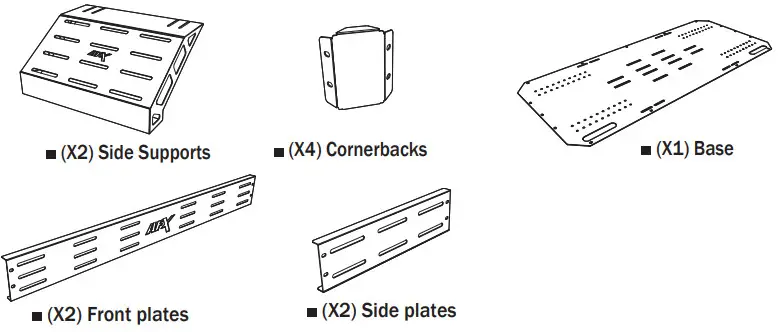 Hardware:
- (48x) 1/4” X 1/2” bolt and lock nuts
NOTE: Depending on the vehicle model, it is the hardware that we will provide.
CANAM DEFENDER = D:
- (6x) 5/16” Special Clamp
- (6x) 5/16” x 2” hexagonal screws
- (6x) 5/16” Washers
POLARIS RANGER = R:
- (6x) 5/16” Hardware Fitting
- (6x) 5/16” x 2” Eyebolt
- (6x) 5/16” Plain Washer

- (6x) Plastic Gasket
Tools needed (Not Included):
- 7/16” Combination Wrench
- 7/32” Allen Key
- Phillips Screwdriver
- 10 mm Combination Wrench
Liability Statement
AF1 Motorsports products are designed to best fit user’s ATV/UTV under stock conditions. Adding, modifying, or fabricating any factory or aftermarket parts will void any warranty provided by AF1 Motorsports and is not recommended. AF1 Motorsports products could interfere with other aftermarket accessories. If user has aftermarket products on machine, contact AF1 Motorsports to verify that they will work together. Although AF1 Motorsports has thousands of satisfied customers, user should be aware that installing bumpers, rock sliders, spare tire carriers, etc. will change the ride of machine and may increase maintenance and part wear. Operating any off-road machine while, or after, consuming alcohol and/or drugs increases risk of bodily harm or death. No warranty or representation is made as to this product’s ability to protect user from severe injury or death. AF1 Motorsports urges operators and occupants to wear a helmet and appropriate riding gear at all times. By purchasing and installing AF1 Motorsports products, user agrees that should damages occur, AF1 Motorsports will not be held responsible for loss of time, use, labor fees, replacement parts, or freight charges. AF1 Motorsports, nor any 3rd party, will not be held responsible for any direct, indirect, incidental, special, or consequential damages that result from any product purchased from AF1 Motorsports. The total liability of seller to user for all damages, losses, and causes of action, if any, shall not exceed the total purchase price paid for the product that gave rise to the claim. AF1 Motorsports will warranty only parts provided by AF1 Motorsports. Any damage or problems with OEM housings, bearings, seals, or other manufacturers’ products will not be covered by AF1 Motorsports. AF1 Motorsports parts and products are not warrantied if item was not installed properly, misused, or modified.
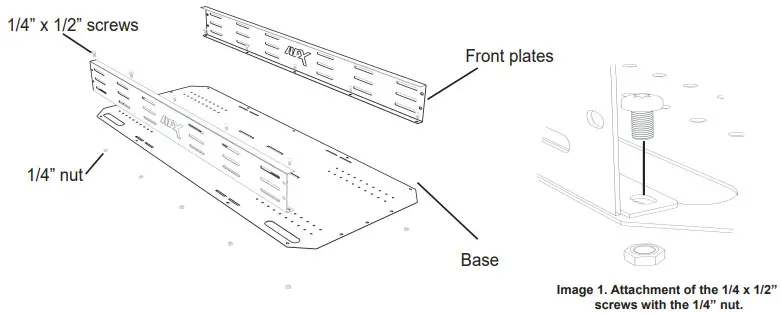
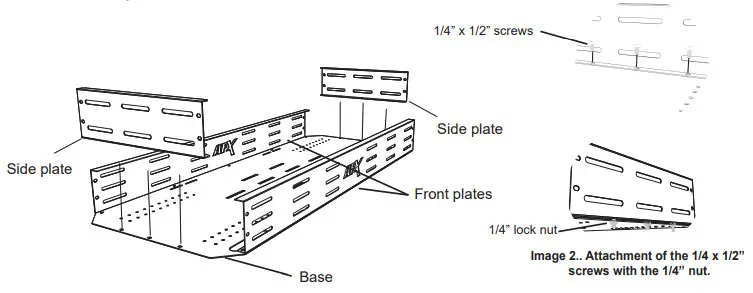
Note: Do not tighten the screws until assembly is finish.
- Attach the front plate to the base with the 1/4″ x 1/2″ bolts and 1/4″ lock nuts.
- Attach the side plates to the base with the 1/4 x 1/2″ screws and 1/4″ lock nuts.
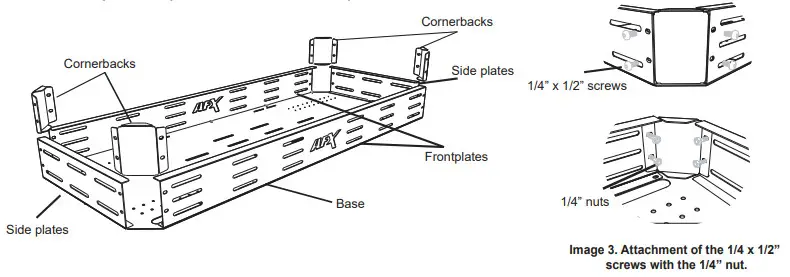
- Attach the cornerbacks to the side plates and to the base with the 1/4″ x 1/2″ screws and 1/4” lock nuts.
DEFENDER INSTALLATION
4-D: Before placing the overbed join the side supports to the rear box of the defender.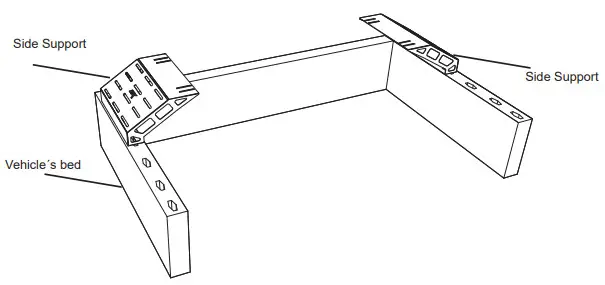 5-D: Attach the side supports to the vehicle´s bed whit the 5/16” x 2” screws and the 5/16” special clamps.
Attach the side plates to the base with the 1/4 x 1/2″ bolts and 1/4″ lock nuts. 6-D: Once both side legs are attached to the vehicle´s bed, place the tray over the side legs and secure with screws.
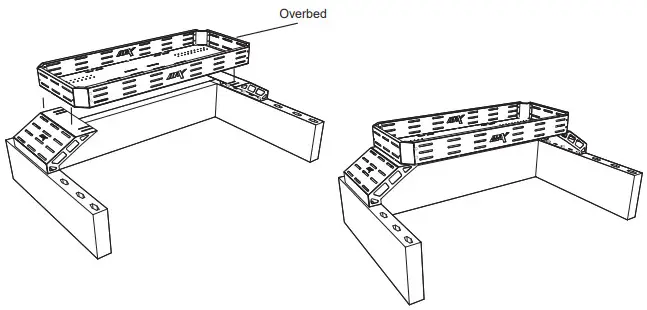 7-D: Attach the overbed to the side supports using the 1/4″ x 1/2″ bolts and 1/4″ lock nuts and place them in the corresponding holes based on the racer model.
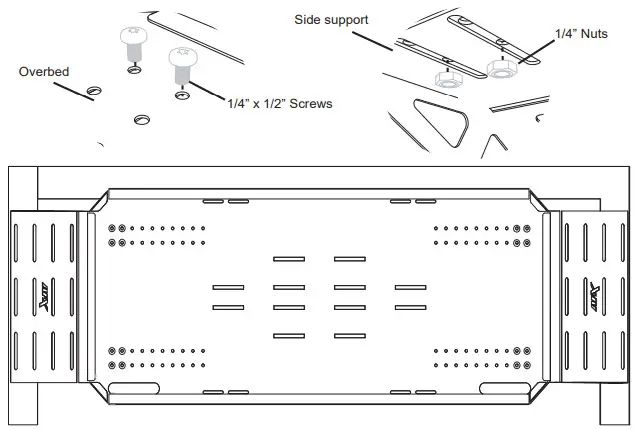 DEFENDER
The screws are placed in the first two holes of both pairs from left to right on the driver’s side and on the passenger side they are placed from right to left.
8-D: Verify the overbedis tightly fitted and the side supports are securely fastened to the rear box.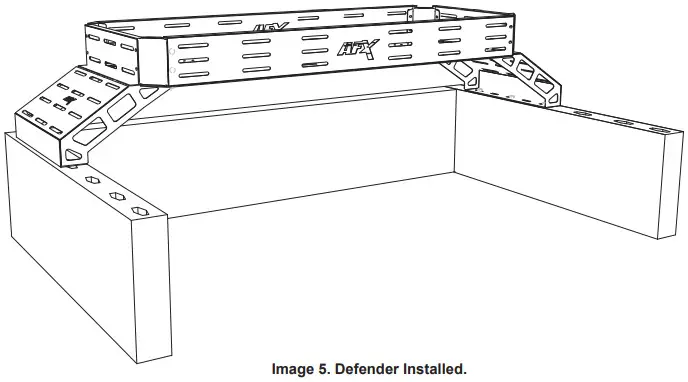
RANGER INSTALLATION
4-R: Attach the side supports to the vehicle´s bed with the 5/16” x 2” eyebolts and the plain washer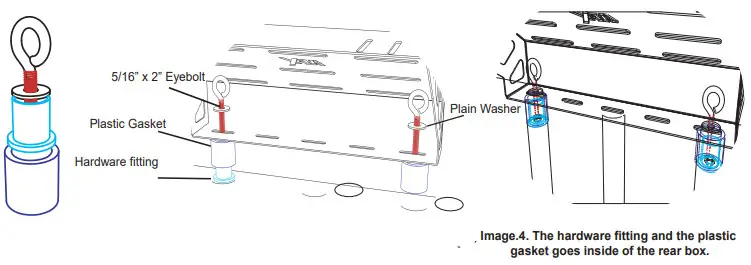 5-R: Before placing the overbed we have to join the side supports to the vehicle´s bed. Push down both Sides supports until the metal base is placed on top of the vehicle´s bed.
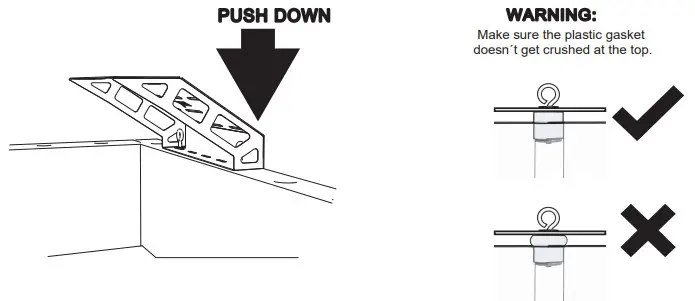 6-R: Tighten the 5/15” x 2” eyebolt to the vehicle´s bed and put the overbed on the side supports.
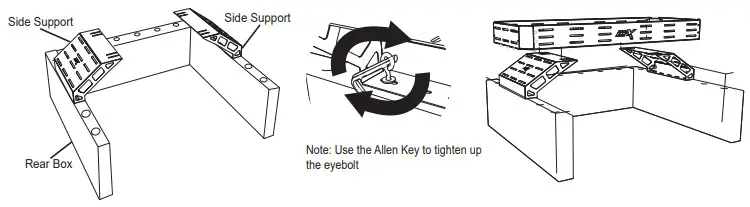 7-R: Attach the overbed to the side supports using the 1/4″ x 1/2″ bolts and 1/4″ lock nuts and place them in the corresponding holes based on the racer model.
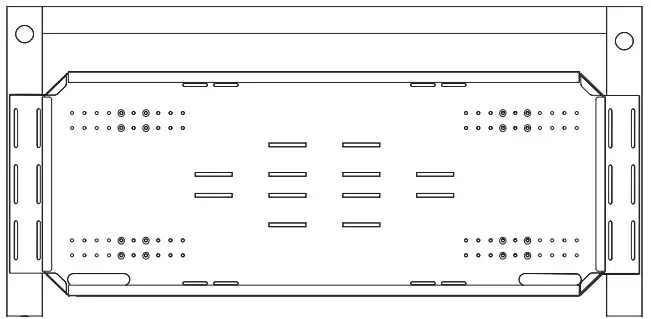 RANGER
The screws are placed in the fifth and seventh holes of both pairs from left to right on the driver’s side and on the passenger side they are placed from right to left.
8-R: Verify the overbedis tightly fitted and the side supports are securely fastened to the rear box.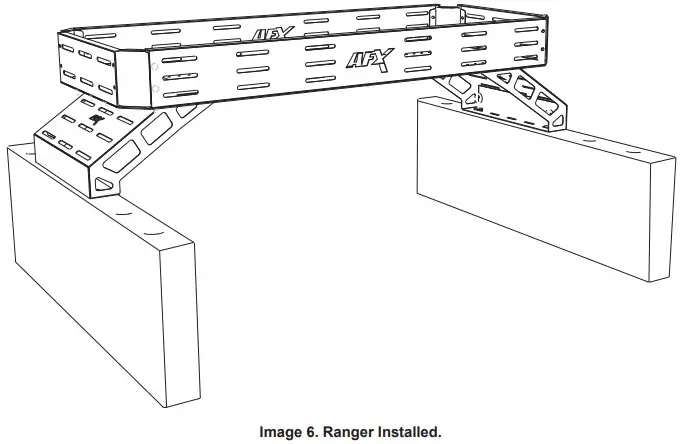
![]() For technical support , please write us to:
For technical support , please write us to:
[email protected] or call us at:
Ph. 956-242-6521
HAVE FUN AND A SAFE RIDE-!
www.afxmotorsports.com
4610 Modem Lane, Laredo, TX 78041 Ph. 956-242-6521
THIS PRODUCT IS FOR OFF ROAD USE ONLY


