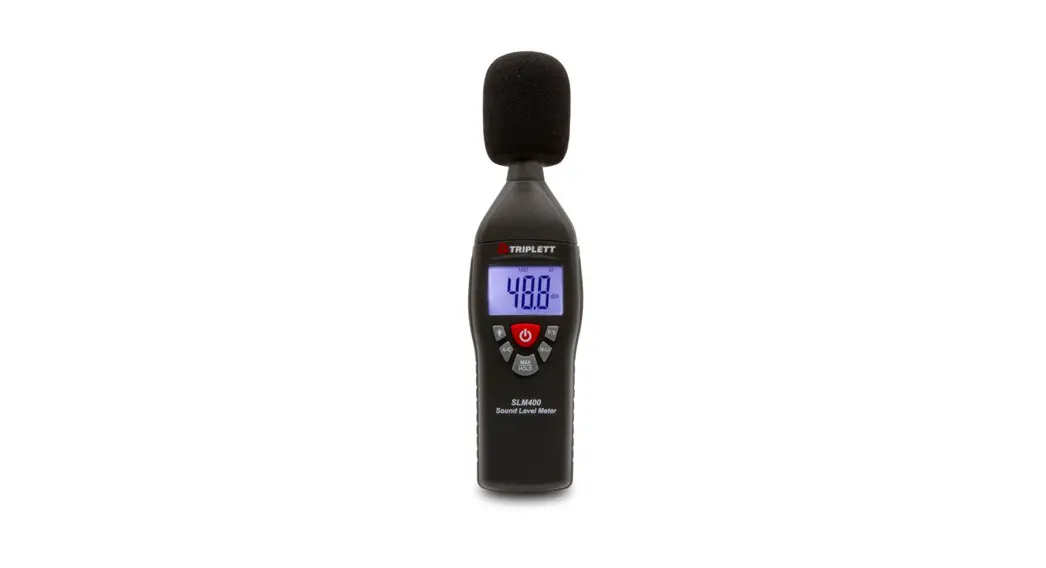
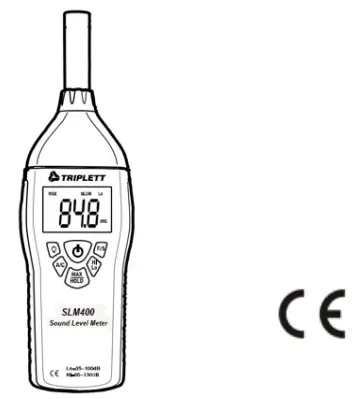
![]() SLM400
SLM400
Digital Sound Level Meter
 User Manual
Introduction
Congratulations on your purchase of the SLM400 Digital Sound Level Meter.
This device is shipped fully tested and calibrated and, with proper use, will provide years of reliable service.
Safety
![]() Read the following safety information carefully before attempting to operate or service the meter. Use the meter only as specified in this manual; otherwise, the protection provided by the meter may be impaired.
Read the following safety information carefully before attempting to operate or service the meter. Use the meter only as specified in this manual; otherwise, the protection provided by the meter may be impaired.
Environmental Conditions
- Altitude up to 2000 meters
- Relative Humidity: 90% max.
- Operating Temperature: 0 to 40°C (32 to 104°C)
Maintenance and Cleaning
- Repair or servicing not covered in this manual should only be performed by qualified personnel.
- Periodically wipe the case with a dry cloth. Do not use abrasives or solvents.
Meter Description
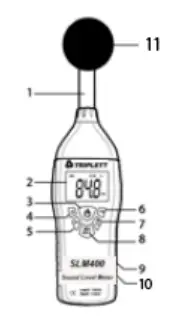
| 1. Microphone 2. 4-digit LCD Display 3. ON-OFF button 4. LCD Backlight button 5. Frequency weighting selection button 6. Response time selection button | 7. Range selector button 1. Max Hold / Data Hold selector button 2. Battery compartment on rear 10. Calibration pots in the battery compartment 11. Windscreen |
Measurement Considerations
- Wind blowing across the microphone increases the noise measurement. Use the supplied windscreen to cover the microphone when applicable.
- Calibrate the instrument before each use if possible. Especially if the meter has not been used for a long period of time.
- Do not store or operate the instrument in areas of high temperature or humidity.
- Keep the meter and microphone dry.
- Avoid severe vibration.
- Remove the battery when the meter is to be stored for long periods of time.
- Min: sec or Hour: min Display
Operation
- Power the meter by pressing the
 power button. The meter will begin displaying readings. If the LCD does not switch on, check the 9V battery
located in the rear battery compartment. - Hold the meter in hand facing the microphone toward the source of the sound to be measured.
- View the measurement on the meter’s LCD. An indication of OVER means that the measurement is out of range. Toggle the ‘Hi’ (65 to 130dB) and ‘Lo’ (35 to 100dB) measurement ranges using the HI/LO button. For measurements in the 65 to 100dB region, either range can be used.
‘A’ and ‘C’ Frequency Weighting
Use the ‘A/C’ button to select ‘A’ or ‘C’ frequency weighting. With ‘A’ weighting selected, the frequency response of the meter is similar to the response of the human ear. ‘A’ weighting is commonly used for environmental or hearing conservation programs such as OSHA regulatory testing and noise ordinance law enforcement. ‘C’ weighting is a much flatter response and is suitable for the sound level analysis of machines, engines, etc.
Most noise measurements are performed using ‘A’ Weighting and SLOW Response. ‘FAST’ and ‘SLOW’ Response Time Use the ‘F/C’ button to select FAST (125 ms) or SLOW (1 second) response time. Select FAST to capture noise peaks and noises that occur very quickly. Select the SLOW response to monitor a sound source that has a consistent noise level or to average quickly changing levels.
Select Slow response for most applications.
‘Hi’ and ‘Lo’ Range Selections
Use the ‘Hi/Lo’ button to select the appropriate range. If the measurement is in the range of 35 to 100 dB, use the ‘Lo’ range. If the measurement is between 65 and 130dB, use the ‘Hi’ range. For measurements between 65 and 100dB, either range can be used. If the display flashes the OVER icon,
Press the orange button to toggle the range.
MAX HOLD
In this mode, the meter only updates the LCD when a higher reading than the one presently on the display is detected. Select MAX HOLD by momentarily pressing the MAX HOLD button. The meter displays the MAX icon when in the MAX HOLD mode. Press the MAX HOLD button again to exit this mode (the MAX indicator will switch off).
DATA HOLD
To freeze a displayed reading, press and hold the MAX HOLD button until the MAX and HOLD display icons appear. To release the display and return to the normal operating mode, press and hold the MAX HOLD button until the MAX and HOLD icons switch off.
Backlight button![]()
The LCD is equipped with backlighting for easier viewing, especially in dimly lit areas. Press the backlight button to turn the backlight on. Press again to turn the backlight off. The backlight does not have an automatic power-down function; judicious use will conserve battery life.
Calibration
To calibrate the SLM400 an external calibrator that can provide a 94.0dB signal at 1 kHz is required in addition to a small screw-driver.
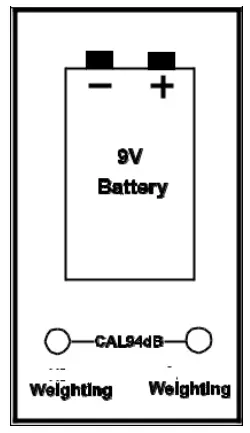
- Open the battery compartment and locate the two calibration potentiometers behind the 9V battery (see diagram)
- Put the meter in the ‘C’ weighting mode
- Put the meter in the ‘FAST’ response mode
- Place the SLM400 microphone into the calibrator.
Set the calibrator to output a 1kHz sine wave @ 94dB - Put the meter in the LOW range
- Adjust the ‘C (Lo)’ potentiometer for a display of 94.0 dB
- Put the meter in the HIGH range
- Adjust the ‘C (HI)’ potentiometer for a display of 94.0 dB
Battery Replacement
When the low battery icon BAT appears on the LCD replace the 9V battery as soon as possible. The battery compartment cover is located on the rear of the meter. Remove the Phillips screw to loosen the cover.
Slide the battery compartment cover off, change the battery, and replace the compartment cover. You, as the end-user, are legally bound (Battery ordinance) to return all used batteries and accumulators; disposal in the household garbage is prohibited!
You can hand over your used batteries/accumulators at collection points in your community or wherever batteries/accumulators are sold
Specifications
| Display | 4-digit (4000 counts) backlit LCD |
| Display update rate | 0.5 seconds |
| Microphone | 0.5″ Electret condenser |
| Measurement Bandwidth | 31.5Hz to 8KHz |
| Dynamic range | 65dB |
| Measurement Range | 35 to 130dB (Low: 35 to 100; High: 65 to 130dB) |
| Frequency weighting | ‘A’ and ‘C’ (selectable) |
| Accuracy / Resolution | ± 1.5dB (under reference conditions) / 0.1dB |
| Standards | Meets Type 2 ANSI S1.4-1983, IEC 60651, EN60651 |
| Maximum Hold decay time | <1dB / 3min |
| Response time | Fast: 125 milliseconds / Slow: 1 second |
| Calibration source required | 1KHz sine wave @ 94dB |
| Power | 9V Battery |
| Battery life | 50 hours (typical); low battery indicator alerts the user |
| Automatic power off | After approx. 15 minutes of inactivity |
| Operating temperature | 0 to 40°C (32 to 104°F) |
| Operating humidity | 10 to 90% RH |
| Storage temperature | -10 to 60°C (14 to 140°F) |
| Storage humidity | 10 to 75% RH |
| Dimensions/weight | 240 x 68 x 25mm (9.45 x 2.68 x 1”) /210g (6.75oz) |
Warranty Information
Triplett / Jewell Instruments extends the following warranty to the original purchaser of these goods for use. Triplett warrants to the original purchaser for use that the products sold by it will be free from defects in workmanship and material for a period of (1) one year from the date of purchase. This warranty does not apply to any of our products that have been repaired or altered by unauthorized persons in any way or purchased from unauthorized distributors so as, in our sole judgment, to injure their stability or reliability, or which have been subject to misuse, abuse, misapplication, negligence, accident or which have had the serial numbers altered, defaced, or removed. Accessories, including batteries, are not covered by this warranty
![]() Copyright © 2020 Triplett
Copyright © 2020 Triplett


