
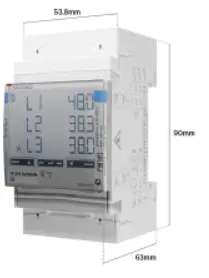
wallbox Single Phase Energy Meters
Purpose and Scope of the Document:
The purpose of this document is to outline the instructions for installation of energy meters compatible with the Power Boost and Eco-Smart functionalities.
For instructions to install an MID meter, refer to the relevant Installation Guide.
Important Notes
- After the installation, connect the energy meter before closing your charger. In case the charger had already been installed, open it to connect the energy meter.
- Only energy meters delivered by Wallbox are compatible.
- The installation must be performed only by suitably qualified personnel, according to local regulations.
- Make sure to update your charger with the latest software version before installing the meter.
- Ensure the charger is powered off before connecting the meter.
- For more information, refer to your charger’s Installation Guide on Wallbox Academy.
Materials and Tools
Inside the Box
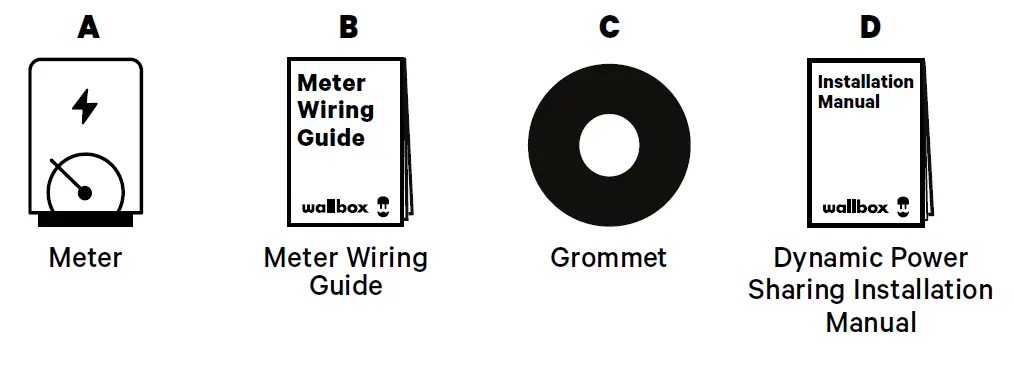
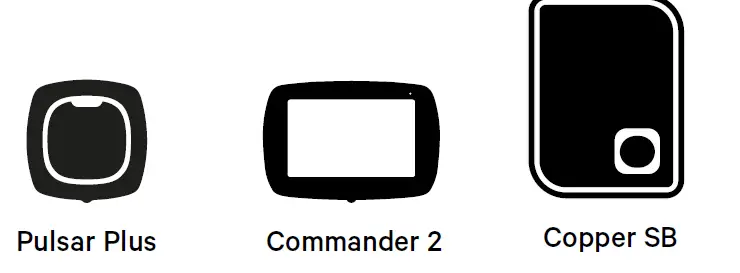
Devices
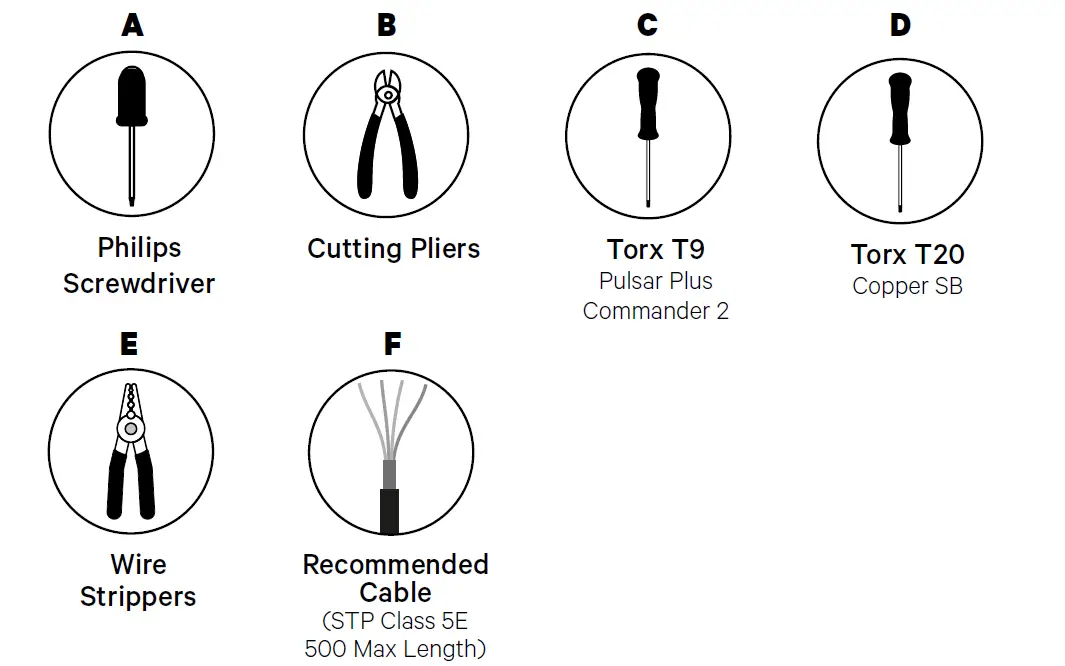
Tools
Compatibility Table
| Meters | Power Boost | Eco-Smart |
| EM340 | PF.A / PF.B | PF.B |
| EM112 | PF.A / PF.B | PF.B |
| SPM1-100-AC | ||
| EM330 CTA 5X 250 A 5A CTA 6X 400 A 5A CTD-6S 600 5A | ||
| N1CT | ||
| PRO2 MOD | ||
| PRO380 MOD |
Placement
- Place the energy meter after the mains supply in the fuse box.

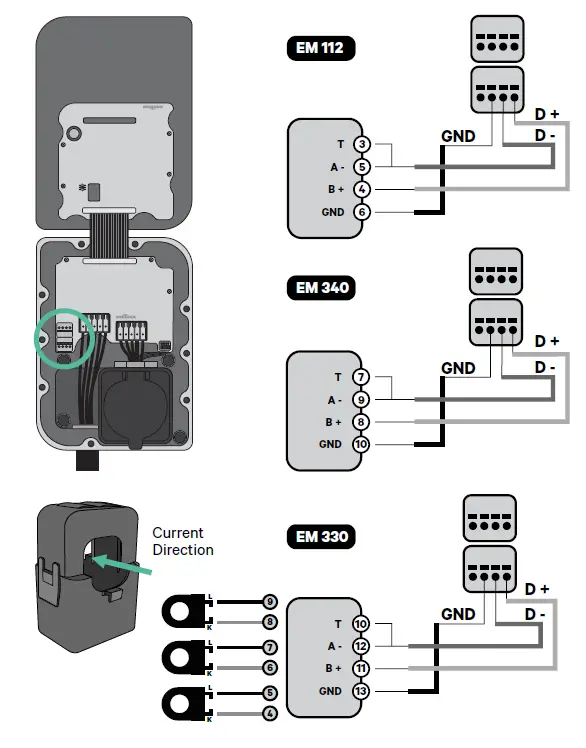
- For all the meters, follow the corresponding manual included in the box.

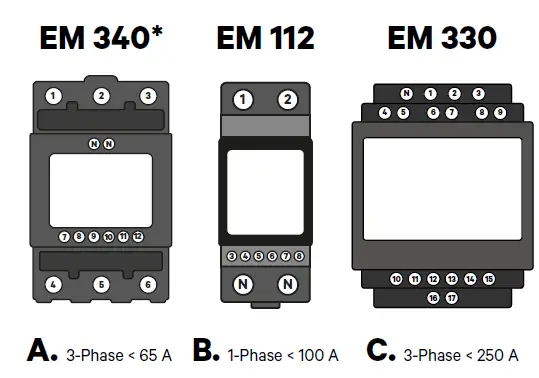
Note: For the EM340 and the EM112 meters, only the PF.B versions are compatible with the Eco-Smart functionality.For the Power Boost functionality, both the PF.A and PF.B versions of EM340 and EM112 meters are compatible. Refer the Eco-smart configuration article to know more.
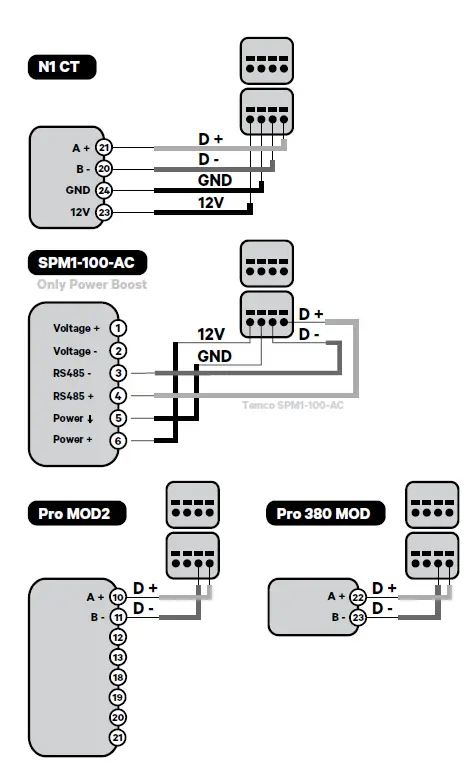
SPM1-100-AC

- Used for 1-Phase installation. Up to 100A.
- Clip the power meter to the mains power cable.
- Neutral cable must not be drawn through the clamp.
Note: Ensure to insert the cable through the clamp in the correct direction as shown.
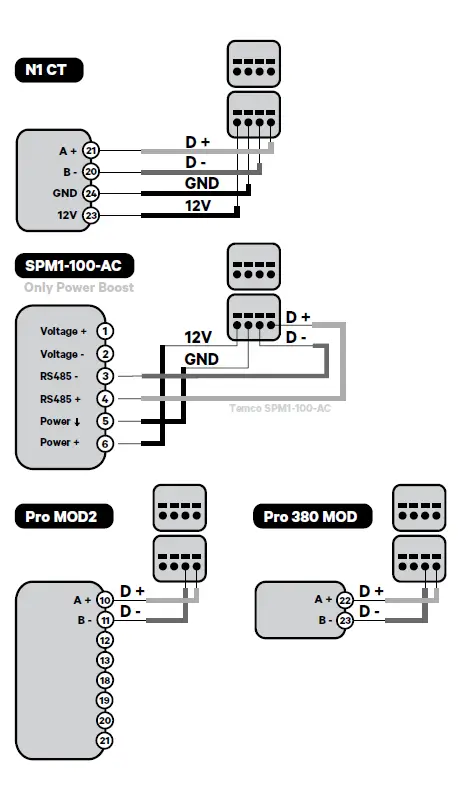
Pro MOD2 / Pro 380 MOD / N1 CT

Pulsar Plus

Commander 2

Copper SB
Configuration
Power Boost
Follow these steps to configure the Power Boost functionality.
Eco-Smart
Follow these steps to configure the Eco-Smart functionality.


