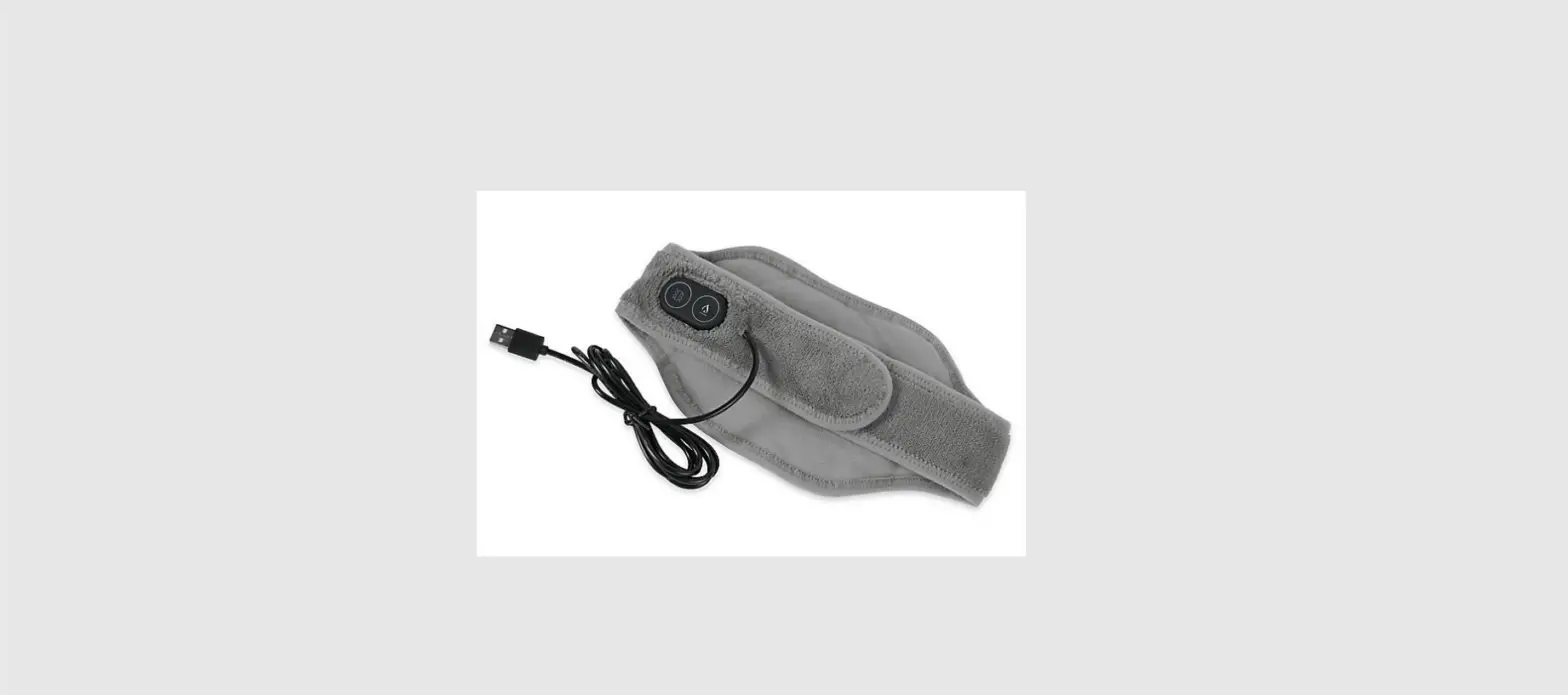
 SHARPER IMAGE 206910 Cordless Shoulder Heat Therapy Wrap

Heat Therapy Wraps and Rechargeable Battery
User Guide
Thank you for purchasing a Sharper Image Heat Therapy Wrap.
Please take a moment to read this guide and store it for future reference.
introduction
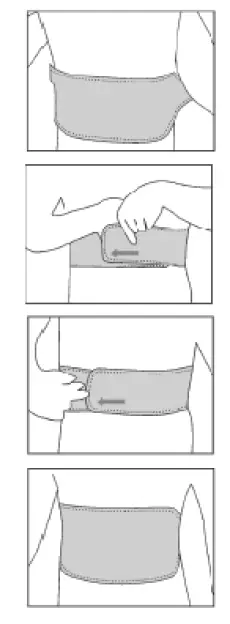
BACK WRAP
- Place heating area over your back with logo facing out.
- Bring the straps around your sides.
- Lay the strap with the logo over the other end to close it with the velcro.
- Our Back Wrap may also be used in the front to relieve pain from menstrual cramps.

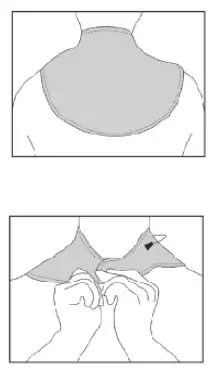
NECK WRAP
- Place wrap over back of neck.
- Place straps around the neck and over one another to secure the velcro.

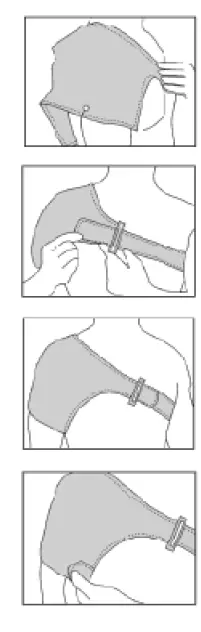
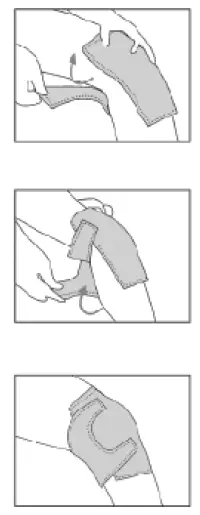
SHOULDER WRAP
- Place the wrap, logo facing out, so that the cupping of the wrap fits over your shoulder.
- Bring the longer strap around your back and under the opposite arm to the front of your chest. Put the longer strap through the loop.
- Tighten the strap and bring the velcro back over the strap so the logo is now facing out.
- Bring the smaller velcro strap beneath your arm and place it over the wrap as shown. It should fit securely over your bicep.

WRIST WRAP
- Place thumb through the slit, with the wrap’s logo side facing out.
- Wrap the strap around your wrist, making sure to support any area with slight compression.
- Lock the strap in place with the velcro at the end of the strap by placing it over the wrap surface.

KNEE WRAP
- Place wrap over knee, making sure the cupping of the wrap goes over the knee cap. Wrap the upper strap around your thigh and close the velcro over the wrap.
- Wrap the lower strap around your upper calf and secure the velcro over the top of the wrap.
- You may use the wrap over either knee. To do so repeat the same directions on your other knee.
BATTERY GUIDE
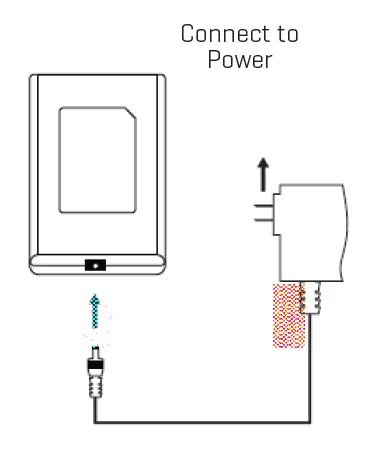
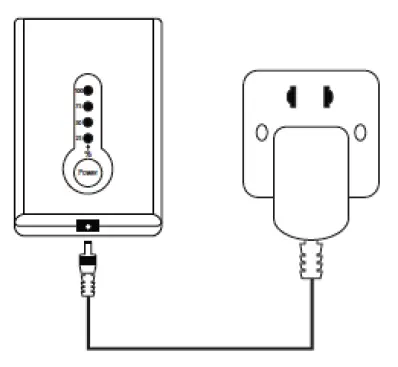
- CONNECT THE CHARGER

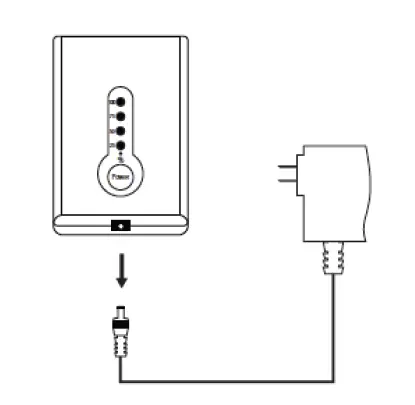
- FULLY CHARGE THE BATTERY Four Blue lights = Full Charge

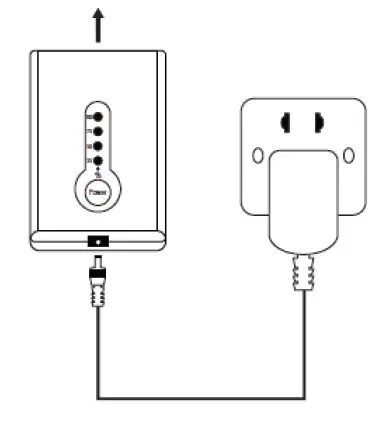
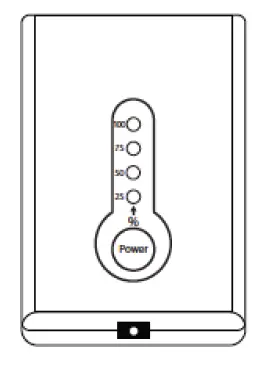
- REMOVE BATTERY CHARGER PLUG/CHECK THE BATTERY

- Click “ Power ”:
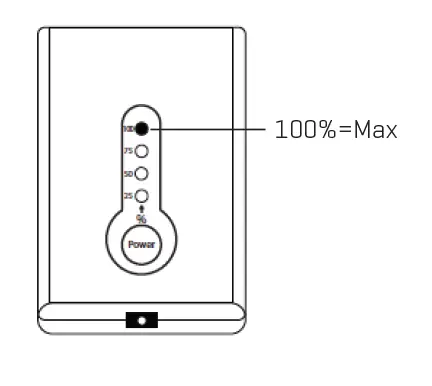
- Four lights = 100% battery
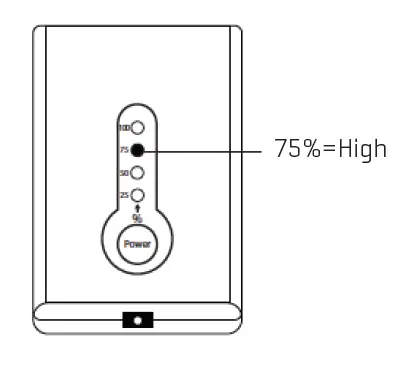
- Three lights = 75% battery
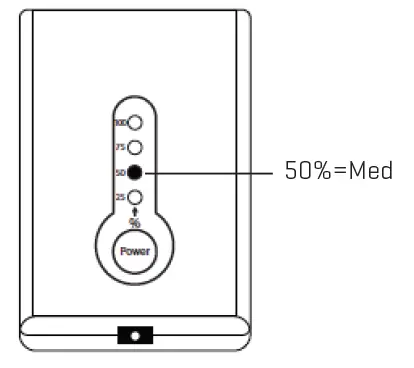
- Two lights = 50% battery
- One light = 25% battery
- One light (blinking) = Less than 25% battery
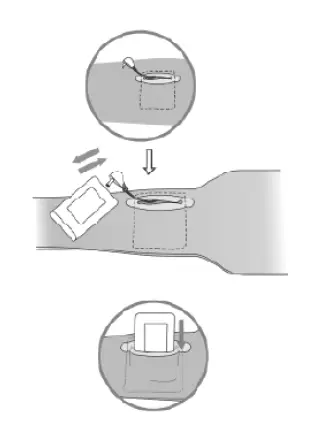
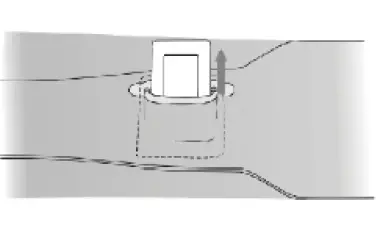
- INSTALL POWER PACK
Locate the connector. Plug Power Pack into the connector. Put Power Pack into pocket.
- POWER ON & MAX TEMP SETTING
To Turn Power On:
Press and hold ‘’ Power ‘’ for 2 seconds until the controller light shows BLUE (100%).
ATTENTION
Do not turn the power on when brace/glove is folded.
- SELECT HIGH TEMP SETTING
High Temperature Setting: Click ” Power ” until the light changes to 75%.
- SELECT MED TEMPERATURE SETTING
Med Temperature Setting: Click ” Power ” until the light changes to 50%.
- SELECT LOW-TEMPERATURE SETTING
Low Temperature Setting: Click ” Power ” until the light changes to 25%.
- POWER OFF
To Turn Power Off:
Press and hold “ Power ” for
2 seconds until all lights are OFF. - FULLY CHARGE THE BATTERY BEFORE STORING
ATTENTION- Battery must be fully charged before use.
- Battery must be fully charged before it’s stored, and at least once every 6 months of storage thereafter.
- WASH & CARE

- Warning: Power Pack must be removed from device prior to washing.
Spot Cleaning Recommended - Hang dry
- Do not iron
- Do not use bleach or cleaning solvents
- Do not twist or wring
- Warning: Power Pack must be removed from device prior to washing.
SPECIFICATIONS
Charge time:
2.3 hours
Output charger: 8.4V/1A
PLEASE NOTE: This is a personal care item and is returnable if in its original unopened packaging and unused condition.
WARRANTY/CUSTOMER SERVICE
Sharper Image branded items purchased from SharperImage.com include a 1-year limited replacement warranty. If you have any questions not covered in this guide, please call our Customer Service department at 1 (877) 210-3449. Customer Service agents are available Monday through Friday, 9:00 a.m. to 6:00 p.m. ET.


