![]()
Installing Receiver to Swift 800
- TURN OFF POWER AND UNPLUG THE POWER POINT OF THE
MOTOR DO NOT PROCEED UNLESS THIS STEP IS COMPLETE - Unscrew and remove the cover from the motor unit.
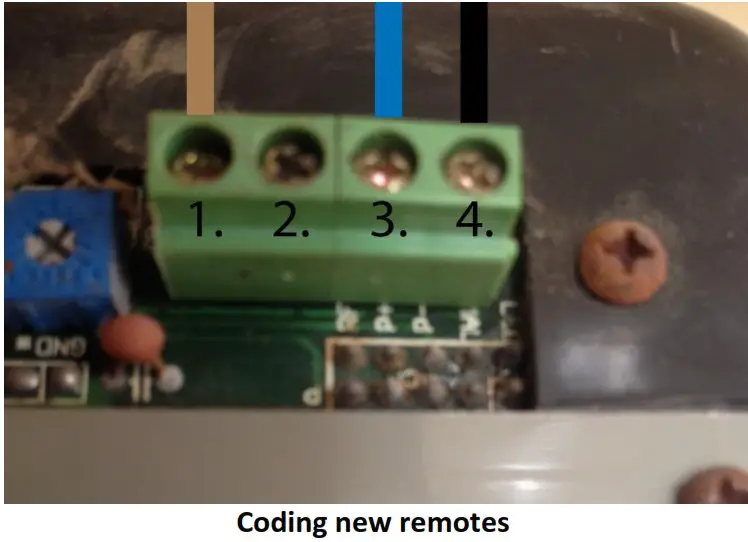
- View the diagram on the following page and ensure that it matches the control panel of your motor.
- Loosen screw number 1 (numbered 1 in the diagram). Connect the brown cable fromthe receiver and tighten the screw.
- Loosen screw number 3 (numbered 3 in the diagram). Connect the blue cable from the receiver and tighten the screw.
- Loosen screw number 4 (numbered 4 in the diagram). Connect the black cable from the receiver and tighten the screw.
- Ensure all cables are secured and are not loose. Plug back in the power to the motor and switch it on.
- The remotes have been pre-programmed to button number 1. Press 1 to test the door.

Please Note: Your original remotes will continue to work
- Press the black learn button inside the receiver located next to the LED light until the LED illuminates.
- Press and hold any button on your new remote until the LED flashes 3 times.
- The remote is now coded, please test the remote to ensure it can operate the motor.
- If you have more than one new remote, please repeat steps 1-3.


