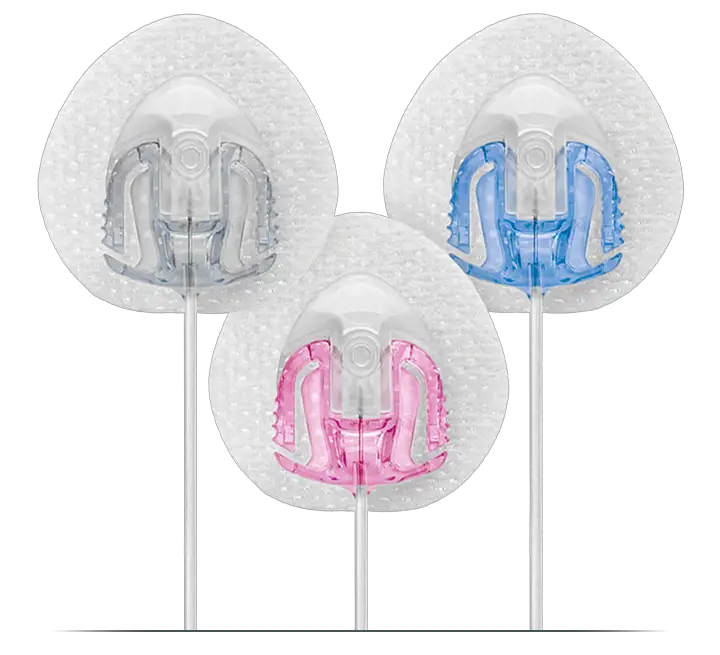
Tandem Insert an AutoSoft 90 Infusion Set in Insulin Pump Instructions
 Insert an AutoSoft 90 Infusion Set
for the t:slim X2 Insulin Pump
This reference sheet is intended to supplement the instructions included with your AutoSoft™ 90 infusion set. Please refer to those instructions (available for download at tandemdiabetes.com/support) for a complete list of warnings and precautions.
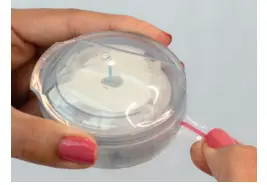
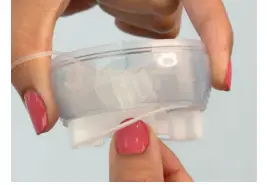
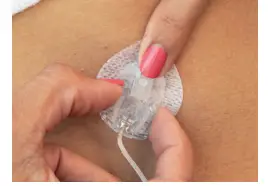
- To open, pull the red tape to remove the tamper-proof seal and remove the sterile paper.
CAUTION: DO NOT use if the seal or sterile paper has been broken.
NOTE: Clean the insertion area with an alcohol prep pad or other skin preparation as recommended by your healthcare provider.
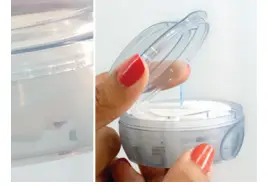
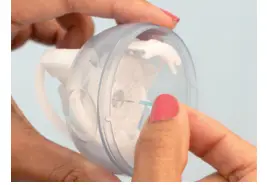
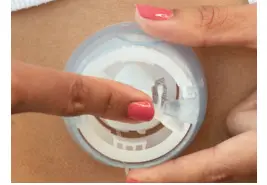
- Remove the lid by pressing the three raised dots on either side of the lid firmly with one hand and lifting the flat tab of the lid with the other hand.
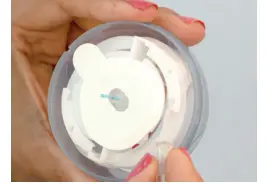
CAUTION: If the infusion set is not securely seated in the insertion device with the needle pointing straight ahead, pain or minor injury may occur during insertion. - To unnotch the tubing from the insertion device, unhook the tubing from the notch then gently unwind the tubing. Stop when you get to the end.
CAUTION: Be careful when handling the insertion device to keep from dislodging the cannula housing.
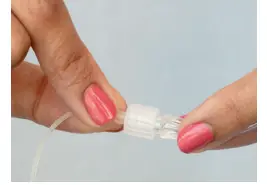
CAUTION: DO NOT touch or bend the introducer needle. - To attach the infusion set tubing to the t:lock™ connector on the cartridge, twist the connector clockwise until tight, then twist another quarter of a turn to ensure a secure connection.
- Fill your tubing according to the instructions detailed in the user guide that came with your Tandem Diabetes Care® insulin pump.
- When filling the tubing, hold the introducer needle pointing down and hold the tubing straight upwards at the t:lock connector. Make sure there are no gaps of air in the tubing.
CAUTION: DO NOT fill tubing while the infusion set is connected to your body. - Stop after three drops of insulin have appeared from the introducer needle.
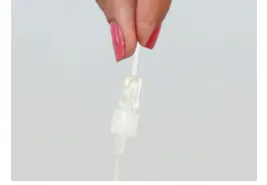
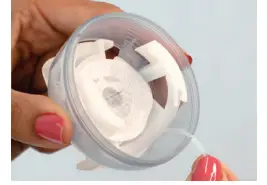
- Pull up gently on the backing paper to remove it from the adhesive tape.
CAUTION: Be careful not to pull the backing paper too hard from the tape. - To spring-load the insertion device, place your fingers on the lined ridges on both sides of the device and press in.
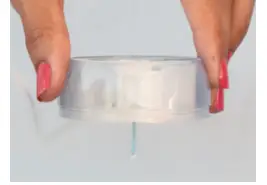
- Make sure the tubing hangs freely, then grip the lined ridges and pull the spring loader back until you hear a click.
- Remove the needle guard from the introducer needle by gently twisting and pulling it off.
- Slide the tubing into the closest notched edge to ensure that the tubing is not caught underneath during insertion.
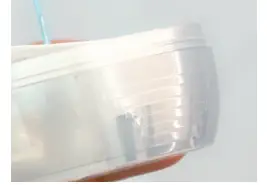
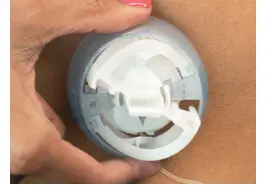
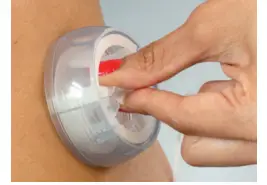
- Place the insertion device flat over the selected insertion area. Press the round indentations on both sides of the insertion device simultaneously.
NOTE: Reference the gray arrow inside the insertion device to help determine which direction the tubing will face.
NOTE: You might need to hold and secure the tubing in the notched edge of the device during the insertion process. - Gently push on the center of the insertion device to secure the adhesive tape to the skin.
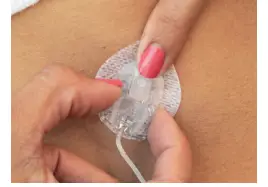
- Remove the introducer needle by grasping the white tabs of the insertion device and pulling it gently back. Massage the tape thoroughly onto the skin.
- Fill cannula 0.3 units for 6mm cannulas or 0.5 units for 9mm cannulas.
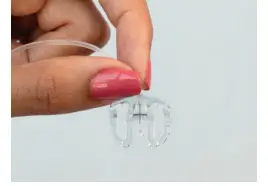
Put the lid back on the insertion device before disposing.
CAUTION: Always check glucose levels two hours after inserting to make sure it’s working properly.


 Temporarily Disconnect
- Place your finger in front of cannula housing, gently squeeze the sides (close to the cannula housing) of the AutoSoft 90 infusion set and pull the connector needle straight out.

- Insert the disconnect cover into the cannula housing.

 Reconnect Your Infusion Set
- Remove the circular protective cap from the connector needle.
If needed, fill the infusion set with the needle pointing down until you see insulin drop from the needle.
CAUTION: DO NOT fill tubing while the infusion set is connected to your body.
- Remove the disconnect cover from the cannula housing.
Hold the connector needle at the point where it connects with the tubing and insert it into the cannula housing. You should hear a click.
![]()
Important Safety Information: RX ONLY. These infusion sets are indicated for the subcutaneous infusion of insulin administered by the t:slim X2™ insulin pump for the treatment of diabetes. These infusion sets are indicated for single use. For contraindications, warnings, precautions, and other important information, please refer to the instructions for use accompanying the infusion sets.
© 2021 Tandem Diabetes Care, Inc. All rights reserved. Tandem Diabetes Care, AutoSoft, t:lock, and t:slim X2 are either registered trademarks or trademarks of Tandem Diabetes Care, Inc. in the United States and/or other countries. All third-party marks are the property of their respective owners. ML-1008719_A


