JEGS com 555-94020 Diesel Auxiliary Tank
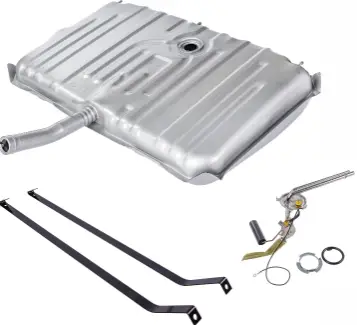
Diesel Auxiliary Tank Installation Guide
PRE-INSTALLATION
Professional installation by a certified technician is highly recommended for this job.
- Do not install this kit when the factory tank is full.
- 2 in. factory fill neck OD applications.
- Chevrolet/GMC: 2010 & Older
INCLUDED PARTS
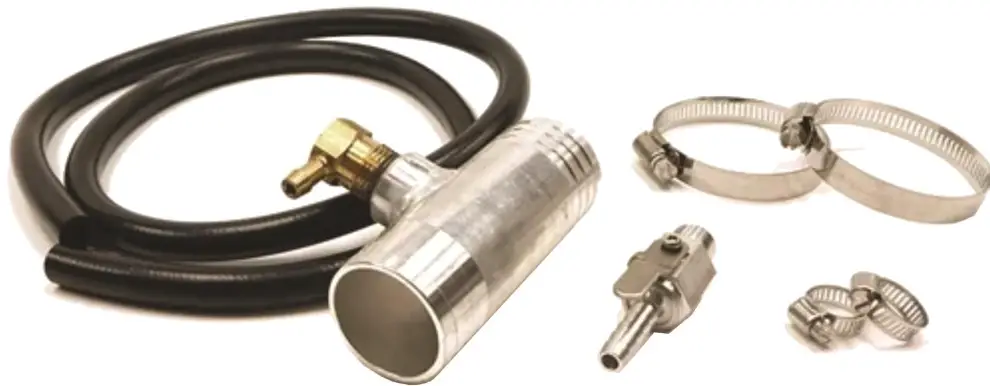
- Aluminum Tee Adapter
- Fuel Hose
- Hose Clamps (Small)
- Shut-Off Valve
- Hose Clamps (Large)
- Rubber Hose Sleeves
REQUIRED TOOLS
- Drill
- Drill Bit: 7/8 in.
- Saw (Metal)
- Utility Knife (Rubber)
- Screwdrivers
- Wrench/Socket: 3/8 in.
INSTALLATION INSTRUCTIONS
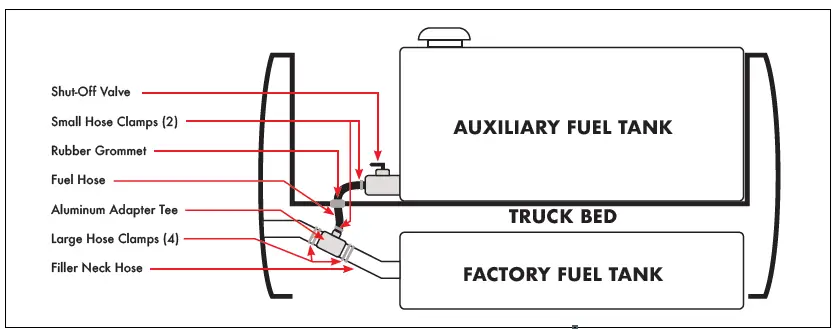
- Select the desired location and fasten the auxiliary tank to the bed of your truck.
- Mark the mounting tab locations and drill a 3/8 in. hole for each tab.
- Secure the auxiliary tank using 3/8 in. by 1 1/2 in. bolts, flat washers (not included) on each side, and locking washers to secure the nuts.
- Install the aluminum adapter into the filler neck.
- If the filler neck is metal, remove from the vehicle before cutting. If the filler neck is a flexible rubber hose, cut the neck, insert the aluminum adapter tee and tighten the hose clamps. Position the valve on the aluminum adapter tee facing upward.
- Remove the drain plug from the auxiliary tank and install the shut-off valve (closed position). Use anti-seize.
- Before drilling, check the underside of the vehicle to avoid wiring, brake, and fuel lines.
- Drill a 7/8 in. hole in the bed of the truck near the area of the shut-off valve.
- Connect the 3/8 in. fuel hose to the shut-off valve and secure with a hose clamp.
- Feed the 3/8 in. fuel hose through the truck bed and install on adapter tee valve. Secure with hose clamps
- Fill both tanks with fuel. Always fill the factory tank first. Open the shut-off valve and check the system for leaks.
 Not responsible for altered products. No claims are made regarding any lifting devices. Any and all claims implied in this document excluded.


