![]() NestDB2VerMtBlkUSA Vertical Adjustable Angle Mount
NestDB2VerMtBlkUSA Vertical Adjustable Angle Mount
User Manual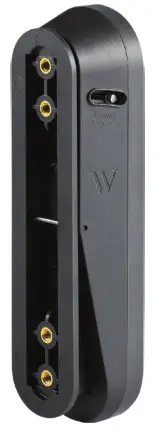
Package Includes
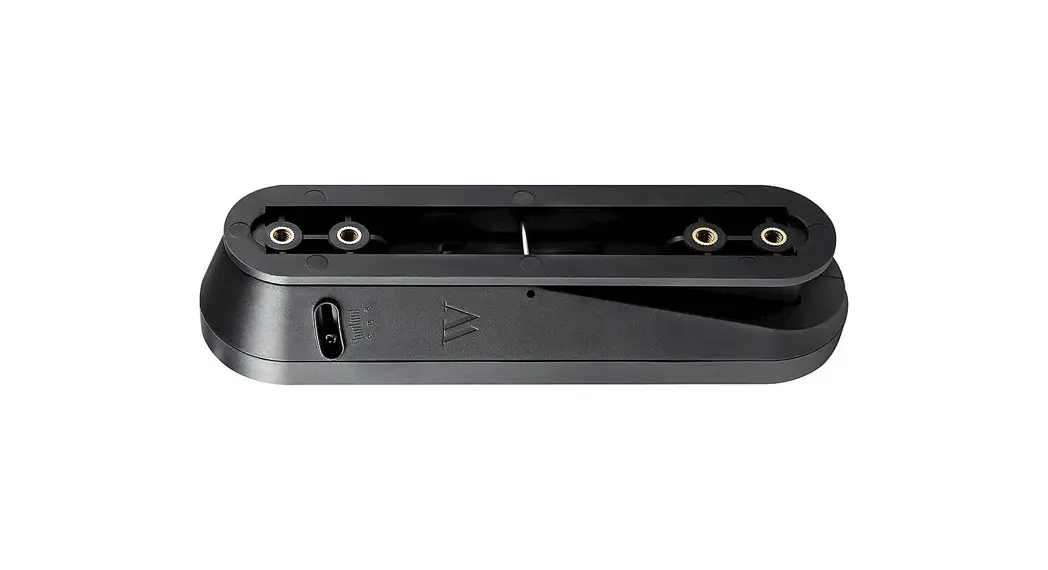
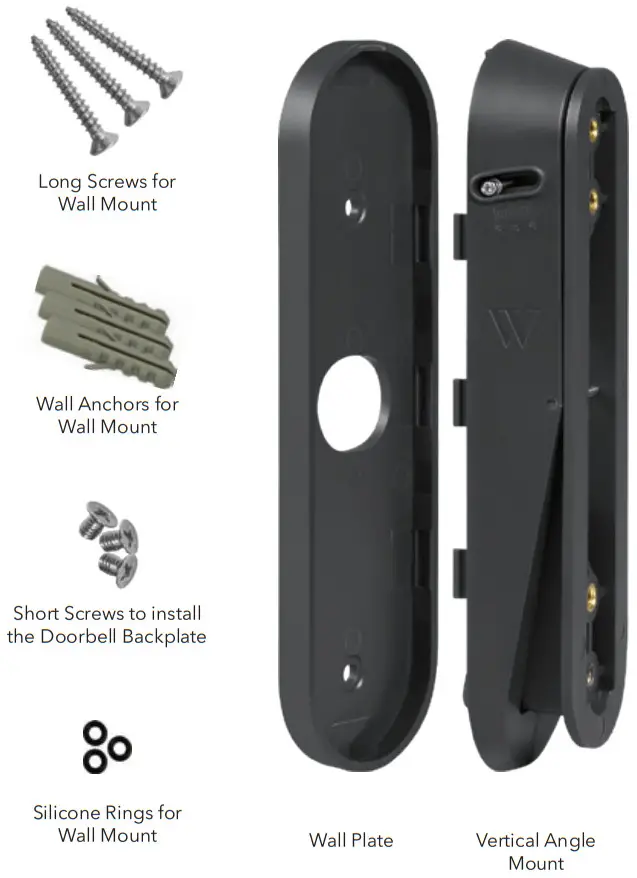
- 1 x Vertical Angle Mount
- 1 x Wall Plate
- 3 x Long Screws for Wall Mount
- 3 x Wall Anchors for Wall Mount
- 3 x Short Screws to install the Doorbell Backplate
- 3 x Silicone Rings for Wall Mount
- 1 x User Manual

Pre-Installation
- We recommend that you use a magnetic screwdriver to easily screw in the screws.
Installation
- Take down the Nest Doorbell if you have previously installed it on your wall.

- Attach the Vertical Angle Mount’s Wall Plate to the wall using the long screws and wall anchors provided for mounting. The drill bit size is 1/8″. Use the silicone rings if you have an uneven surface before mounting. Place the silicone rings underneath the mount when mounting.
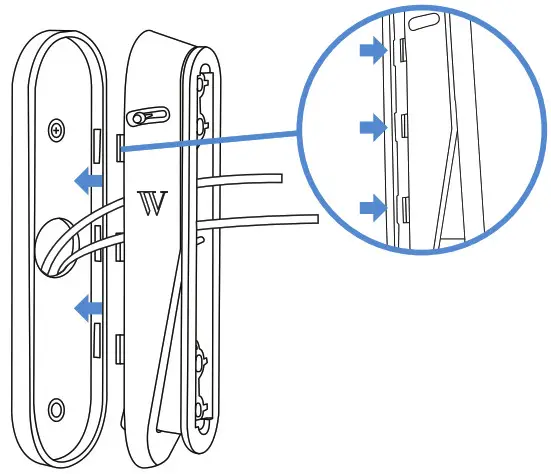
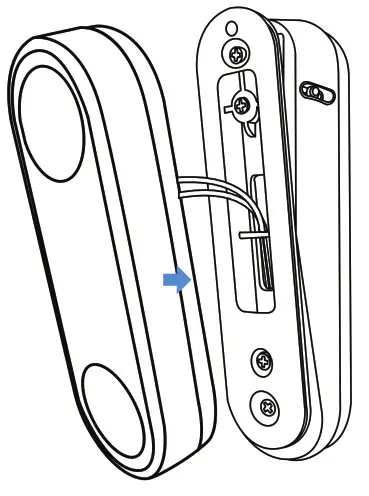
If your doorbell is hardwired: Make sure that the wires of the doorbell come out through the opening as shown below.
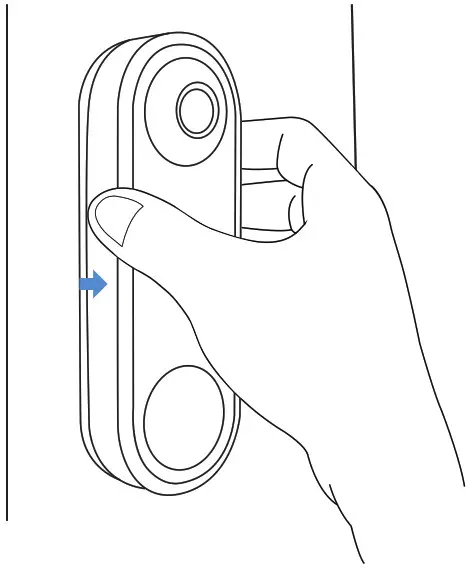
- Attach the Vertical Angle Mount onto its wall plate. When attaching the Vertical Angle Mount, ensure that the clasps inside of these two plates are aligned and push hard until you hear a “click” sound.
 Note:
Note:
If you want to adjust your doorbell facing upwards after the installation, just turn the Vertical Angle Mount upside down before attaching it to its wall plate. You can detach the Vertical Angle Mount from its wall plate by using a sharp object such as a knife or a pin.
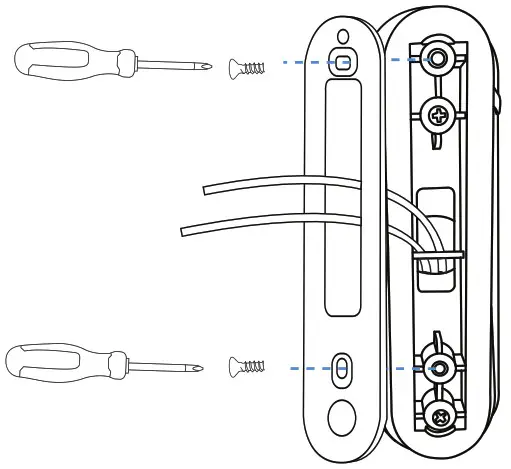
- Screw in the doorbell backplate onto the Vertical Angle Mount using the short screws.

- Attach the doorbell onto the Vertical Angle Mount.
 If your doorbell is hardwired: Connect the wires to the doorbell as shown.
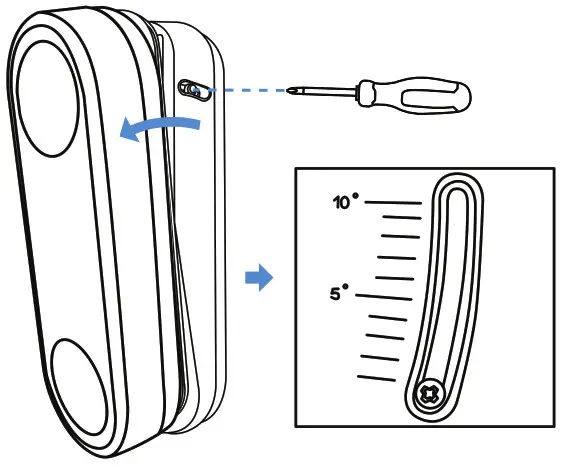
- Choose your desired angle and tighten the tiny screws on the left and right sides of the mount.


 Note:
Note: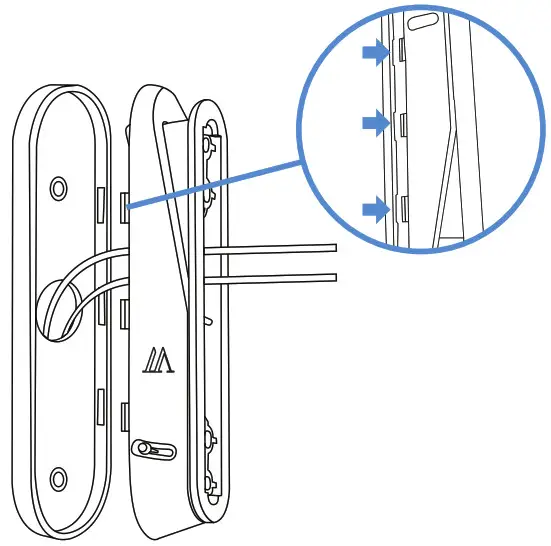 You can detach the Vertical Angle Mount from its wall plate by using a sharp object such as a knife or a pin.
 If your doorbell is hardwired: Connect the wires to the doorbell as shown.
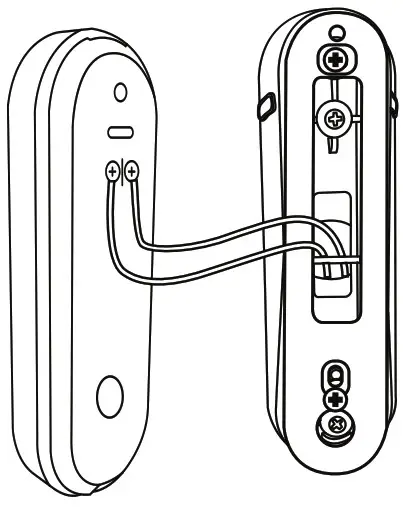
Get More Support
Scan the QR code below or, email us at [email protected]

The Wasserstein Vertical Adjustable Angle Mount has been certified by Wasserstein to meet Google’s compatibility standards. Google is not responsible for the operation of this product or its compliance with any applicable safety or other requirements.
Learn more at g.co/madeforgoogle.
Google’s “made for” badge, Google Nest Doorbell (battery), and related marks are trademarks of Google LLC.
Google Nest Doorbell (battery) is not included.
Wasserstein is not affiliated with Google LLC.
Wasserstein is a trademark of Dropcases Ltd.
Google Nest Doorbell (battery) is a trademark of Google LLC.
![]() For more information, please visit:
For more information, please visit:
www.wasserstein-home.com
Made in China


