![]() DAG2500-48S FXS Analog VoIP Gateway
DAG2500-48S FXS Analog VoIP Gateway
Installation Guide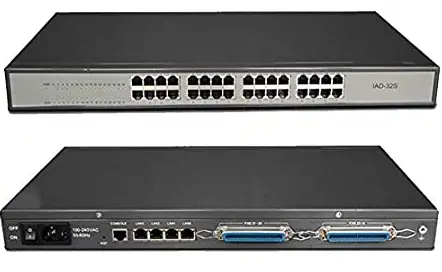 Quick Installation Guide
DAG2500-48S
DAG2500-72S
DAG2500-96S
DAG2500-48S FXS Analog VoIP Gateway
Thanks for Choosing Dinstar’s VoIP Gateway!
Please read this guide carefully before installing the gateway. If you need any technical support, please contact us .
Tel: +86 755 61919966
Email: [email protected]
Website: www.dinstar.com
Product Model & Number of Ports
Port Type Model | Network Port | RJ21 | RJ45 |
| DAG2500-48S | 3 | 2 | 12 |
| DAG2500-72S | 3 | 3 | 18 |
| DAG2500-96S | 3 | 4 | 24 |
- For the DAG 2500 series product, FXS Ports support two types, RJ21 or RJ45. Please check the table above for the number of ports on specific product models;
- Please confirm your product model before installation and follow the installation guideline for the model.
Description of Indicators
Indicator | Definition | Status | Description |
| PWR | Power Indicator | On | The gateway is powered on |
| Off | The gateway is powered off or there is no power supply | ||
| RUN | Running Indicator | Slow Flashing | The gateway is running properly |
| Fast Flashing | SIP account is registered successfully | ||
| Off | The gateway is running improperly | ||
| FXS | Telephone In-use Indicator | On | FXS port is currently occupied by a call |
| Off | FXS port is idle or faulty | ||
| MGMT | Network Link Indicator | Green Flashing | The gateway is properly connected to network |
| Off | The gateway is not connected to network or network connection is improper way. | ||
| Network Speed Indicator | On | Work at 100Mbps | |
| Off | Work at 10Mbps | ||
| GE0/ GE1 | Network Link Indicator | Green Flashing | The gateway is properly connected to network |
| Off | The gateway is not connected to network or network connection is improper way. | ||
| Network Speed Indicator | On | Work at 1000Mbps | |
| Off | Work at 10Mbps |
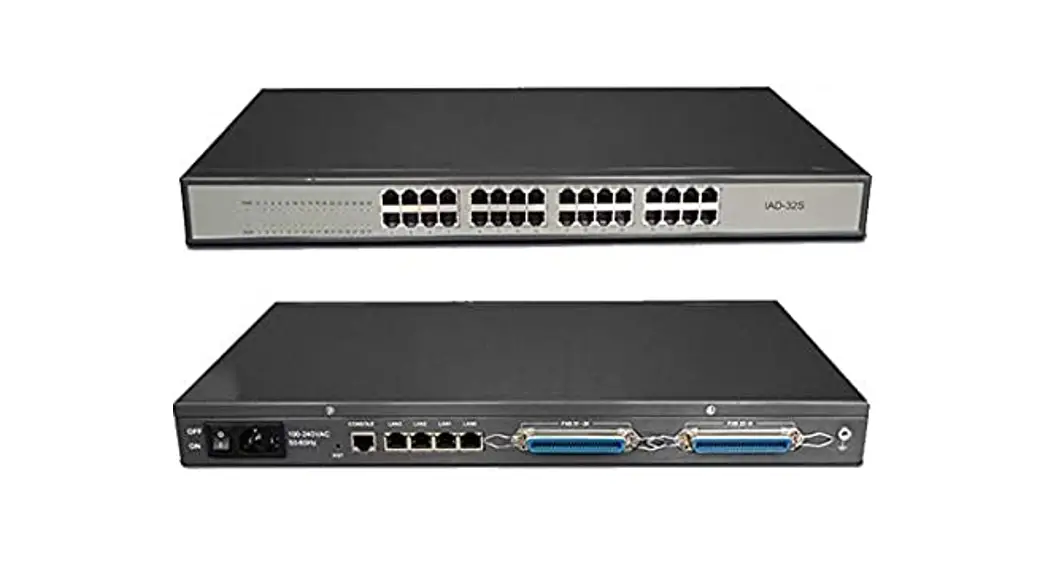
Indicators & Interfaces
DAG2500-48/72/96S Note: DAG2500-48/72/96S has a similar physical appearance except for the different number of ports. And the AUX port on the front panel is a reserved interface.
Installation Attentions
- When installing the device, please confirm the type of telephone interface of the device: The telephone interface type of the DAG2500-48S/72S/96S is RJ21 or RJ45;
- Please go to RJ45 & RJ21 Wire Sequence of this guideline to get more information about wire sequence.
- Anti-jamming: to reduce the interference with telephone calls, it’s highly recommended that telephone lines connected to the gateway should be placed away from power cables.
- Power supply: the power adapter of the gateway accepts 100-240V AC power supply. Please ensure safe and stable power supply (The DAG2500-48/72/96S supports a dual 220v power supply or dual 48v power supply).
- Network bandwidth: please ensure there is enough network bandwidth so as to guarantee stabilized running of the gateway.
- Temperature and humidity: to avoid any accident that might cause malfunction, it’s advised to install the gateway in an equipment room where temperature and humidity are appropriate.
- Ventilation:to avoid overheating, please do not pile up the gateway with other devices and make sure the gateway has good ventilation around.
- Mechanical load:please make sure the gateway is placed steadily to avoid damage. It’s highly advised to horizontally place the gateway on a flat surface or a cabinet.
Installation Instructions
Connection Diagram for DAG2500-48S/72S/96S
Connect gateway with network via a switch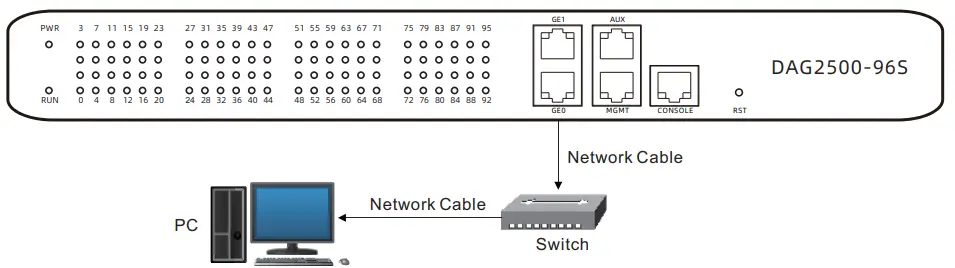 Connect FXS ports with analog phones, connect gateway with power input and grounding lug
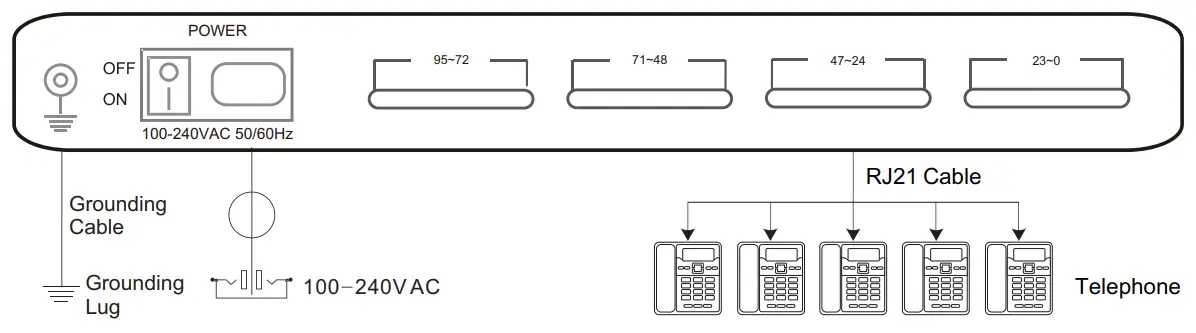
RJ45 & RJ21 Wire Sequence
·RJ45 Wire Sequence
DAG2500-48S/72S/96S support RJ45 Interfaces for FXS connections. One RJ45 cable can be split into four pairs of RJ11 interfaces. The outlook wire sequence of RJ45 cable is shown as follows:
| Pair 1 | Orange & White |
| Orange | |
| Pair 2 | Green & White |
| Green | |
| Pair 3 | Blue& White |
| Blue | |
| Pair 4 | Brown & White |
| Brown |
·RJ21 Wire Sequence
DAG2500-48S/72S/96S support RJ21 Interfaces for FXS connections. One RJ21 cable has 25 pairs of wires, but the 25 pair of wires never used. It means that RJ21 interface only support 24 pairs of RJ11 interfaces.
| Call No. | 0 | 1 | 2 | 3 | 4 | |||||
| Colour | White | Blue | White | Orange | White | Green | White | Brown | White | Slate |
| PIN No. | P1 | P26 | P2 | P27 | P3 | P28 | P4 | P29 | P5 | P30 |
| Call No. | 5 | 6 | 7 | 8 | 9 | |||||
| Colour | Red | Blue | Red | Orange | Red | Green | Red | Brown | Red | Slate |
| PIN No. | P6 | P31 | P7 | P32 | P8 | P33 | P9 | P34 | P10 | P35 |
| Call No. | 10 | 11 | 12 | 13 | 14 | |||||
| Colour | Black | Blue | Black | Orange | Black | Green | Black | Brown | Black | Slate |
| PIN No. | P11 | P36 | P12 | P37 | P13 | P38 | P14 | P39 | P15 | P40 |
| Call No. | 15 | 16 | 17 | 18 | 19 | |||||
| Colour | Yellow | Blue | Yellow | Orange | Yellow | Green | Yellow | Brown | Yellow | Slate |
| PIN No. | P16 | P41 | P17 | P42 | P18 | P43 | P19 | P44 | P20 | P45 |
| Call No. | 20 | 21 | 22 | 23 | 24 | |||||
| Colour | Violet | Blue | Violet | Orange | Violet | Green | Violet | Brown | Violet | Slate |
| PIN No. | P21 | P46 | P22 | P47 | P23 | P48 | P24 | P49 | P25 | P50 |
Modify PC’s IP Address
To log in the Web Management System of the gateway, firstly, you need to modify the IP address of PC which is used to access the gateway and to make it at the same network segment with the gateway.
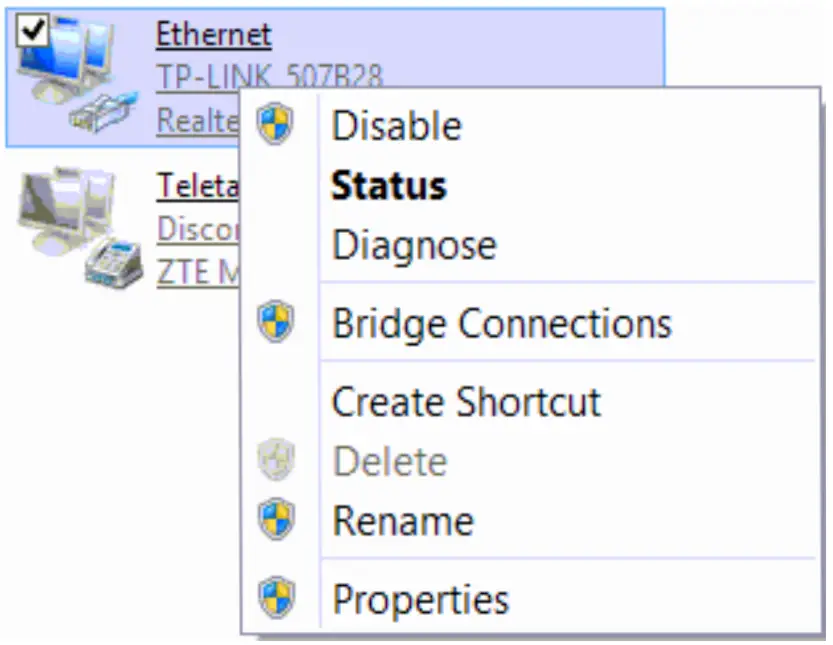
- On the PC, click ‘Network (or Ethernet) → Properties’.

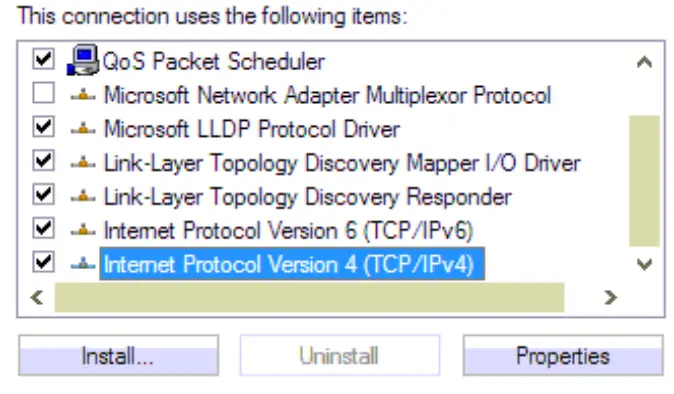
- Double-click ‘Internet Protocol Version 4 (TCP/IPv4)’.

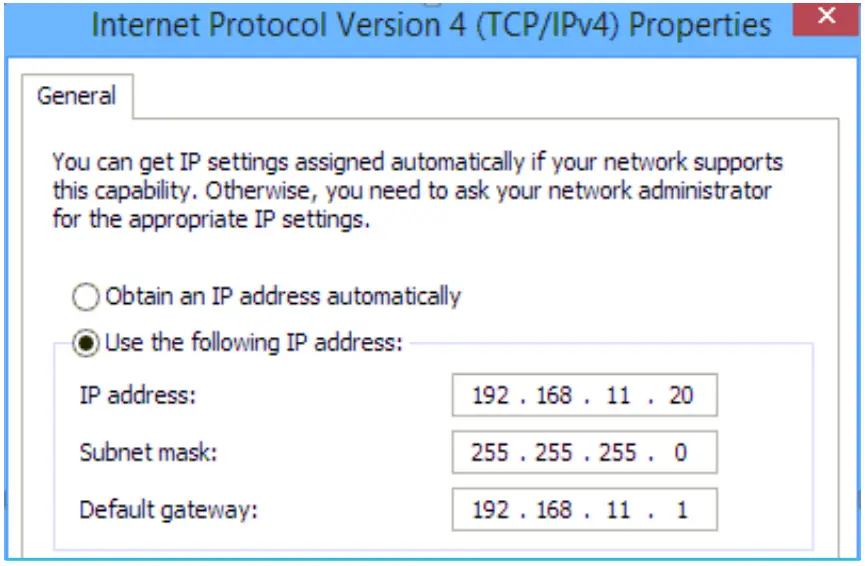
- Select ‘Use the following IP address’, and then enter an available IP address ‘192.168.11.XXX’ which is at the same network segment with ‘192.168.11.1’.

Log in Web Management System
Enter the gateway’s IP address in the browser (The default IP is 192.168.11.1).
Enter the administrator’s username and password to access the Web GUI. (By default the admin password is admin)
Modify Gateway’s IP Address
If you want to modify the IP address of the gateway, please click ‘Network → Local Network’ in the navigation tree on the left of the Web Management System, and then input new IP address and DNS server address on the displayed interface.
Configure Gateway
(1) Configure SIP Server
Log in the Web Management System of the gateway, and then click SIP Server in the navigation tree and then enter the address of the SIP server which is to be registered.
Click Save in the last.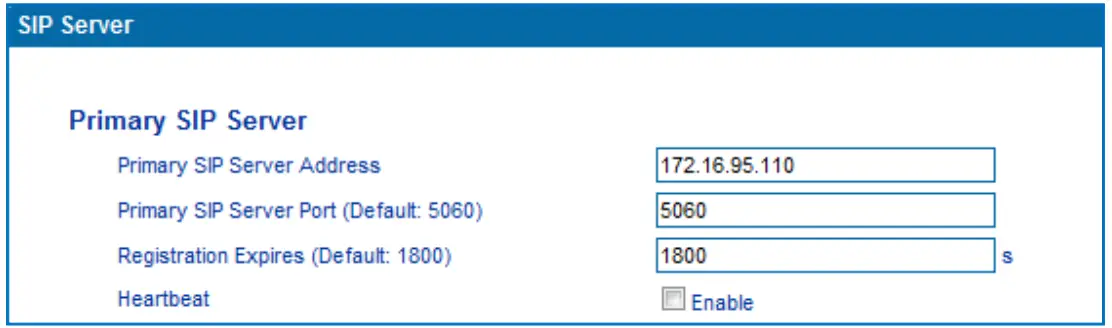 (2) Configure SIP Account Information
Click Port in the navigation tree on the left, and then click Add. Input the SIP account and authentication password assigned by the SIP server.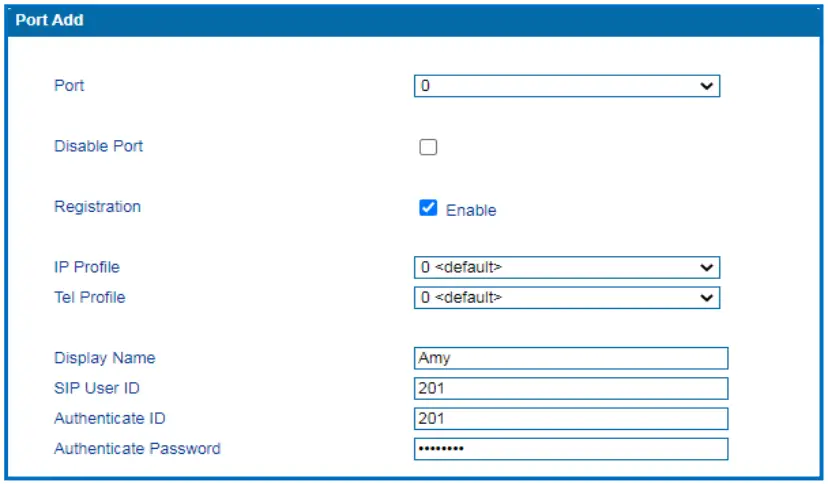 Click Save and then restart the gateway for the new configurations to take effect.
Basic Operations
Dial *158# to query the IP address of LAN port of the gateway;
Dial *159# to query the IP address of WAN port of the gateway;
Dial *114# to query the telephone number of a FXS port;
Dial *165*000000# to restore default IP address, username and password;
Restore factory default settings:
- dial *166*000000#;
- press the RST button for 7 seconds;then restart by manual;
- Log in the gateway and then click ‘Tools → Factory Reset’ , then click Apply and restart the gateway.
Restart the gateway:
- Dial *111# to restart the gateway.
- Log in Web Management System, click ‘Tools → Restart’ in the navigation tree on the left, and then click Restart on the displayed interface.
More Details
This document only provides instructions for quick installation and basic configuration, For detailed configuration and parameter explanation, please refer to user manual or
ask for online technical support.
![]() IP Communication Solutions
IP Communication Solutions
Shenzhen Dinstar Co., Ltd.
Website: http://www.dinstar.com http://www.dinstar.com/


