DRAGONTOUCH 28368684 InstantFun 2 Kids Print Camera User Manual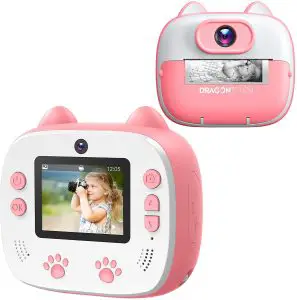
WHAT’S IN THE BOX
- InstantFun 2
Kids Camera × 1
- Print Paper Roll × 5

- Carrying Bag × 1

- Color Pen Set × 1

- Cartoon Sticker × 1

- Lanyard × 1

- Type-C Cable × 1

- Quick Start Guide × 1

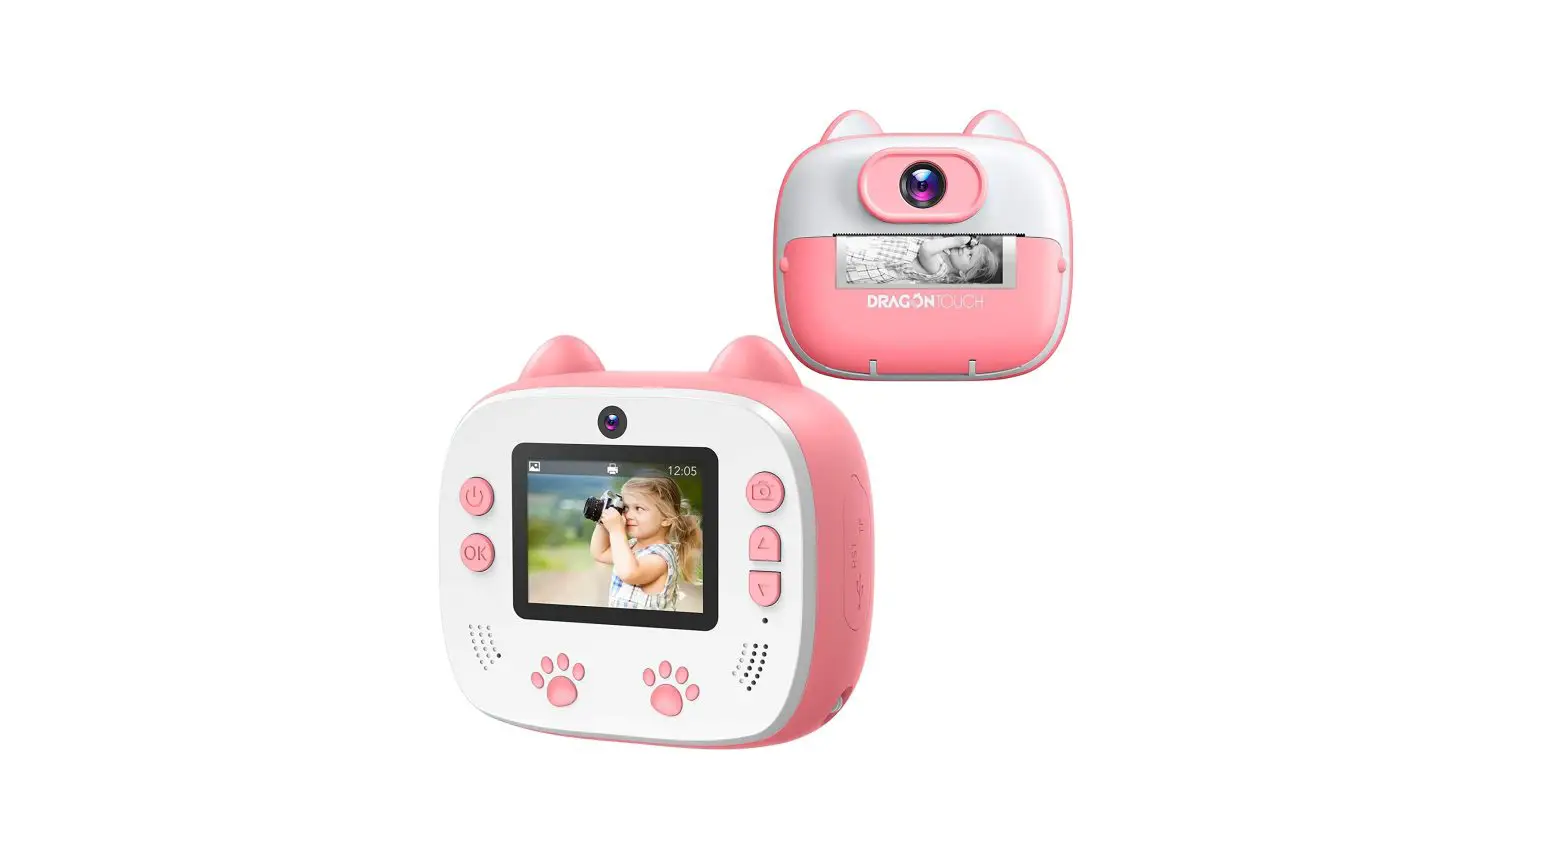
PRODUCT FEATURES
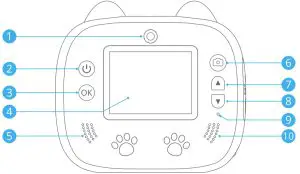
- Front camera
- Power/Menu button
- OK/Print button
- Screen
- Microphone
- Photo/Video button
- Up/Switch camera
- Down/Back button
- Indicator light
- Speaker
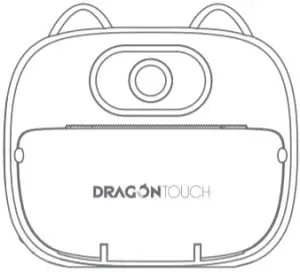
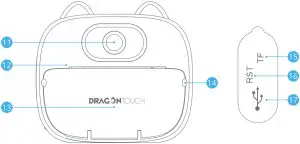
- Rear camera
- Paper exit
- Paper slot
- Paper slot switch
- microSD card slot
- Reset switch
- USB Type-C port
PRODUCT SPECIFICATIONS
- Dimension: 95.5 × 45.5 × 86mm
- Weight: 350g
- Display: 2” LCD screen
- microSD Card: max support 32G microSD card (not included)
- Battery: 1000mAh
- Working Hours: 2 hours
- Input: 5V/2A
- Language:
- English
- Deutsch
- Español
- Français
- Italiano
- Pусский язык
- 한국어 日本語
- 中文简体
- 中文繁體
- Video Resolution: FHD, HD
- Image Quality: 26MP, 12MP, 8MP, 5MP, 3MP, 1MP
GETTING STARTED
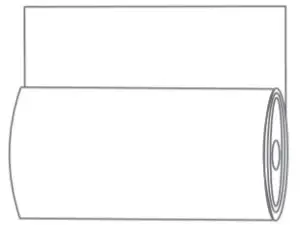
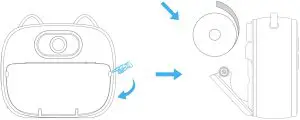
Installing Printing Paper
Open the lid and put the paper into the paper slot. The paper should be oriented according to the picture shown below. Make sure 1in (5cm) of printer paper is sticking out when closing the lid.
Note:
- The size of the thermal print paper is 2 1/4” × 50’ (58mm × 15m). We highly recommend you purchase printer paper refills from the product manufacturer to ensure proper function.
- For best results, the camera should be turned on and allowed to warm up for a few minutes before printing photos.
Inserting microSD Card
This camera can instantly print a photo without a microSD card, but if you want to save photos and videos, you must install a microSD card (not included) in the microSD card slot. This camera supports up to 32GB memory cards. The memory cards must be formatted before use.
Note: This camera can only support an up to 32GB memory card.
Charging and Powering On
Connect the USB Type-C cable to the USB Type-C port on the camera and plug the cable into a powered USB port. The indicator light will turn red when it is charging. The light will turn off when it is fully charged. When the charging is done, press and hold ![]() the to turn on the camera.
the to turn on the camera.
Note: Charging the camera must be done with adult supervision.
Taking Photos and Recording Videos
After turning the camera on, it is in photo mode. Press and hold the![]() to switch between the photo and video mode.
to switch between the photo and video mode.
In the photo mode, press the ![]() to take photos.
to take photos.
In the video mode, press the ![]() to start recording video and press it again to end recording.
to start recording video and press it again to end recording.
Playback
Press and hold ![]() the to enter the playback mode and press the
the to enter the playback mode and press the ![]() or
or ![]() to scroll through your files. You can print or delete the selected file by pressing the. Press
to scroll through your files. You can print or delete the selected file by pressing the. Press ![]() and hold
and hold ![]() to exit.
to exit.
Delete Files
Enter the playback mode and press the ![]() or
or ![]() button to scroll through your files. You can delete the selected file by pressing the
button to scroll through your files. You can delete the selected file by pressing the ![]() and choose Delete, press
and choose Delete, press ![]() to confirm.
to confirm.
Printing Mode
When in the Photo mode, press the ![]() to turn on the Printing mode, the
to turn on the Printing mode, the ![]() will appear on the screen. When you press the to take a photo, the photo will be printed instantly. Press the
will appear on the screen. When you press the to take a photo, the photo will be printed instantly. Press the ![]() again to exit the instant Printing mode.
again to exit the instant Printing mode.
You can also print photos saved on the camera. Press and hold the ![]() to enter playback mode. Press the
to enter playback mode. Press the ![]() to turn on the Printing mode, the
to turn on the Printing mode, the ![]() will appear on the screen. Choose the photo by using the
will appear on the screen. Choose the photo by using the ![]() and
and ![]() ,
, ![]() and press and confirm printing, the photo will be printed instantly. Press and hold
and press and confirm printing, the photo will be printed instantly. Press and hold ![]() to exit.
to exit.
Switch Cameras
Press and hold the to switch between the front and rear cameras.
Filters and Frames
In the photo mode, press the ![]() or
or ![]() to select different filters and frames.
to select different filters and frames.
Reset
When the camera cannot work properly, a reset operation is required. Toggle the RESET key once to reset the camera to factory default settings.
Settings
Press ![]() the to enter the settings menu. Press the
the to enter the settings menu. Press the ![]() or
or ![]() to select settings and press the
to select settings and press the ![]() to confirm.
to confirm.
- Print Shade: High/Mid/Low
Choose different degrees of print density to change how dark the printed photo appears. - Resolution: HD/FHD
You can choose the video resolution. - Image Quality: 1MP/3MP/5MP/8MP/12MP/18MP/26MP
You can choose the image quality. - Delay Photo: Off/3s/5s/10s
You can take a photo with a delay of 3s/5s/10s. - Three Photo: On/Off
Turn on the Three Photo feature, three photos will be taken in quick succession after you press the shutter button. - Cyclic Record: Off/Three Minutes/Five Minutes/Ten Minutes
You can set loop recording time and this camera continues to record videos of the preset time length. When the memory card is full, it will replace the previously recorded material with the new content. - White Balance: Auto/Sunlight/Cloudy/Tungsten/Fluorescent
It can adjust the color temperature of videos and photos to optimize for cool or warm lighting conditions. - Auto Sleep: On/Off
It helps to turn off the display after a period of inactivity to save battery life. - Photo Zoom: On/Off
Turn on Photo Zoom, in the photo or video mode, press or to adjust the zoom level. - Date Tag: On/Off
You can add a date stamp to your photo or video. - Beep Sound: Off/Big/Small
You can adjust the volume of the camera.
Time Setting: You can set the date and time. - Auto Power-off: Off/Three Minutes/Five Minutes/Ten Minutes
To preserve battery life, you can set the auto-off time to make the camera automatically turn off. - Language Setting:
- English
- Deutsch
- Español
- Français
- Italiano
- Pусский язык
- 한국어
- 日本語
- 中文简体
- 中文繁體
- Format: To keep your microSD card in good condition, reformat it on a regular basis. Reformatting erases all your content, please make sure to offload your photos and videos first.
- Reset System: This option resets all settings to their default values.
- Version: You can check the firmware version of the camera.
WARNING
- This camera includes small components and is not recommended for children under 3 years of age.
- Children should be under adult supervision while using this product.
- For your safety, please use the original USB cables provided to charge the camera.
- Avoid exposing the camera to excessive heat, fire, or hot temperatures.
- The built-in battery cannot be removed or replaced. If damaged, please contact the customer service. The charging should be done by an adult or under adult supervision.
CONTACT US
For any inquiries with Dragon Touch products, please feel free to contact us, we will respond within 24 hours.
E-mail: [email protected]
Tel: 888-811-1140 (US) Mon-Fri (except holidays) 9am-5pm (EST)
Official website: www.dragontouch.com
The microSD, microSDHC, microSDXC and SD marks and logos are trademarks of SD-3C, LLC.
![]()


