![]() QUICK USER GUIDE
QUICK USER GUIDE
LTE CPE
OA-B48
Before Installing the ODU
- It is important to comply with the precautions listed below before installing.
- It must be installed by qualified service personnel who are well-trained in the correct procedures for installing the equipment.
- Avoid installing or working on equipment in adverse weather conditions.
- Do not disassemble the product. Warranty void if seal is broken.
- Please install the device underneath the eaves of the house or the eaves of the equipment room on the rooftop.
- Do not install the device on the lightning rod pole. A bolt of random lightning could easily cause fatal damage to the device.
- Ensure that the device is within the shielding angle of the lightning rod.
- Lightning I Lightning induction I EMD damage is NOT covered under warranty.
About This Document
This document serves as a brief overview and setup guide for OA series ODUs (Outdoor Units). The OA series is an LTE outdoor unit. In this document, the terms ODU, Outdoor CPE, and Outdoor Unit are used interchangeably.
Version No. : V1.0 Release Time: 2020-12
Note: Because of the product version upgrade or other reasons, the content of the document will not be updated on a regular basis. Unless otherwise agreed, this document is used only as a guide, all statements, information, and advice in this document do not constitute any express or implied guarantee.
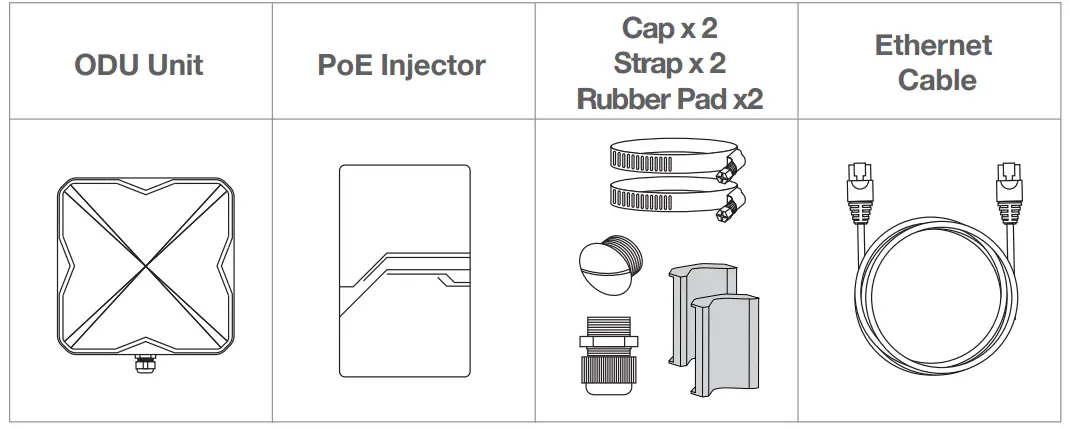
Included Hardware
Ensure that you have everything required to properly set up your device.
SIM Card Installation
Step 1. Power off the ODU, Insert the SIM card into the SIM slot located on the bottom panel.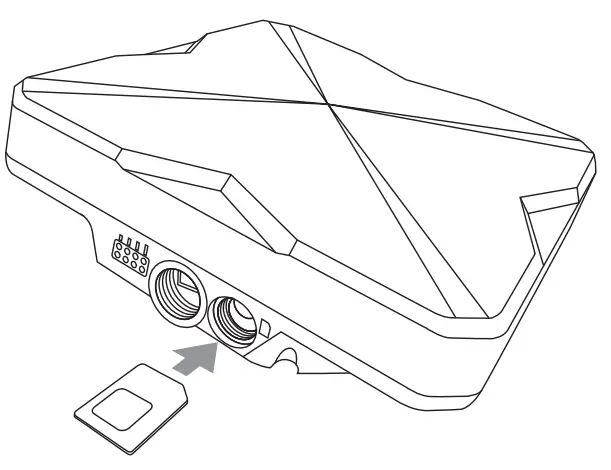
Step 2. Place the protective cap on the SIM slot after insertion.
Step 3. Screw the protective cap firmly to protect the SIM slot against water and dust.
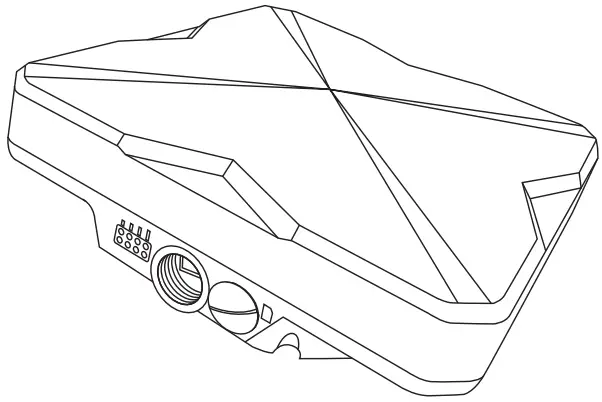
Note: The ODU uses a Standard-size SIM card (Also called, Mini SIM or 2FF SIM card)
Installing Outdoor Unit
Mounting kit :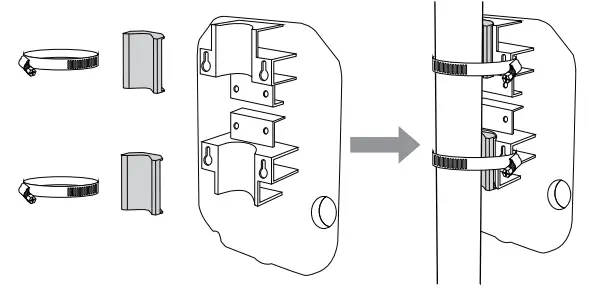 Note: The Mounting Pole’s diameter should be 33-57mm.
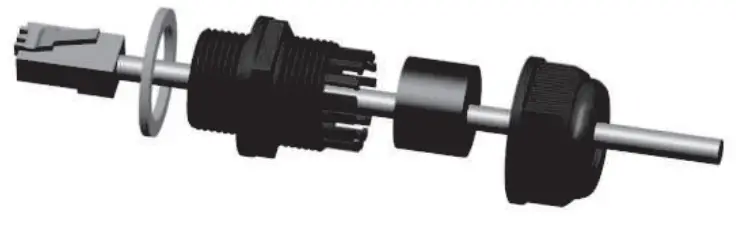
Header Installation :
Note: LAN Cable’s diameter should be 5-10mm.
Wiring Diagram
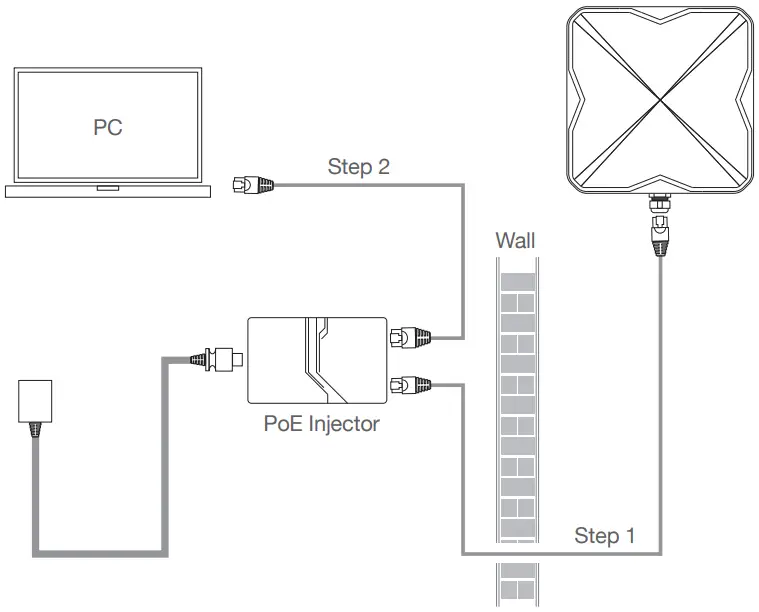
Note: Make sure SIM is inserted correctly before powering up.
Step 1 Connect the (CAT 5e) Outdoor Ethernet cable between ODU and the “Power + Data out” port on the PoE.
Step 2 Connect the provided indoor Ethernet cable between the ‘Data In’ port on the POE and your PC or router.
Adjusting For Optimal Installation
For best signal level and connection quality, the ODU must be aimed directly at the servicing tower. Fine tuning the signal level can be done by making small, incremental adjustments up, down, or side to side in order to improve the signal, once established. The ODU signal strength level can be observed on the RF Indicator LED lights located on the bottom panel, as shown below. The more LEDS that are lit, the stronger the signal level.
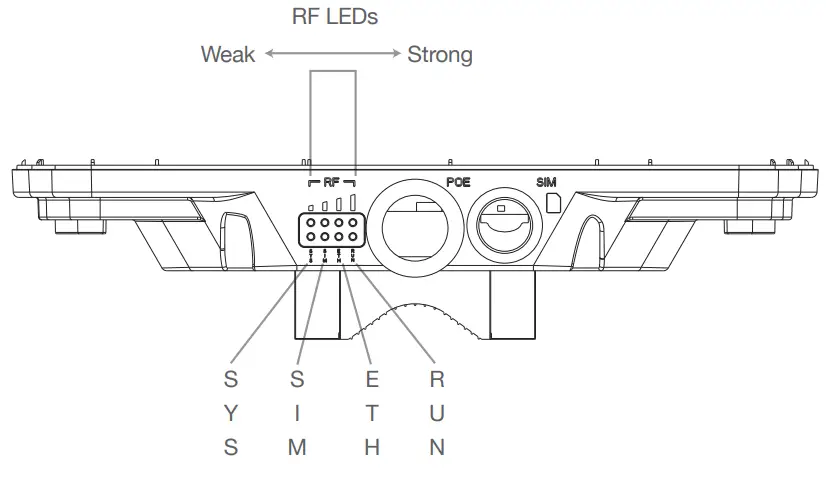
(ODU) LED Behavior
When the ODU is powered on, the LEDs on the bottom panel will have the following behavior.
| State | Description | LED Behavior | LED Illustration
|
| Signal Strength weak | Signal strength is weak | Only first signal LED steady on, the other three off | |
| Signal Strength medium | Signal Strength is medium | The first two signal LEDs steady on, the last two off | |
| Signal Strength good | Signal strength is good | The first three signal LEDs steady on, the last one-off | |
| Signal Strength strong | Signal strength is strong | MI signal LEDs steady on | |
| LTE Scanning | The CPE is searching for a frequency channel or is performing network entry | M signal LEDs blinking simultaneously | 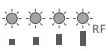 |
| LAN Connected | The CPE has a successful connection with a device on the LAN | The Ern LEO On |  |
| LAN Disconnected | The CPE does not have an Ethernet connection with the LAN | The ETli LED Off | |
| SIM card abnormal | The SIM Card ii abnormal state | The SIM LED Blinking | |
| No SIM card | The SIM Card is Undetected | The SIM LED Off | |
| SIM card normal | The SIM Card is ready | The SIM LED On | |
| SYS linked | The CPE attached to LTE network | The SYS LED On | |
| SYS no link | The CPE not attached to LTE network | The SYS LED Off | |
| CPE Operation | The CPE is operating property | The RUN LED Blinking | |
| Firmware Upgrading | The CPE is upgrading the firmware | All signal LEDs scrolling blink one by one | 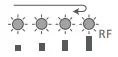 |
Use PC to Configure the ODU
After the ODU boots up properly, use the following instructions to fine-tune the direction of ODU to optimize signal level and for any advanced personalized configuration. A computer is required to execute the following steps.
Access the Web Management Page
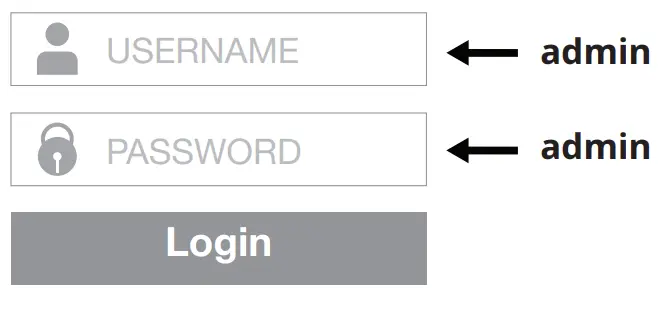
The web-based configuration utility can be used for initial device installation, parameter configuration, and function management through the browser. Ensure that the device is connected to the computer. Follow these steps to log in to the web management page:
- Open the browser, enter 192.168.0.1 in the address box, and login Username and Password.
Default IP address: 192.168.0.1
- Once logged in, an overview of current signal statistics will be displayed, and you can have a status overview on device activity.
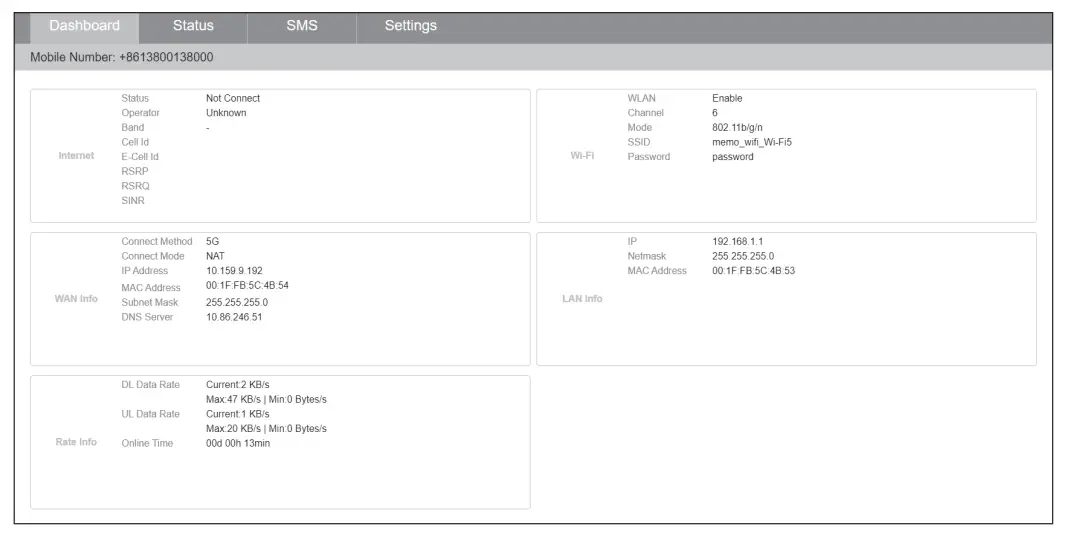
Note: You will automatically obtain the IP address and DNS server address.
SINR of 1OdB is the bare minimum to provide services. During installation, the user must always try to get the best SINR possible.
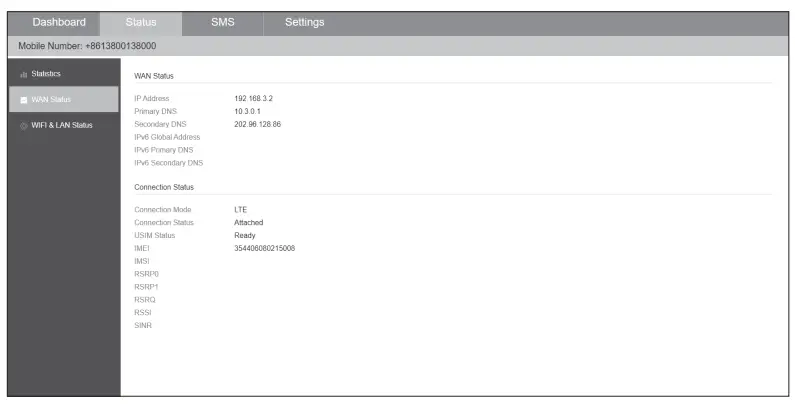 Note: SINR threshold varies per service plan. For more information, contact service support.
Basic Troubleshooting
Q1: For No Internet
Ans: Check PoE LED if lit, check if black LAN cable is plug to ODU.
Q2: LED (on the bottom side) does not light up
Ans: Make sure the ODU is correctly connected to PoE injector – Connect RJ-45 port ( marked as Power+Data Out) of PoE injector to ODU’s RJ-45 port by using an Ethernet cable.
Q3: Unable to get access to the “Info Page”
Ans:
- Power supply (ODU to PoE injector and power adapter) is correctly connected.
- Please enable the Laptop PC to automatically obtain IP address.
- IP address is correct? Default IP address is
192.168.0.1 - Ensure PoE is Powered On.
- Ensure Cabling is Correct.
- Power Cycle PoE.
Note: Refer to Wi-Fi router manual to configure Wi-Fi, this is supplied separately.
Claim FCC Regulations
FCC Regulations
- This device complies with part 15 of the FCC Rules. Operation is subject to the following two conditions:
(1) This device may not cause harmful interference. and (2) this device must accept any interference received, including interference that may cause undesired operation. - Changes or modifications not expressly approved by the party responsible for compliance could void the user`s authority to operate the equipment
- This equipment has been tested and found to comply with the limits for a Class B digital device, pursuant to part 15 of the FCC Rules. These limits are designed to provide reasonable protection against harmful interference in a residential installation. This equipment generates, uses, and can radiate radio frequency energy and, if not installed and used in accordance with the instructions. may cause harmful interference to radio communications. However, there is no guarantee that interference will not occur in a particular installation. if this equipment does cause harmful interference to radio or television reception, which can be determined 12 by turning the equipment off and on, the user is encouraged to try to correct the interference by one or more of the following measures:
- Reorient or relocate the receiving antenna.
- Increase the separation between the equipment and receiver.
- Connect the equipment into an outlet on a circuit different from that to which the receiver is connected. Consult the dealer or an experienced radio/TV technician for help.
FCC RF Exposure Compliance
This equipment complies with radio frequency (RF) exposure limits adopted by the Federal Communications Commission for an uncontrolled environment. This equipment should be installed and operated with a minimum distance 24 cm between the radiator & your body.
CE Regulations
Max. RF Power
23 dBm ± 2 dBm
RF Exposure Information
This device meets the EU requirements and the International Commission on Non-Ionizing Radiation Protection ( ICNIRP ) on the limitation of exposure of the general public to electromagnetic fields by way of health protection. To comply with the RF exposure requirements, this equipment must be operated in a minimum of 24 cm separation distance to the user.
Simplified DoC
Hereby, Green Packet Berhad declares that the radio equipment type OA series is in compliance with Directive 2014 / 53 / EU. The full text of the EU declaration of conformity is available at the following internet address: http://www.greenpacket.com/
Warranty
Hardware warranty is for one year (12 months) from the date of purchase. Customer’s unit and his accessories under normal use for the warranty period are free from error, improper or inferior workmanship, material, and design.
This Warranty does not cover damage resulting from:
- Defects and damages due to the equipment being used other than its normal and customary manner.
- An unauthorized disassembly, repair, alteration, or modifications being carried out, misuse, abuse, negligence, or accident howsoever caused.
- Defects or damage arising from improper testing, operation, maintenance, installation, or any alteration or modification.
- Use other than in accordance with the user manual, rough handling, exposure to extreme thermal or environmental conditions or a rapid change in such conditions, corrosion, oxidation, unauthorized modifications or connections, unauthorized opening or repair, repair by use of unauthorized spare parts, accidents, forces of nature, or other actions beyond the reasonable control of GP.


