MASTERVOLT 44010350 ChargeMaster Battery Charger
Installation
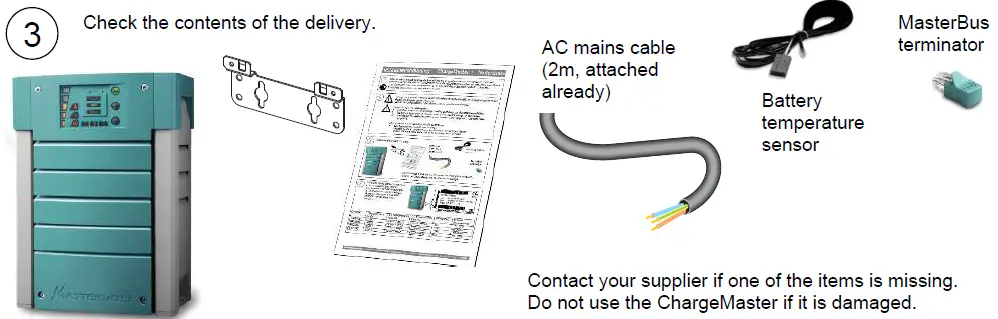
This Quick installation guide provides a brief overview of a basic ChargeMaster installation. Reading the user’s manual is still necessary for safety instructions, additional features, best performance and years of trouble-free service. The ChargeMaster 1 manual is available at www.Mastervolt.com. All electrical systems (DC and AC) must be disconnected from any power source during the entire installation! Use isolated tools! Read the safety instructions (chapter 2 of the user’s manual). Safety regulations and measures
- Install the charger according to the instructions in both the user’s and installation manual.
- Never use chargers at a location where there is danger of gas or dust explosions.
- Connections and safety features must be executed according to locally applicable regulations.
Mastervolt cannot be held liable for:
- Damage resulting from the use of the battery charger;
- Possible errors in the included manual and the consequences of these;
- Use that is inconsistent with the purpose of the product.
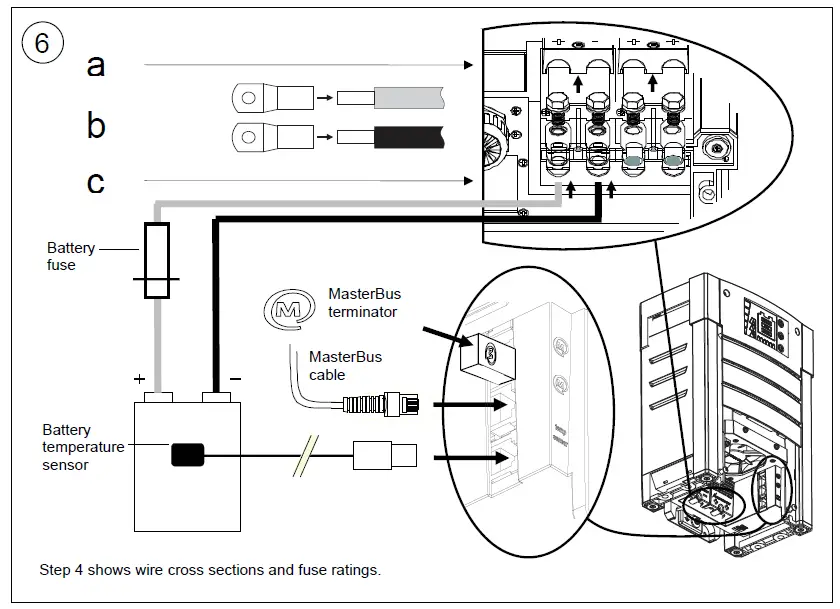
Check from the identification label if the battery voltage and current matches the DC output of the ChargeMaster. Choose the right DC wiring and fuses, see the table below for recommended values.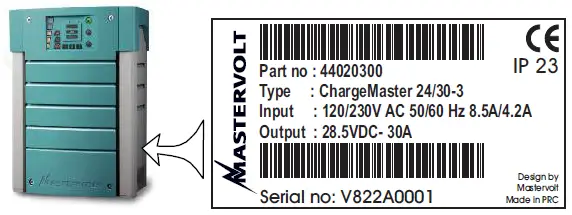
| Part no | ChargeMaster 1 model | DC Cable cross section <2m/ 6ft | DC Cable cross section 2-5m/16ft | DC fuse | Minimum battery capacity |
| 44010350 | 12/35-3 | 16mm² / 4AWG | 25mm² / 2AWG | 40A | 70-350Ah |
| 44010500 | 12/50-3 | 25mm² / 2AWG | 35mm² / 1AWG | 63A | 100-500Ah |
| 44020200 | 24/20-3 | 10mm² / 6AWG | 16mm² / 4AWG | 32A | 50-250Ah |
| 44020300 | 24/30-3 | 16mm² / 4AWG | 25mm² / 2AWG | 40A | 70-350Ah |
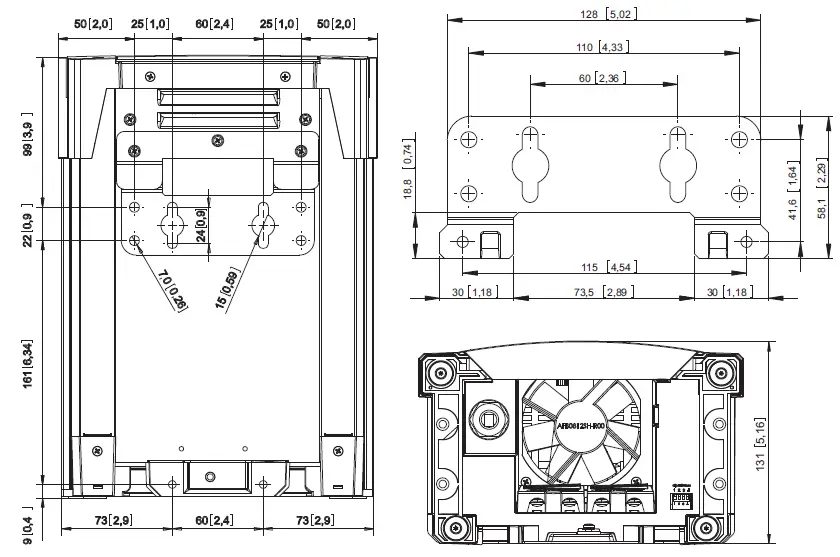
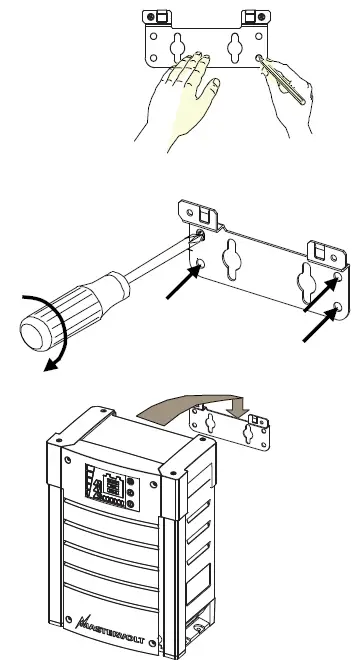
- Mount the ChargeMaster 1 to the wall. Two ways are possible.

- Mounting the bracket to the wall and fixing the ChargeMaster onto it.

- Use the dimensions on the back of this manual.

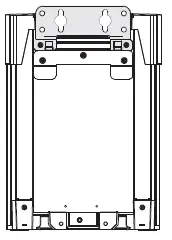
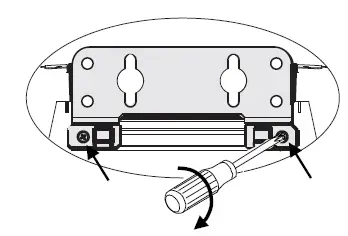
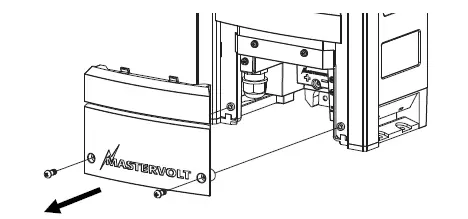
- Mounting the bracket to the ChargeMaster and hanging the ChargeMaster onto the wall.


- (B): take out the two screws before mounting the bracket.


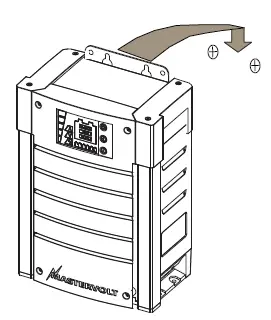
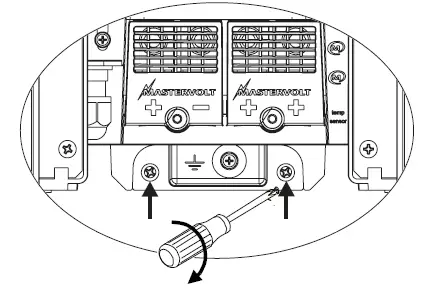
- Fix the cabinet to the wall by fastening two screws at the lower side of the cabinet.


| Model | 12/35-3 | 12/50-3 | 24/20-3 | 24/30-3 |
| Nominal input voltage: | 120/230V | 120/230V | 120/230V | 120/230V |
| Nominal input frequency: | 50/60Hz | 50/60Hz | 50/60Hz | 50/60Hz |
| Full load consumption: | 575VA | 825VA | 660VA | 925VA |
| Nominal output voltage: | 12V | 12V | 24V | 24V |
| Total maximum charge current: | 35A at 14.4V | 50A at 14.4V | 20A at 28.8V | 30A at 28.8V |
| Weight including cable and bracket: | 4kg (9Lbs) | 4kg (9Lbs) | 4kg (9Lbs) | 4kg (9Lbs) |
| DC consumption | <5mA | <5mA | <2.5mA | <2.5mA |
| Protection degree | IP23 | IP23 | IP23 | IP23 |