![]() BK2 UHF Wireless Lavalier Microphone System
BK2 UHF Wireless Lavalier Microphone System
User Manual
Product application introduction:
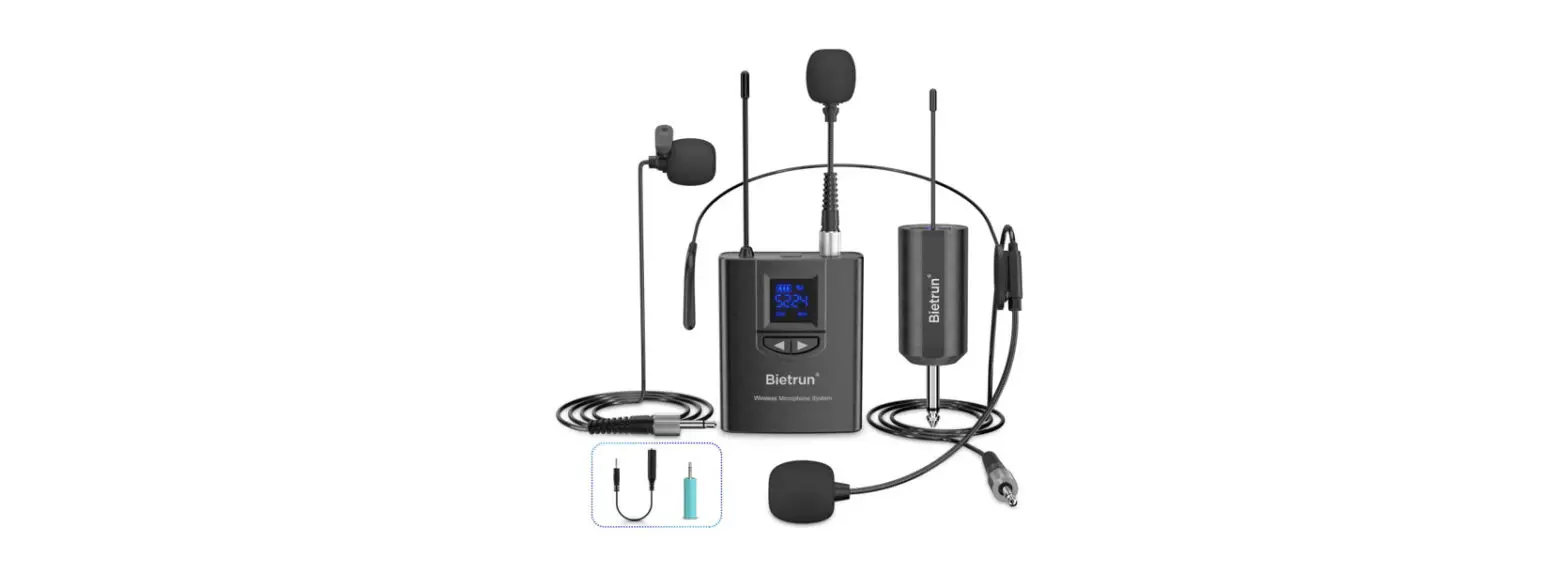
- Professional Wireless Micphone for Teacher.Coach.Short Video Recording: At class, Yoga gym, speech, church, and tour guiding, Teacher/Coach’s voice is clearly received by Wireless Headset MIC, then amplified by Voice amplifier/Home & stage speakers/Portable pa system/Mixer. or recorded by iPhone/Android/Samsung/Camera/Desktop PC/iPad. iPhone 7 & above needs lightning to 3.5 mm converter. Not Supported: Bluetooth Speaker with an aux jack. Laptop, iMac, Macbook. lt is using UHF wireless carrier frequency band design: •high-sensitivity condenser microphone•Stable & Comfortable •66-165 feet (20-50m) transmission distance•Signal stability: No delay •No radiation •Anti-howling•Anti-jamming•Constant frequency•Clearer sound quality•TRS/TRRS Converters( 6.35 to 3.5mm port) •built-in 50 channels.
- The wireless live microphone includes two parts: microphone transmitter and receiver. The receiver audio output through a 3.5mm plug, can connect to mobile phones. stereos, cameras, camcorders, and so on through different audio conversion cables. First, turn on the speaker to play music, and then turn on the power switch of the transmitter and receiver. After the automatic connection is successful, you can start karaoke or record short videos now.
With different devices to connect the use of introduction:
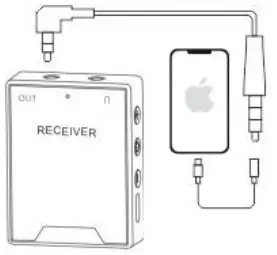
- Connect with ‘Phone and iPad without 3.5mm headset jacks
 SmartPhone Record Cable+ Lightning Audio Converter
 - Connect to android phones and tablets without 3.5mm headset jacks
 SmartPhone Record Cable+ Android Audio Converter
 - Connection mode with a mobile phone with 3.5mm headset jacks

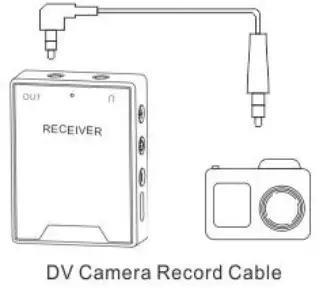
- Connection mode with other recording equipment with 3.5mm MIC headset jacks (camera, DV, mixer, speaker, etc.)headset jacks

 SmartPhone Record Cable+ Lightning Audio Converter
 SmartPhone Record Cable+ Android Audio Converter
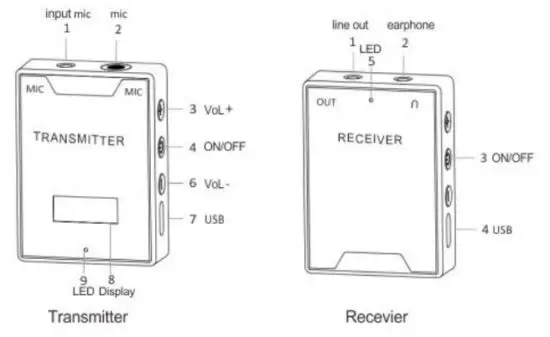
Operation Introduction:
- Pairing method: one-to-one frequency-locking pairing (mainly used in situations where multiple microphones are used at the same time, such as schools, shopping malls, and tour guides. The transmitter and receiver must be paired with one-to-one frequency locking first so that multiple devices work at the same time and have no serial frequency.)
- One to one frequency lock pairing method: The current receiver must be turned off, then turn on the transmitter, and then press and hold the transmitter “–button until it displays l’888” and then release the button. After prompt tum on the receiver power, the green light on the receiver will be on after 3 seconds. At this time, the receiver-transmitter has successfully locked one to one. In the future, this receiver can only be connected to this transmitter, and other transmitters cannot be connected to this receiver.
- Multi-device mode pairing method:
1 drag 1 mode
The wireless microphone 1 drag 1 mode supports 50 sets of wireless microphone use without cross-frequency and no interference: 50 transmitters must be tuned to different frequency bands A01, A02…A50. If multiple transmitters are turned on at the same time and there is cross-frequency interference. just long-press the “+” button for 1 second to convert to other frequency bands (such as frequency conversion to one of A02 or A03…A50) until the karaoke is normal.
1 drag 2 modes (that is A microphone and b microphone are used at the same time)
Wireless microphone 1 drag 2 mode supports 100 sets of wireless microphone use without cross-frequency and no interference: 100 sets must be tuned to different frequency bands of A01. A02…A50, or b01, b02…b50 respectively.
“ A/b microphone channel switching: first press and hold the “-” key, then short press” “power on transmitter, it switches from A01 to b01 about 3 seconds; the same operation, b01 can also be switched to A01, as long as A and b are two One microphone frequency band is A01…or A50. and the other is b01…or b50.
A wireless microphone A frequency band has a total of 50 frequency bands A01, A02…A50,
b wireless microphone b frequency band has a total of 50 frequency bands b01. b02…b50:
Just keep one wireless microphone in one of the frequency bands of A01. A02… or A50, and the other wireless microphone in one of the frequency bands of b01. b02… or b50; in this way, two wireless microphones can broadcast K songs and lectures at the same time (similar to KTV love songs) Duet).
If there are multiple wireless microphones around you working at the same time and cross-frequency interference occurs, just press and hold the “+” button for 1 second to convert to other frequency bands (for example, A wireless microphone converts to one of A02 or A03…A50: B wireless microphone frequency conversion to one of b02 or b03…b50) until the live broadcast K song is normal. - POWER ON-OFF:
Short press the ”“one-time power on. long-press the ” ” 3-second power off. - Turn Channel:
Long press the “+” button for 1 second to turn the channel (for example, long-press the “+” button for 1 second to turn the channel from A01 to A02), - Volume adjustment:
Short press the “+” or “-” button 1 time to Volume up or Volume down - ECHO set
A Continuously press”” 2 times to adjust echo, default is echo off (E00). a total of 6 levels (E01. E02… E06,E00).
Product parameters
| Audio Signal | Analog Signal | Power Supply | Lithium Polymer Battery |
| Pairing Method | 1 To 1 Hold Pairing | Battery Capacity | 450mAh |
| Voice Frequency | 20-18Khz | Working Time | <60Mah |
| Transfer Method | UHF | Charging Time | Full Time Is 120 -150Minutes |
| Carrier Frequency | 700Mhz-800Mhz | Working | 30-50Meters(Empty areas) |
| Channel | Built-in 50 Channels | Tranpsomwiettring | -10 |
Transmitter and receiver work instructions:
In charging mode: the red light is always on; when the battery is full, the red light is off.
Working mode: (1) The green light flashes slowly for 1 second to indicate waiting for pairing; (2) The green light on that indicates successful pairing; (3) The green light flashes quickly for 300 milliseconds to indicate a low battery prompt, please charge in time.
Display mode: After the transmitter is turned on, the display first displays the channel, and then displays the remaining power. Working time: 7H, 6H, 1 H, 45, 30…10 (For example. the current display of 7H or 1H means that the transmitter can still work for 7 hours or 1 hour if it displays 45 or 10, it means it can work for 45 minutes or 10 minutes);
Matters needing attention:
- The original factory-equipped transmitter or receiver is lost or damaged, and it needs to be purchased separately from the original factory to pair with the current accessories;
- Turn off the transmitter and receiver power switches in time after use;
- Do not use metal to cover the transmitter and receiver to avoid unstable signals;
- Be careful not to rain or throw into the fire when using;
- Subject to upgrade and change without notice. If in doubt, the right of interpretation belongs to the company.
- What If I Can’t Pair or No Sound
| Problem | Common Problem | Solution |
| No sound | The transmitter and receiver and audio equipment are out of power | Charge the device |
| No sound | Receiver audio 3.5mm plug connector, 6.35 plug is not plugged in or poor contact, and the connector is worn and rusted | Re-plug or turn the receiver left and right or wipe the audio connector plug |
| No sound | The purchase is 1 drag 1: The green light of the the receiver still flashes 5 seconds after the transmitter and receiver are turned on |
|
| No sound | What I bought is 1 drag 2: The green and blue lights of the receiver are still flashing 5 seconds after the transmitter and receiver are turned on | A mic transmitter and b mic transmitter respectively use one to one frequency lock pairing method to lock pairing connection receiver will be successful within 3 seconds. |
| Noise | The transmitter is too near to speakers, mobile phones, and other devices | The distance between the transmitter and audio speakers, mobile phones |
| Noise | The volume of the transmitter or speaker equipment is too loud | Turn down the volume of the transmitter or speaker equipment |
| small sound | The volume of the transmitter is relatively small or the Micphone is too far away from the mouth | Adjust the transmitter volume and the distance between the microphone and the mouth (5-10cm) |


