MARK-10 EK3 Series Ergonomics Kits User Guide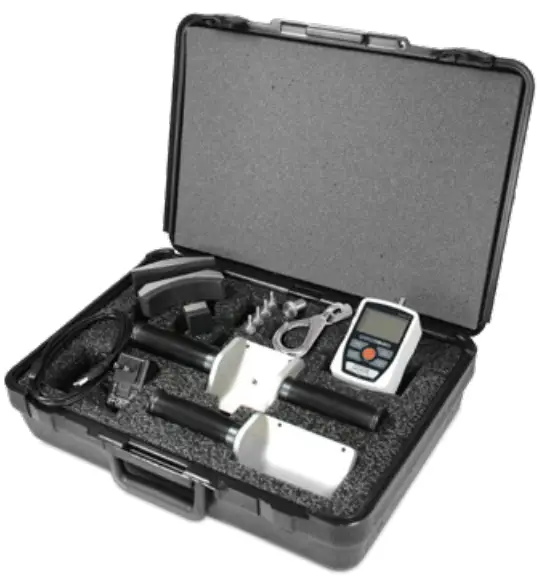
Thank you!
Thank you for purchasing a Mark-10 Series EK3 Ergonomics Kit. Please read through this Quick Start Guide and the complete force gauge User’s Guide before using this kit.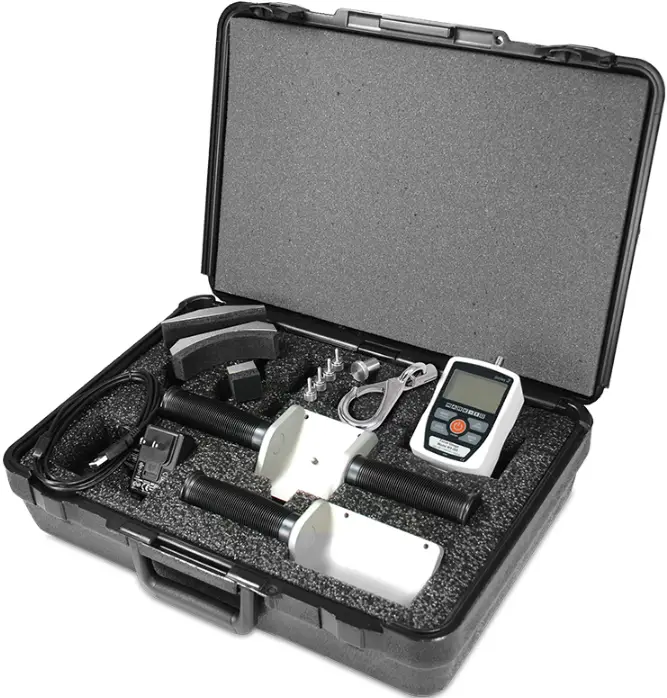
IMPORTANT SAFETY CONSIDERATIONS
Force gauges are sensitive instruments that must be treated with care. Please review the yellow safety information card included in the box.
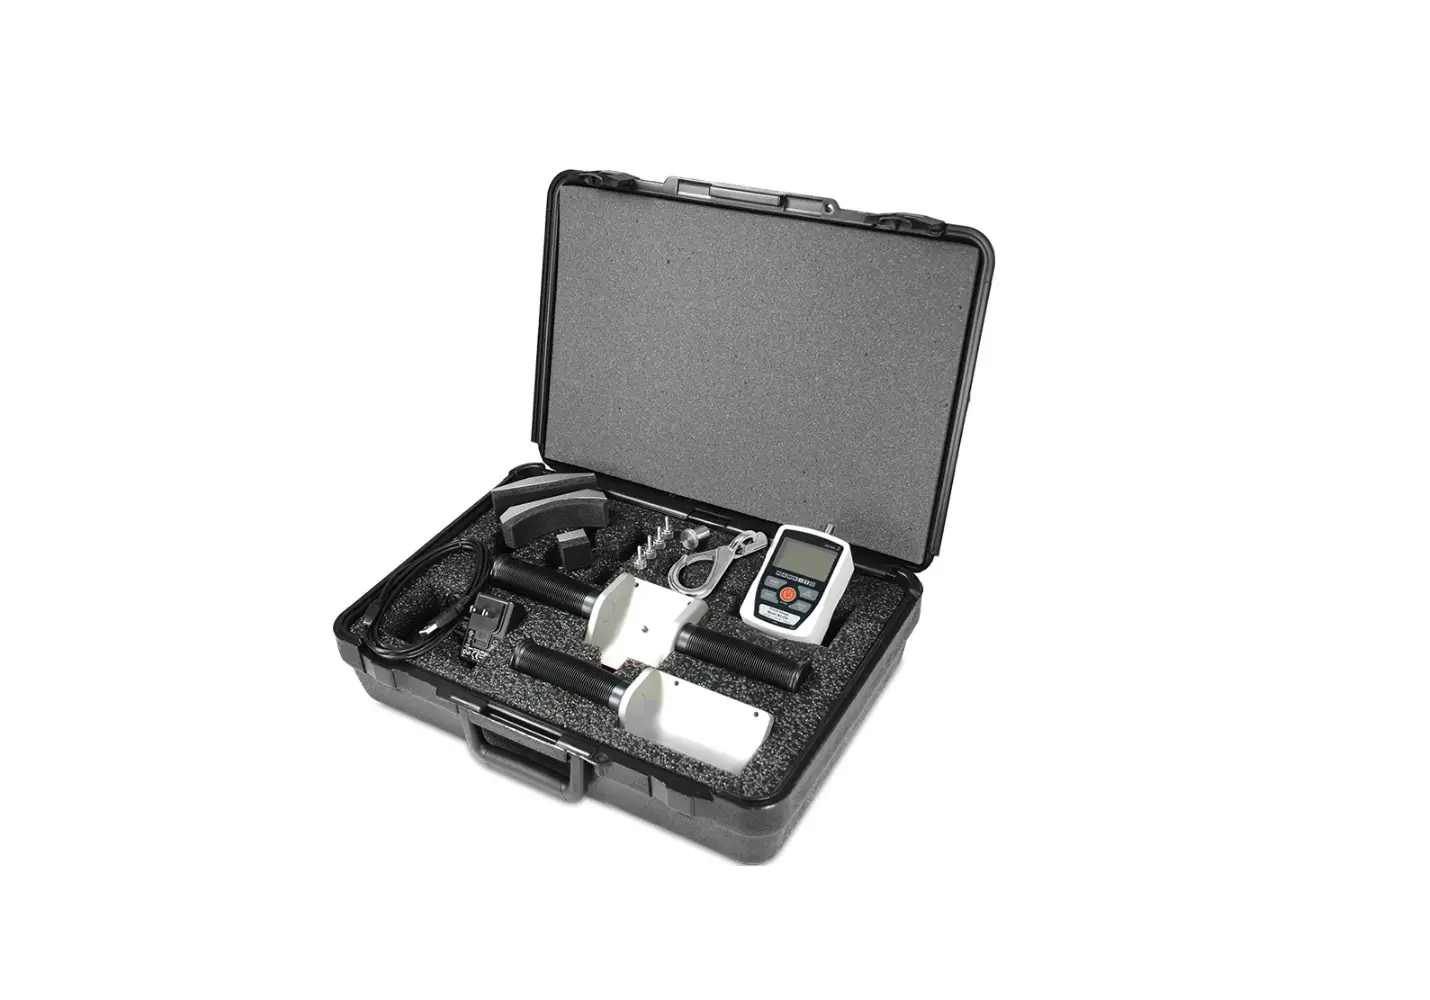
LIST OF INCLUDED ITEMS
| Qty. | Part No. | Description | EK3-100 | EK3-200 | EK3-500 |
| 1 | M3-100 | Force gauge, 100 lb F / 50 kg F / 500 N | – | – | |
| 1 | M3-200 | Force gauge, 200 lb F / 100 kg F / 1000 N | – | – | |
| 1 | M3-500 | Force gauge, 500 lb F / 250 kg F / 2500 N | – | – | |
| 1 | 08-1022 | AC adapter body with US, EU, UK, or AUS prong | |||
| 1 | AC1118 | Battery (inside the gauge) | |||
| 1 | AC1111 | USB cable, type micro B to A | |||
| 4 | 10-1023 | Thumb screw, #6-32 X 1/2 | |||
| 1 | 10-1021 | Hex jam nut, #10-32 | – | ||
| 1 | 10-1108 | Hex jam nut, 5/16-18 | – | ||
| 1 | AC1003 | Double handle grip for Series 3/2 | |||
| 1 | AC1003-1 | Single handle grip for Series 3/2 | |||
| 1 | G1019 | Padded attachment, square | |||
| 1 | G1020 | Padded attachment, rectangular | |||
| 1 | G1021 | Padded attachment, curved | |||
| 1 | G1029 | Flat attachment, #10-32F | – | ||
| 1 | G1036 | Flat attachment, 5/16-18F | – | ||
| 1 | G1112 | Padded attachment, circular | |||
| 1 | 12-1032 | Carrying case, large | |||
INSTALLING ACCESSORIES
Double and Single Handles
Attach the force gauge to the double handle grip (AC1003) or single handle grip (AC1003-1) by mating the male dowel pin in the cradle to the corresponding hole in the rear of the force gauge housing.
Then, fasten the gauge to the cradle with four included thumb screws (10-1023), as shown at left.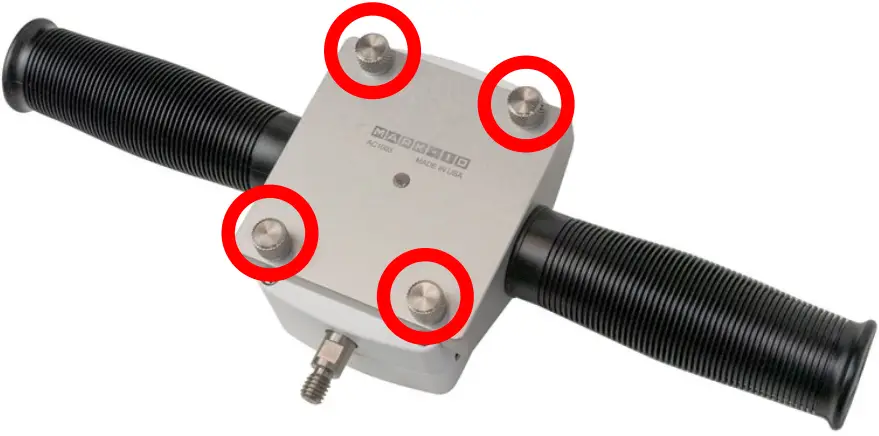
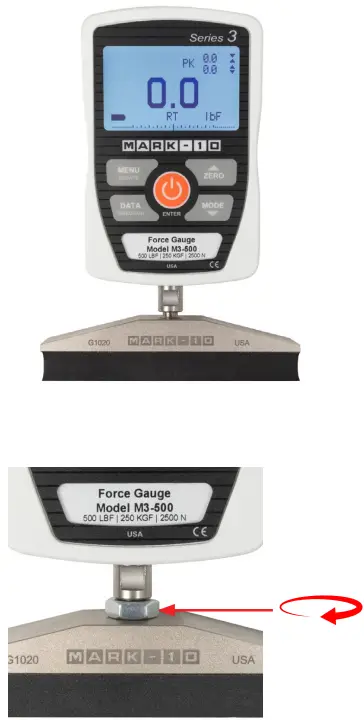
Attachments
Ergonomics attachments G1019, G1020, G1021, G1029, G1036, and G1112 thread onto the load cell shaft of the Series 3 force gauge.
Fasten the attachment onto the shaft, as shown at left.
Do not overtighten the attachment, or load cell damage can occur!
The attachments may freely rotate on the shaft, thereby self-adjusting to the shape of an object. However, if a fixed position is desired, use an included jam nut, as follows:
- Rotate the jam nut as high as possible up the load cell shaft.
- Rotate the attachment up to the jam nut, then back off until the desired position. Tighten the nut against the attachment. Friction between the nut and attachment body will prevent the attachment from loosening as shown at left.

INSTALLING MESUR® SOFTWARE
MESUR® Lite
www.mark-10.com/mesur-lite-download-form/
Free basic data acquisition application, for data tabulation and exporting to Excel.
MESUR ® gauge
www.mark-10.com/mesur-gauge-download-form/
Data tabulation, graphing, analysis, and reporting, with user-configurable start and stop triggers and other tools. Compatible with all Mark-10 instruments. Free 90-day evaluation.
USB driver
www.mark-10.com/downloads/software-downloads/Mark-10-USB-Driver.zip
For Mark-10 instruments and the model RSU100 RS-232 to USB converter. Required for communication with a PC. Follow the installation instructions provided in the user’s guide.
PC requirements
Compatible with PCs running Microsoft Windows 7 or later. Minimum monitor resolution is 1108 x 758. A USB or RS-232C serial port is required. If USB communication is required, install the Mark-10 USB driver.
LITERATURE & SOFTWARE DOWNLOADS
Download user’s guides, data sheets, software, solid models, and more.
www.mark-10.com/resources
Mark-10 Corporation
11 Dixon Avenue Copiague, NY 11726
888- MARK-TEN
Tel: 631-842-9200
[email protected]
www.mark-10.com


