![]()
G1030 Series Inkjet Printer
User Guide
Read Safety and Important Information(addendum)first.
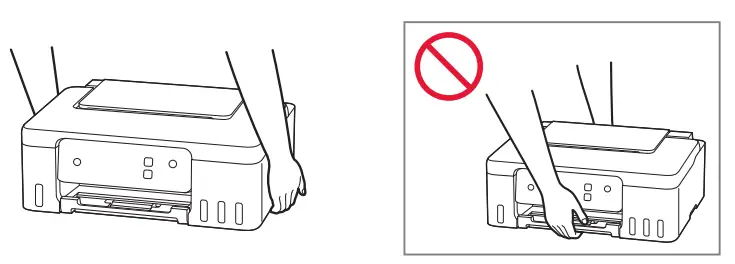
Holding the Printer
Setting Up the Printer
1. Box Contents
- Print Heads
- Ink Bottles
- Power Cord
- Setup CD-ROM
- Safety and Important Information
- Getting Started (this manual)
2. Turning on the Printer
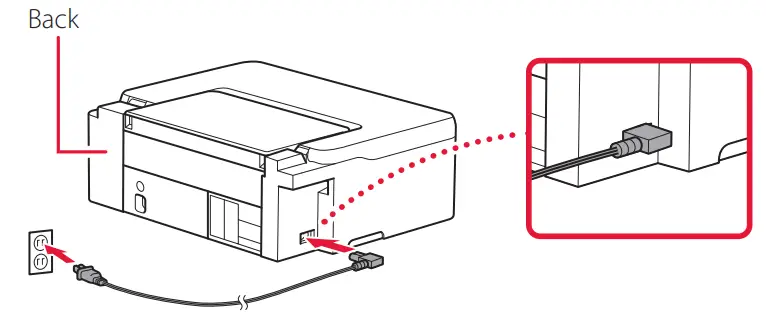
- Connect the power cord.
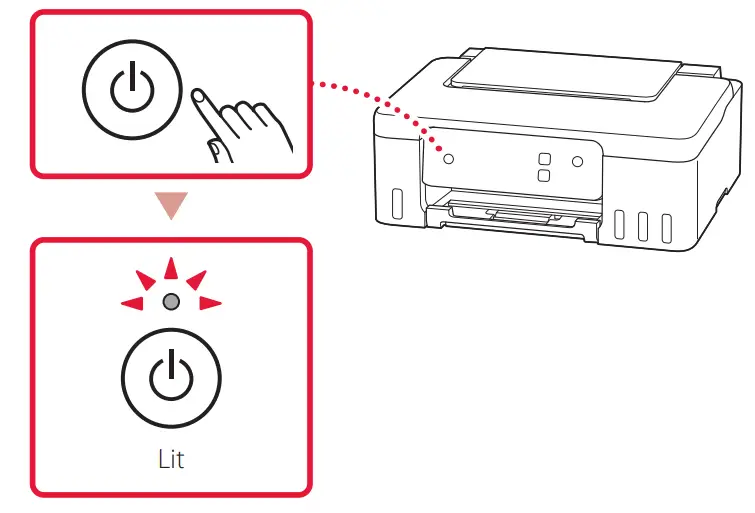
- Press the ON button.
• The ON lamp lights.
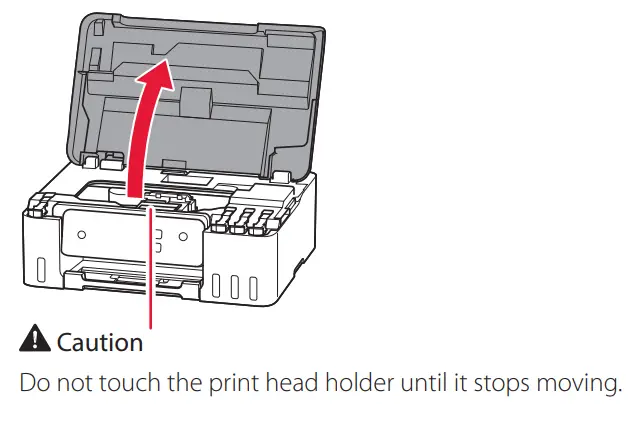
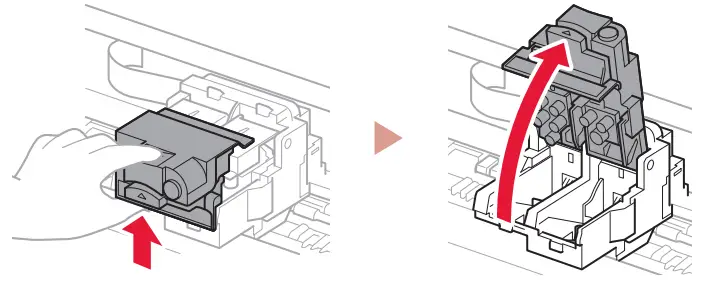
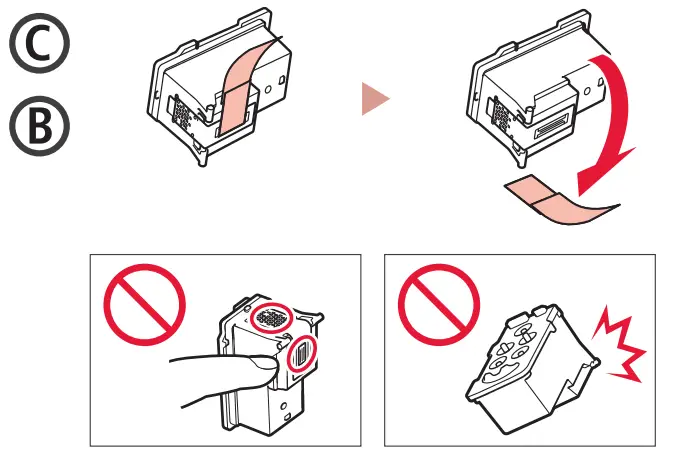
Installing the Print Heads
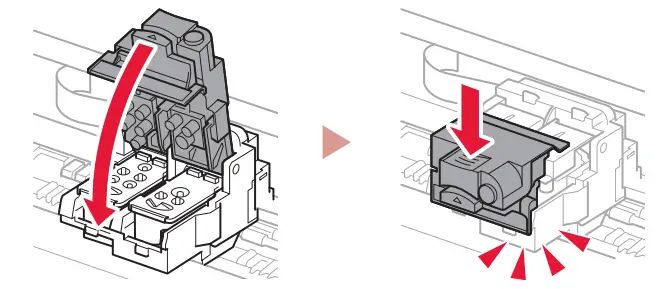
- Open the top cover.
- Open the print head locking cover.
- Take out each print head from the package and remove the label.

- Remove the orange tape.
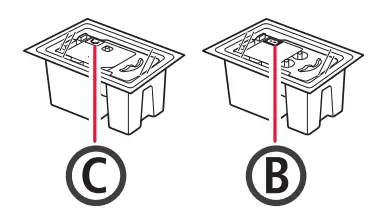
- Insert the C )color( print head on the left and the B )black( print head on the right.
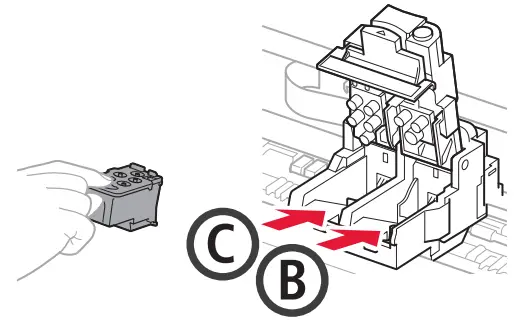
- Close the print head locking cover and press down until it clicks.
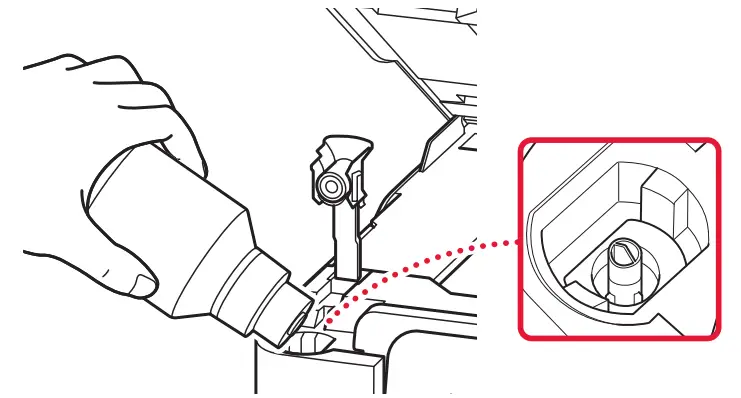
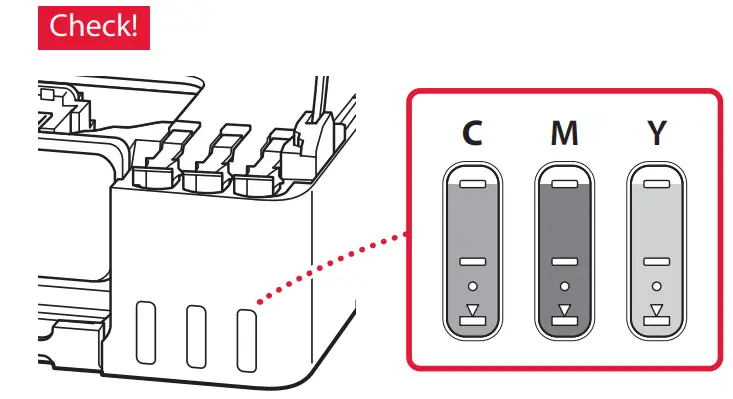
Pouring Ink
Important
This product requires careful handling of ink. Ink may splatter when the ink tanks are filled with ink. If ink gets on your clothes or belongings, it may not come off.
- Open the tank cap on the left of the printer.
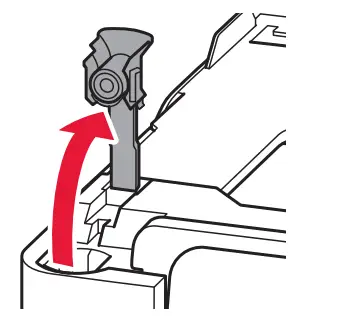
- Hold the ink bottle upright and gently twist the bottle cap to remove.
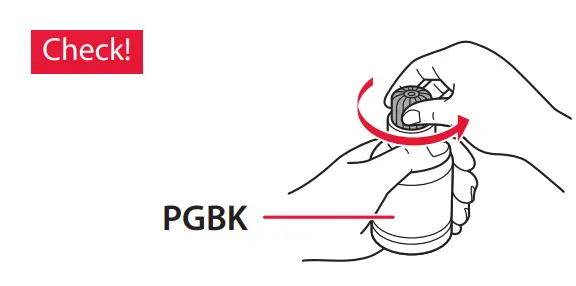
- Align the nozzle of the ink bottle with the inlet.
- Slowly stand the ink bottle upside down and push down to pour the ink.
• If the ink does not pour, gently remove the ink bottle and try again.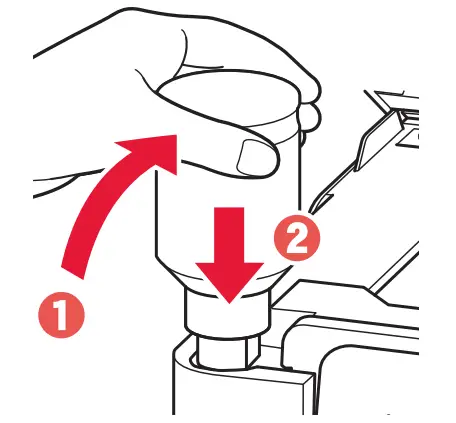
- Gently remove the ink bottle from the inlet.
• Be careful not to spill the ink.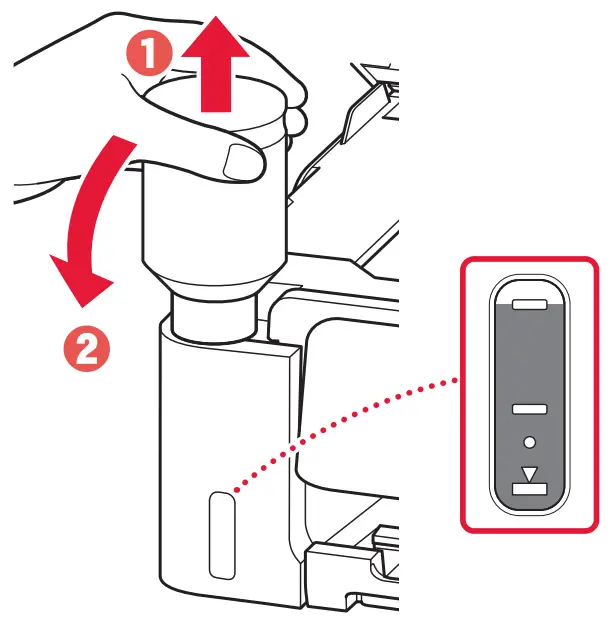
- Replace the tank cap securely.
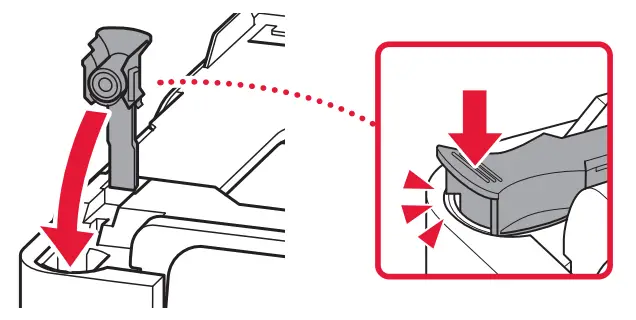
- Repeat steps 1 through 6 to pour all ink into the corresponding ink tanks on the right.
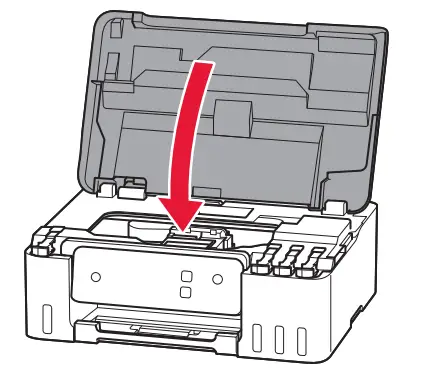
- Close the top cover.
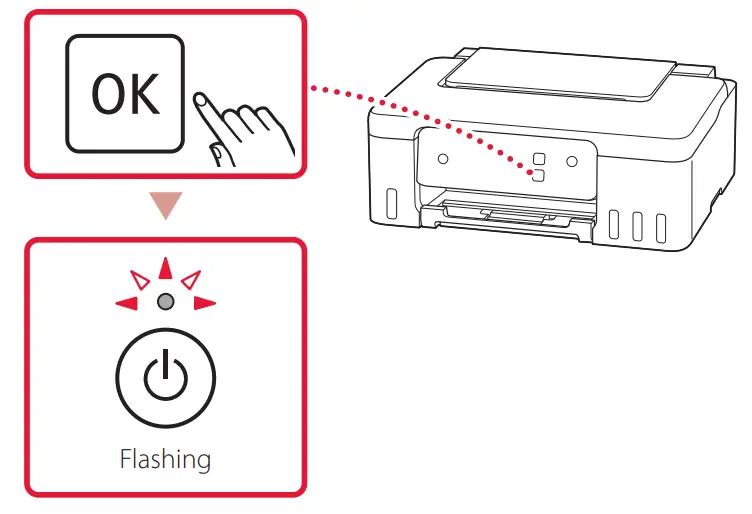
- Press the OK button.
• The ON lamp flashes and the ink system preparation starts. It takes about 6 minutes to complete.
![]() If the Alarm lamp flashes or lights
If the Alarm lamp flashes or lights![]()
Count the number of flashes.
• 4 times
Print heads are not installed correctly.
⇒”4. Installing the Print Heads” on page 3
• 5 times
Print heads cannot be recognized.
⇒”4. Installing the Print Heads” on page 3
For all other cases, refer to the Online Manual.
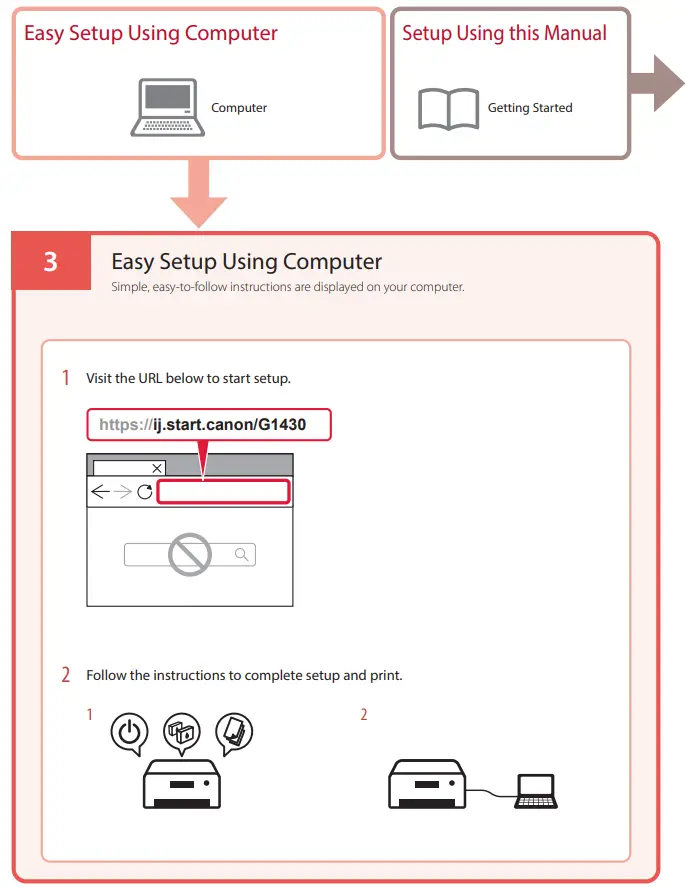
Connecting to a Computer
If you are using multiple computers, perform these steps on each computer.
- Access the Canon website directly. No need to search.
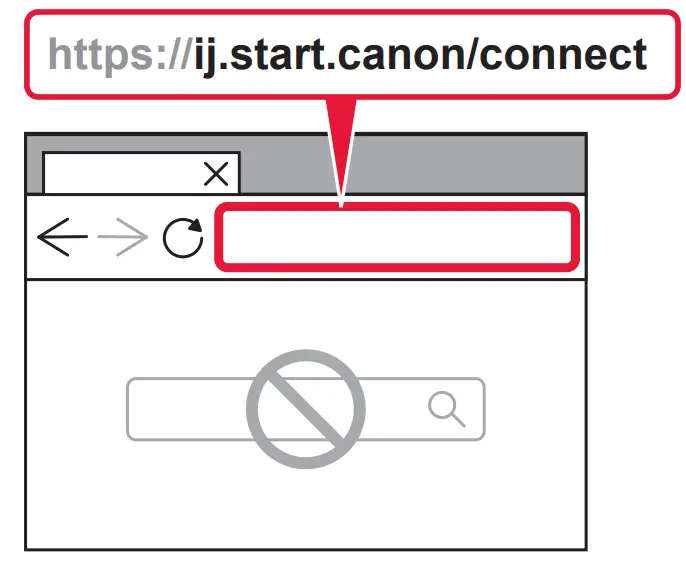
- Enter your printer’s model name and click Go.
- Follow the on-screen instructions.
![]() Using the Setup CD-ROM
Using the Setup CD-ROM
- Double click EasySetup.exe on the screen that appears.
- If the printer selection screen appears, select G1430.
If the installation screen appears, click Next. - Follow the on-screen instructions.
If nothing appears, start Explorer and then run EasySetup.exe in the CD-ROM.
Loading Paper
- Open the paper support.
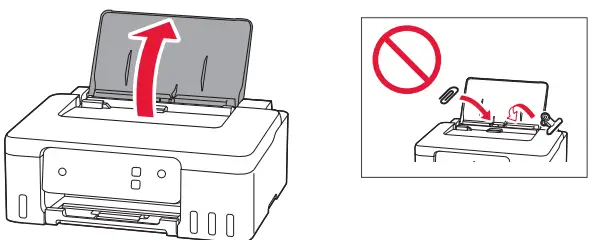
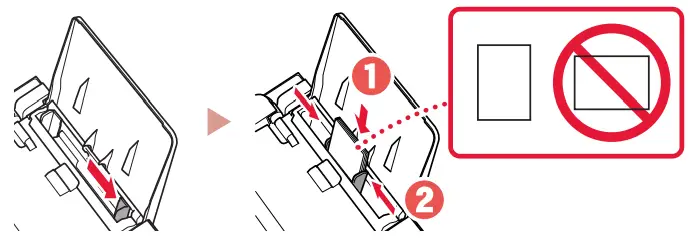
- Slide the right-hand side paper guide to the far right.
- Load several sheets of paper with the print side facing up and slide the side paper guide against the edge of the paper stack.
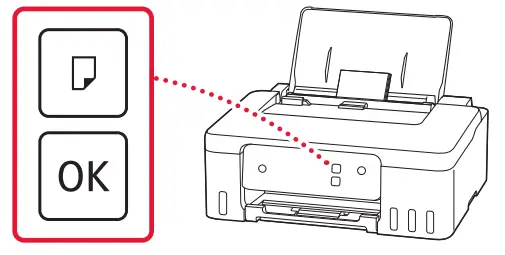
- Press the Paper Select button, select a paper size, and then press the OK button.
- Extend the paper output tray.

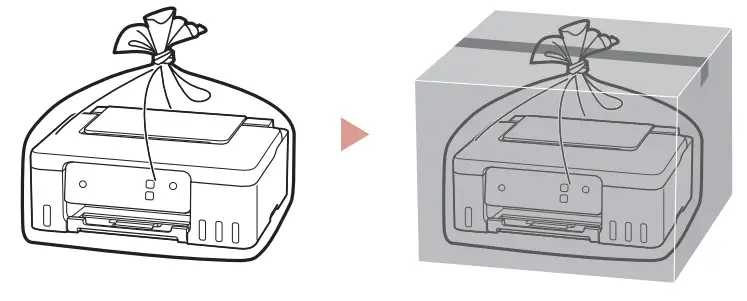
Transporting Your Printer
When relocating the printer, check the following. Refer to the Online Manual for details.
Check if the tank caps are completely closed.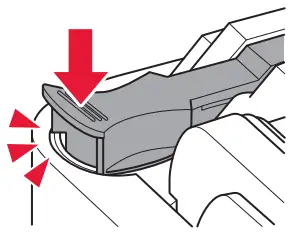 If the print head holder is in the center of the printer, check that the cover is closed.
Pack the printer in a plastic bag in case ink leaks.
- Pack the printer in a sturdy box so that it is placed with its bottom facing down, using sufficient protective material to ensure safe transport.
- Do not tilt the printer. Ink may leak.
- Please handle with care and ensure the box remains flat and NOT turned upside down or on its side, as the printer may be damaged and ink in the printer may leak.
- When a shipping agent is handling transport of the printer, have its box marked “THIS SIDE UP” to keep the printer with its bottom facing down. Mark also with “FRAGILE” or “HANDLE WITH CARE”.
![]() Access Online Manual
Access Online Manual
From your browser
 https://rs.ciggws.net/rd2.cgi?FNC=GSQB_MOV&DEV=G1030%20series&CTN=MOV%2FUSB_connection.html