
ILUMINAR IL-i627FSG-120 LED Lighting COBs Engines Modules
Product Information
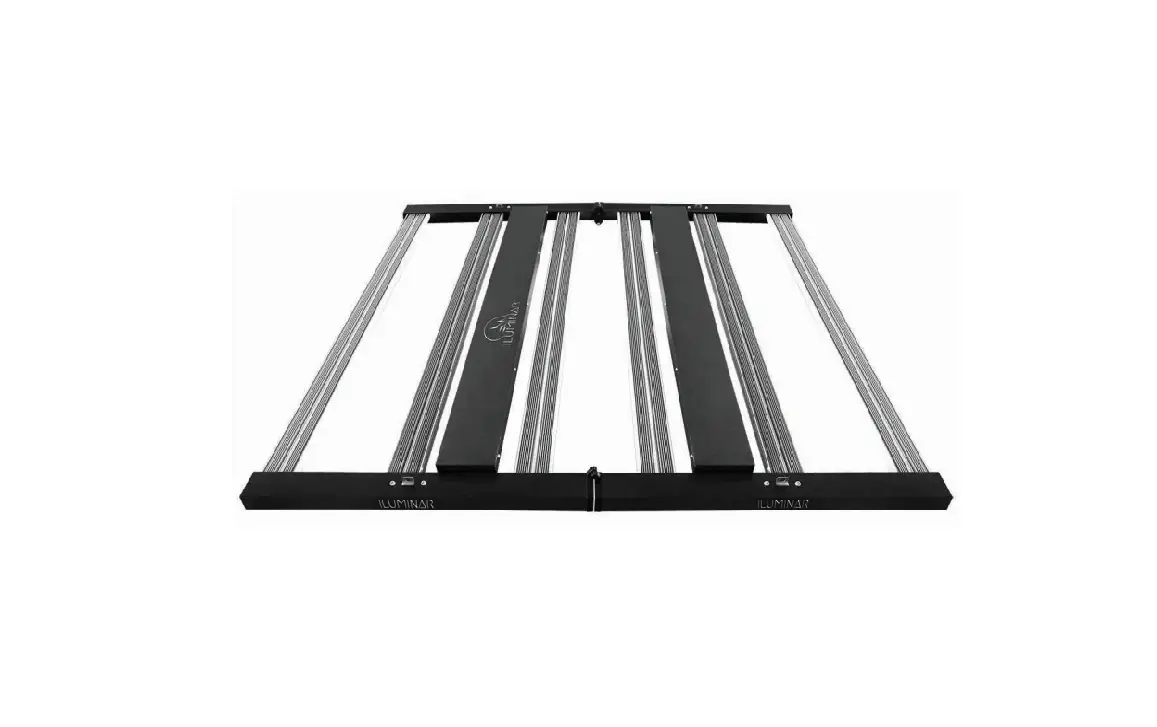
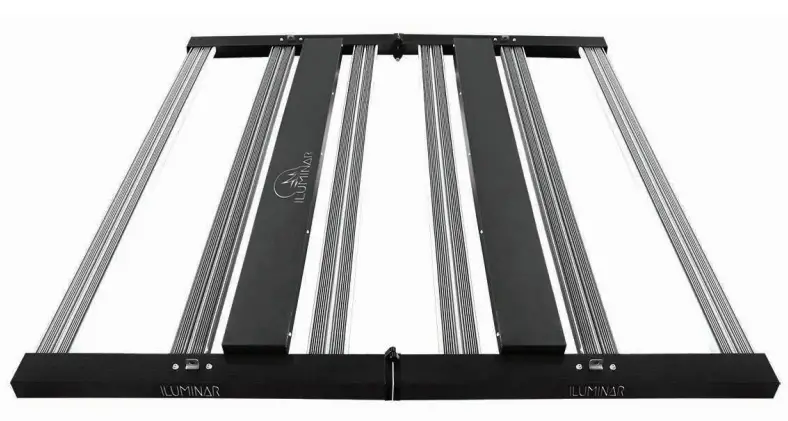
The iLi6 is a LED lighting solution with a power consumption of 630W and a voltage range of 100-277V. It has a waterproof rating of IP66 for damp/wet conditions and a color temperature of 4000k with a color rendering index of 88. The LED lifespan is more than 36,000 hours and it comes with 4 hanging rope ratchets and an attachable end cap.
Technical Specifications
- Rated Voltage: 120V-277V
- PPF Efficacy: 2155
- THD: <10%
- Crest Factor: 0.99
- BTU Frequency: 50/60Hz
- Dimmable: 0-10V Controllable
- Ambient Temperature: <98%
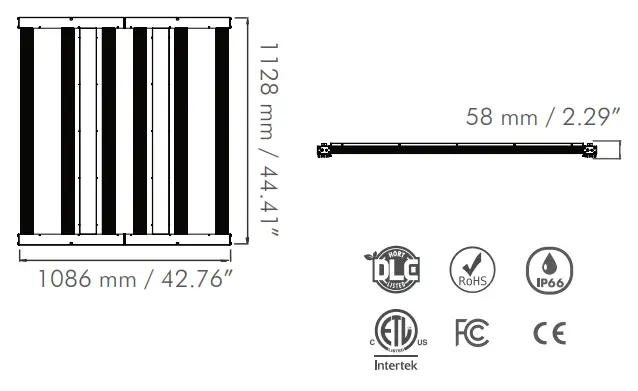
Physical Specifications
- Length: 1128mm / 44.41″
- Width: 1086mm / 42.76″
- Height: 58mm / 2.29″
- Weight: 17.6kg / 38.8lbs
Product Usage Instructions
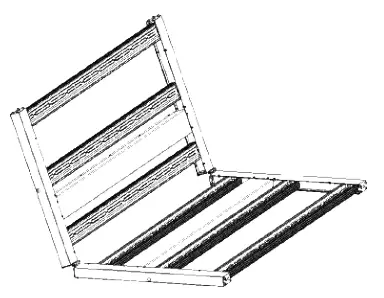
Step 1: Open the package and take out the LED grow light and place it on the table.
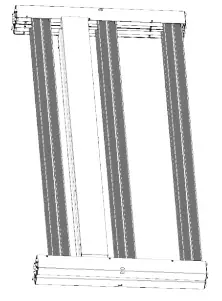
Step 2: Unfold the LED grow light fixture and ensure the light output surface faces the table.
Step 3: Take out the lock-shaft and lock the attachable end cap.
Step 4: Lift the LED fixture and hang it on the long S-hooks for surface mounting or use the 4 hanging rope ratchets for suspended mounting.
Step 5: For surface mounting, use long S-hooks (not provided) to hang the fixture from shelving.
Step 6: For suspended mounting, hang the 4 hanging rope ratchets packaged with the fixture from the ceiling and then lift the LED fixture and hang it from the rope ratchets.
Note: Before installation, check that you have all the necessary parts to begin. When handling the ILUMINAR Lighting iLi6 fixture, avoid contact with sharp objects and do not touch diodes or apply direct force to them as it can cause damage.
Please read this manual thoroughly prior to installing or operating the ILUMINAR Lighting iLi6.
- Observe all safety precautions (see page 10), seek the services of a qualified/certified/licensed/insured electrician, or call ILUMINAR Lighting technicians for assistance.
- DO NOT handle or touch the fixture while in use.
- DO NOT touch diodes or apply direct force to the diodes as this can/will cause permanent damage.
- Connect the fixture only to the power sources of the appropriate voltage using the correct AC plug type. Protect power cables from being pinched, walked on, or otherwise damaged. Be especially careful where the power cable enters the power outlet to the unit. Only connect the fixture to an electrical outlet or extension cord of comparable standard and level rating.
- Connect the fixture ONLY to the power sources of the correct voltage using the plug received.
- The fixture should only be cleaned as directed. Always seek service for your system by qualified service personnel if any of the following occur:
- The fixture shows a noticeable change in performance.
- The power-supply cord or plug is damaged.
- The fixture has been dropped, or the exterior is damaged.
TECHNICAL SPECS
| Rated Voltage | 120-277V AC |
| Voltage Range (+/-10%) | 100-277V |
| PPF | 1700 µmol/s |
| Efficacy | 2.7 µmol/J |
| Min Power Factor | 0.9 |
| THD | < 10% |
| Crest Factor | 0.99 |
| BTU | 2155 |
| Frequency | 50 / 60Hz |
| Dimmable | 0 – 10V Controllable |
| Ambient Temperature | 0 – 35°C / 32-95°F |
| Relative Humidity | 98% |
| Plug Type | Power Cord Sold Seperately |
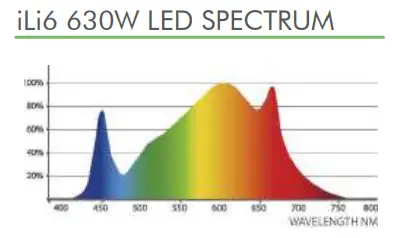
| Color Temperature | 4000k |
| Color Rendering Index | 88 |
| Minimum Mounting Height | 12” (30cm) to top of Canopy |
| Emitter Cooling | Passive Cooling |
| Light Distribution +/- 5% | 125º |
| Waterproof Rating | IP66 for Damp/Wet Conditions |
PHYSICAL SPECIFICATIONS
| 120V | 5.38A | 646W |
| 208V | 3.03A | 630W |
| 240V | 2.63A | 631W |
| 277V | 2.27A | 629W |
| 347V | 1.79A | 621W |
VOLTAGE AND AMPERAGE
| Length | 1128mm | 44.41” |
| Width | 1086mm | 42.76” |
| Height | 58mm | 2.29” |
| Weight | 17.6kg | 38.8lbs |
MOUNTING & COVERAGE 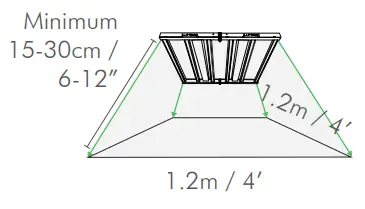
HARDWARE AND ACCESSORIES
The iLi6 can be hung from rope ratchets or can be mounted to a rack. Before you begin installation, check that you have all the necessary parts to begin.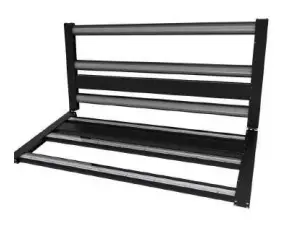
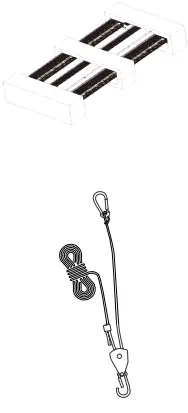
IN THE BOX
- 1 iLi6 Fixture
- 4 hanging rope ratchets with attached cylindrical locks for hanging

ASSEMBLY INSTRUCTIONS
- Open the package and take out the LED grow light and place it on the table.

- Unfold the LED grow light fixture and ensure the light output surface faces the table.
 CAUTION when handling your ILUMINAR Lighting iL Fixture. The LED array should NOT come in contact with sharp objects. DO NOT touch diodes or apply direct force to the diodes as this can/will cause
 - Take out the lock-shaft and lock the attachable end cap.

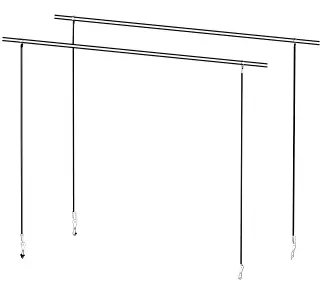
HANGING INSTALLATION
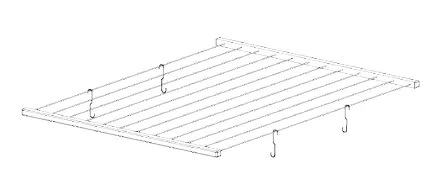
SURFACE MOUNTING INSTRUCTIONS - There are two ways to mount your LED grow light fixture: Suspending Mounting (default) and Surface Mounting. Surface Mount using long S-hooks (not provided) to hang the fixture from shelving.

- Lift the LED fixture and hang it on the long S-hooks.

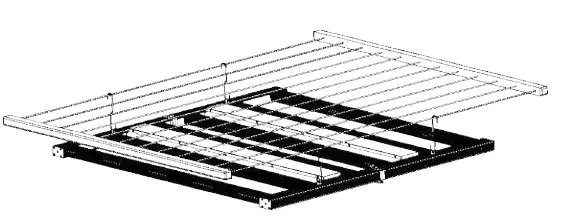
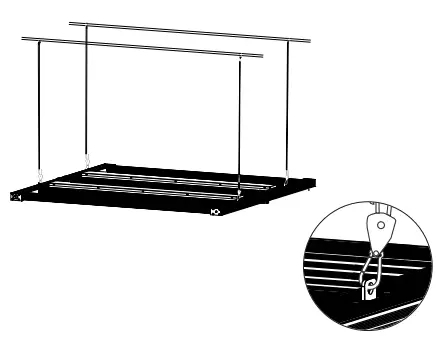
SUSPENDED MOUNTING INSTRUCTIONS - To Suspend Mount (default), use the 4 hanging rope ratchets that come packaged with this fixture and hang them from the ceiling.

- Then lift the LED fixture and hang it from the rope ratchets.

 CAUTION when handling your ILUMINAR Lighting iL Fixture. The LED array should NOT come in contact with sharp objects. DO NOT touch diodes or apply direct force to the diodes as this can/will cause
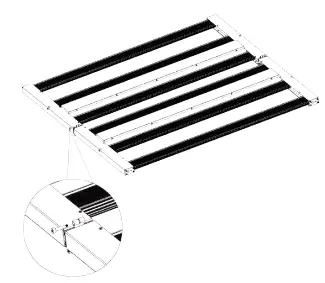
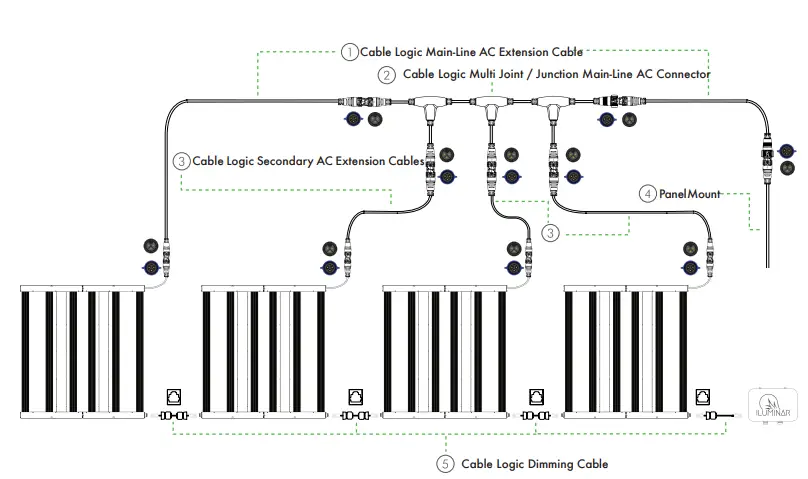
WIRING DIAGRAM
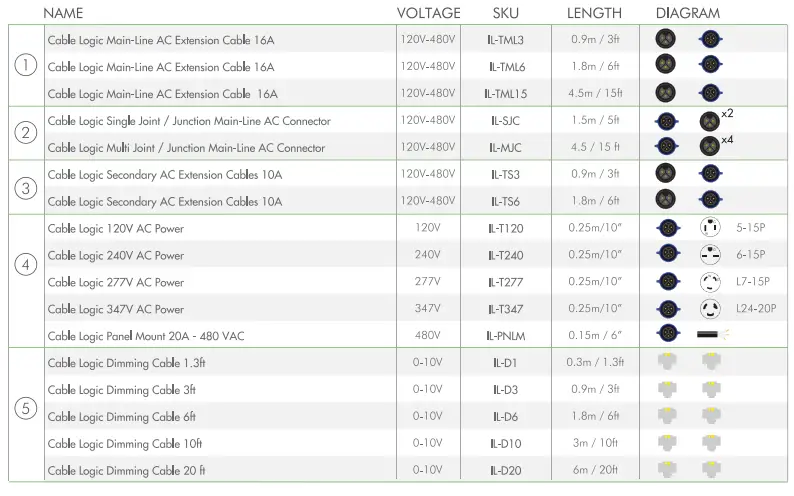
Cable Single Joint / Junction Main-Line AC Connector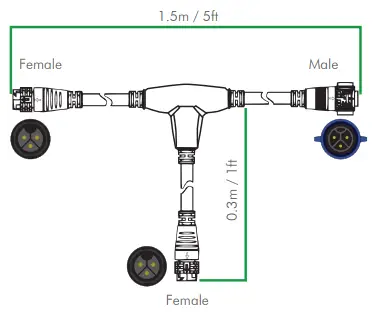
CAUTION
Please read the following list carefully prior to beginning installation.
- Leave at least one inch of space between the fixture and the mounting area for maximum performance and lifespan.
- ALWAYS wear protective eye wear when looking directly at the diodes to prevent eye damage.
- The LED array should NEVER come in contact with sharp objects.
- Do not touch or apply force to the diodes – this will cause permanent damage.
- Only handle, clean or move fixture when it’s unplugged and completely cool.
- Keep the fixture free of dust, debris, deposits to ensure the maximum potential of the fixture.
- NEVER use cloth to clean the diodes. This will scratch the diodes and could potentially break or dislodge them.
- DO NOT use chemicals to clean the fixture. Use ONLY low pressure air or low pressure water to remove dust and debris.
- DO NOT exceed 70% max load for breakers due to Inrush current in LED fixtures.
- Do NOT use sulfur vaporizers.
GUARANTEE
At ILUMINAR Lighting, we stand behind our products and our technology as well as our customers. All ILUMINAR Lighting LED fixtures are backed by our 5-Year Guarantee. Please visit our website iluminarlighting.com/warranty for more information.
Contact Us
1-877-540-5588
iluminarlighting.com
[email protected]


