BRINK Excellent RV Humidity Sensor Instruction Manual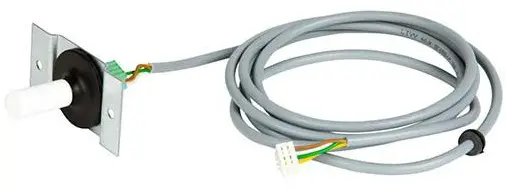
Mounting humidity sensor (RH sensor)
![]() Installation of a humidity sensor (RH sensor) is possible on all Brink heat recovery appliances, with the Renovent Excellent appliance only from software version S1.05
Installation of a humidity sensor (RH sensor) is possible on all Brink heat recovery appliances, with the Renovent Excellent appliance only from software version S1.05
- Duct from dwelling
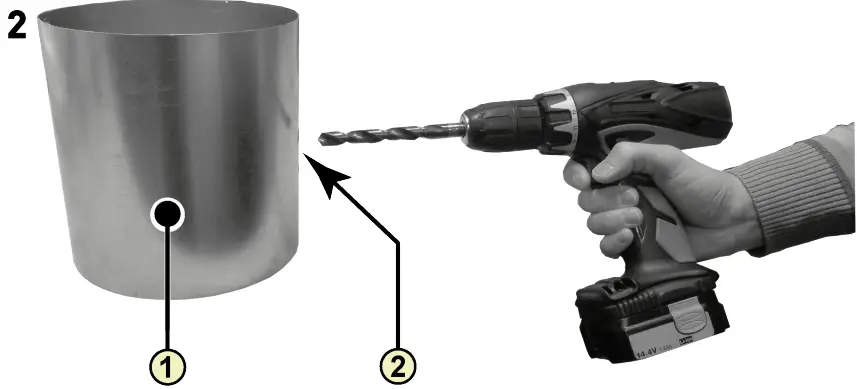
- Drilling hole; minimum ø18 mm – maximum ø25 mm

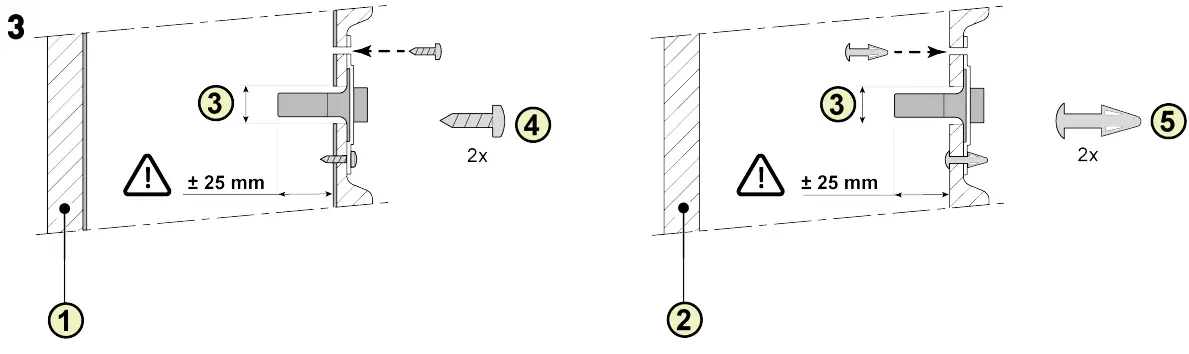
- Isolated metal duct
- EPE duct
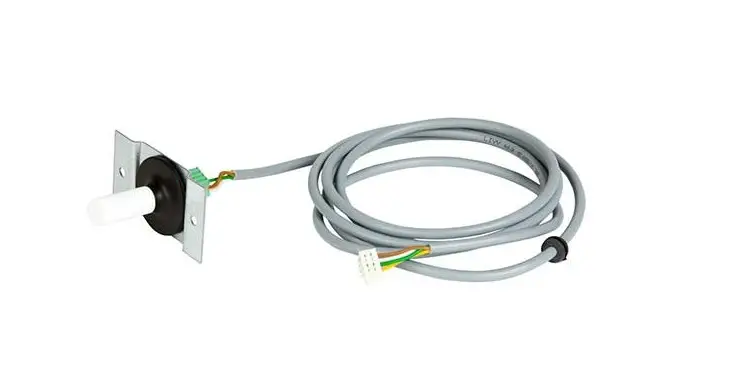
- Humidity sensor (RH sensor)
- Screw pozidrive 3,5 x 19
- PCB spacer

5A Renovent Excellent 300/400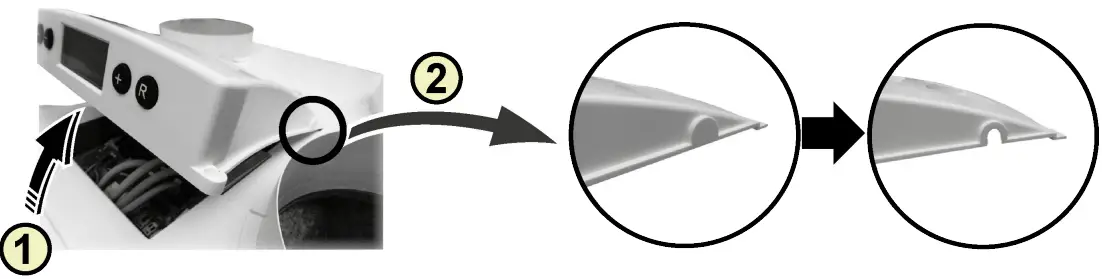
- Remove cover
- Remove breakout

5B Renovent Excellent 180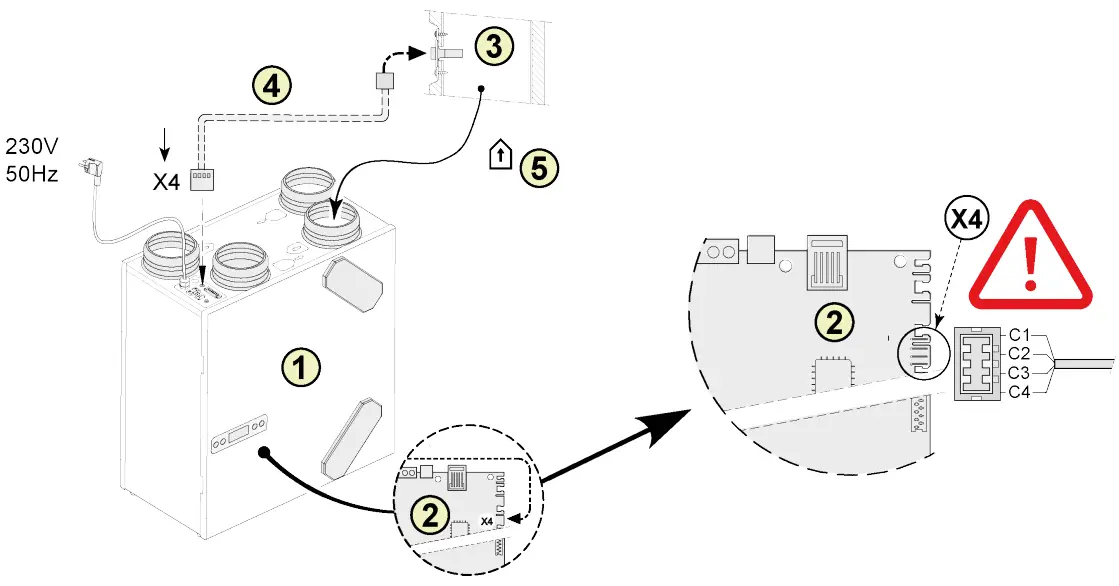
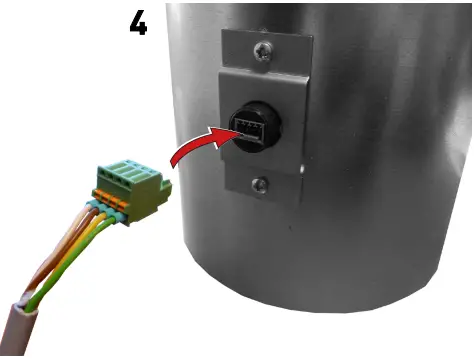
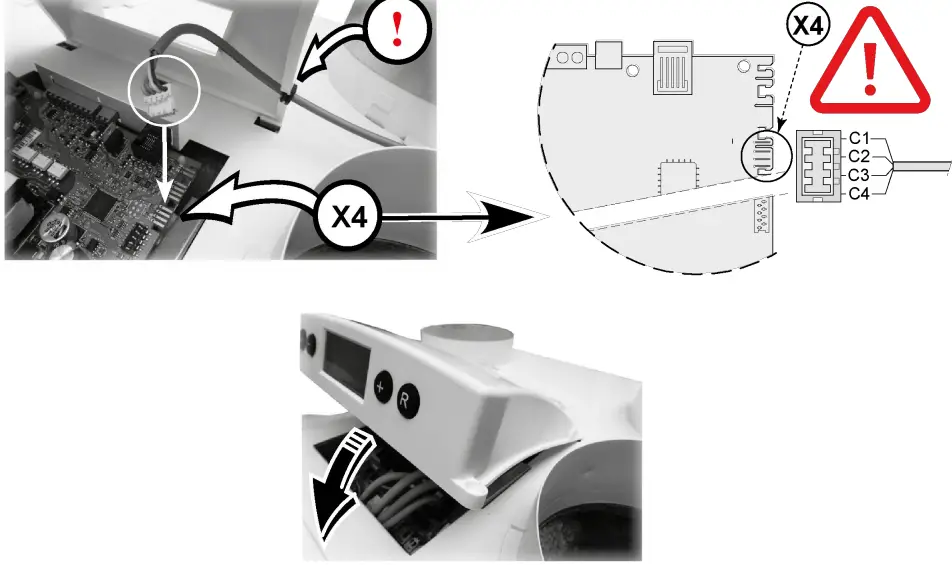
- Renovent 180 Excellent appliance
- Control board
- Humidity sensor (RH sensor)
- Cable comes with humidity sensor. Cut out an opening in the available grommet for feeding through the sensor cable.
- Duct “Extract air”
C1 = Brown
C2 = White
C3 = Green
C4 = Yellow
5C Renovent Sky 150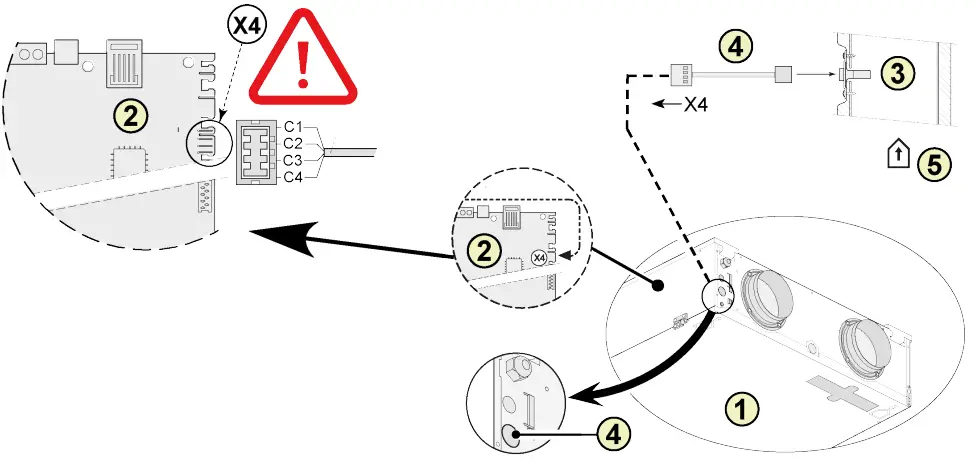
- Sky 150 appliance
- Control board
- Humidity sensor (RH sensor)
- Cable comes with humidity sensor. Cut out an opening in the available grommet for feeding through the sensor cable.
- Duct “Extract air”
C1 = Brown C2 = White
C3 = Green
C4 = Yellow
5D Renovent Sky 300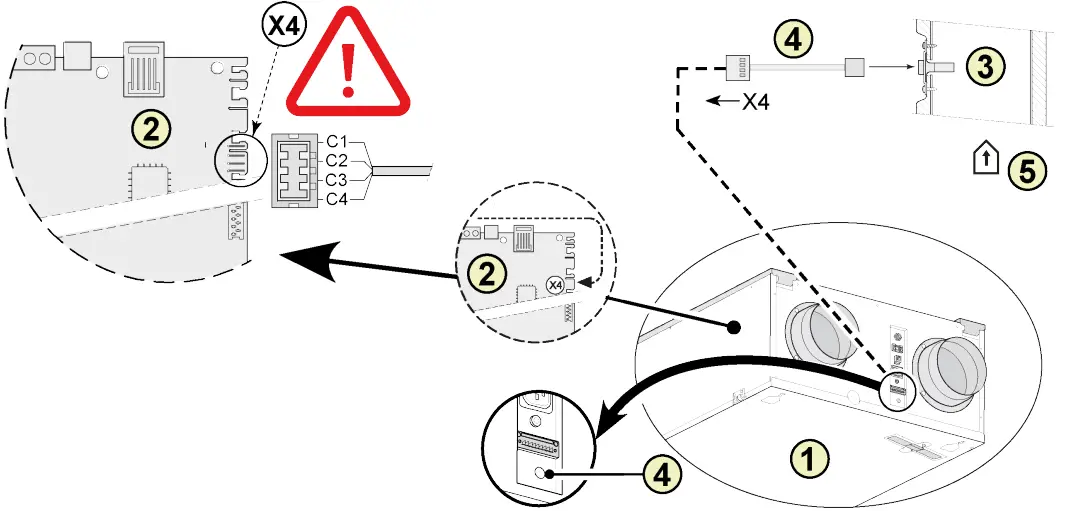
- Sky 300 appliance
- Control board
- Humidity sensor (RH sensor)
- Cable comes with humidity sensor. Cut out an opening in the available grommet for feeding through the sensor cable.
- Duct “Extract air”
C1 = Brown
C2 = White
C3 = Green
C4 = Yellow
5E Flair HRV appliance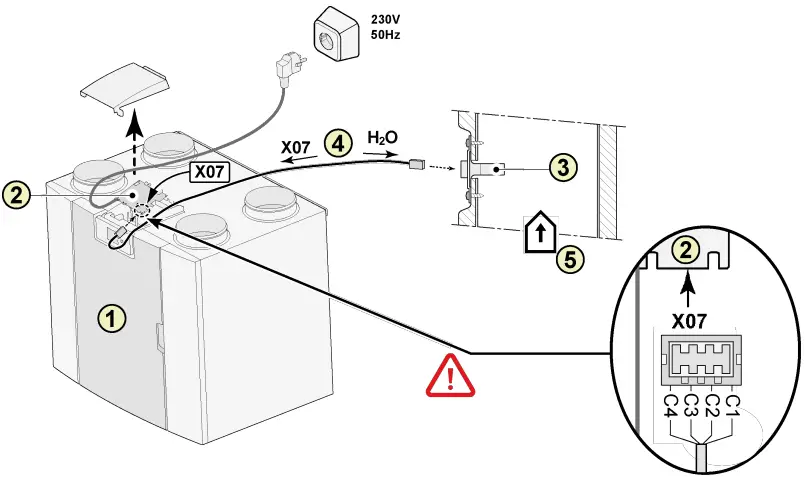
- Flair HRV appliance (A Flair 325 is shown as an example)
- Control board
- Humidity sensor (RH sensor)
- Cable comes with humidity sensor. Cut out an opening in the available grommet for feeding through the sensor cable.
- Duct “Extract air”
C1 = Brown
C2 = White
C3 = Green
C4 = Yellow
Setting humidity sensor (RH sensor)
Renovent 180/ 300/400 Excellent
After installing the humidity sensor (RH sensor) it must be activated in the settings menu step number 30 to ON. Optionally, the sensitivity of the sensor can be altered by means of step number 31. Process for adjusting the value (s) in the settings menu of the Renovent Excellent, see § 6.3 of the installation instructions.
| Step no | Description | Factory setting | Adjusting range |
| 30 | Humidity sensor (RH sensor) | OFF | OFF = Humidity sensor (RH sensor) not active ON = Humidity sensor (RH sensor) active |
| 31 | Sensitivity | 0 | +2 = most sensitive 0 = default setting -2 = least sensitive |
Check the operation of humidity sensor (RH sensor)
Select step number 9 in readout menu (See §6.4 of the installation instructions)

Sky 150/300 Excellent
After installing the humidity sensor (RH sensor) it must be activated in the settings menu step appliance control unit number 29 to ON. Optionally, the sensitivity of the sensor can be altered by means of step number 30. Process for adjusting the value (s) in the settings menu of the Renovent Sky, see § 6.5.3 of the installation instructions.
| Step no | Description | Factory setting | Adjusting range |
| 29 | Humidity sensor (RH sensor) | OFF | OFF = Humidity sensor (RH sensor) not active ON = Humidity sensor (RH sensor) active |
| 30 | Sensitivity | 0 | +2 = most sensitive 0 = default setting -2 = least sensitive |
Check the operation of humidity sensor (RH sensor)
See RH value Information menu installer (See § 6.5.4 of the installation instructions).
Flair HRV appliance
After installing the humidity sensor (RH sensor) it must be activated in the settings menu step number 7.1 to ON. Optionally, the sensitivity of the sensor can be altered by means of step number 7.2. Process for adjusting the value (s) in the settings menu of the HRV appliance, see the installation instructions.
| Step no. | Description | Factory setting | Adjusting range |
| 7.1 | Humidity sensor (RH sensor) | OFF | OFF = Humidity sensor (RH sensor) not active ON = Humidity sensor (RH sensor) active |
| 7.2 | Sensitivity | 0 | +2 = most sensitive 0 = default setting -2 = least sensitive |
Check the operation of humidity sensor (RH sensor)
Select ![]() on touchscreen and go with
on touchscreen and go with ![]() and
and ![]() to readout value RH sensor
to readout value RH sensor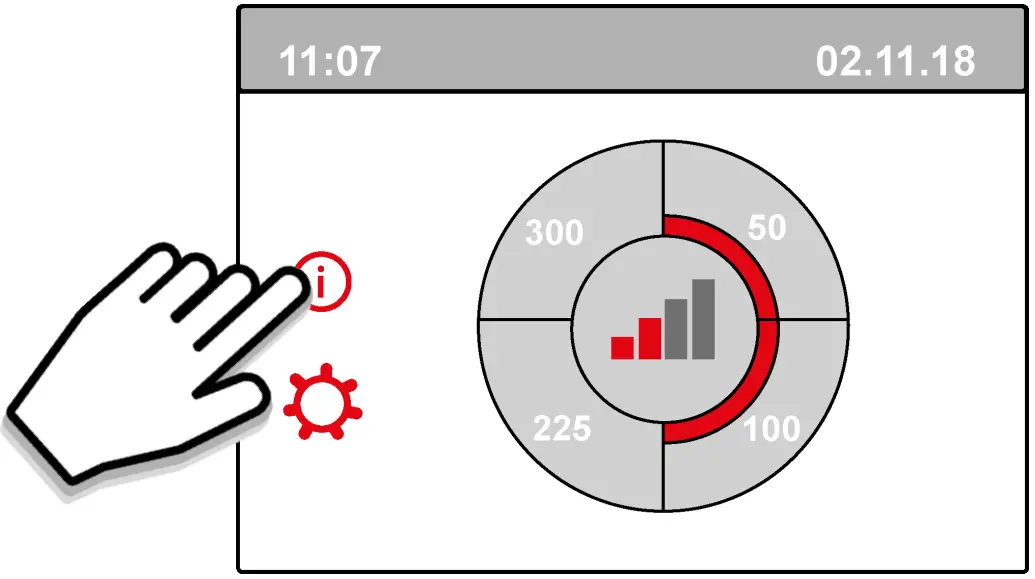
Support
Brink Climate Systems B.V. P.O. Box 11, NL-7950AA Staphorst
T: +31 (0) 522 46 99 44
E: [email protected]
www.brinkclimatesystems.nl