INKEE D11392 Falcon Plus Handheld Action Camera Gimbal Stabilizer User Manual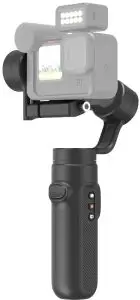
Introduction
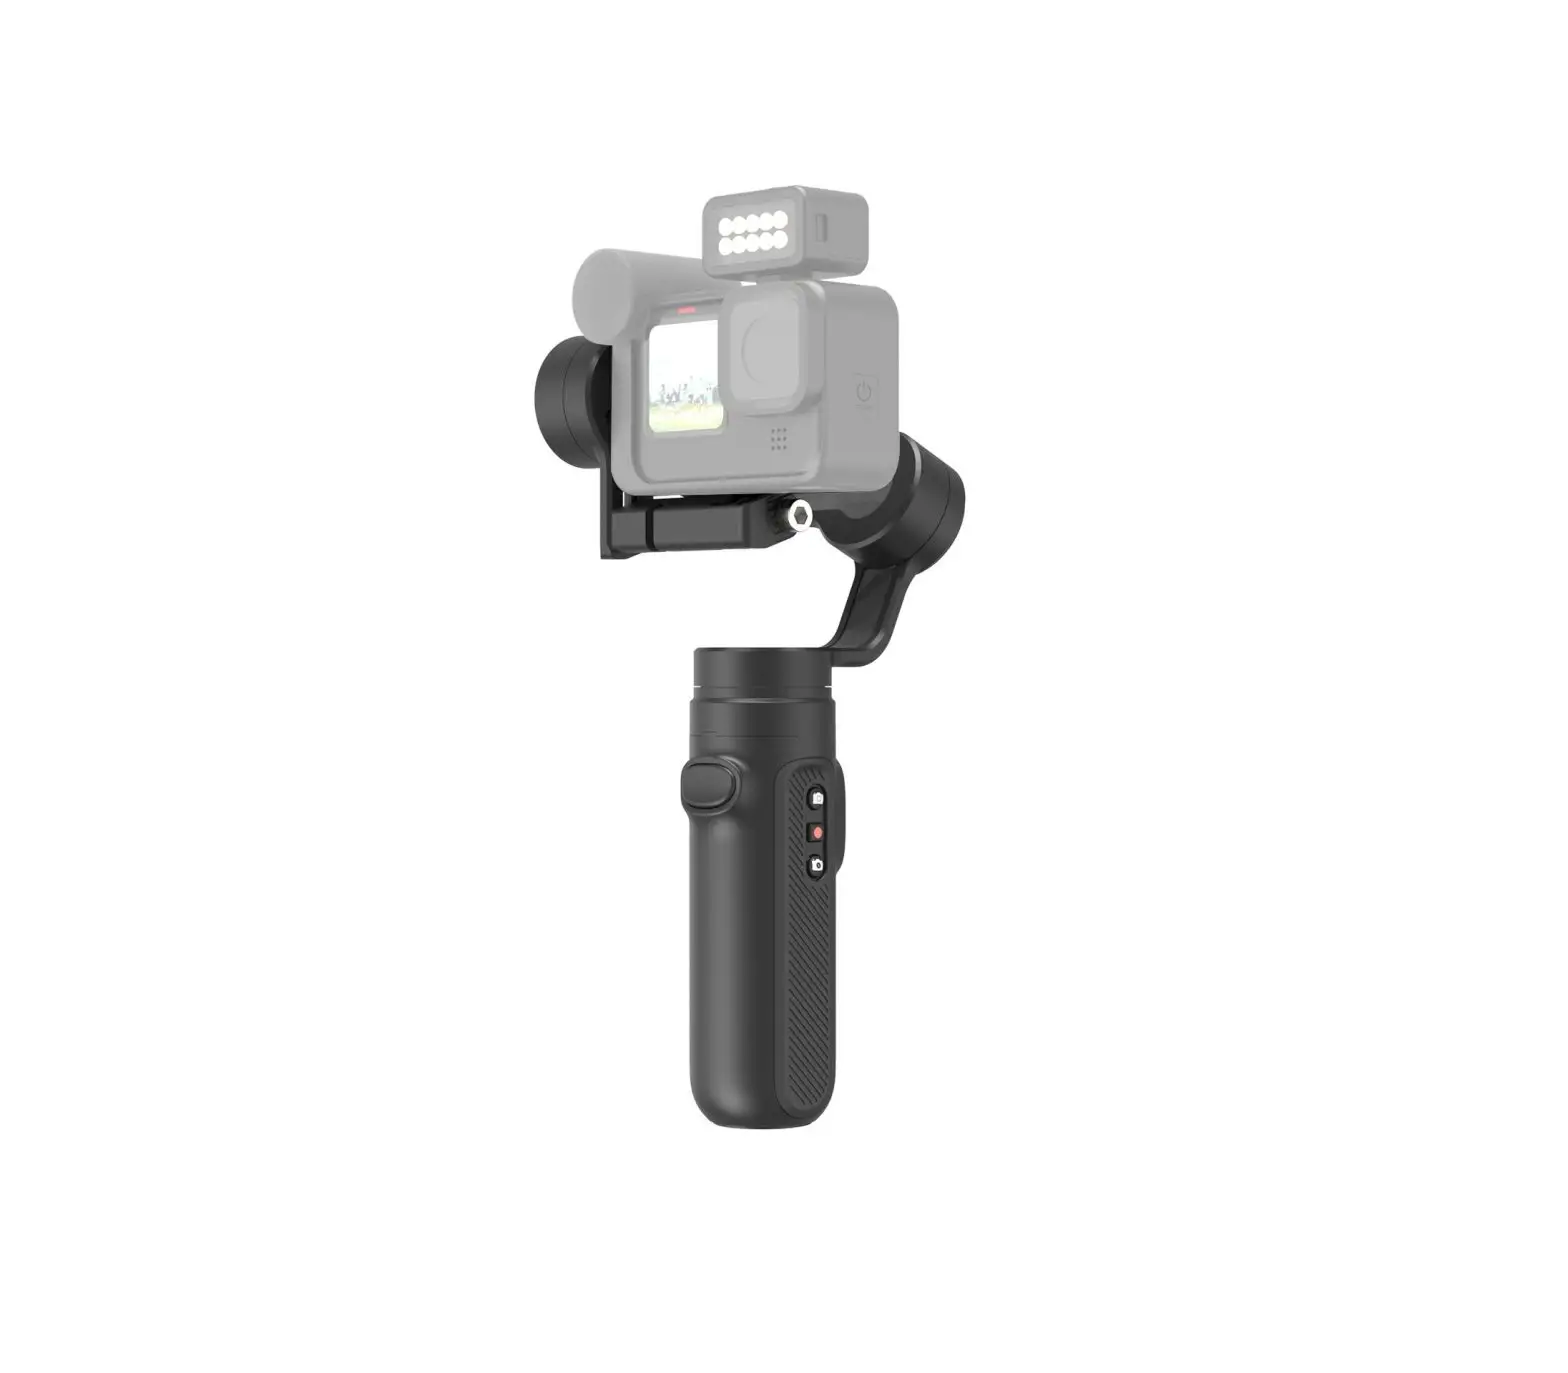
Falcon Plus is a hand-held stabilizer specially designed for cameras, which supports
most of Action Cameras on the existing market, Through the three-axis motion
compensation to stabilize the Action Camera to get a stable effect.
Product Contents
- Stabilizer *1

- Charging Cable*1

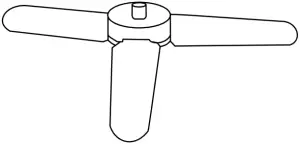
- Tripod *1

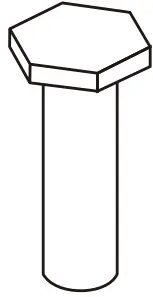
- Screw*1

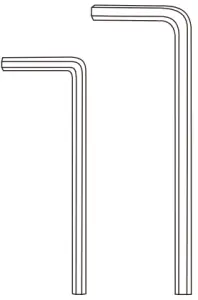
- Hexagon Wrench *2

- Screw to fix camera*1

- Storage Bag(at the bottom of the package)*1

- Quick Start Guide *1

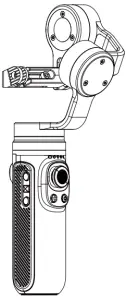


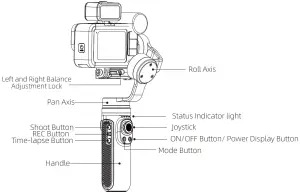
Falcon diagram

Product Usage
Charging
Use Type-C cable to charge. Blue light flashes during charging. All the four lights are always on when fully charged.

![]() Note
Note
- Make sure to fully charge the stabilizer when use for the first time.
- Please charge the stabilizer immediately if the power is too low and the red-light flashes slowly.
- Turn off the power if not in use.
Installation of Action Camera
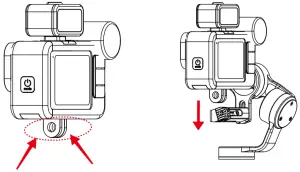
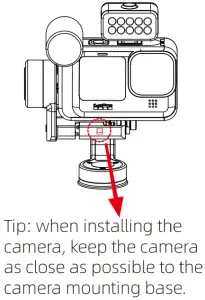
Take GoPro HERO 10 + MEDIA MOD as an example:
- Pull apart the bottom mounting buckle of the action camera and install it on the stabilizer.
- Insert the screw into the hole corresponding to the stabilizer and then tighten the screw.
*If the installed camera is GoPro hero 8 or GoPro hero 9, it may cause camera lock virtual position. Please adjust the position of the camera)
Tip: when installing the camera, keep the camera as close as possible to the camera mounting base.
Installation of camera is completed.
Balance Adjustment
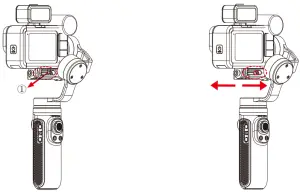
- Left and Right Balance Adjustment Lock
Determine the center of gravity of the camera. If the camera tilts to the left, it means that the center of gravity of the camera is to the left. Loosen the left and right balance adjustment locking screw ①, and move the mounting base and the camera to the right until it can keep level with the ground when it is still; If the camera is tilted to the right, move the mounting base and the camera to the left until it is horizontal with the ground when it is still, and then tighten the screw.
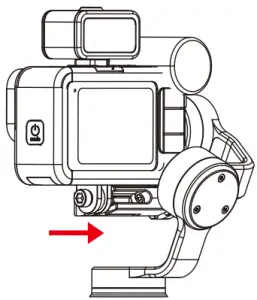
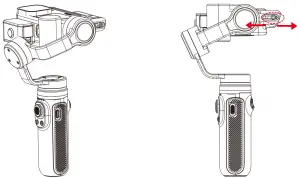
- Front and Rear Balance Adjustment
Flip the camera so that the lens is vertically up. Determine the center of gravity of the camera.
When the camera lens is tilted forward, the mounting base and the camera should be moved backward until it can keep level with the ground when it is still, and then the screw can be tightened; If the camera lens is tilted backward, the mounting base and the camera should be moved forward until it can keep level with the ground when it is still, and then the screw can be tightened.
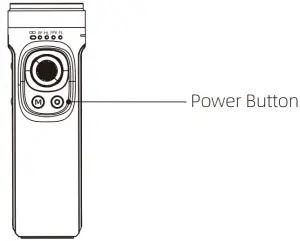
Power Button
- Under the condition of power on or off, Long press two seconds the power button to turn on or turn off the gimbal.
- Under the condition of power on or off, single press the power button to display the power of stabilizer.
- In the boot state, double press the power button into standby mode, and then single press any button to restore the working state of the stabilizer.
- In the boot state, continuously and quickly press eight times to clear the remote-control pairing. Too slow will trigger standby.

![]() Note
Note
The Action Camera can only be turned on after it is firmly installed
Shutter Button
Shooting Button: Single press to shoot
REC Button: Single press to start recording or stop.
Time-lapse Button: Single press the button to start time-lapse shooting or stop. 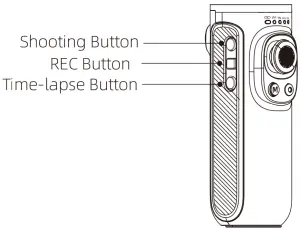
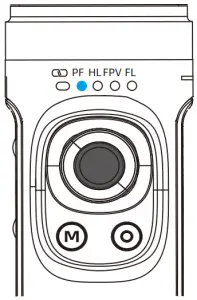
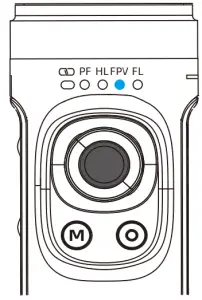
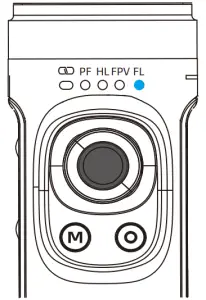
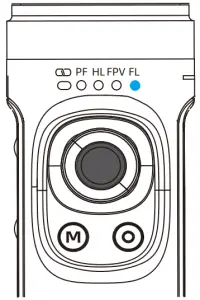
Indicator Light Status
| Indicator Light Status | Description |
| Blue LED Light | In shutdown and standby mode, the current power is 0-25%, 25-50%, 50-75%, 75-100% from the left. |
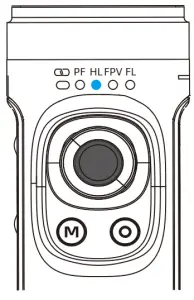
| Represent the mode state after Turning on, in proper sequence from left to right are: PF mode, HL mode, FPV mode, Flashlight mode(FL), under Lock mode(GL) the LED all bright, Vertical Shooting Mode (FL flashes). | |
| Green LED Light | Display the Bluetooth connection status. It is always on when the Bluetooth is connected while it is always off when no connection. After pairing is cleared, the light will flash slowly during the Bluetooth scanning, if there is connected then always on if not then off light. |
| Red LED Light | Display the current upgrade status. The red-light flashes rapidly during upgrade, and it will turn off after three seconds when upgrade completed. When the power is lower then 10% the red-light flashes slowly, Red light flashing indicates upgrade failure |
Mode Switch Button
- Illustration
- Single click to switch PF-HL-FPV mode.
- Double click to enter vertical shooting mode, double click again to ener Flashlight Mode. Single click to exit to HL mode.
- Long press the Trigger Button to enter GL Mode(Lock Mode), release to back to previous mode(GL Mode works only under PF or HL Mode).
- The current mode of the stabilizer can be identifed by the status of the indicator light
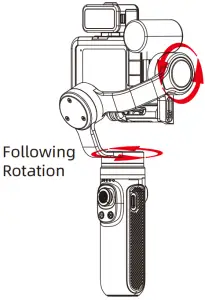
PF Pan Following
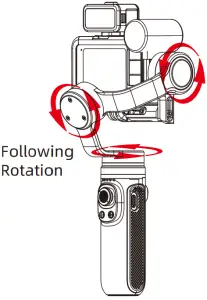
HL Pan/Tilt Following
FPV Three axis all Following
Vertical Mode (the indicator light flashes)
Flashlight Mode
Lock Mode

Function Operation
Mode Function
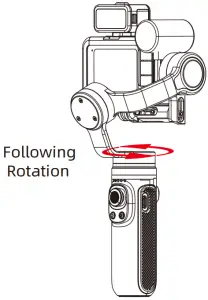
- Following Mode
Pan Following Mode Single press Mode Button
Pan and Tilt Following
Mode Single press the Mode Button again
Full Following
Mode Single press the Mode Button again
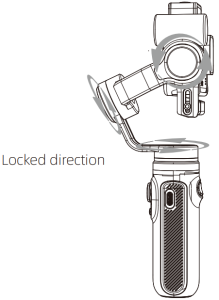
- Lock Mode
Pan and Tilt Locked Mode Long press trigger button
The red circle indicates that the motor follows the movement of the handle to change the angle, while the gray circle indicates that the motor locks the angle and does not follow the movement of the handle. - Vertical shooting Mode and Flashlight Mode
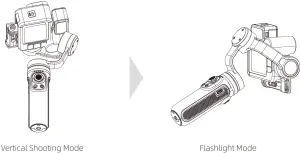
Double click to enter vertical shooting mode, double click again to ener Flashlight
Mode. Single click to exit to HL mode.
Mode Description Pan Follow (PF) Tilt axis and roll axis keep the same direction, and the lens rotates with the direction of the handle. Horizontal Lock (HL) (Default Mode) Roll axis remains horizontal, and the lens rotates in the direction of the handle. First Person View (FPV) The lens follows the projection direction of the handle to simulate the first-person visual effect. Flashlight Mode (FL) When the handle is parallel to the ground, vertical shooting with 360 rotation can be carried out. Global Lock (GL) Press and hold the trigger button to enter into full lock under PF/HL mode. Vertical Shooting Assist the camera to shoot vertically
Four-directional Joystick Operation
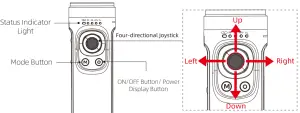
| Joystick Operation | Description |
| Push upwards /downwards | Tilt axis rotates up or down |
| Push left/right | Pan axis rotates left or right. |
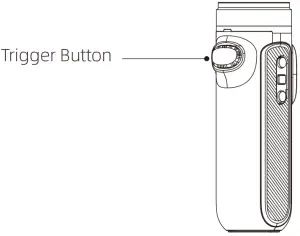
| Trigger Button Operation | Description |
| Press and hold | Into GL mode (release will back to previous mode) |
| Double press | Angle reset (Tilt axis and Pan axis return to initial position) |
| Three-times press | Selfie mode (Pan axis rotate 180 relative to initial position, Tilt axis reset at the same time ) |
Manual Lock
Grasp the camera and pull it to the specified angle in the tilt direction, stay for half a second and then lock the current angle.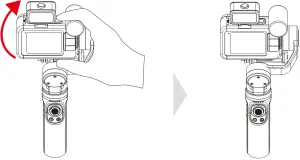
Connect to device
* Turn on the gimbal before connect to a device.
- Pull out the Selection Box from top to bottom, Click on “CONNECT”,
- Click on “Connect New Device”, ③ Click on“GOPRO APP”.


* If the above operation fails to connect the device, remove the pairing and make the following steps, and once again repeat the above steps.
- Pull out the selection box from top to bottom, click on “CONNECT”,
- Click on “Reset Connections ”, ③ Click on “RESET”.


Disclaimer
![]() Warning
Warning
The contents mentioned in this article are related to your safety, legal rights, and responsibilities. Please read them carefully and set up and use this product correctly according to the instructions. If you do not follow the instructions and warnings in this article, it may cause harm to you and the people around you and damage the product or the products around you. Any illegal use by any user is prohibited. The user will be responsible for all actions of purchasing and using the product. For this product, the company does not bear all the risks and responsibilities (including direct, indirect, or third-party losses) of the end customers during the debugging and use of this product.
Our company will not provide any service for any products obtained from abnormal channels or for unknown purposes.
Note
- Ensure that the motor rotation is not blocked by external force during and after the stabilizer is powered on.
- Make sure that the stabilizer is not exposed to water or other liquids.
- Do not disassemble the whole stabilizer. If it is disassembled carelessly and causes abnormal operation, please send it back for re-debugging. All the expenses arising therefrom shall be borne by the customer.
- Long time continuous operation may cause the surface temperature of the motor to rise, please operate with caution.
- It is strictly forbidden to fall or collide. Falling or colliding the stabilizer may damage it and cause abnormal operation. In case of abnormal work caused by falling or collision, please contact the after-sales department in time.
Storage and Maintenance
- Please keep this product out of the reach of children and pets.
- It is forbidden to place the product near the heat source (furnace or heater, etc.) and in the car in hot weather.
- Please store in a dry environment.
- Do not overcharge or over discharge the battery, otherwise it will cause damage to the cell.
- Do not use this product in too high or too low temperature environment.
FAQ
- How to connect to GoPro?
- Gimbal: Continuous and fast “click eight times the power button of the gimbal”.
- GoPro: Need to “Reset the connection”
- GoPro Hero 5:Connect -> Connect to new device -> GoPro APP
GoPro Hero 6:Connect -> GoPro APP
GoPro Hero 7:Preferences –> Connect -> Wireless connect -> Open ->
Connect to the device -> GoPro APP
GoPro Hero 8:Preferences -> Connect -> Wireless connect -> Connect ->GoPro APP
GoPro Hero9: New device connection: Connect – > Wireless connect -> Open ->
Connect-> GoPro APP
Connected device connection: Connect ->Connect to the device ->GoPro App GoPro Hero 10:Connect-> Wireless connect -> Open -> Connect to thedevice-> GoPro Quik APP - After successfully connect to the GoPro camera, the connection indicator of the gimbal will be steady green.
- Why cannot the gimbal turn on?
It maybe that the power of the gimbal is too low. Please charge for 10 minutes and then turn it on. - The gimbal boots vibrating?
- Check whether the installation is leveled and whether the screws are tightened. If the screws are not tightened, the gimbal may vibrate.
- If the firmware is older, please update the firmware.
- Why does not it take effect when you press the button to take a picture, record a video or delay a photo?
Since switching from one mode to another may only trigger the mode switching without triggering the operation, please press the corresponding mode again to trigger the operation (for example, switching from the photographing mode to the video mode, the gimbal only switches to the video mode without performing the video operation, so you need to press the video button again, GoPro camera can perform recording operation). - What is the reason that the boot is still crooked after the installation of the gimbal?
- If the installed camera is GoPro hero 8 or GoPro hero 9, it may be caused by the virtual position of the camera lock, please adjust the position of the camera.
- Connect the gimbal to the Falcon app and perform “static calibration” and “horizontal calibration”.
- Which GoPro Action cameras are compatible with?
- Cameras can be installed: DJI Osmo action, GoPro hero 10 / 9 / 8 / 7 / 6 / 5 / 4, Sony RX0, YI, SJCAM and other similar size and weight motion cameras;
- Installable and controllable camera: GoPro hero 10 / 9 / 8 / 7 / 6 / 5.
- If FALCON APP can not connect to the gimbal?
Method 1:- Restart the gimbal;
② Find the Bluetooth name of the gimbal in the phone setting, click “Cancel pairing/ Cancel Saving”;
③ Open the app of Falcon again, go to the Bluetooth connection interface to connect to the gimbal Bluetooth.
- Restart the gimbal;
- Method 2:
① Search for the Bluetooth of your phone and Click “Cancel Pairing” when you find it.
② After successfully cancel the pairing, connect to the Bluetooth again.
③ Turn on Falcon gimbal, search for the Bluetooth of the gimbal and connect to it. - Why does the gimbal power-on connection indicator blink red?
During the upgrade process, the upgrade interruption will cause the gimbal to boot into BOOT mode, thus the red light will flash. Upgrade again to solve the problem.
Product Parameter
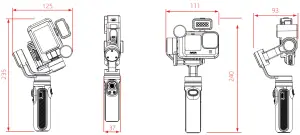
| Product Dimension | 235mm×125mm×37mm ( Folded Status ) 111mm×240mm×93mm ( Service Status ) |
| Product Name | Gimbal Stabilizer for Action Camera |
| Product Material | Aluminium Alloy |
| Charging Mode | 5V2A |
| Charging Voltage | 5V2A |
| Bluetooth Version | Bluetooth 5.0 |
| Battery Capacity | 2500mAh |
| Energy | 9Wh |
| Product Load | 200g |
| Endurance Time | Laboratory stationary placement test results are 9 hours. |
| Product Weight | 292.5g (Battery included and Tripod is not included.) |
| Bluetooth Device Name | INKEE 061 + Last four digits of serial number |
| Remote control distance | Within 10M |
Shenzhen Yingzhiqi Technology Co., Ltd
Address: 18A, Ruijun Business Building, No.108,Central Road,
Xinqiao Street, Bao’an District, Shenzhen,
Guangdong Province
Tel:+86 40096 80096
Website:www.in-kee.com
Latest version of the User Manual is available at Official Website:
https://www.in-kee.com/en/falcon/
This manual is subject to update without prior notice. If you have any questions or suggestions about the manual, please contact us at the following email address:
[email protected]
Official website QR code
WeChat Subscription