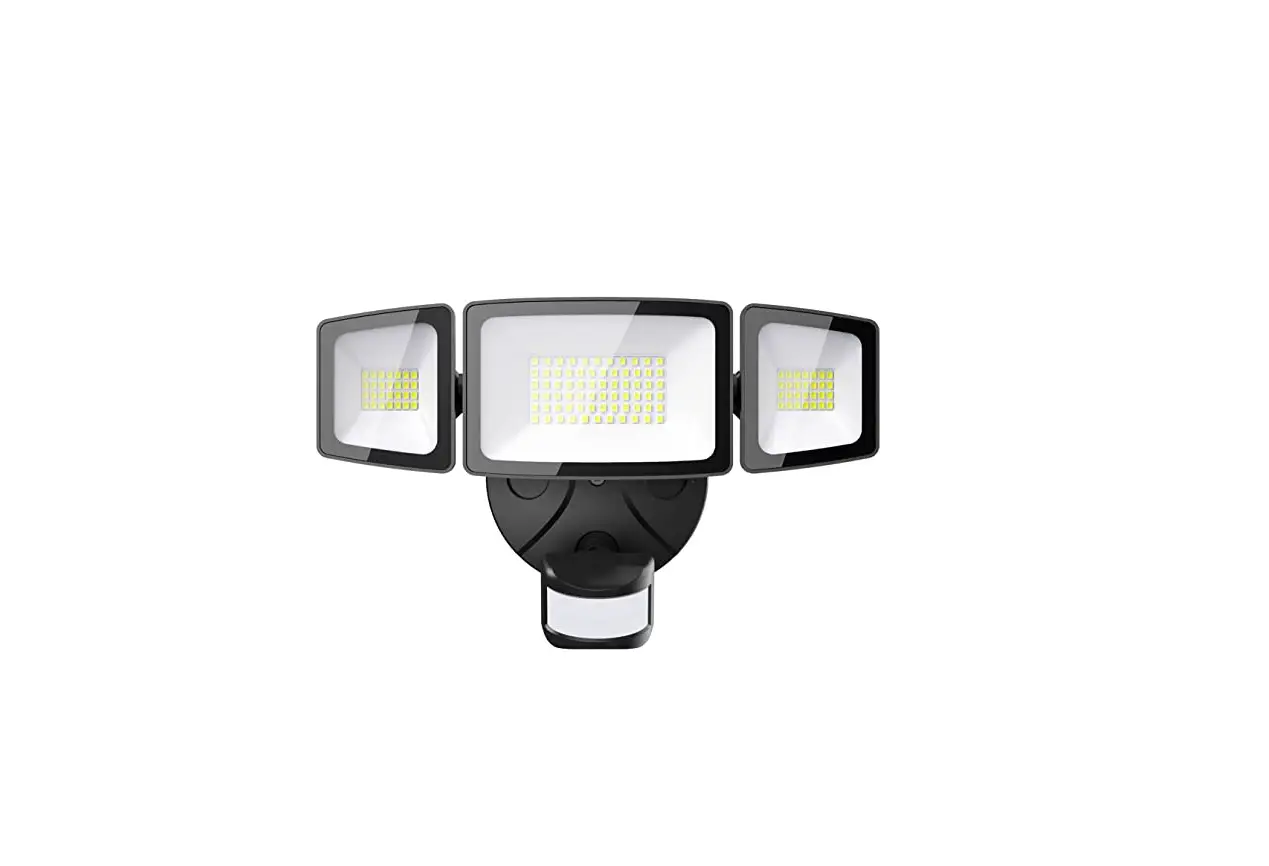
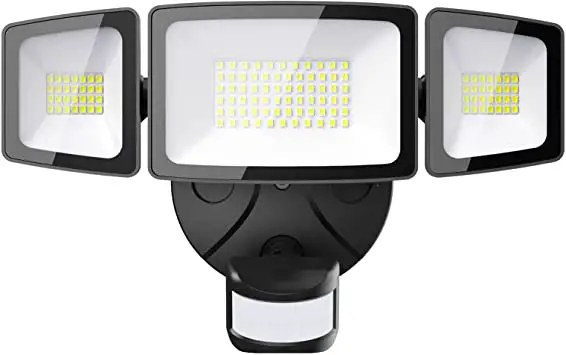
ONFORU BDJ55G-3 PIR LED Wall Lights
COMPONENTS AND STRUCTURE
BDJ55G-3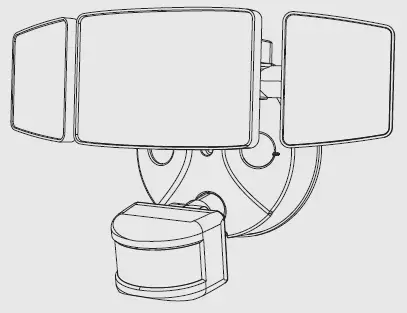
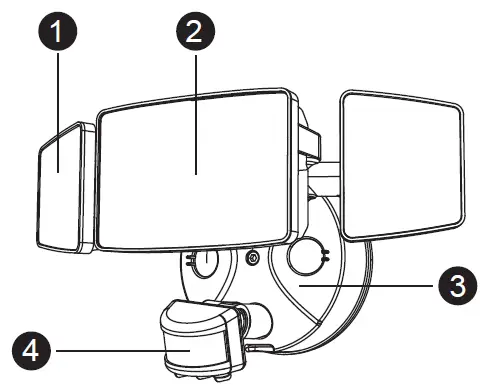
- Cover
- LED Light Source
- Lamp Bracket
- Sensor Head
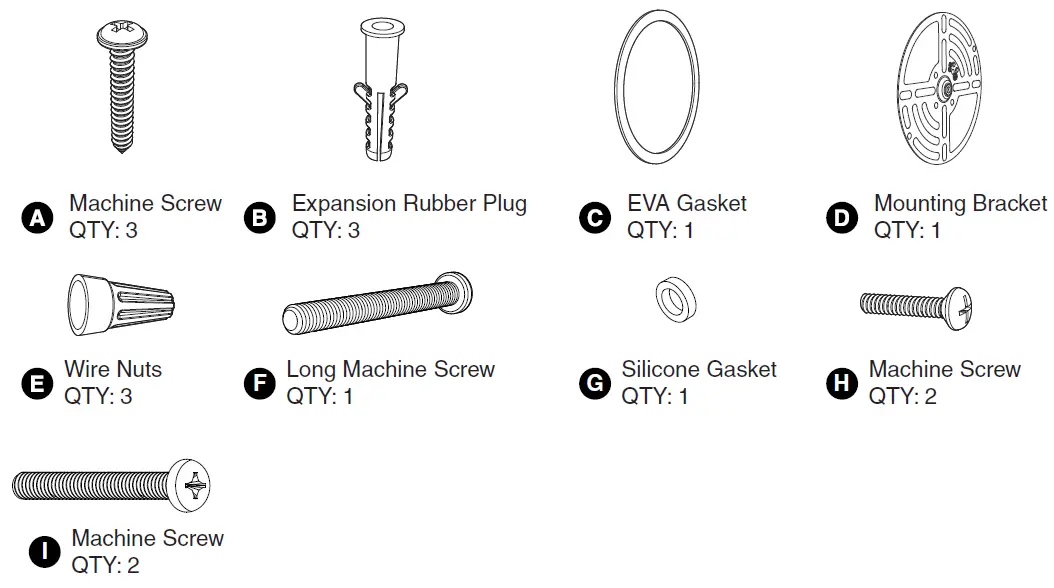
PARTS LIST
SPECIFICATIONS
| Malfunction | Cause | Remedy |
| LED senses a movement, the light does not light up | 1. The light is not energized 2. Other surrounding light sources make the light misjudge it as daytime 3. During the day, the brightness is in night mode 4. Internal wiring is loose | 1. Check power-on status 2. Turn off the nearby lights or sensor head to other directions 3. Reset 4. Rewiring after power failure |
| LED sensor light did not go out, continued to light up | Continuous movement within the sensing range | Check the relevant area and retune or override the sensor head if necessary |
| LED sensor light illuminates during the day | The shadows around the sensor make it mistakenly think it’s night | 1. Do not cover the sensor head 2. Place the light in a place where the light is bright enough during the day |
| LED sensor light flashing | Surrounded by other unstable light sources shining onto the induction | Avoid being exposed to such light sources |
| LED lights turn on unexpectedly | 1. Wind blows the branches and bushes within the sensing range 2. Sensing cars on the road 3. Sudden temperature change due to climate factors or fans, exhaust from open windows | 1. Adjust its scope 2. Adjust its scope 3. Change irradiation area |
Note:
The testing standard of the product’s luminous flux: Place the three/two lights on the same horizontal surface for testing, and the tested luminous flux is the accurate luminous flux.
Operation Instructions
The function knob is divided into 5 gears
- L: Low sensitivity, sensing distance is 4-6 meters.
- D2D: Light control mode, automatically turn the light on/off depending on the ambient brightness.
- M: Medium sensitivity, sensing distance is 6-10 meters.
- ON: Constant light mode: the light will always be on after being powered on, and won’t switch on/off automatically.
- H: High sensitivity, sensing distance is 10-15 meters.
Can identify day and night:
The consumer can adjust work ambient light. It can work in the daytime and at night when it is adjusted on the “+” position (max). It can work in ambient light less than 10LUX when it is adjusted on the “−” position (min).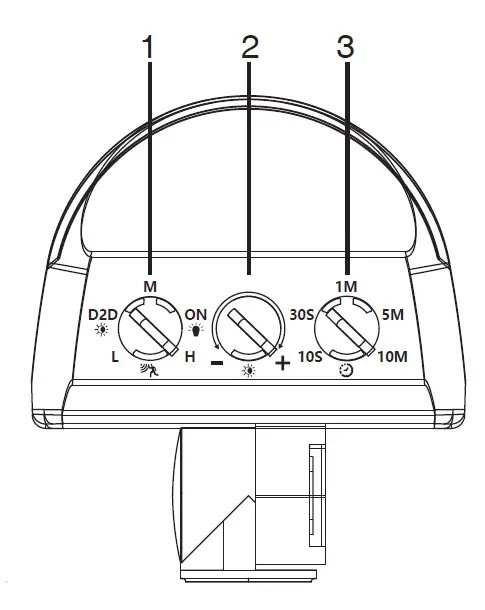
Time-delay adjustment:
It can be set according to the consumer’s desire, there are five gears: 10 seconds/30 seconds/1 minute/5 minutes/10 minutes. Time delay is added continually: When it receives the second induction signal after the first induction, it will compute time once more on the rest of the first time-delay basic (set time).
Detection Range: 180
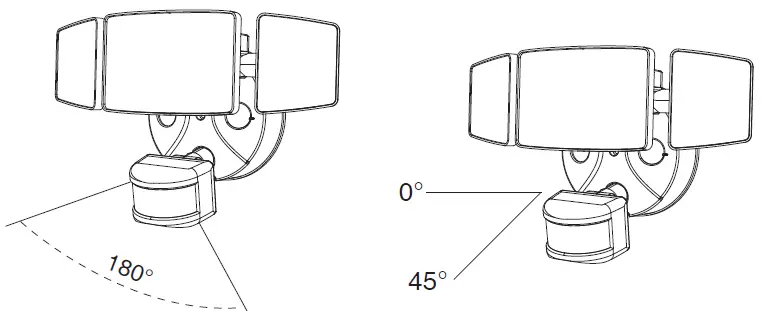
NOTE:
- The PIR sensor shall always be tilted slightly downward.
- The orientation angle of the sensor shall be between 0-45°.
- The detection distance of the sensor is the farthest when the ambient temperature is 25℃. Any temperature fluctuations above or below 25℃ will affect the detection distance.
- If the light continues to detect motion while it is on, it will remain on until the motion stops.
PREPARATION
NOTE:
Before beginning assembly of the product, make sure all parts are present. Compare parts with parts list.If any part is missing or damaged, do not attempt to assemble the product. Estimated Assembly Time:30-60 minutes. Recommended to be installed on the ground above 2.5m (8.2 ft) and no higher than 5 m (16.4 ft). Product appearance may vary from the image shown.
TOOLS REQUIRED(not included)

WARNING:
THIS PRODUCT MUST BE INSTALLED IN ACCORDANCE WITH THE APPLICABLE INSTALLATION CODE BY A PERSON FAMILIAR WITH THE CONSTRUCTION AND OPERATION OF THE PRODUCT AND THE HAZARDS INVOLVED.
CAUTION:
PLEASE MAKE SURE YOUR WALL SWITCH AND POWER AT THE MAIN CIRCUIT BREAKER BOTH ARE OFF. IF IN DOUBT ABOUT ELECTRICAL INSTALLATION, CONSULT A LICENSED ELECTRICIAN.
RISK OF SHOCK:
BEFORE BEGINNING INSTALLATION, TURN OFF ELECTRICITY AT THE CIRCUIT BREAKER BOX OR THE MAIN FUSE BOX.
NOTE:
BE SURE TO USE WIRE NUTS/CONNECTORS RATED FOR THE CORRECT GAUGE AND NUMBER OF WIRES USED. MAKE SURE THERE ARE NO EXPOSED WIRE BUNDLES OUTSIDE THE WIRE NUT/CONNECTOR (IF APPLICABLE). BE CAREFUL NOT TO DAMAGE OR CUT THE WIRE INSULATION (COVERING) DURING INSTALLATION. DO NOT LET THE WIRES TOUCH ANY SHARP EDGES.
WARNING:
DO NOT CONNECT THIS LIGHT FIXTURE TO AN UNGROUNDED ELECTRICAL SYSTEM. ATTACH GROUND FIXTURE WIRE TO EITHER THE GREEN GROUND SCREW ON THE MOUNTING PLATE OR THE GROUND WIRE IN THE OUTLET BOX. INSTALLING THIS LIGHT IN AN UNGROUNDED ELECTRICAL SYSTEM MAY CAUSE THE METAL PARTS OF THE LIGHT TO CARRY CURRENT IF ANY WIRES OR WIRE CONNECTIONS ARE DAMAGED OR LOOSE. IN THIS CASE, ANYONE WHO TOUCHES THE LIGHT WILL RECEIVE AN ELECTRIC SHOCK, RESULTING IN INJURY OR DEATH.
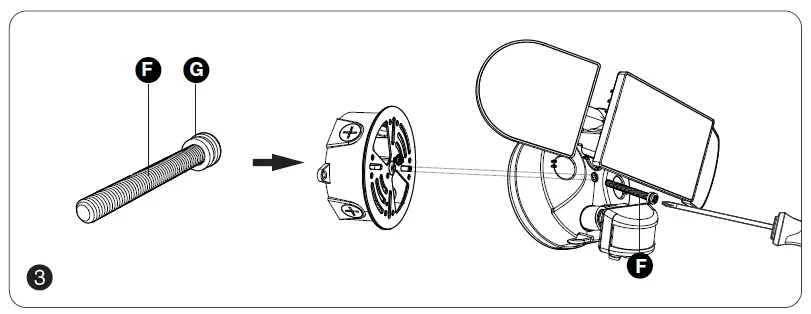
INSTALLATION STEPS
FOR WET LOCATION, MAKE SURE TO FILL FULL THE GAP OF THE EVA GASKET AND MOUNTING SURFACE WITH SEALING COMPOUND OR SILICON GLUE.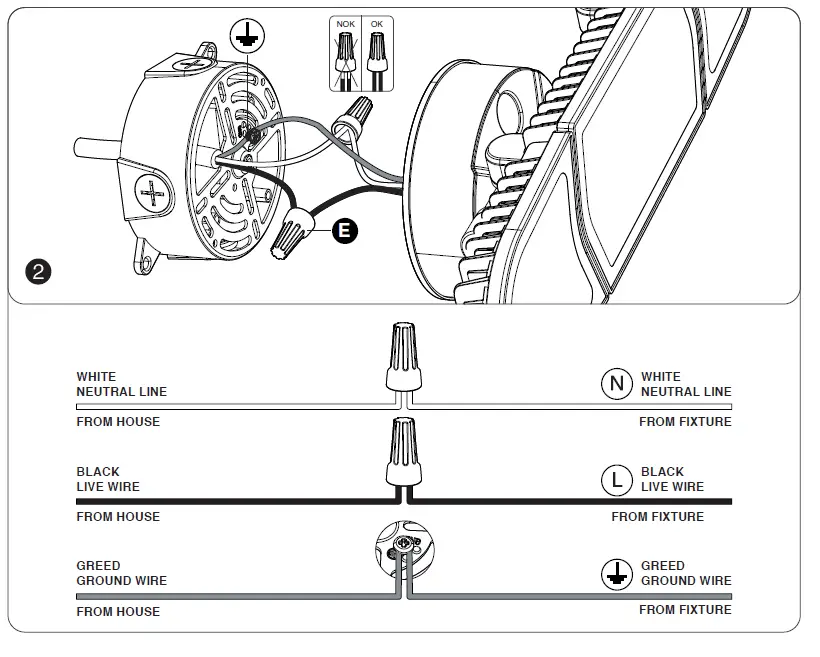
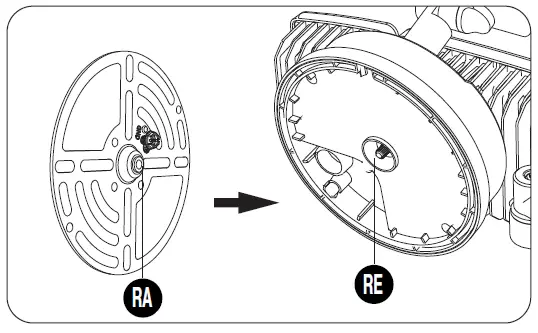
Note:
The raised part (RA) of the metal plate must be engaged with the recessed part (RE) of the base, otherwise, it cannot be installed.
Troubleshooting
| Malfunction | Cause | Remedy |
| LED senses a movement, the light does not light up | 1. The light is not energized 2. Other surrounding light sources make the light misjudge it as daytime 3. During the day, the brightness is in night mode 4. Internal wiring is loose | 1. Check the power-on status 2. Turn off the nearby lights or sensor head to other directions 3. Reset 4. Rewiring after power failure |
| LED sensor light did not go out, continued to light up | Continuous movement within the sensing range | Check the relevant area and retune or override the sensor head if necessary |
| LED sensor light illuminates during the day | The shadows around the sensor make it mistakenly think it’s night | 1. Do not cover the sensor head 2. Place the light in a place where the light is bright enough during the day |
| LED sensor light flashing | Surrounded by other unstable light sources shining onto the induction | Avoid being exposed to such light sources |
| LED lights turn on unexpectedly | 1. Wind blows the branches and bushes within the sensing range 2. Sensing cars on the road 3. Sudden temperature change due to climate factors or fans, exhaust from open windows | 1. Adjust its scope 2. Adjust its scope 3. Change irradiation area |


