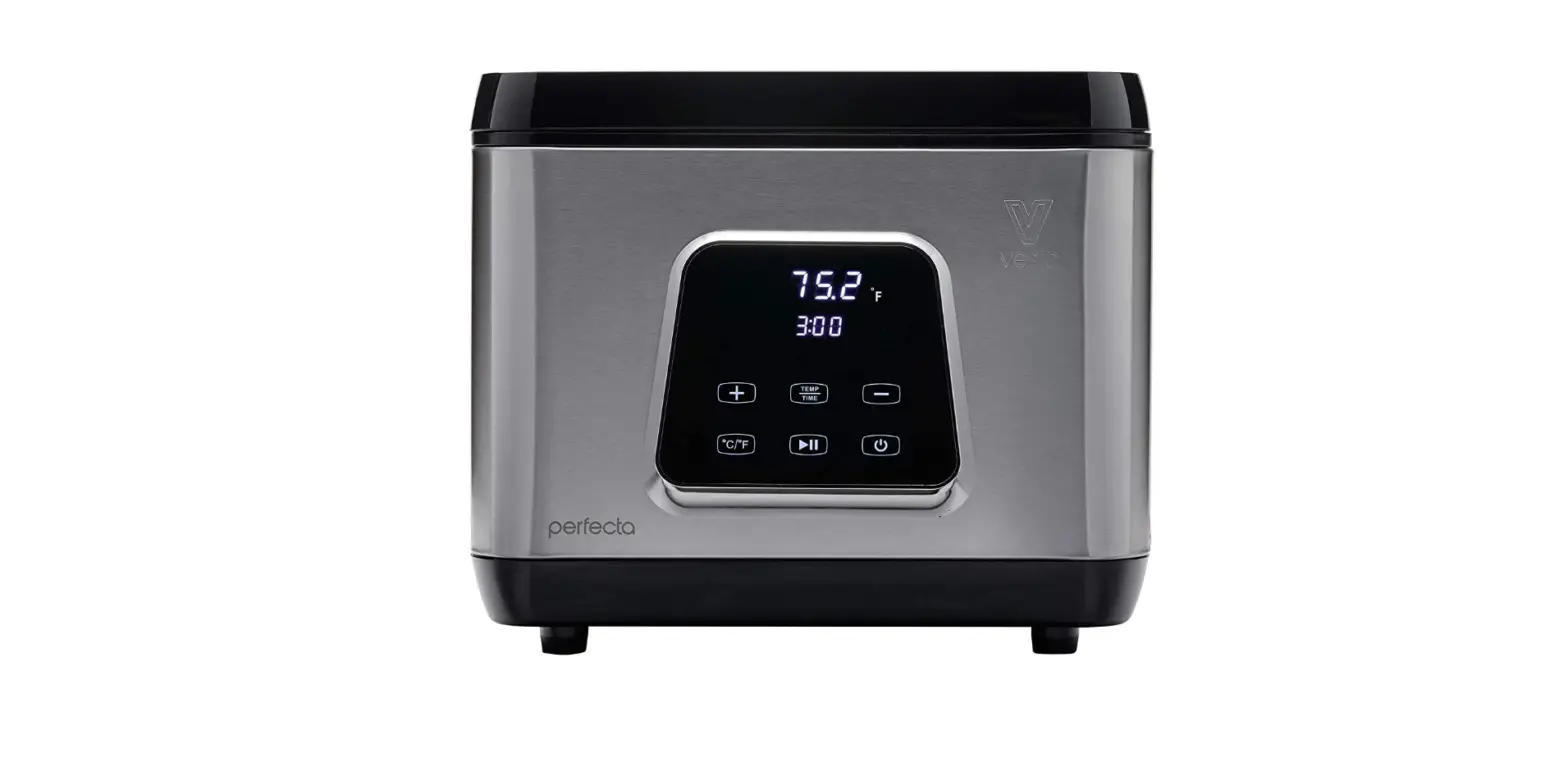

V Vesta Precision Sous Vide Water Oven by Vesta Precision
IMPORTANT SAFETY INFORMATION
When using this electrical appliance, basic safety precautions should always be followed including:
- Read and understand all instructions.
- Operate the appliance indoors only on a dry, stable, hard surface.
- Connect to a grounded outlet of the correct rating only.
- Do not use the appliance near a heat source, on a hot surface, or in wet conditions.
- To protect against electrical shock, do not immerse the appliance in water or other liquid.
- Do not use the appliance with water above the MAX line or below the MIN line.
- Unplug the appliance from the walloutlet when not in use and before cleaning, draining, and storing.
- Always unplug the appliance using the plug and never pull on the cord.
- Do not operate the appliance if the cord or plug is damaged.
- Do not operate the appliance if it malfunctions or is damaged.
- Children should not use this appliance. When in use around children, close supervision by an adult is necessary and the appliance should be kept out of their reach.
- This appliance is not intended for use by people with reduced physical, sensory or mental capabilities or who lack experience with cooking appliances.
- Do not use an extension cord with this product.
- Use caution as the metal parts of the appliance will become hot and could cause injury.
- Use this appliance for its intended use only.
BENEFITS OF COOKING SOUS VIDE
Developed in France in the 1970s, sous vide is a culinary technique in which food is vaCUum-sedled and cooked in d water bath at a consistently low temperature for an extended period of time. Ideal for families with busy schedules and health-conscious lifestyles, sous vide cooking delivers easy meal solutions that make dinnertime virtually foolproof. Cooking sous vide provides consistent results for cooking proteins, fruit, vegetables, grains, and starches, as well as desserts, sauces, and infusions.
OVERVIEW OF COOKING SOUS VIDE
There are several elements needed for successfully cooking sous vide. First, determine the temperature and time required for cooking your food item. The Vesta app has a wealth of time and temperature values for many ingredients. Second, season and vacuum seal the food item. Seasoning the ingredient before vacuum sealing optimizes the flavor. Third, place the vacuum sealed food item info the pre-heated water bath for the specified amount of time. From the temperature and time information, determine when you want to eat and then go about your day.
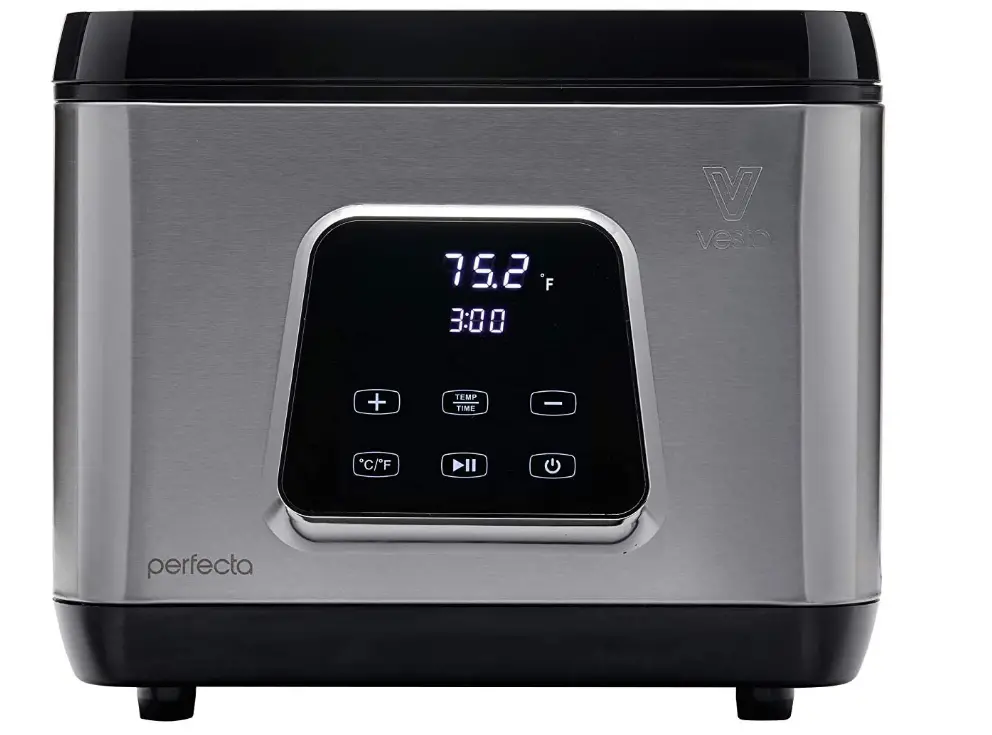
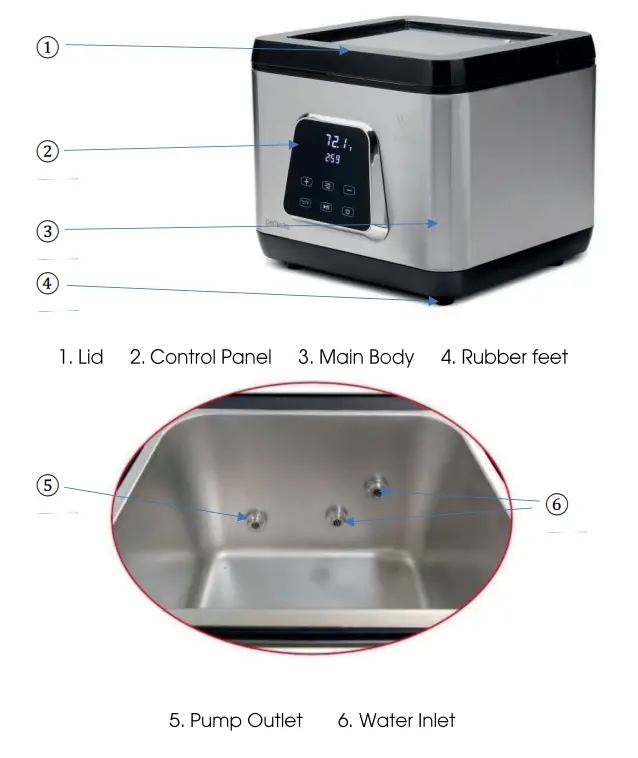
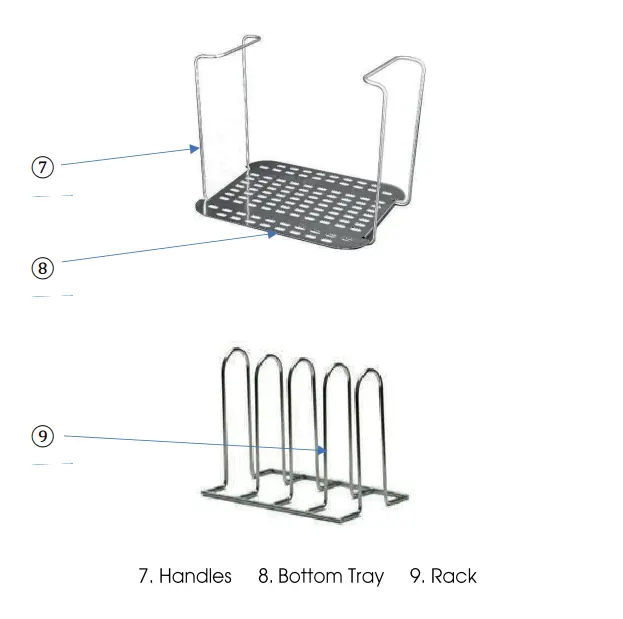
PRODUCT COMPONENTS
Control Pannel
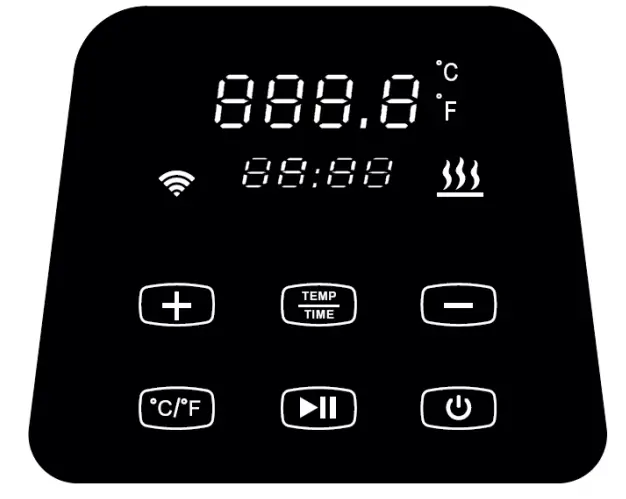 Power Button
When plugged in, all buttons and indicators will flash for 2 seconds before the device enters power saving mode (with only the “Power” button illuminated).
When the device is in power saving mode, press the “Power button to activate standby mode. When in standby mode, the large numeric display shoWS fhe last wafer temperature set and the small numeric display shows the last time. Pressing the “Power” button again will end the power-saving mode.
Temperature Selection Button (°C/°P)
Press the C/F* button to toggle between Celsius and Fahrenheit temperature measurements.
Temperature and Timer Selection Button (Temp/Time)
- Press the “Temp/Time” button to toggle between setting temperature or time. When pressed once, the temperature display blinks, and pressing “+” or “-” sets the target temperature. When pressed a second time, the timer display blinks, and pressing the+” or -” sets the target time.
- After approximately 10 seconds with no change to the selected option made, the device will exit the temperature/timer sniffing
mode. Press Temp/Time again to enter the setting mode - Press and hold the “Temp/lime” button for 3 seconds to show the Currently set temperature and time.
Start/Stop Button
- When in standby made, press the “Start/Stop” button once to start the heater and pump to pre-heat the water bath to the desired temperature.
- When the desired temperature is reached, the device wll beepp three times. To start cookng, place the vacuum sealed item(s) into the water bath and press the “Start/Stop” button to start the timer. The timer will begin counting down to 00:00 and the flame icon will still be illuminated to show the unit is actively maintaining the desired temperature.
- When the timer runs down to 00:00 and beeps or when finished cooking press the “Stari/Stop” button to stop the device. The timer willstop, and the flame icon will no longer be illuminated.
Temperature and Timer Adjusting Buttons( +)
Press the Temp/Time” to select which value to set, then press “+” or ” to acdjust to the target temperature or time
Temperature Display (Upper)
When in standby mode, the target temperature is displayed. When the device is active, the current temperature is displayed.
Timer Display (Lower)
When in standby mode, the target time is displayed. When the device is active, the remaining time on the timer is displayed.
Wireless icon
The wireless icon iluminates when the device is connected to the wireless network.
Flame icon
The flame icon pulses when the device is heating to or maintaining the desired femperafure.
CONNECTING WIFI
Before connecting to your wi-fi network..
- Be sure to have the Vesta app installed from either Google Playstore for Android or Apple AppStore for Apple/ioS phones.
- Connect to your 2.4 GHz network and have the SID and nefwork password available.
- Open the Vesta app and egister or login fo your account.
- Plug in the Perfecta and press the Power button fo swifch fo standby mode.
While logged in to the app with the Perfecta in standby mode.
- Select “Manage Devices or “Connect Devices” from the lower right-hand corner of the app.
- Click the “+” to add a new device.
- Select the SSID in use (the app will populate it by default) for fhe 2.4 GHz wireless nefwork and enter the password before pressingNext”.
- When prompted, press and hold the “°C/°F* and “Start/Stop” buttons until the Wireless icon on the Control Panel begins to flash.
- Click “Next” in the app to begin the pairing process.
- Keepthe phone and the device in proximity to each other until the pairing process is complete, approximately 15 to 60 seconds.
- If the pairing process fails, check that the phone is connected to a 2.4 GHz network, verify the password is correct, and keep the phone and device in close proximity before trying a second time. Additional troubleshooting tips are available in the Troubleshooting section.
COOKING SOUS VIDE
- Select sturdy and level work surface for the Perfecta.
- Add water to the bath, to a level above the MIN line and below the MAX line orn the back of the device. NOTE: Take into consideration the displacement of the food items to be cooked.
- Plug in the device. The Control Panel display will iluminate for 2 seconds and beep before enfering power saving mode
- Press the Power button to enter Stand By mode.
- Press “°C/°F” to select the temperature display unit for the device. The initial default is °C. The selected value will bee stored in memory for the next time you turn on the device.
- Click Temp/Time” to set the temperature. While the Temperature value is flashing, adjustthe value with the “+” and -” keys.
- Click Temp/Time” to set the timer. While the Timer is flashing. adjust the value with the “+” and “-” keys.
- Affer the femperature and fimer seffings are complete, click “Start/Stop” to start heating cycle. The Flames icon will pulsatee while the heater and pump are active
- When the water reaches the target temperature, the device will beep for 3 times. Place the vacuum-packed food into the water.
- Press the “Start/Stop” button to start the timer. The Flames icon will confinue fo glow signifying the heater and pump are running.
- When the timer reaches 00:00, the machine will beep to notify you that the food is cooked. Press “Start/Stop”to stop the pump and heafer. NOTE: if fhere is no action faken affer fhe fimer reaches 00:00, the device will maintain the set temperature.
- Remove the food item from the water bath and finish preparing the dish as desired.
- When finished using the device, press the Power button to enter power saving mode and unplug the device. Allow it to cool before draining, drying. and storing
NOTE
Always drain by pouring from the corner with the arrow.
MAINTENANCE
To avoid possible injury from hot surfaces, please power off the appliance and allow if fo cool down before performing any maintenance.
- Place the device verfically affer cleaning fo allow if fo drain completely, do not place it horizontally or upside down.
- Do not use abrasive cleansers or scouring pads to clean the machine to avoid scratching the surface.
- Clean the outside of the machine with a soft, damp cloth or sponge, using mild dish soap and warm water when necessary.
- Dry the machine gently, but thoroughly, with a soft, clean cloth.
- Depending on fhe hardness or soffness of your wafer, descaling the device may be necessary. If you notice a decrease in the pump flow, please follow the steps outlined in How fo Descale.
HOW TO DESCALE
Dissolved minerals in water can adhere to the metal components inside your Perfecta and over time will adversely impact its performance. Periodic cleaning and descaling will keep your device in fop working order.
- Fill a container with 75% water/25% vinegar mixture up to the MAX” line of the machine.
- Turn on the device, set the working temperature to 80°C/(176 F), set the timer to 3 hours (03:00), and click “Start/Stop”. When the target temperature is reached, press ‘Start/Stop” to stat the timer.
- When the fimer reaches 00:00, stop the device and power if down. Unplug it from the outlet and allow it to cool.
- Drain the container and rinse the device in clean water.
TROUBLESHOOTING
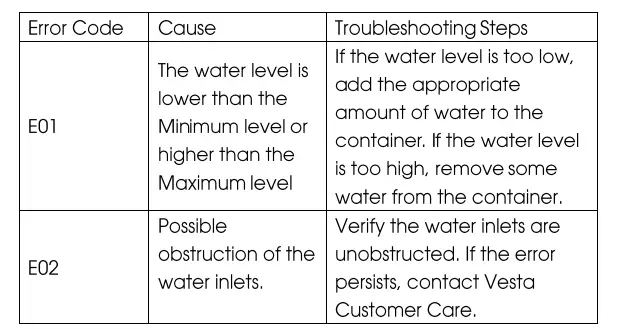 If any ofher problems or errors occur, pledse confact Vesfa Customer Care. Do not aftempt unauthorized repairs.
TECHNICAL PARAMETERS
- Rated voltage: 110-120 V- / 220-240 V
- Rated frequency: 60HZ / 50HZ
- Rated power: 650 W/ 620 W
- Temperature Range: 5-95 °C/41 -203°F
- Time Range: 5 min to 99 hours
- Accuracy: tl °F
- Size: 13.8×12.9×11.3in (332x327x288mm)
- Weight: 14.55 lb. / 6.6 kg
LIMITED WARRANTY AND AFTER SALES SERVICE
Returns
If you are not fully satisfied, our products come backed with a 30 day, no questions asked, money-back guarantee. To be eligible for a full refund, you must:
- Have purchased your product in the last 30 days directly from Vesta Precision
- Have fhe original order number or email that was used during your purchase
- Email your request for your return and full refund
Full refunds can nly be provided within 30 days of purchase directily from Vesta Precision. Devices purchased through resellers, retail partners, or other websites are not eligible for a return and full refund. Please consult their return policies for more information. We cannot providea full refund for any damaged devices not covered under our limited warranty.
- Have purchased your product in the last 30 days directly from the Vesta Precision
- Have fhe original order number or email that was used during your purchase
- Email us to request an exchange
Retail exchanges can only be provided within 30 days of purchase dlrectily from Vesta Precision. Products purchased through resellers, retail partners, or other websites are not eligible for a retail exchange. Please consult their exchange policies for more information. We cannof provide a refail exchange for any damaged devices nof covered under our limifed warranty.
Warranty Replacements
Our products come with a 2-year limifed warranty. Warranty replacements are eligible within 2 years of original date of purchase To be eligible for a warranty replacement, you must:
- Have purchased the product within the last 2 years
Have the original order number or email thaf was used during your purchase. If purchased through a reseller, retail partner, or ofher websife, you must provide a copy of your original receipt
Email us fo request warranty service
Warranty replacements can only be provided within 2 years of original purchase date. We cannot provide a warranty replacement for any damaged devices not covered under our limifed warranty.
Shipping Charges
Shipping charges incurred in connection with the return, exchange, or warranty repacement are paid for by Vesta via prepaid waybill issued by the supporf feam.
Damaged and Defective Items
If you received a damaged or defective product, notify us immediately for assistance via phone, email, or web sSupport. Please nofe that if we do not have an exact replacemenf for your unit, we will replace it with a similar unit of equal or greater value.
What Does This Limited Warranty Not Cover?
Ihis limifed warranty does nof cover damages directly or indirectly arising or resuifing from or during
- non-intended use of the product for any purpose not described in the user manual, and
- non-intended use with another product or other damage or loss suffered by such use or in combination with any other item
- accident, misuse, dbuse, Vandalism, power surges or acTs of God (including lightning and other weather conditions)
- improper or inadequate maintenance unauthorized disassembly or modification’
- repairs by an unauthorized service technician
WE ARE NOT RESPONSIBLE FOR AND THIS LIMITED WARRANTY DOES NOT EXTEND TO ANY CONSEQUENTIAL, INDIRECT, SPECIAL INCIDENTAL OR PUNITIVE DAMAGES ARISING OUT OF OR RELATING TO THE UNIT. Some jurisdictions do not llow the exclusion or
limitation of incidental or consequential damages, so the above limitation may not apply to you. This limited warranty is not transferable and is limited to the original purchaser.
Precision Appliance Technology, Inc.
Questions or Problems?
Contact support via
Website: www.vestaprecision.com
Email: [email protected]
Phone:+18335045101 (US)
+442039363041 (EU)
Frequently Asked Questions
The Perfecta can withstand temperatures between 68°F and 203°F. Up to 99 hours and 59 minutes can be programmed into the timer.
The Perfecta doesn’t have a delay timer, unfortunately. We recommend that your vacuum sealed food not linger in the food borne disease danger zone for more than 4 hours to promote food safety when cooking sous vide. The food should be put into the water bath at the proper temperature before the timer is set.
Yes, a chart listing the temperatures and times to cook various items is included (beef, pork, poultry, etc.).
No, although zip lock freezer bags are an option. On Amazon, I purchased the vacuum sealer-compatible bags. They are reusable.
Yes, a rack is included.
Yes, a divider rack is included with the Perfecta.
You can use the Vesta sous vide app to control the Perfecta if it is powered on and connected to your WiFi network.
A rack is included, yes.
No, using WiFi is not necessary to utilise the Perfecta.
Although it is impossible to quantify this number, the Perfecta’s internal measurements are roughly 12×9.5×6.5 inches.


