 STEP by STEP INSTALLATION GUIDE
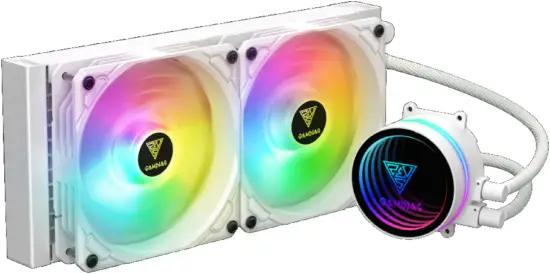
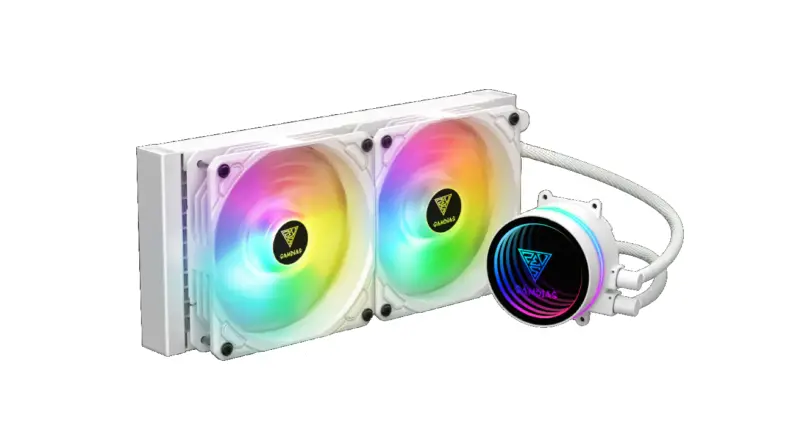
Package Contents
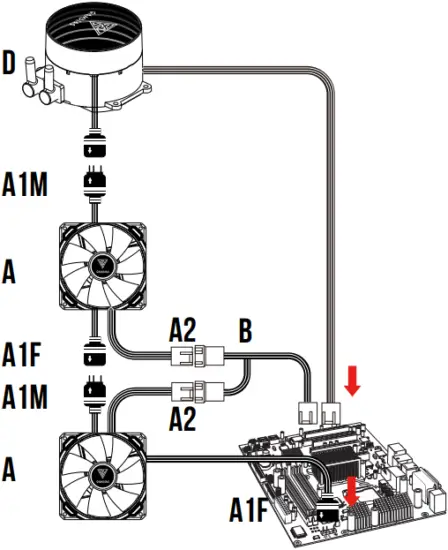
A 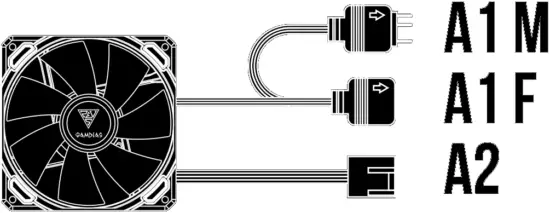 X2
X2
B 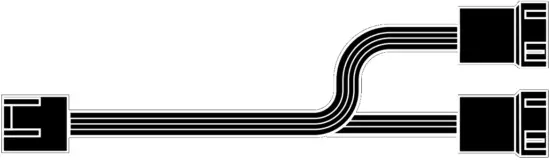 X1
X1
C 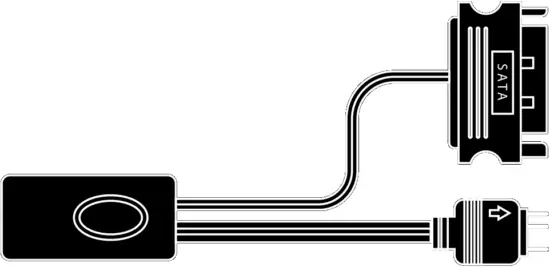 X1
X1
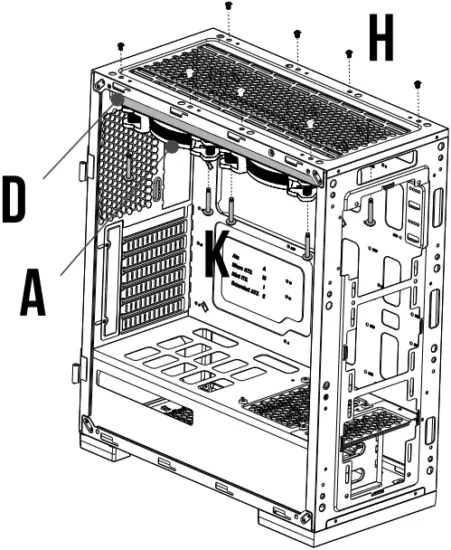
D 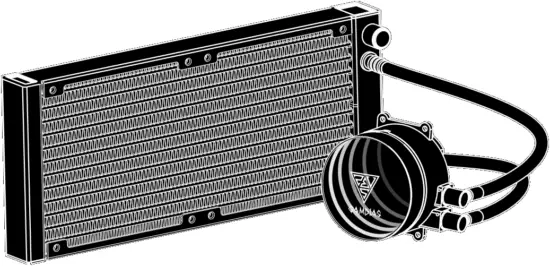 X1
X1
E ![]() X1
X1
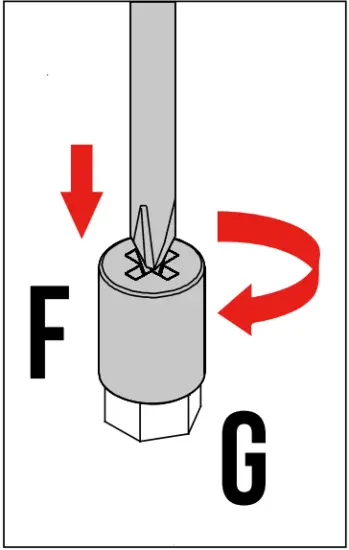
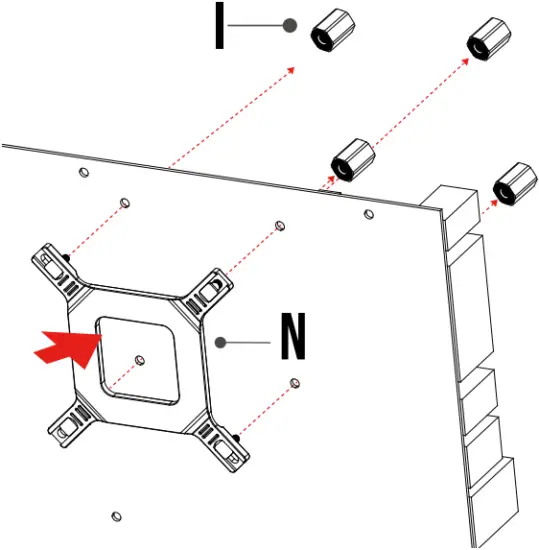
F G H I J
 X1
X1  X4
X4  X8
X8  X4
X4  X4
X4
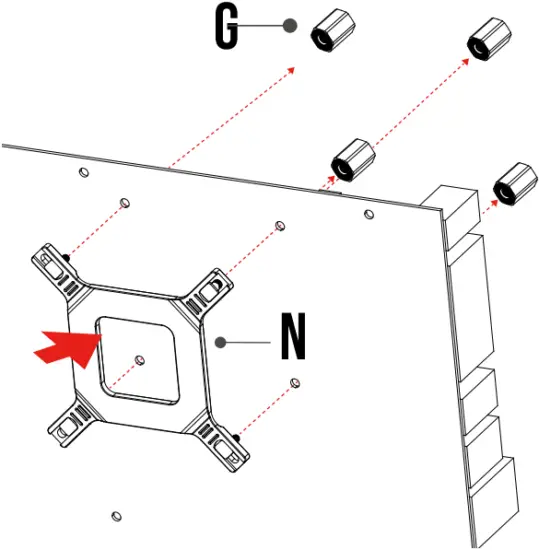
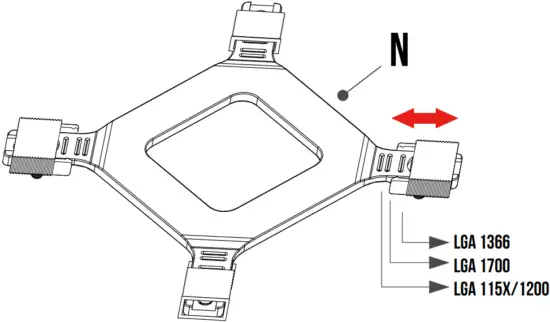
K L M N
 X8
X8  X1
X1  X1
X1 
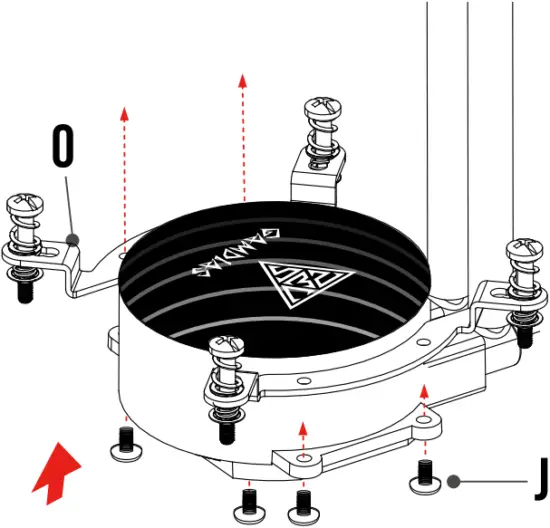
O P Q R S
 X2
X2 ![]() X1
X1  X2
X2  X4
X4  X4
X4
T U
 X1
X1  X1
X1
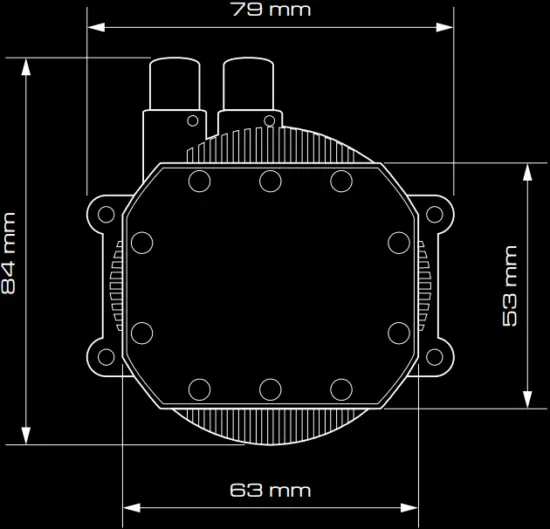
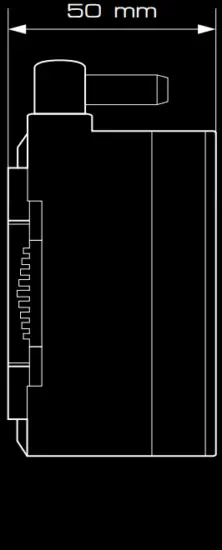
Pump Dimensions
Intel ( LGA1366/115X/1200 )
1
2

3

![]() The insulating plate should face with motherboard
The insulating plate should face with motherboard
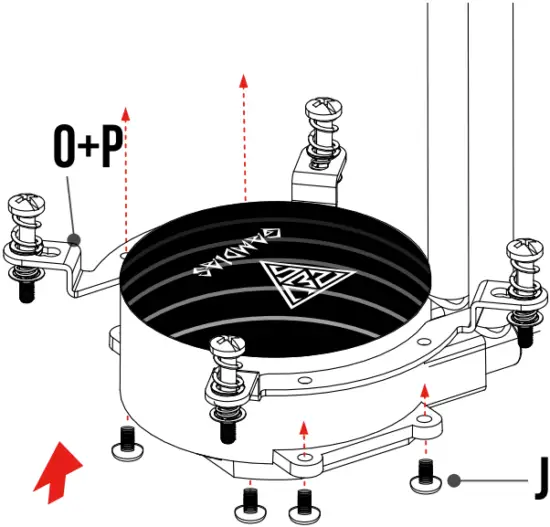
4
5
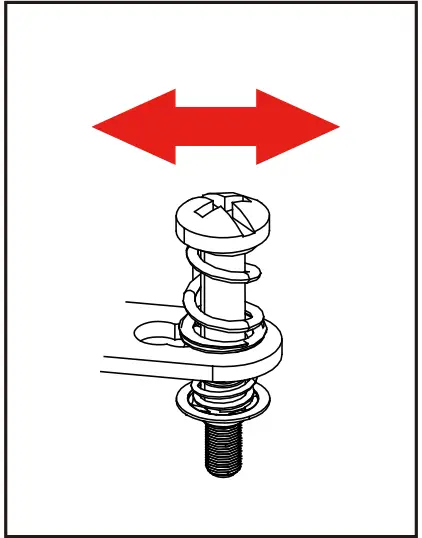
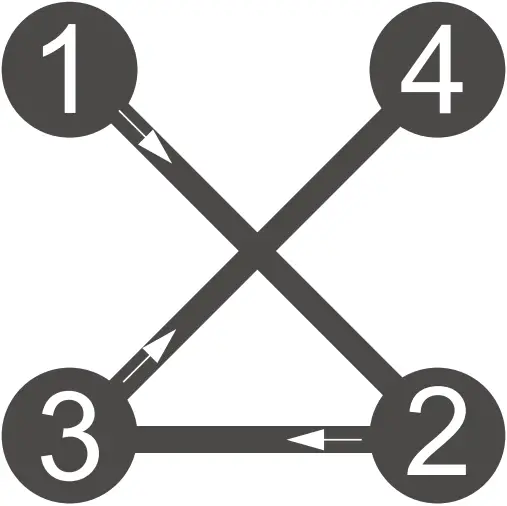
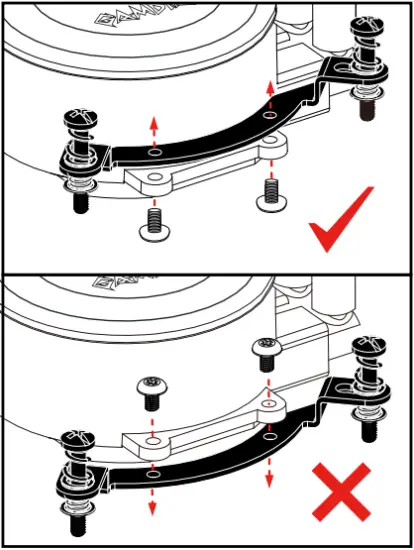
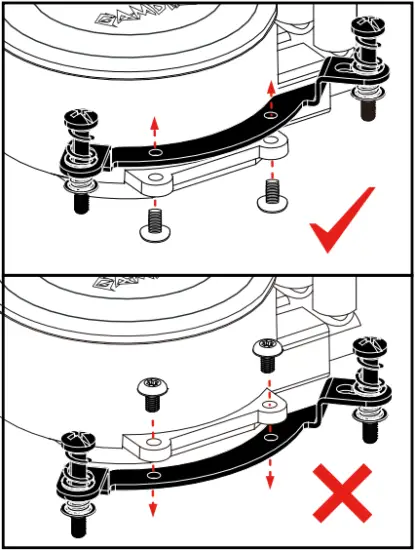
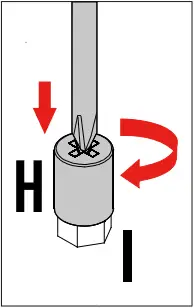
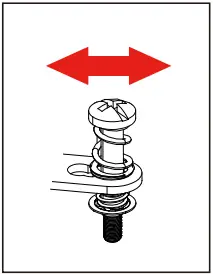
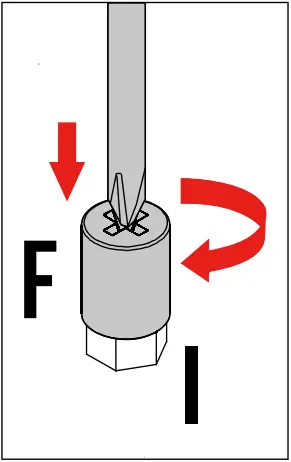
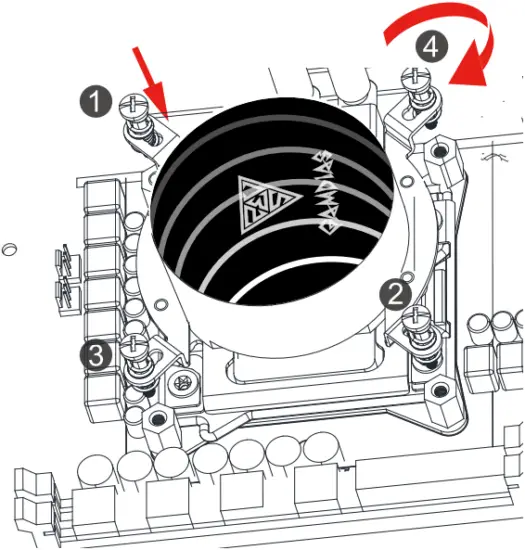
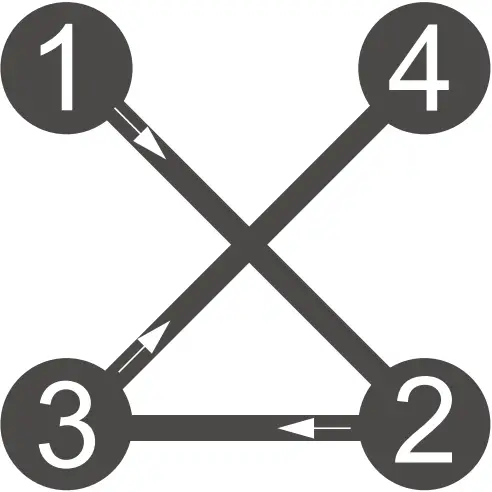
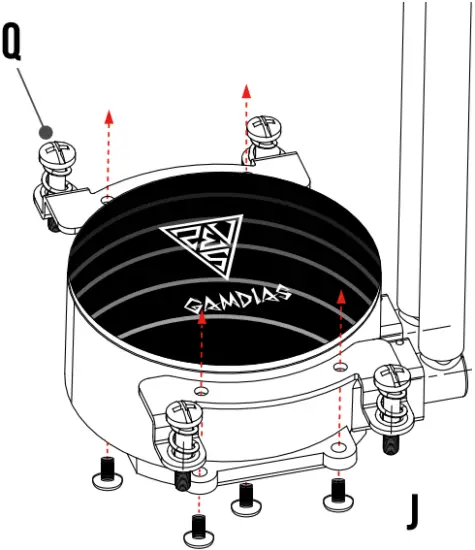
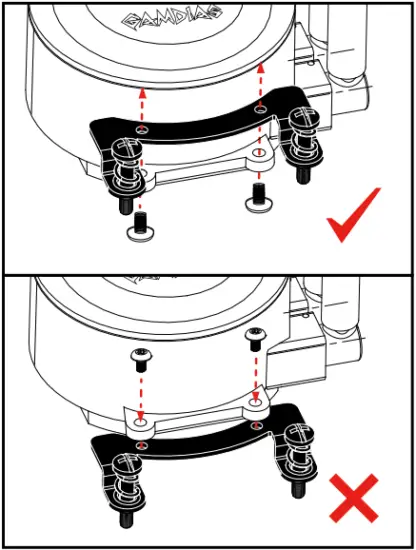
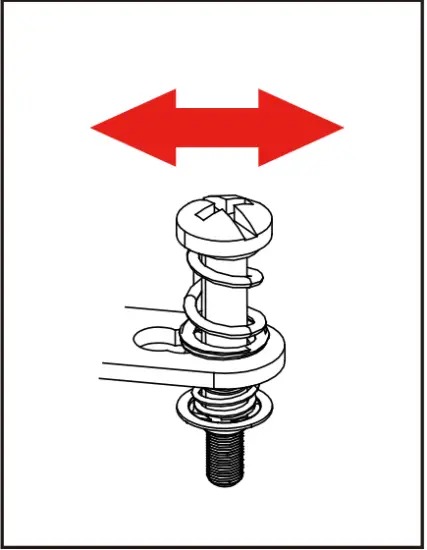
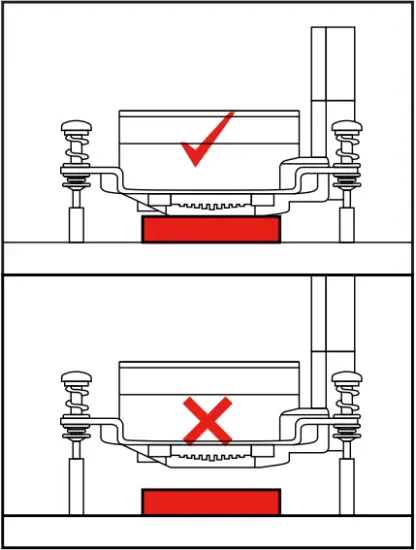
![]() Please tighten the screws in a diagonal sequence to spread the tension properly.
Please tighten the screws in a diagonal sequence to spread the tension properly.
Intel ( LGA1700 )
1
2
3
4
5

![]() The insulating plate should face with motherboard
The insulating plate should face with motherboard
6
7

![]() Please tighten the screws in a diagonal sequence to spread the tension properly.
Please tighten the screws in a diagonal sequence to spread the tension properly.
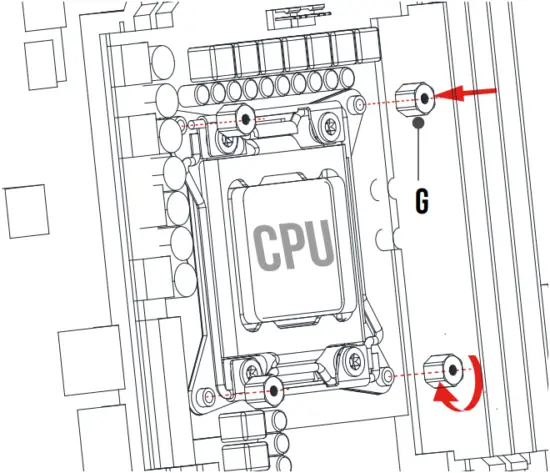
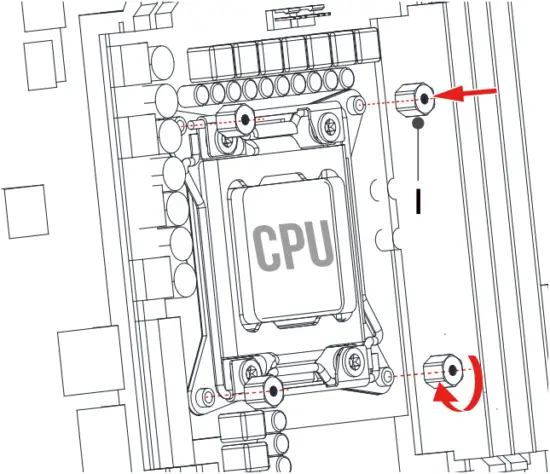
Intel ( LGA2066/2011/2011-3 )
1
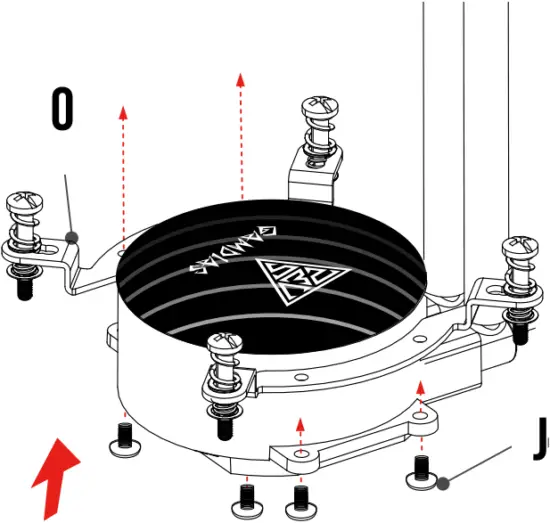
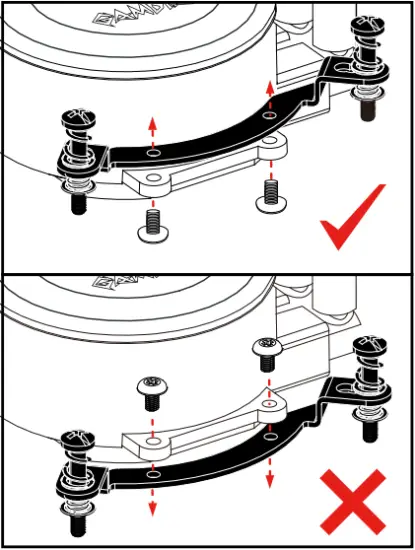
2
3

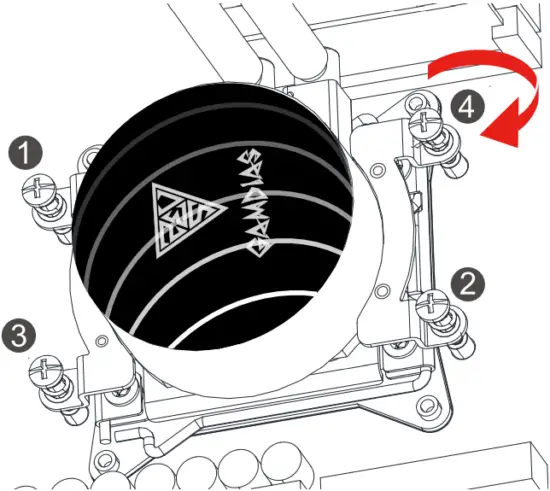
![]() Please tighten the screws in a diagonal sequence to spread the tension properly.
Please tighten the screws in a diagonal sequence to spread the tension properly.
AMD(AM4/AM3+/AM3/AM2+/AM2/FM2+/FM2/FM1)
1

2
3
![]() Please tighten the screws in a diagonal sequence to spread the tension properly.
Please tighten the screws in a diagonal sequence to spread the tension properly.
AMD(TR4)
1


2

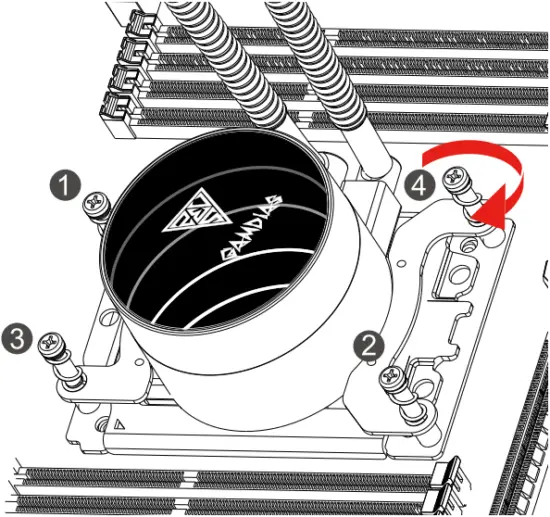
![]() Please tighten the screws in a diagonal sequence to spread the tension properly.
Please tighten the screws in a diagonal sequence to spread the tension properly.
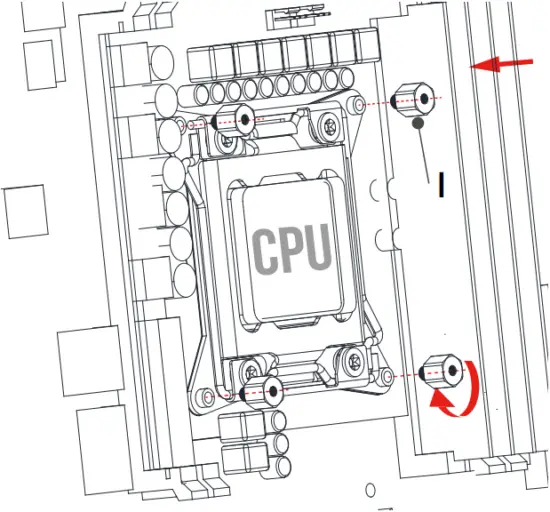
Intel / AMD
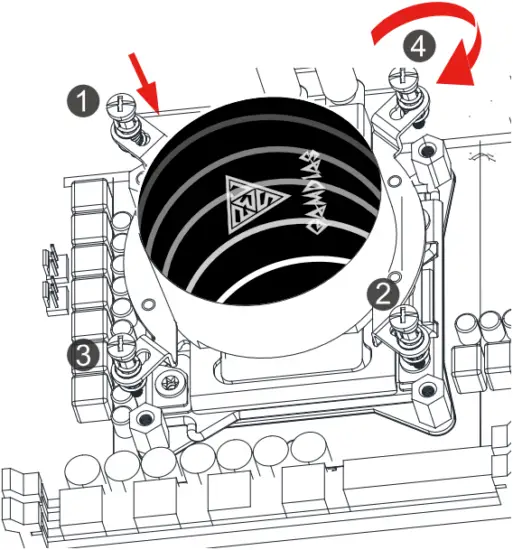
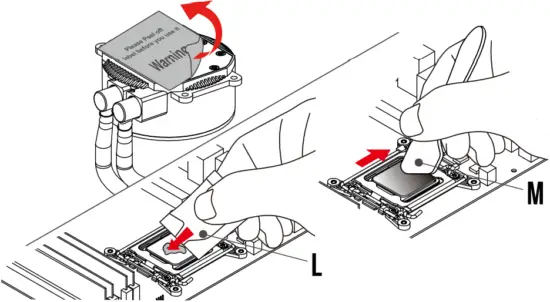
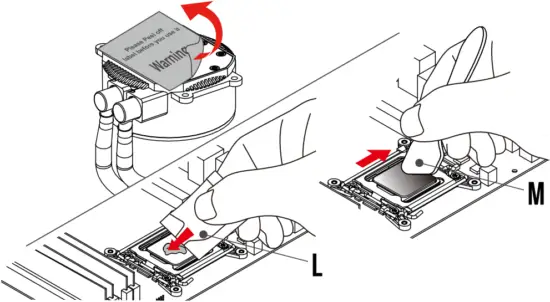
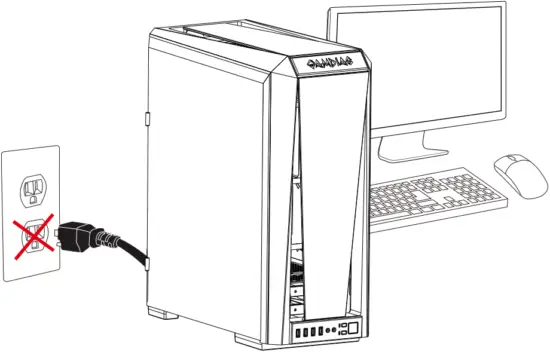
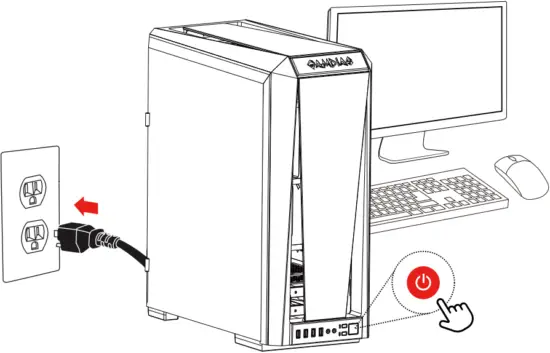
1 Turn off the computer before installing
2
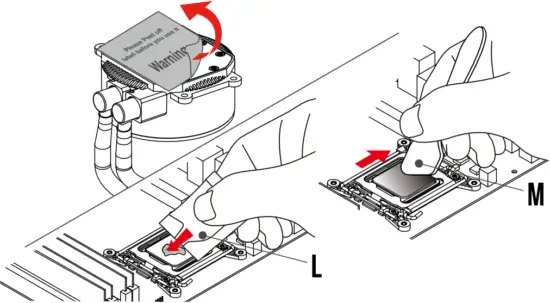
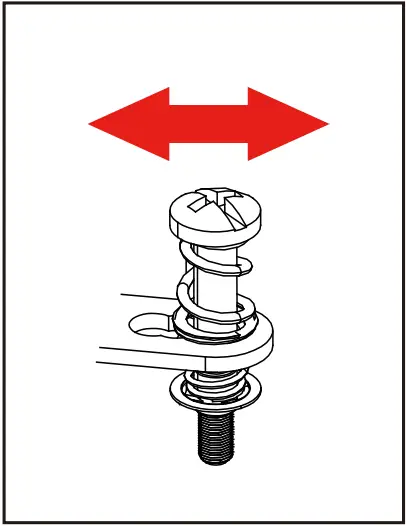
![]() Make sure pump firmly touch CPU
Make sure pump firmly touch CPU
3
4
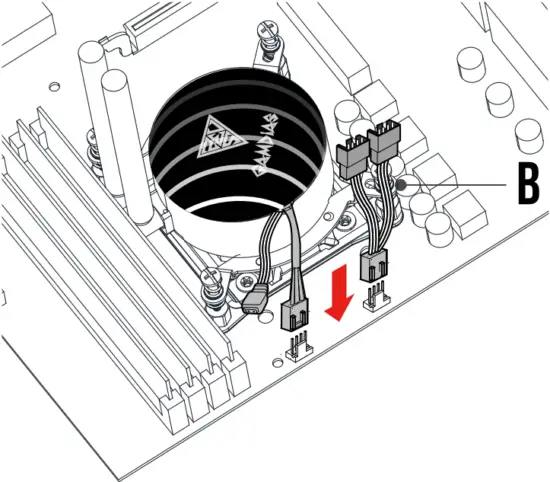
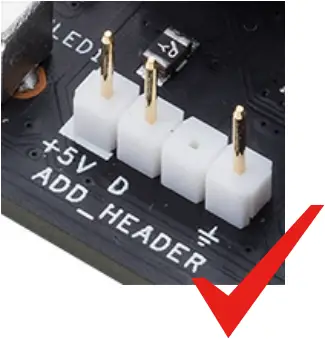
5 If your motherboard has 5V 3-Pin addressable (digital) RGB header, you can customize RGB lighting via motherboard manufacture sync software
OR
Option:
Wired lighting controller (30 different lighting effects)
OR
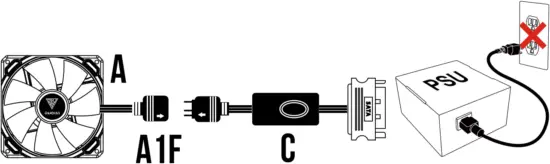
Option:
Adapter Cable to GAMDIAS AEOLUS BOX
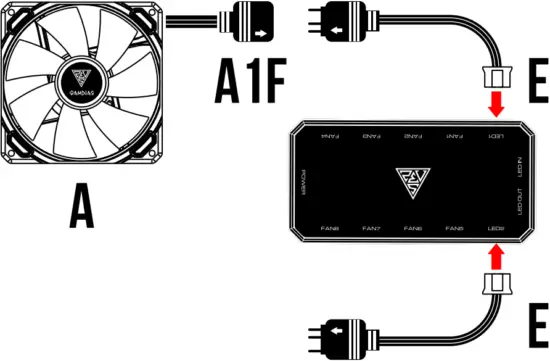
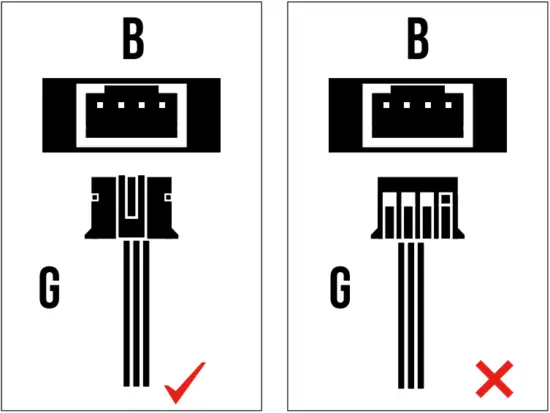
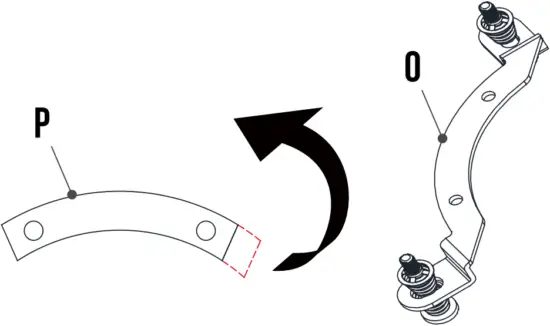
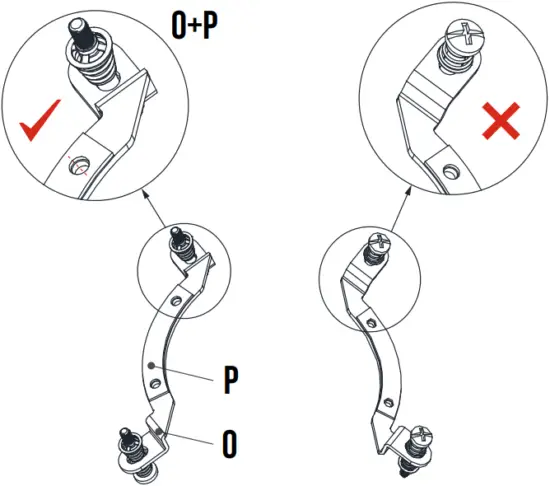
![]() Foolproof design
Foolproof design
GAMDIAS AEOLUS BOX is a part of the following product:
AEOLUS M2-1204R
AEOLUS M2-1205R
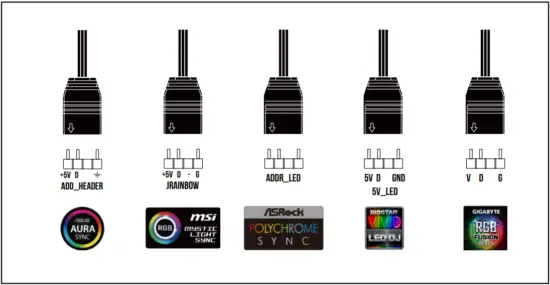
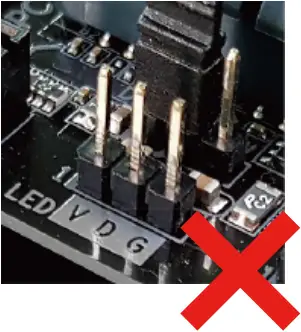
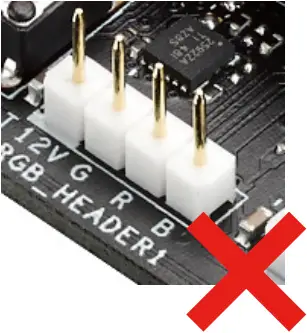
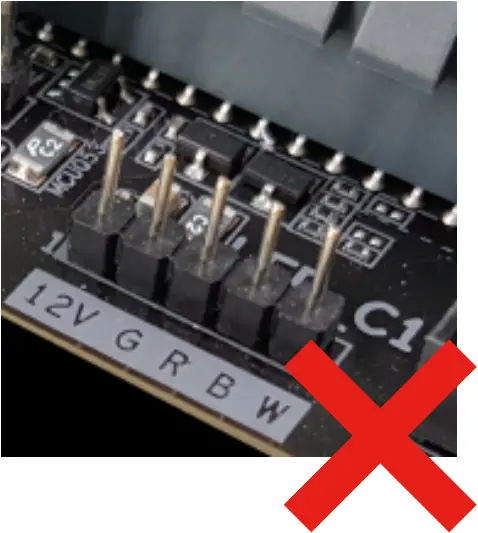
![]() CHIONE M3-240RW only support 5V addressable (digital) RGB header
CHIONE M3-240RW only support 5V addressable (digital) RGB header
6 Turn on the computer after installing
![]()


