![]()
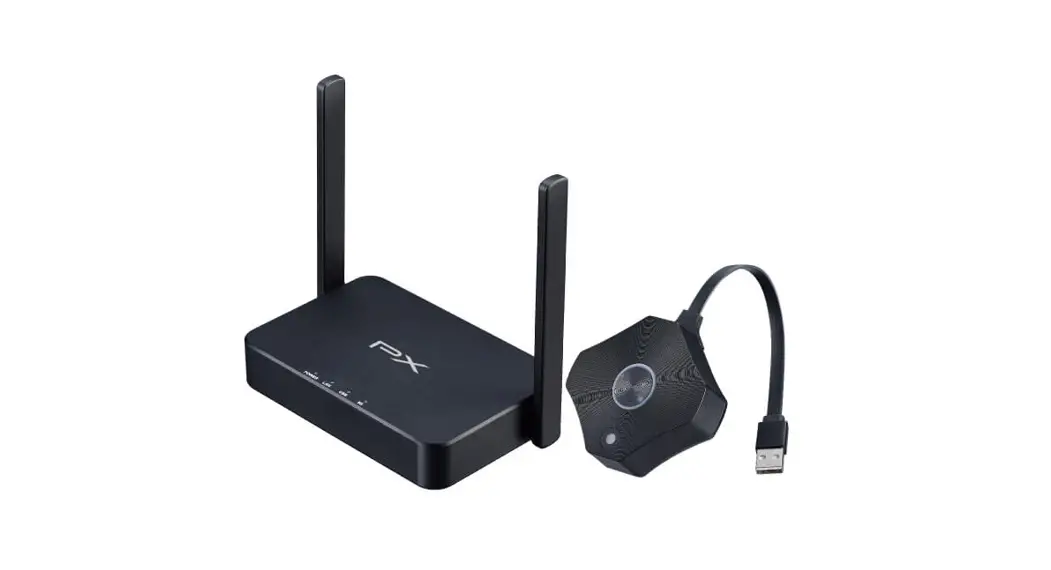
HD Wireless Presentation System
Model: WTR-6000
1080P Wireless HDMI Transmission
INTRODUCTION
Thank you for purchasing Trans WTR-6000 Wireless Presentation System. WTR-6000 is an ideal solution for Bring Your Own Device (BYOD) meeting.
It supports multiple platforms including iOS, Android, Mac, and Windows operating systems for productive and flexible presentations and collaboration from individual devices.
It also enables a powerful 2-way split-screen sharing, making it useful for ideas sharing and on-screen comparisons. A wireless connection to a shared display from participants’ eats will also remove the need for complex configuring and cabling. You can share BYOD content effortlessly with just one click in huddle rooms and many other types of meeting spaces
FEATURES AND CONTENTS
Features:
- Supports wireless transmission of HDMI up to 1080p
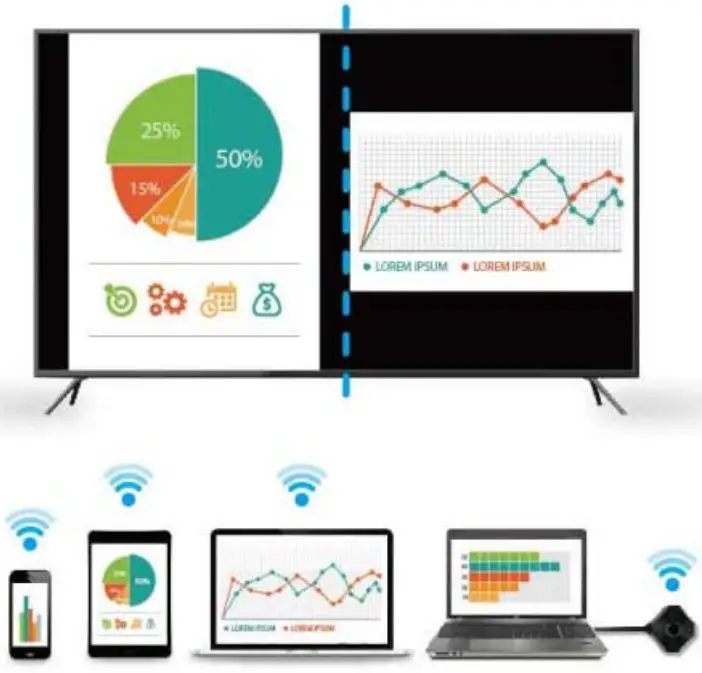
- 2-to-1 split-screen display at the same time.
- Plug and Play-No App required, quick click to cast wirelessly
- Supports iOS, Android, MAC, Windows systems for notebooks, tablets, and smartphones.
- Wifi display support
- Wireless connectivity in up to 100ft (30 meters) (L.O.S)
- Up to 32 wireless transmitters with one receiver ( Additional TX required)
- Latency: 200ms max.
Package Contents: - 1 x WTR-6000 Transmitter main unit
- 1 x WTR-6000 Receiver main unit
- 1x HDMI A-A cable
- 1x DC 5V/2A power adaptor
- User Manual
CONNECTION & OPERATION
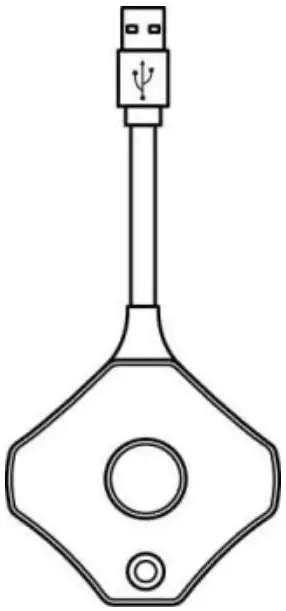
Transmitter Box
| Top | I/O Descriptions | LED Indication |
 |  | 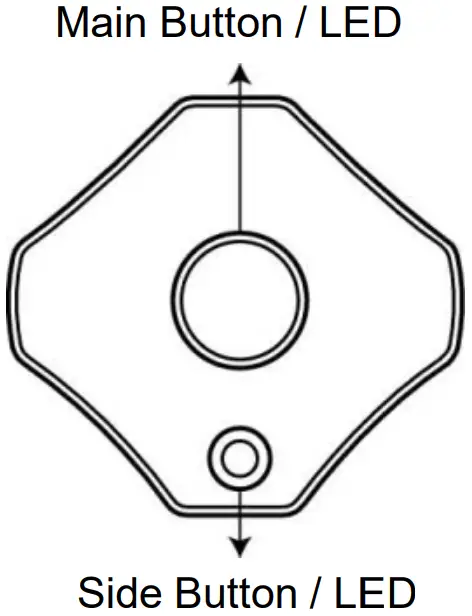 |
Receiver Box
| Top | I/O Descriptions | LED Indication |
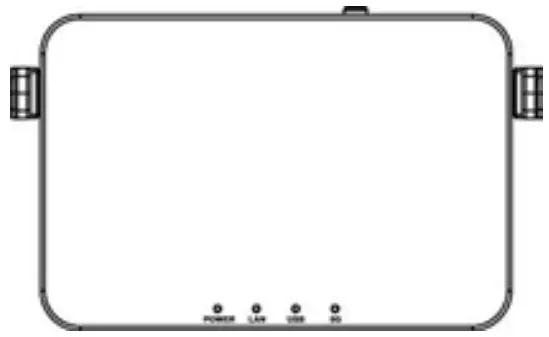 |  |  |
Transmitter LED Status
 | Activate Host Standby w/o source input Main LED: OFF Host LED: Green ON |  | Activate Guest Standby w/o source input Main LED: OFF Guest LED: Red ON |
 | Activate Host & in projecting Main LED: White ON Host LED: Green ON |  | Host received request for projection Host LED: Green FLASH |
 | Guest standby w/o Projecting Main LED: Red ON Guest LED: Red ON |  | Host standby w/o projecting Main LED: Red ON Host LED: Green ON |
 | Guest send request of projection and wait for allowing Main LED: Red FLASH Guest LED: Red ON |  | 1. Under connection 2. Pairing/TX OTA 3. Fail to connect (blinking over 1minutes) |
 | Activate Guest & in projecting Main LED:White ON Guest LED: Red ON |  | Pairing done Main LED: White ON Host LED: OFF |
 | Transmitter OTA Completed Main LED: White FLASH Host LED: OFF |  | Transmitter OTA Fail Main LED: Red FLASH Host LED: OFF |
Installation
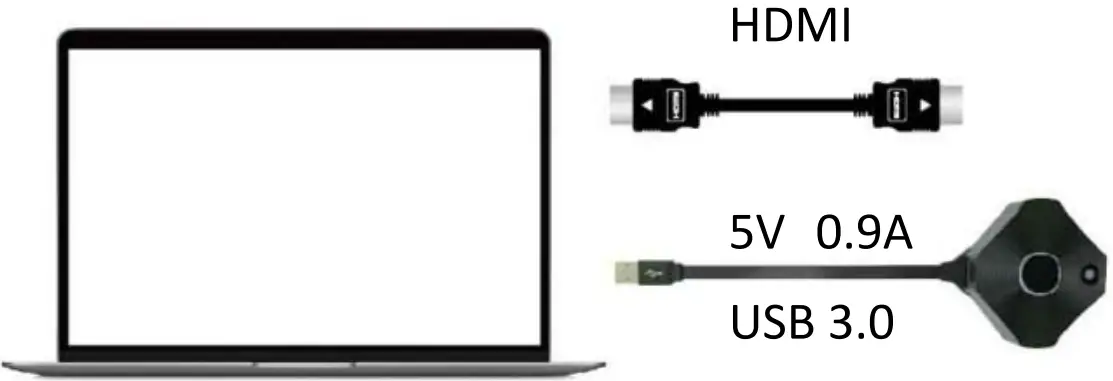
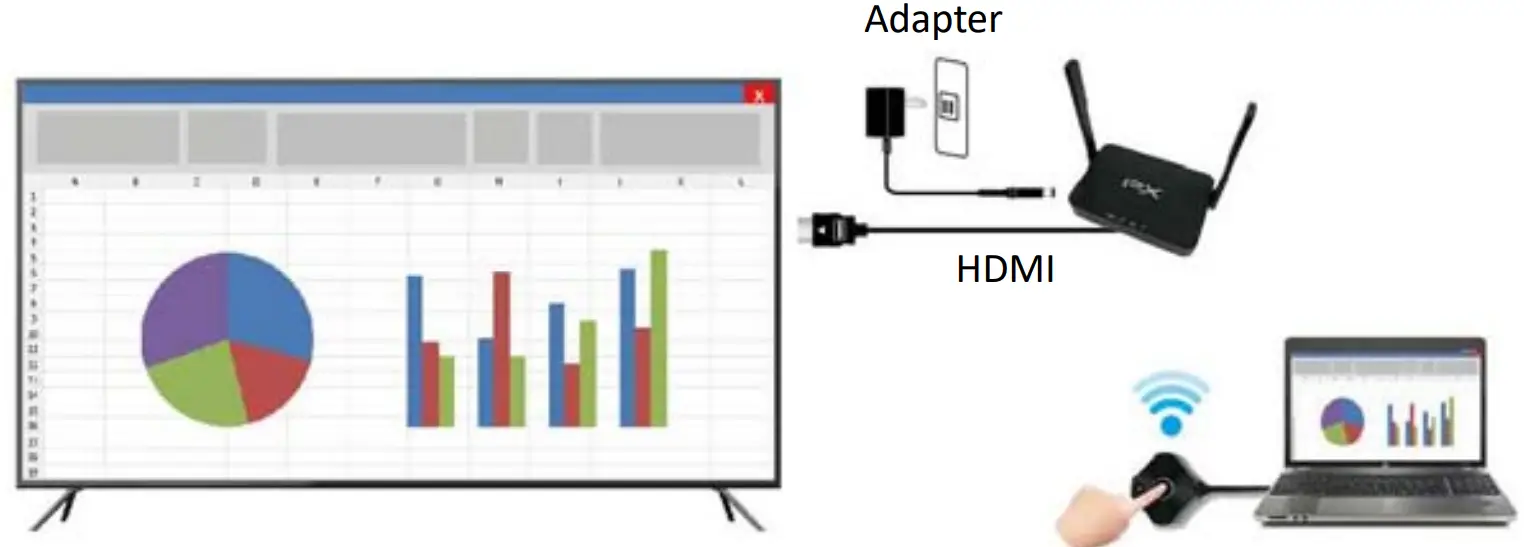
Transmitter connection
Step 1: Use the HDMI A-A cable to connect with the WTR-6000 Transmitter and Source device (Laptop, Notebook)
Step2: Connect the USB power cable of the WTR-6000 Transmitter to the USB port of the Notebook.
PC / Laptop
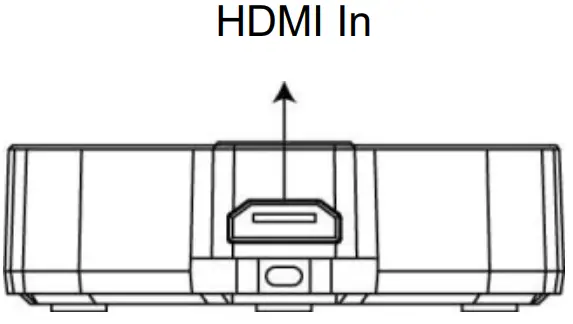
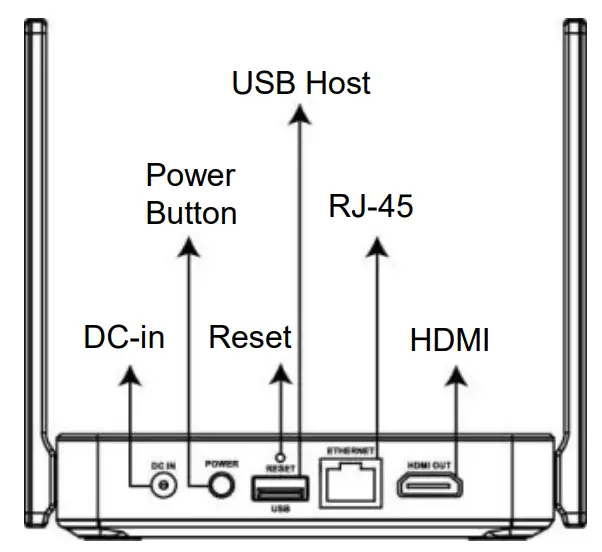
Receiver connection
Step3: Use an HDMI cable to connect the HDMI OUT of the WTR-6000 receiver to a display device (HDTV, Projector). Step4: Connect DC 5V/2A power adaptor to the Power Jack of the WTR-6000 Receiver.
Step4: Connection completed.When the receiver and transmitter are ready simply press the main button on the transmitter to mirror your device. Single click for mirror or disconnect. 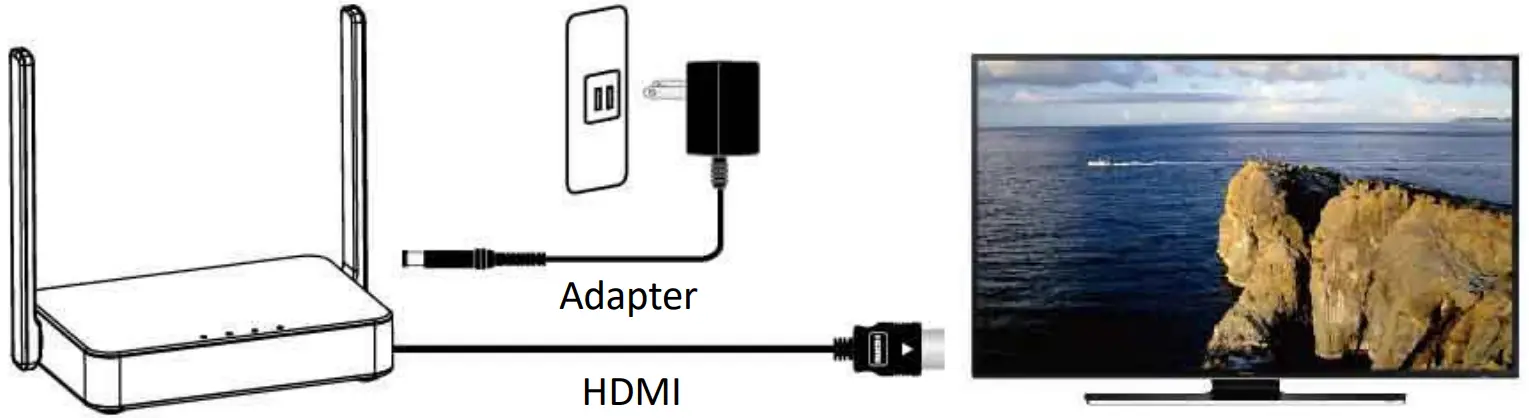
Step5: Connection completed When the receiver and transmitter are ready simply press the main button on the transmitter to mirror your device. Single click for mirror or disconnect.
Note: The receiver and transmitter have finished the pairing set up before delivery. If no video signal on your display,. Please do the pairing Setup again by Plugging in the transmitter’s USB cable to the receiver USB port. (Follow the pairing instructions described in Pairing of TX and RX )
Additional Transmitter connection
For the second transmitter (optional) connection, please follow steps 1 & 2.
•For a 2-to-1 split-screen display at the same time. 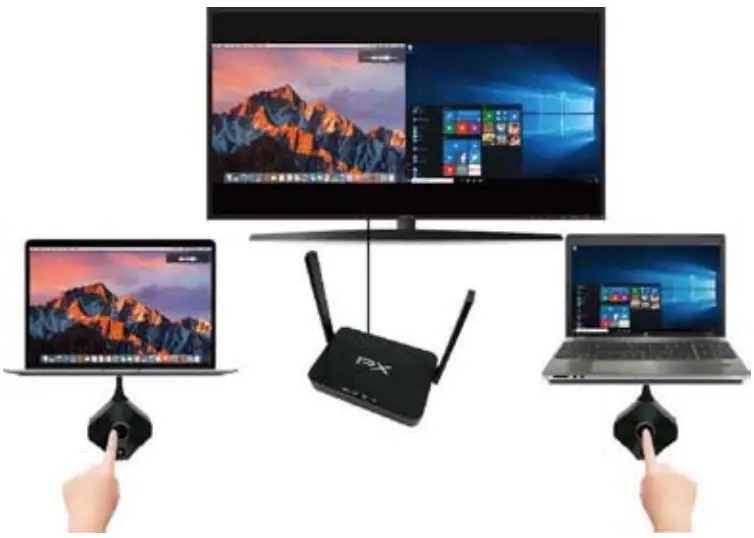
•Supports i0S, Android, MAC, Windows system for pc, notebooks, tablets, and smartphones.
Notice: If the HDMI cable is not long enough, please use an extension cable to ensure the connection
Transmitter Operation
| Main Button (Mirror button) | Host | Guest |
| Single-click | Mirror/Disconnect | Send mirror request |
| Hold for 3 seconds | Full-screen mirror | send full-screen mirror request |
| Side button (control button ) | Host | Guest |
| Single-click | Allow guest to mirror | — |
| Double click | Deny request | — |
| Hold for 3 seconds | Quit all display | — |
| Main Screen of RX |
Main Screen of RX
When WTR-6000 TX is successfully turned on, the screen will be shown on the display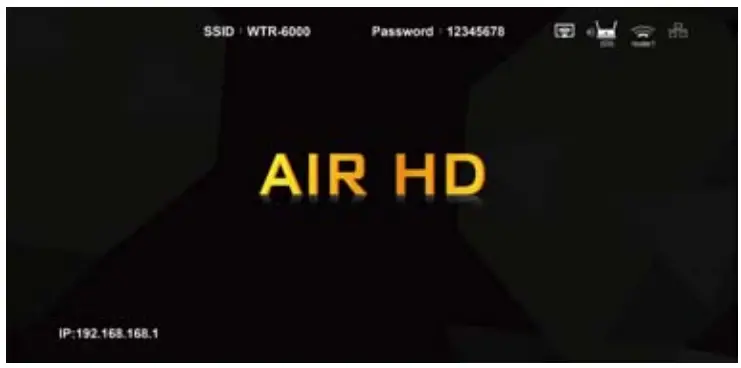
* Outbound link can select only one of Wi-Fi and R145 wireline (LAN).
PAIRING of TX & RX

- When WTR-6000 TX is successfully turned on, the screen will be shown on the display
- Connect the end of the Transmitter USB-A cable to the USB port on the back of the Receiver, and it will automatically enter the Pairing mode
- At this time, the display screen will display “Pairing…” Enter the automatic pairing connection, Sometime later display “Pairing OK”.
Setup screen mirroring with mobile devices for the receiver
The receiver is connected to a screen or projector via HDMI for a wireless presentation. You can also cast your content via a wifi display.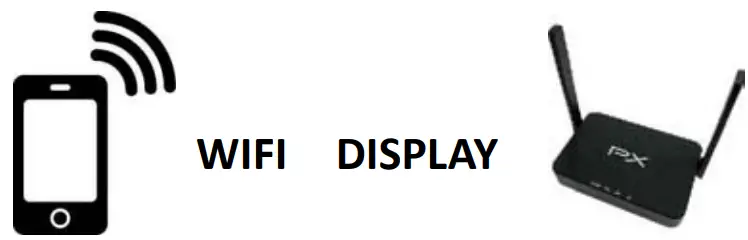
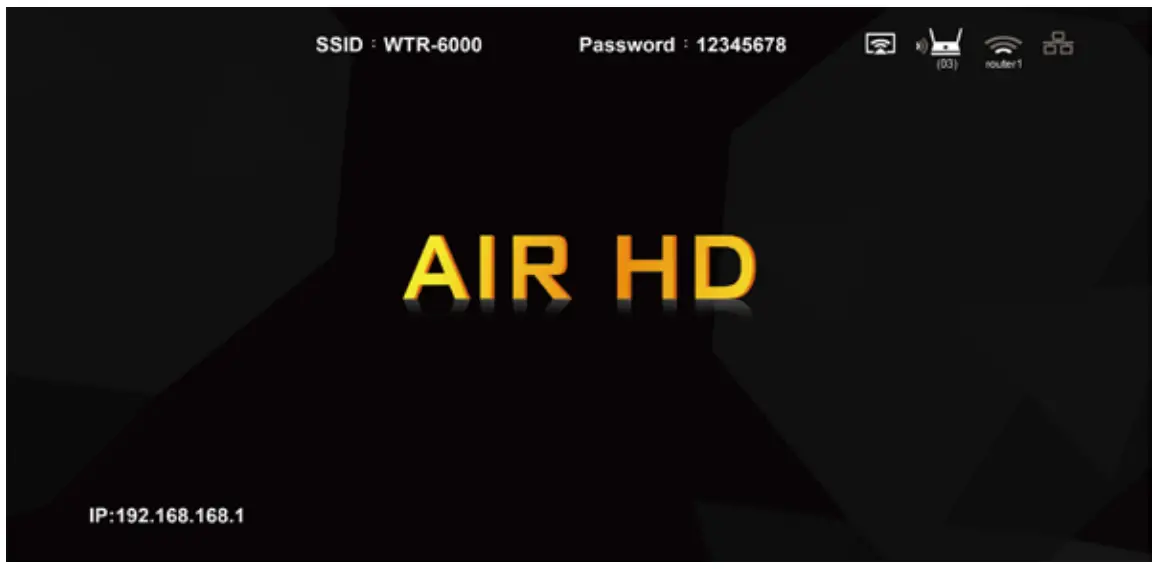
Use your device’s own built-in screen mirroring function. You do not require the WTR-6000 transmitter. Connect with WTR-6000 TX with SSID & Password directly.
- SSID: Selecting the SSID WTR-6000 in the device’s Wi-Fi list
- Password: Entering the password 12345678 to connect your device with the WTR-6000 Receiver.
Web Setting
*WTR-6000 TX IP- when Devices (either laptops or mobile phones) connect with WTR-6000 TX with SSID & Password first, applying the IP in web browser can enter Admin setting page for more advanced settings.
- Preparation-
To access the setting page, you have to choose either way to connect the devices.
1.1 Direct link- you can apply notebook or mobile phone to search WTR-6000 by wifi and key in relative SSID and Password. Turn on web browser and enter “192.168.168.1” in the address bar.
1.2 Through Wifi AP or Routers- if your WTR-6000 TX has been connected to a certain networking device, you can apply a notebook or mobile phone to connect the same device. Turn on a web browser and enter the address shown on the main page in the WTR-6000 IP shown below.
After connecting to Tx and opening the IP, please log in to Admin for more advanced settings.
- Log in:
If you are not logging in, you will only be able to use 3-4 items without the Admin setting in the setup menu.

* Please be noted the default password is “000000”, after logging in 1st time, you will be requested to change the log-in password. Please keep it carefully, if you forget the password, please hold the reset button for 10 secs to reset to default.
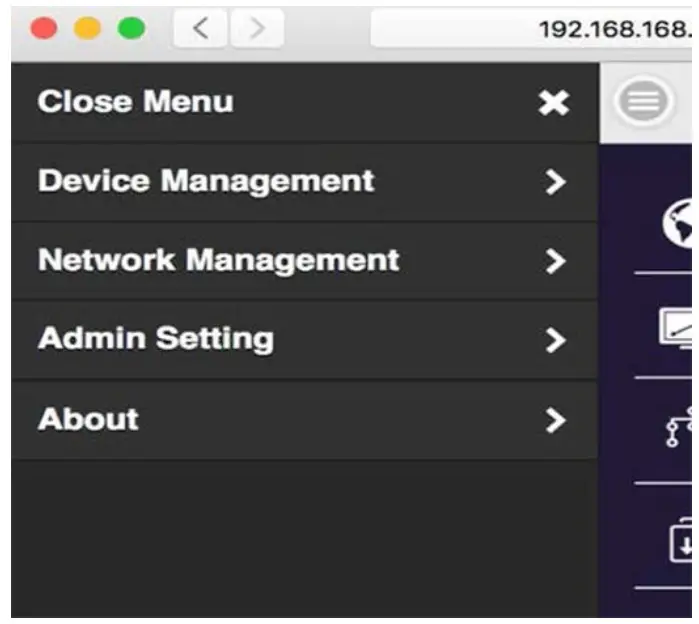
- Menu setup:
3.1 Click the menu button and you will find several items to set: Device Management, Network Management, Admin Setting, and About. You can also download Android APK here.

- Device Management:
This section helps to manage web page language, Rx’s output resolutions, Max connections, and WTR-6000 Receiver & Transmitter pairing file download.
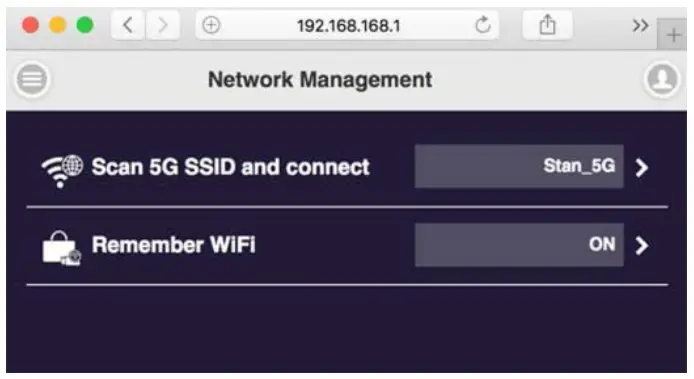
- Network Management:
Connect the outbound Wi-Fi router. If you turn off remember WiFi, the outbound WiFi setting and password will not be kept for auto connection.
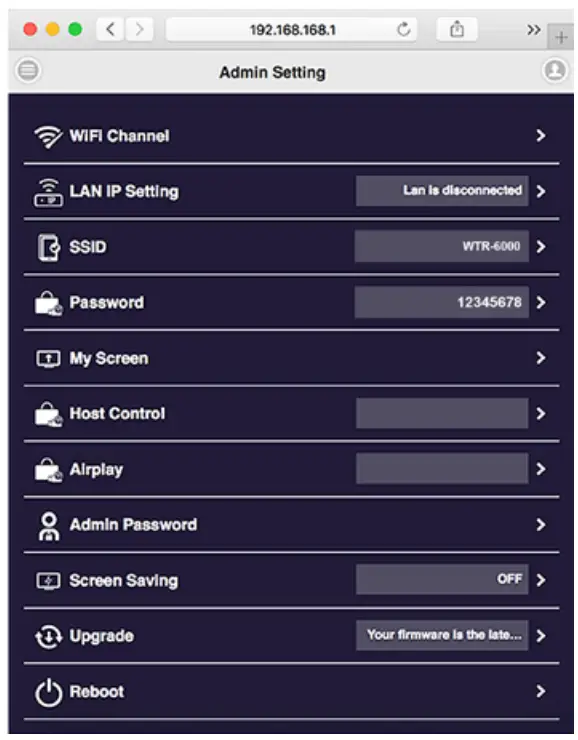
- Admin Setting:
you can adjust Wifi Channel, setup Ethernet IP, Host control
Change SSID, password and background picture, or all other system parameters here. WTR-6000 provides users with various custom configurations.
1. Host Control: Admin can control other casting devices.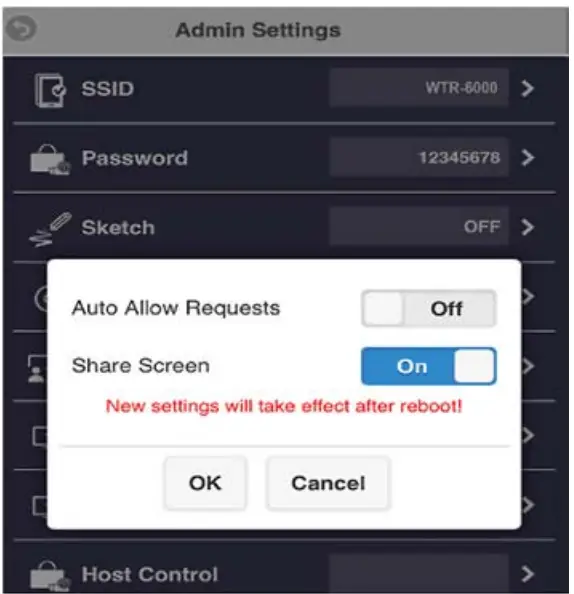
- Turn on mode: other devices can cast content to output screen directly.
- Turn off mode: the host (the first connected TX, with side bottom, LED in green color )can allow or deny other guests’ mirror requests.
The original factory setting is off mode.
2. Share Screen: Once turned on, based on the number of connected devices, the output screen will be split into one-half.
Troubleshooting | ||
| No. | Problem | Solution |
| 1. | No video output |
|
| 2. | Transmitter failed to start-up or turns on and off repeatedly |
|
| 3. | Your screen is not shown on the display when pressing the bottom. |
|
| 4.. | Poor Wi-Fi connectivity |
|
Specification | |
| Output Resolution | 1920×1080@60Hz |
| I/O | HDMI out USB type A DC 5V Ethernet |
| WiFi | 802.11ac |
| WiFi Frequency | 5Ghz: 5.150Ghz-5.825Ghz |
| Power | RX:DC 5V, 2A / TX:5V, 0.9A |
| HDCP | HDCP1.3 |
| Ethernet | 10/100/1000M |
| LED Indication | Power, Ethernet, WiFi status, USB |
| Key | Reset button |
| Power Consumption | 10W max. |
NOTICE
- The manufacturer reserves the right to make changes in the hardware, packaging, and any accompanying documentation without prior written notice.
- The terms HDMI and HDMI High-Definition Multimedia Interface, and the HDMI Logo are other countries.
trademarks or registered trademarks of HDMI Licensing Administrator, Inc. in the United States and
- TR-6000 incorporates HDMI® technology and Soft App powered by Ezcast.
FCC STATEMENT
- This device complies with Part 15 of the FCC Rules. Operation is subject to the following two conditions:
- This device may not cause harmful interference.
- This device must accept any interference received, including interference that may cause undesired operation.
- Changes or modifications not expressly approved by the party responsible for compliance could void the user’s authority to operate the equipment.
NOTE: This equipment has been tested and found to comply with the limits for a Class B digital device, pursuant to Part 15 of the FCC Rules. These limits are designed to provide reasonable protection against harmful interference in a residential installation. This equipment generates uses and can radiate radio frequency energy and, if not installed and used in accordance with the instructions, may cause harmful interference to radio communications. However, there is no guarantee that interference will not occur in a particular installation. If this equipment does cause harmful interference to radio or television reception, which can be determined by turning the equipment off and on, the user is encouraged to try to correct the interference by one or more of the following measures:
- Reorient or relocate the receiving antenna. Increase the separation between the equipment and receiver.
- Connect the equipment into an outlet on a circuit different from that to which the receiver is connected.
- Consult the dealer or an experienced radio/TV technician for help.
FCC Radiation Exposure Statement
This equipment complies with FCC radiation exposure limits set forth for an uncontrolled environment. This equipment should be installed and operated with a minimum distance of 20cm between the radiator & your body.


