![]() KIP Heater Installation & Owner’s Manual
KIP Heater Installation & Owner’s Manual 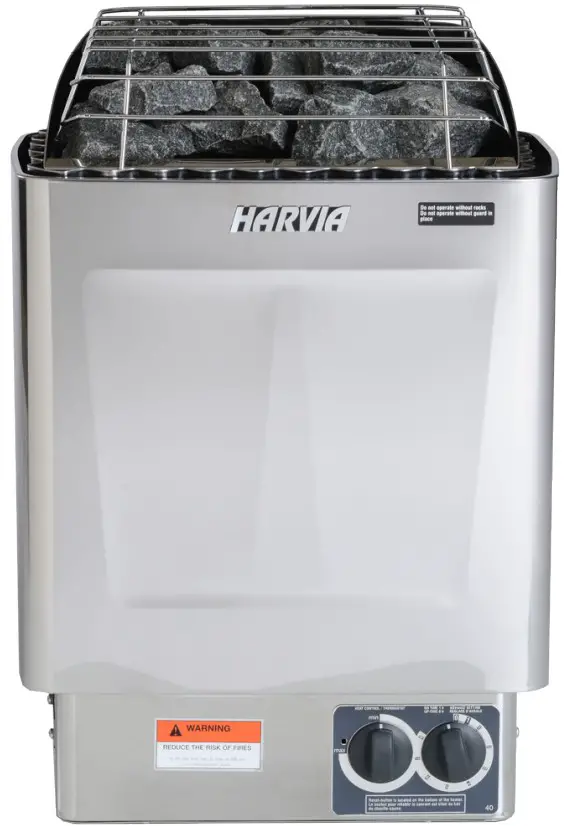
In addition to reading this manual through to the end before proceeding with assembly, you may find our instruction video helpful.
You can find it at: youtube.com/user/almostheavensauna
HEATER INSTRUCTIONS
PERFORMANCE EXPECTATION
HEATER WARRANTY
- 30-amp double pole breaker
- 240 volts
- 1 Phase
- 10/2wire.If the distance is greatert han 90 feet from the power source,we recommend using an 8/2 wireto accommodate for voltage drop.
- Do not use GFCI with this heater
- Use copper wire with 90 Cinsulation
- 40-amp double pole breaker
- 240 volts
- 1 Phase
- 8/2 wire
- Do not use GFCI with this heater
- Use copper wire with 90C insulation
POSITIONING YOUR HEATER
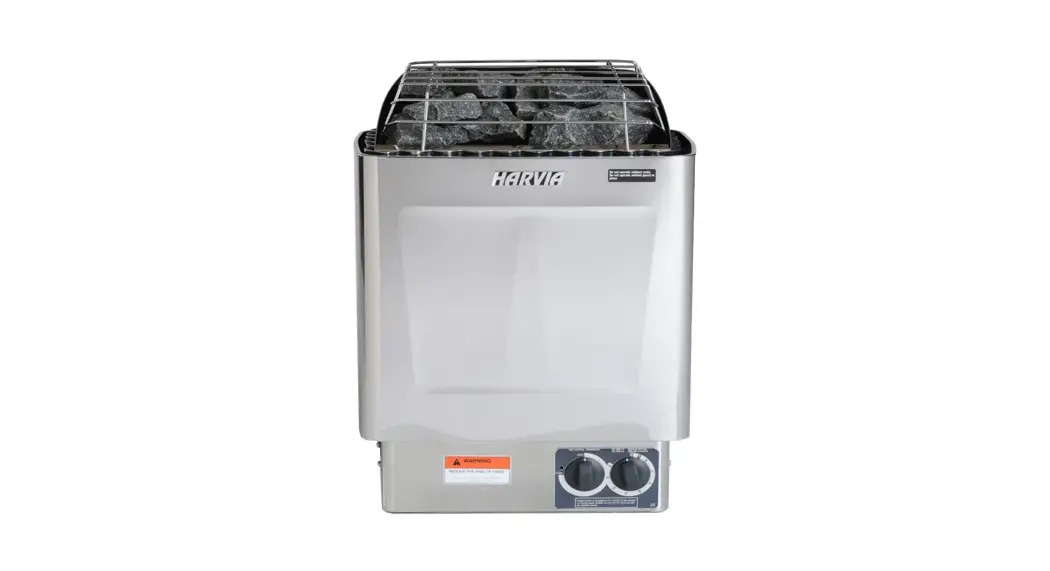
Unpack your heater, setting aside the trim pieces and bag with placards and screws (1).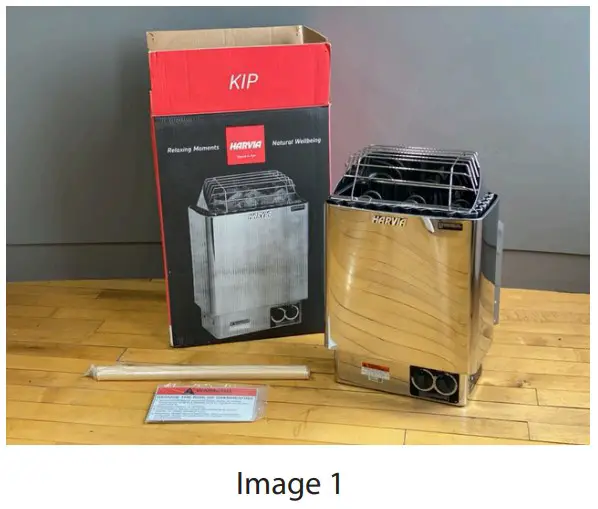 Remove the hardware bag from the baggie with the safety placards (2), selecting the two longer lag screws (1.5”). You will secure these into the sauna wall so that ¼” of the screw protrudes from the wall (3, 4).
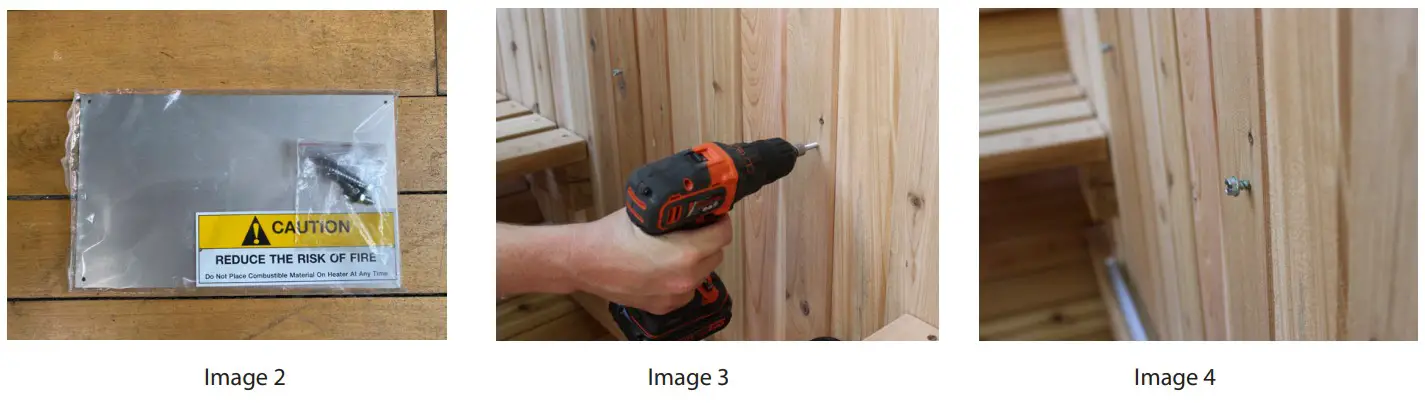 a. For barrel saunas, the 1 1/2” lag screws should be mounted approximately 20” off the lowest point of the barrel and spaced 15 ¼” apart and centered above the vent holes. Note: The heater will conceal a portion of the LED light. This is normal. (5).
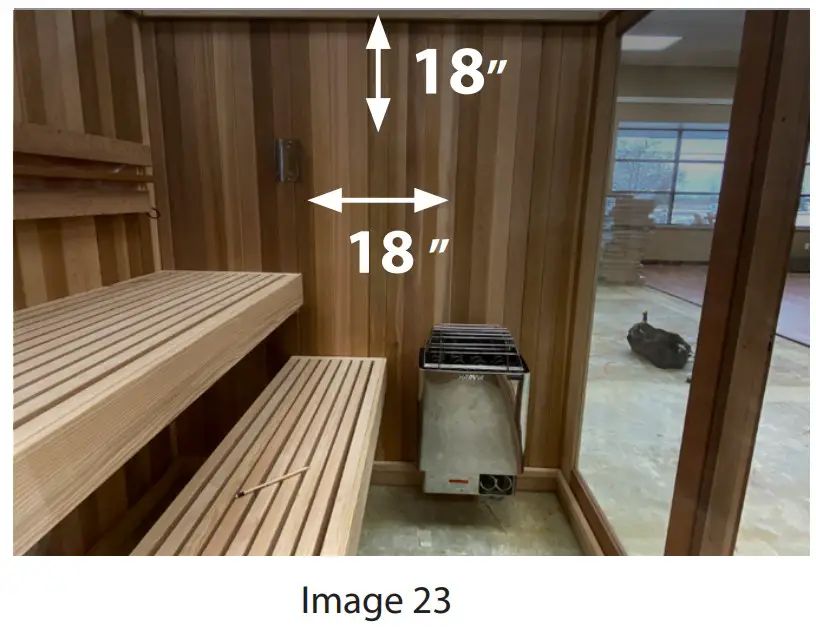
 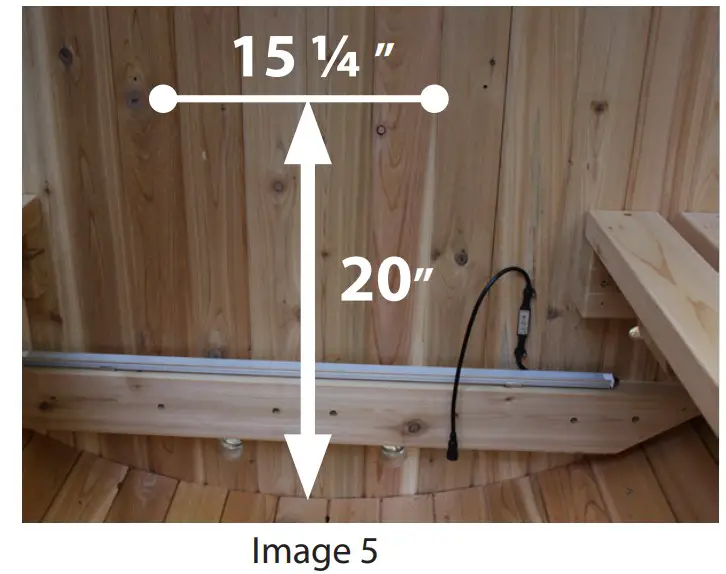 b. For indoor saunas, the screws should be mounted 20” off the floor, and spaced 15 ¼” apart approximately centered above the vent holes (if present). It is fine that the heater is covering the holes as ventilation still occurs (6).
 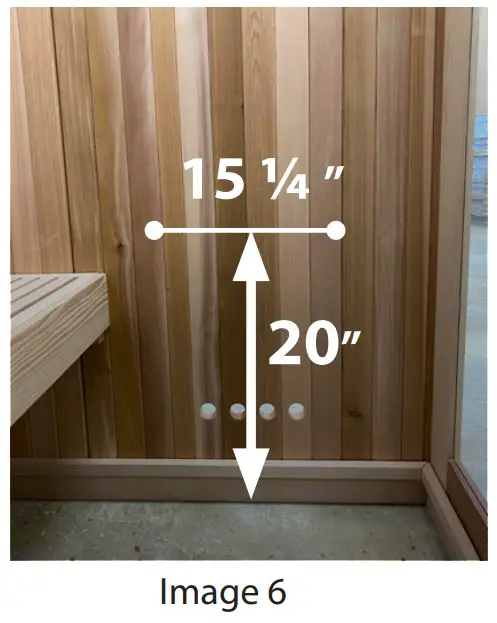 Hang the heater on the mounting screws to ensure it is level and that its base sits 5-7” off the floor of the sauna.
If these criteria are met, make a mark on the wall of the sauna directly behind one of the rubber gaskets on the lower back of the heater (7); this will be where the power enters the sauna. Take the heater off the wall and remove the rubber gasket, exposing the
cutout. It does not matter which gasket is removed (8).
NOTE: While this location is the most common, the power can enter the sauna at any location. It is not recommended you use the pre-drilled vent holes as an entrance for the conduit.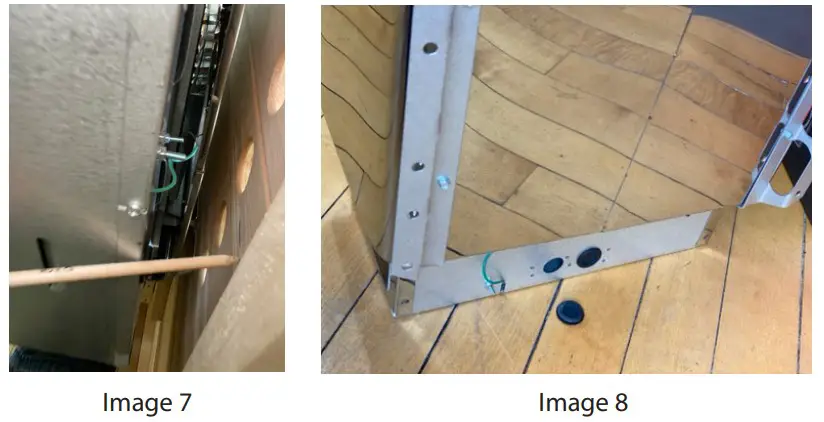
REMOVING THE STONE GUARD AND BOTTOM COVER
Remove the two screws holding the stone guard in place. Pry the guard back and lift up to remove it. Clip the ziptie holding the metal sensor housing from the elements and set it aside for later installation (9 – 11). 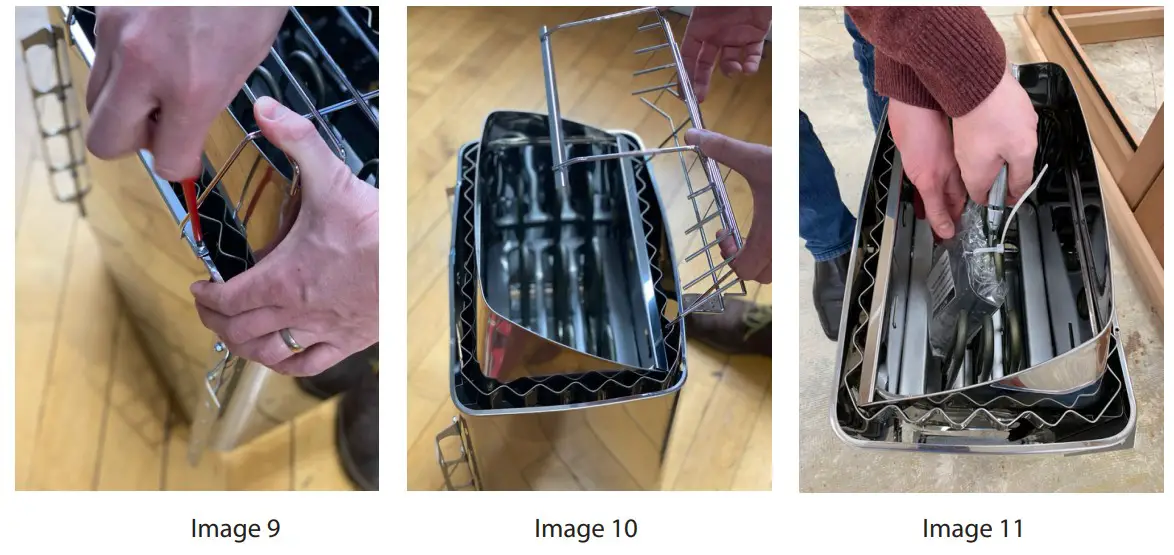 Flip the heater on its back and remove the bottom cover. Locate the 4” temperature sensor, uncoiling the filament and wiring it out the small notch at the base of the heater. Set the sensor aside for later installation (12 – 14).
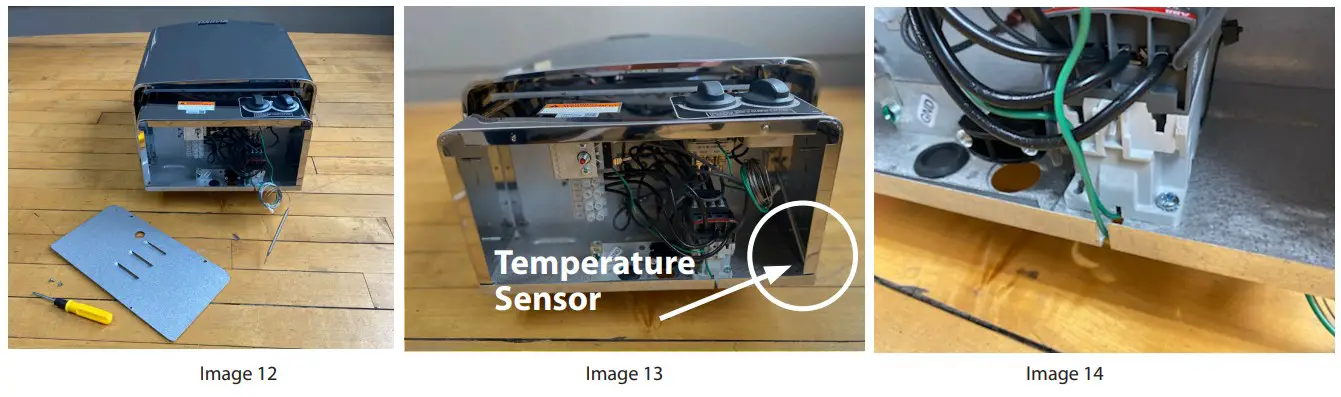
CONNECTING TO POWER
All wiring should be done by a licensed electrician.
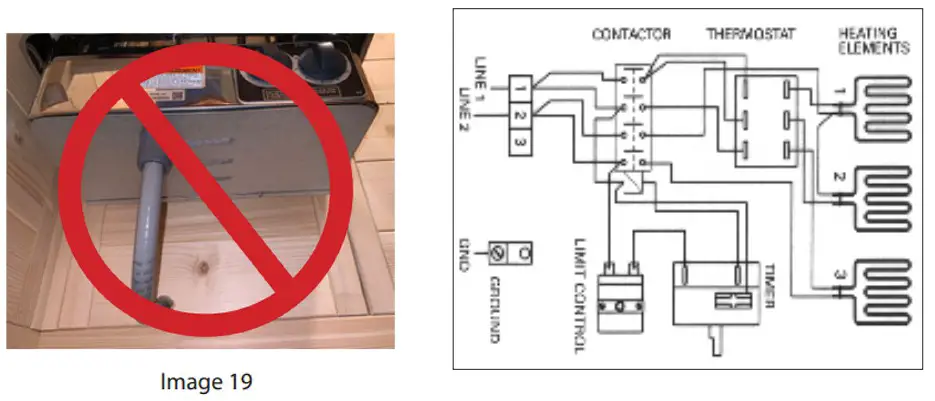
Bore a hole at the mark you made in step 2, being sure it is wide enough to accommodate the wire (15). Feed the wire through this hole and then through the cutout at the base of the heater (16). Being sure the breaker is off, connect your heater to power ccording
to the diagram below. The only connections that should be made are two hot lines to L1 and L2, and the ground line to the ground screw (17). Replace the bottom cover once wiring is complete, and rehang the heater on the screws (18). Turn the breaker on.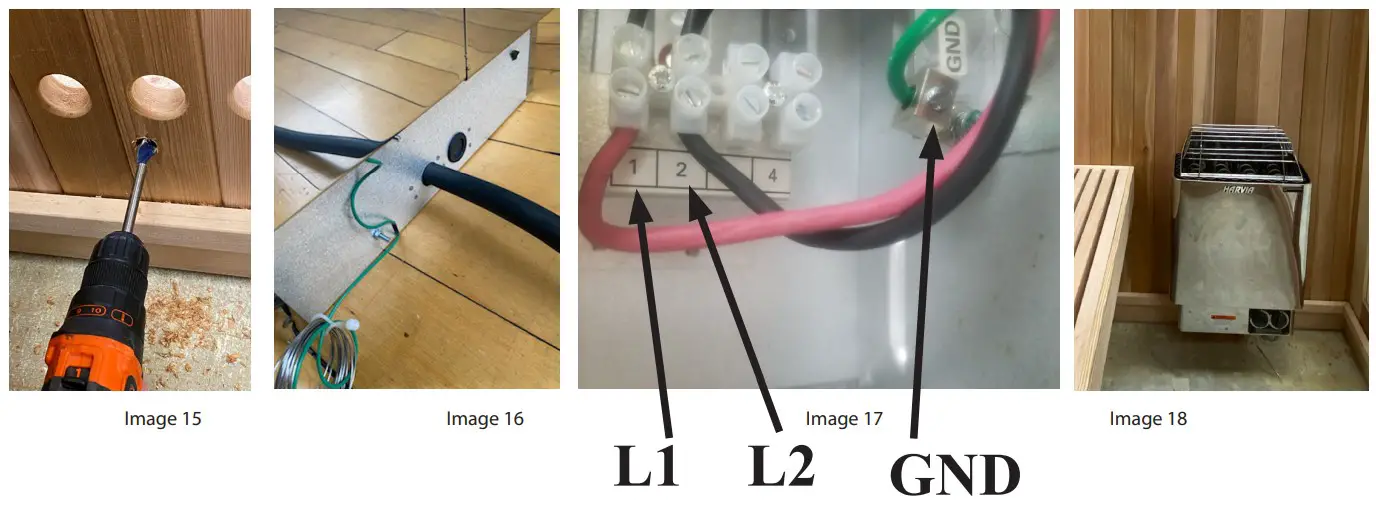
OPERATING THE HEATER
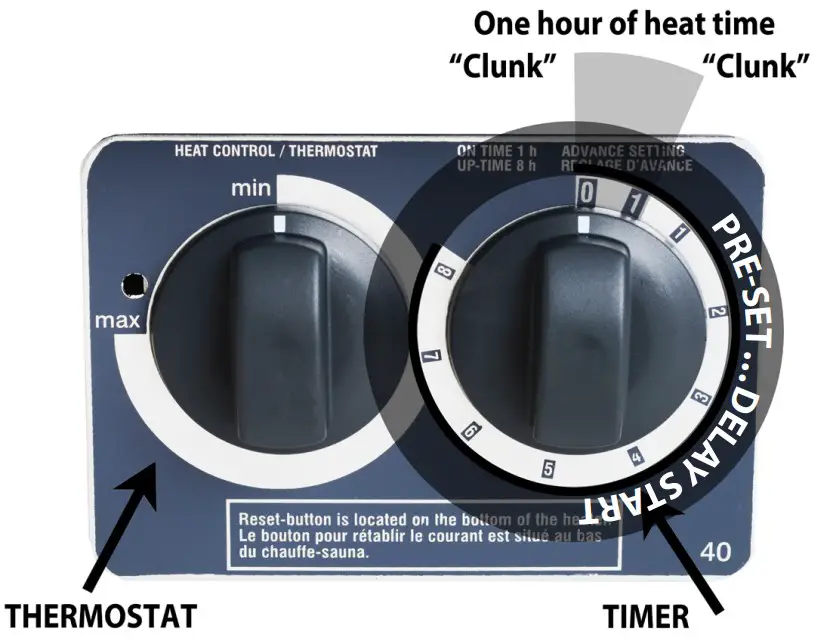
Thermostat (left) controls the temperature of the sauna. Set it according to your personal preference.
Timer (right) turns the heater on and off, and has the ability to delay the start.
If the heater has power, you should hear a loud “clunk” at both the 0 and the large 1. In between these “clunks” is one hour of heat time.
To immediately turn the heater on, we recommend turning the dial past the two clunks to number 1 or 2. Turn the timer back until one loud “clunk” is heard, immediately stopping the turn. This will begin the one hour of heat time.
The heater will automatically shut off after one hour. You may have to restart your heater while you are in the sauna.
The smaller numbers 1-8 refer to the number of hours for the delay start. For example, if you turn the timer to 5, your heater will begin heating in five hours.
With your sauna door open, turn on your heater for five minutes to allow the non-toxic protective coating on the heating elements to “burn off”. It is normal to see some light smoke as this coating burns off.
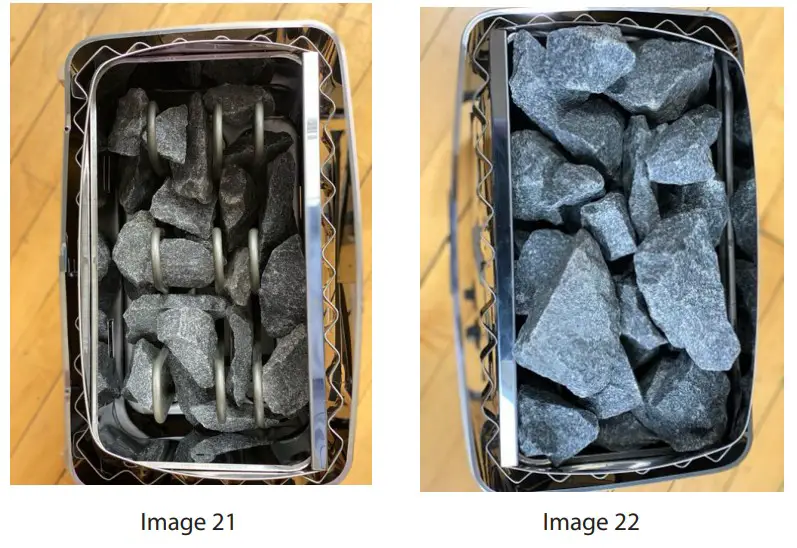
PLACING THE STONES
Place the smaller stones in between and around the three heating elements being sure that the heating elements stay in their original vertical position and do not touch each other. The stones should touch the elements, but not bend them. Reserve the larger stones for placement on top of the heating elements, covering them completely. Replace the stone guard (21, 22).
NOTE: Packing stones in too tightly will restrict airflow and affect the efficiency of your heater. Loosely position the stones around and above the heating elements. It is common to have 5-10 stones left over.
TEMPERATURE SENSOR PLACEMENT
 Place the sensor pin in the housing with the bulb upright and close the wings of the housing over the sensor pin (24, 25).
Conceal the sensor housing and pin with the sensor cover and provided screw (26).
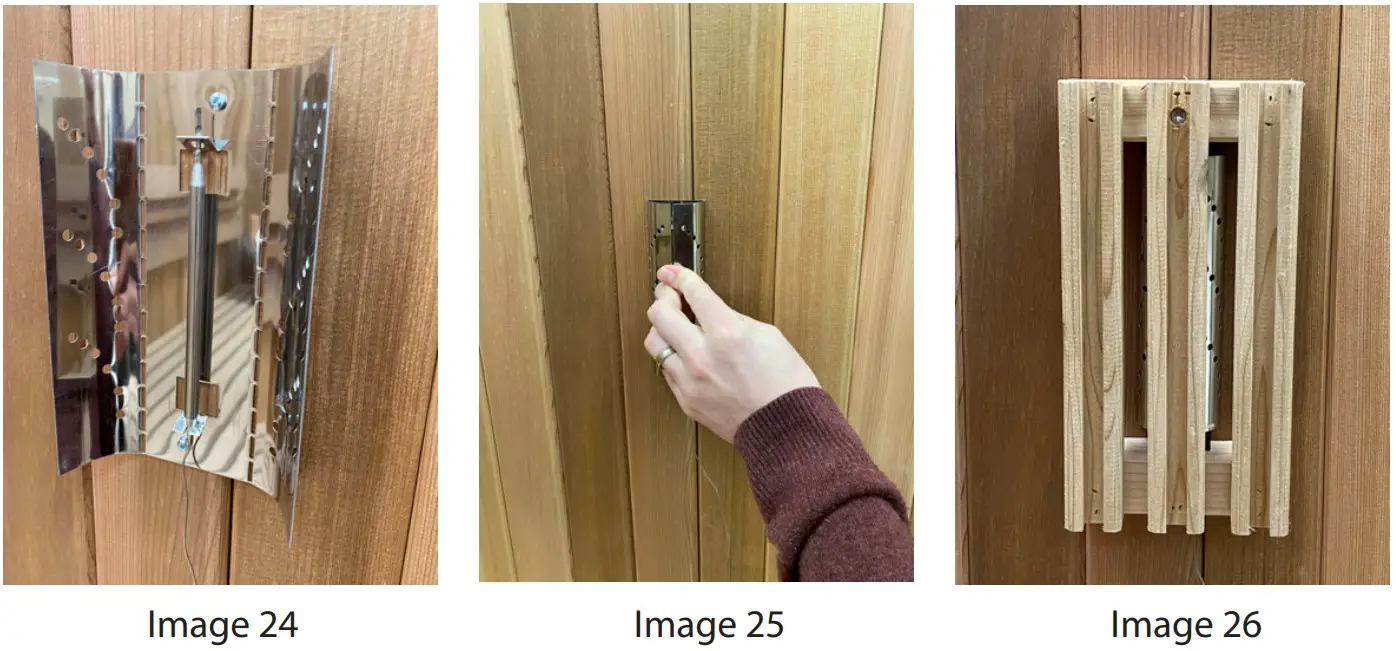 Conceal the sensor wire with the grooved trim pieces from step 1 (27). You will likely have to cut several trim pieces to fit the distance between your heater and the sensor pin. Mount them with the screws provided in the hardware baggie you removed in step 1.
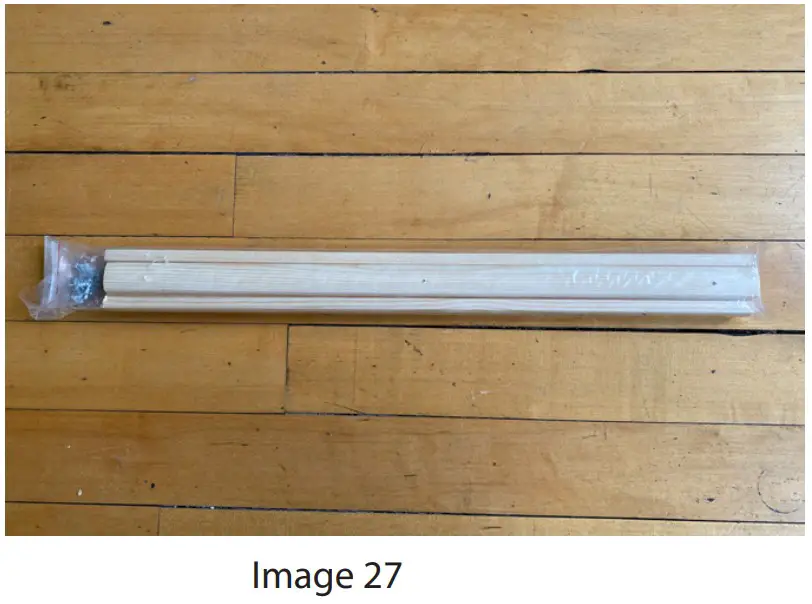
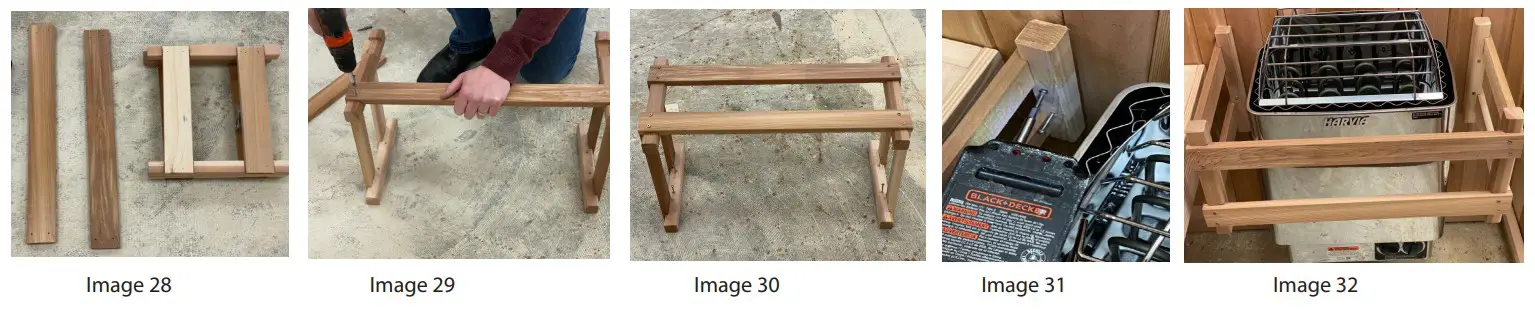
INSTALLING THE (OPTIONAL) HEATER GUARD
USING YOUR SAUNA HEATER
Your sauna has been paired with an appropriately sized heater to consistently achieve temperatures of 175°-185°F. You should expect your sauna to be at a useable temperature in 45-60 minutes.
You have the option to pour water onto the stones to generate steam. Please note, little water is required to achieve this. For most sauna users, a ladle full of water is sufficient. If too much water is poured onto the stones, it will drip out the base of the heater and
should be wiped up with a towel after the sauna session.
If you’d like to continue the sauna session after the automatic one hour shutoff, simply restart the heater.
Consult your sauna manual for the typical sauna routine, and enjoy!
TROUBLESHOOTING
Check the breaker to be sure it is on
Verify with your electrician that 240 volts is reaching the heater
Double check that the timer is being operated correctly (refer to instructions in step 5)
If the sauna heater operates but the sauna room does not come to temperature:
Verify the timer has not timed out. If it has, restart it.
Assess how the stones are placed around the heating elements. If they are packed too tightly, it will restrict airflow and affect the efficiency of your heater. Reposition the stones if needed.
Check the position of the temperature sensor (refer to step 7a). If it is too high in the sauna or too close to the heater, it will trigger a premature shutoff in your heater.
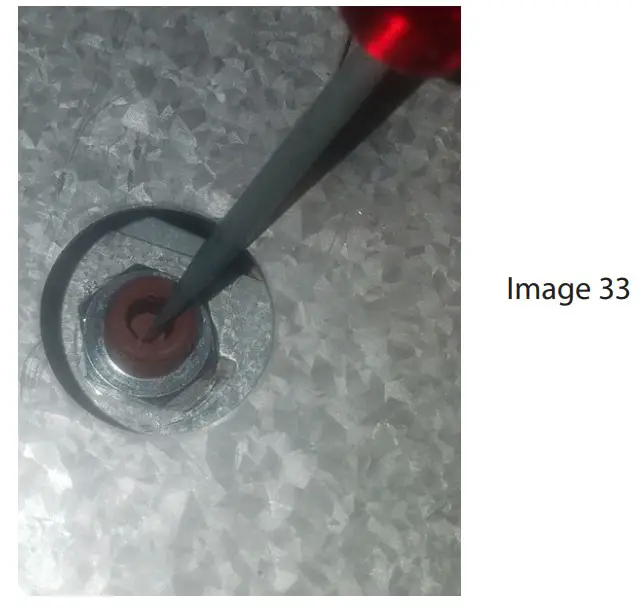
If your heater no longer makes the loud “clunking” noise when turning the timer, turn off your breaker and use a small screwdriver to press the reset button under the heater. You can find this button in the cut-out on the bottom plate (33).
 If none of the above recommendations get your heater working, please call Almost Heaven Saunas at 888-355-3050 to diagnose further.


