MiBOXER T1 Panel Remote
Features
We adopt a high precision capacitive touch screen IC. Touch screen is very stable; 2.4GHz high RF wireless control with long distance controlling, low power consumption and high speed transmitting rate.
This product has T series and B series, and the difference is the method of power supplying. Both series have 4 kinds: T1/B1 4-zone dimmable panel remote; T2/B2 CCT 4-zone panel remote;
T3/B3 4-zone RGB/RGBW panel remote; T4/B4 4-zone RGB+CCT panel remote. This product widely work on our smart LED Lighting, LED controller and smart panel controller, etc.
Parameters
B Series: Powered by 3V(2*AAA Battery)
Working Voltage: 3V(2*AAA Battery)
Transmitting Power: 6dBm
Standby Power Consumption: 20uA
Transmission Frequency: 2.4GHz
Working Temp.: -10~40℃
Control Distance: 30m
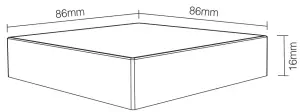
Size: 86*86*16mm
T Series: Powered by AC100~240V
Working Voltage: AC100~240V
Standby Power: 0.15W
Transmitting Power: 6dBm
Transmission Frequency: 2.4GHz
Working Temp.: -10~40℃
Control Distance: 30m
Size: 86*86*31mm
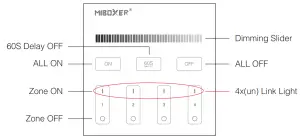
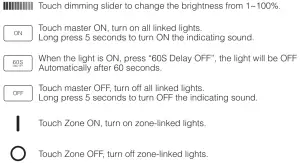
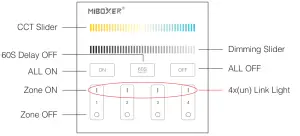
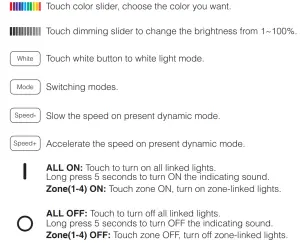
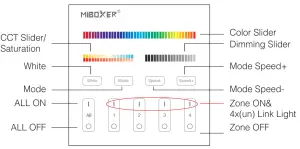
Function of keys
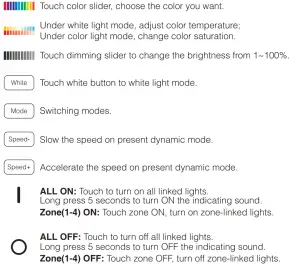
Remark: When touching the button, LED indicating lamp will flash once with different sound (Touch slider with no sound).
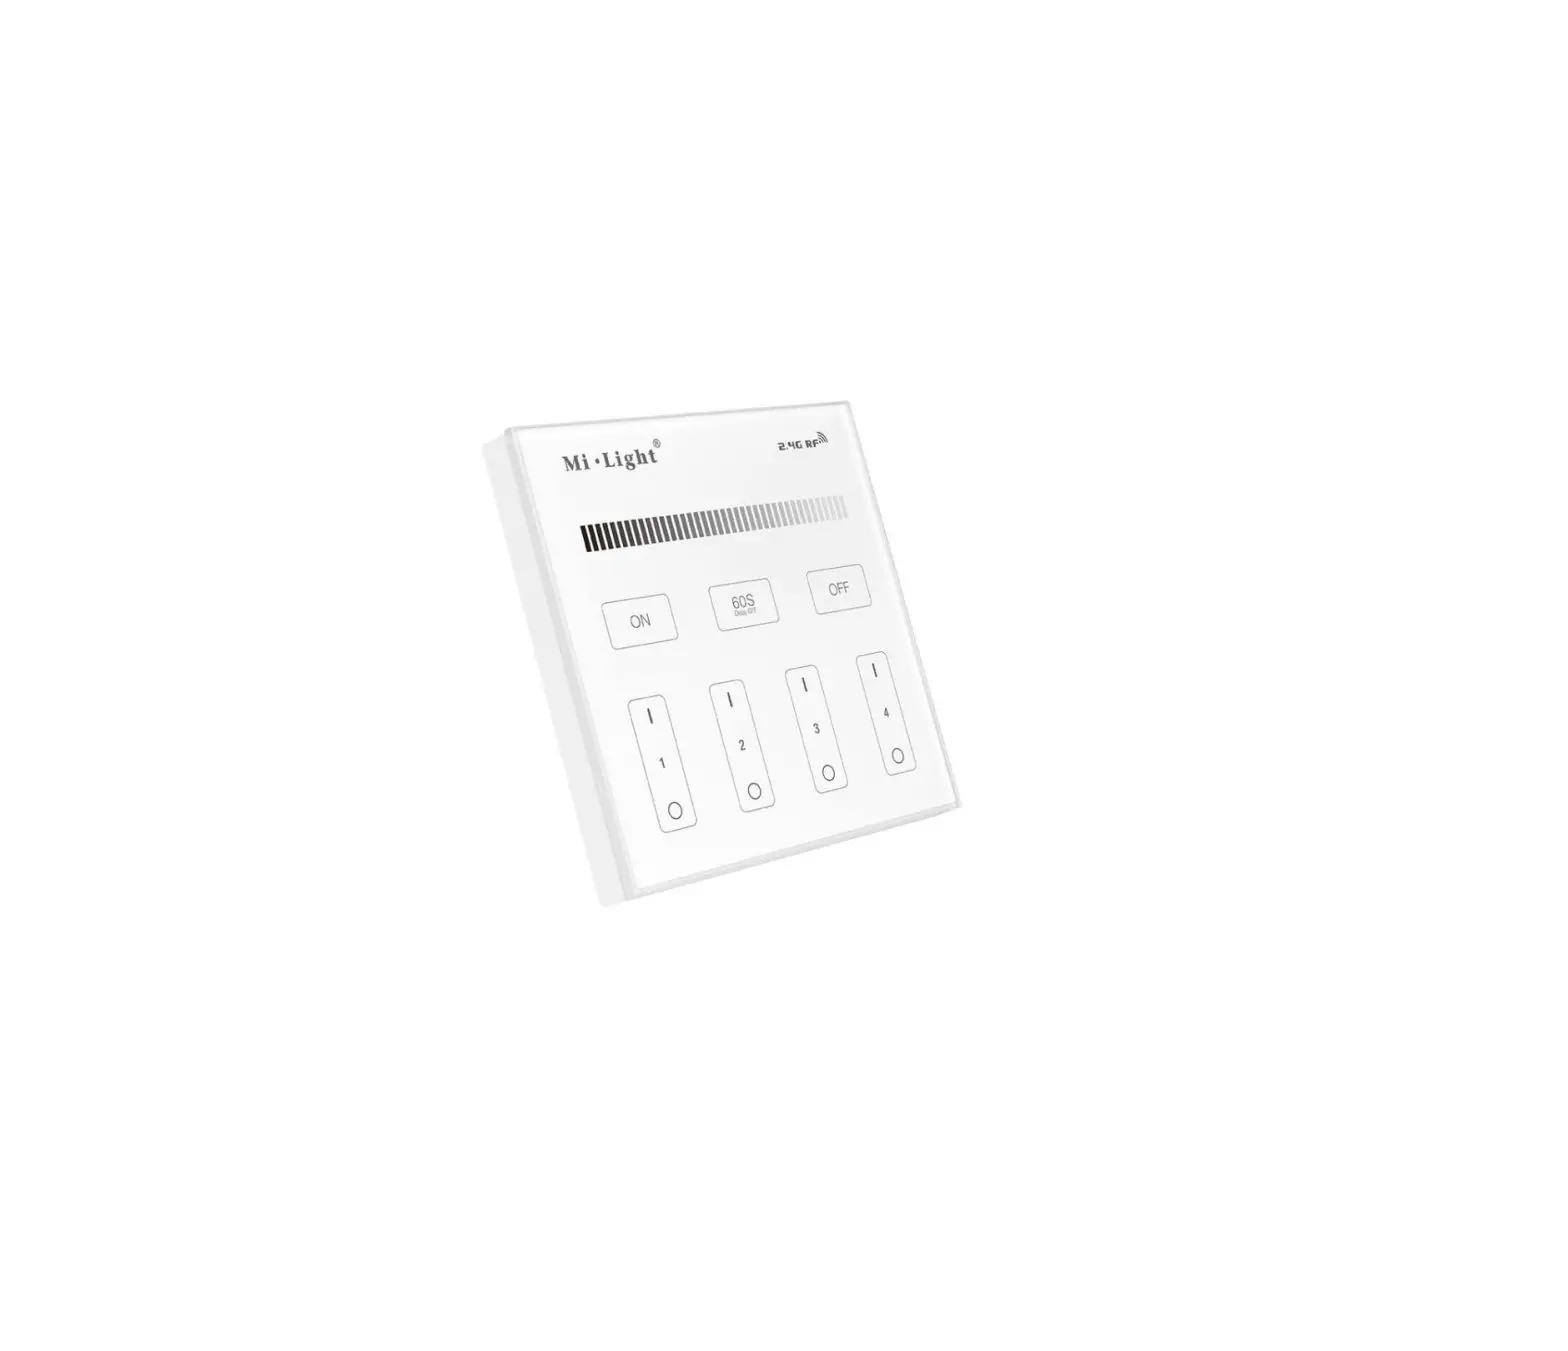
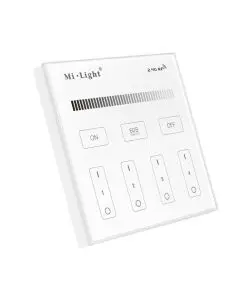
B1 & T1
4-Zone Panel Remote ( Brightness )
B2 & T2
4-Zone Panel Remote ( Color Temp. )

B3 & T3
4-Zone Panel Remote ( RGBW )
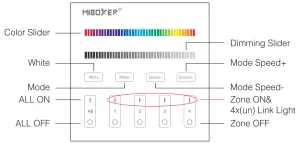
B4 & T4
4-Zone Panel Remote ( RGB+CCT )
Link / Unlink (B1~B4,T1~T4)
Linking Instructions
- Switch off the light, after 10 seconds switch on again

- When the light on, short press any zone of “
 ” 3 times within 3 seconds.
- The light blink 3 times slowly means the linking is done successfully

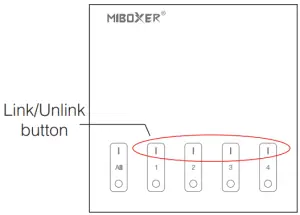
 | If the light not blink slowly, the linking failed, pls switch off the light again, and follow the above steps again. |
Unlinking Instructions
- Switch off the light, after 10 seconds switch on again.
- When the light on, short press “” 5 times within 3 seconds.
Unlinking must be the same zone with the Linking - The light blinking 10 times quickly, means the unlinking successfully
| If the light not blink quickly, the unlink failed, pls switch off the light again, and follow the above steps to unlink again. |
Installation
B series Installation
- Tear out the back tape

- Stick the holder on the position where you want.
- Install 2*AAA battery.
- Put the rotating switch on the front of holder.
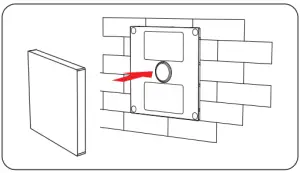
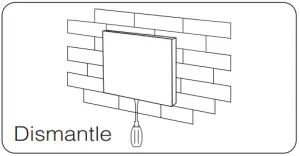
T series Installation/ Dismantlement
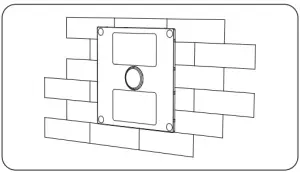
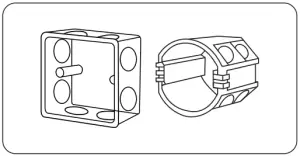
- Install the bottom case into the wall; Above are the standard bottom cases.

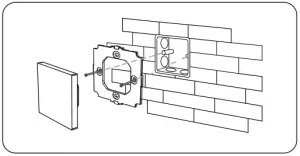
- Fix the controller base on the bottom case with screw.
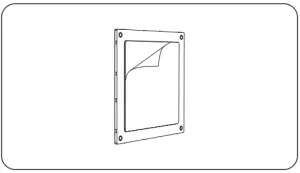
- Clicks into the upper side of glass panel on the controller base, then press the lower side slightly to make it clicks into the controller base.
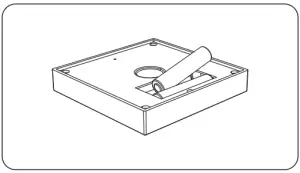
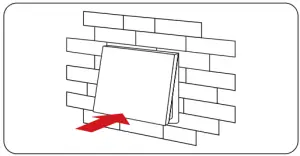
- Plug into the below bayonet with a screwdriver, and upwarp screwdriver, then you can dismantle the controller
Attention
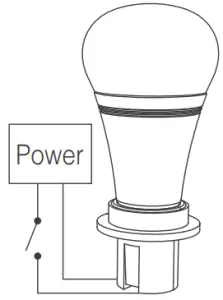
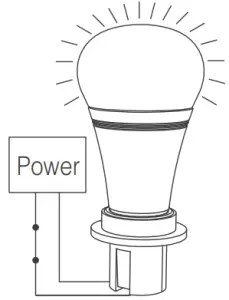
- Please check the cable, and make the circut is correct before power on.
- When installation, pls handle with care to avoid the broken of the T series glass panel.
- Please do not use lighting fixtures around the mental area and high magnetic field, otherwise, it will badly affect the control distance.


 User Manual")


