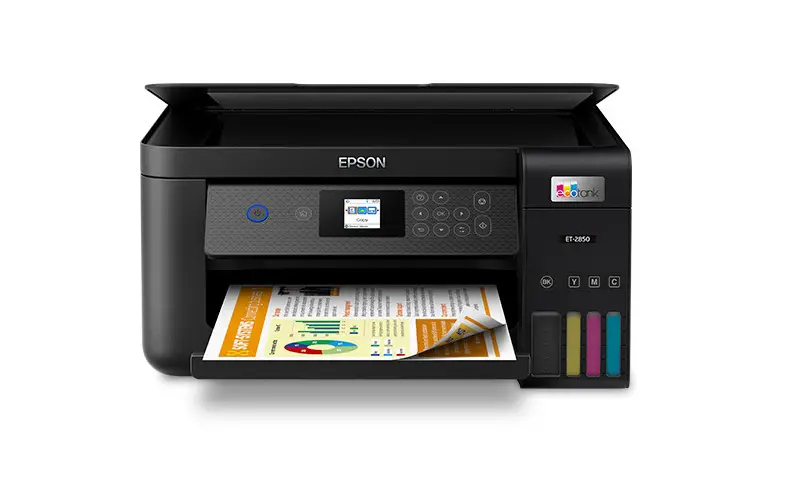
EPSON C11CJ63201 Wireless Printer Instruction Manual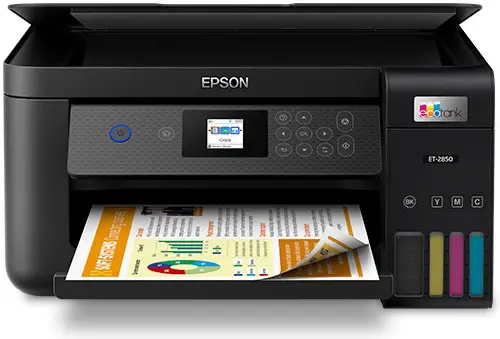
Read This First
The ink for this printer must be handled carefully. Ink may splatter when the ink tanks are filled or refilled with ink. If ink gets on your clothes or belongings, it may not come off.
Installation Instruction
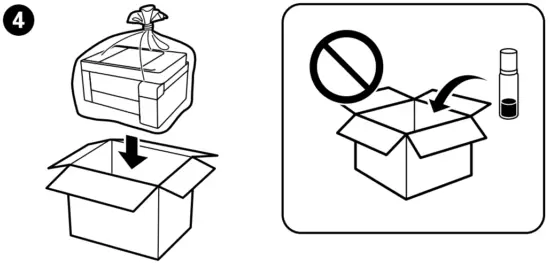
Additional items may be included depending on the location. ET-2850U does not include Windows CD-ROM.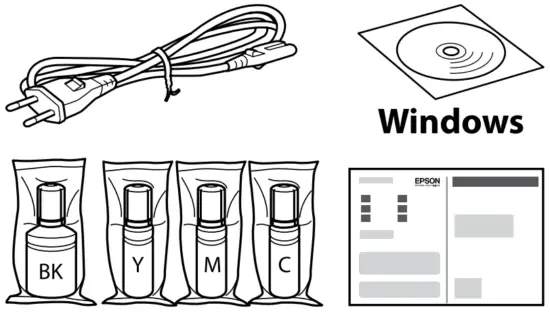
The initial ink bottles will be partly used to charge the print head. These bottles may print fewer pages compared to subsequent ink bottles.
- Select the printer setup method


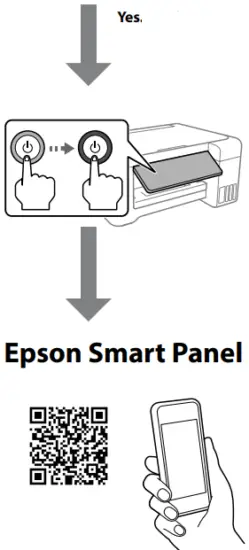
Hold down the ![]() button until the lamp turns on. Then use your smart device to complete the rest of the setup process.
button until the lamp turns on. Then use your smart device to complete the rest of the setup process.
Install Epson Smart Panel.
This will help you set up the printer even if you use the printer with a computer.
Epson Smart Panel ?
You can set up the printer while watching instructions on your smart device. By using the app, you can remotely control the printer on your smart device or perform more diverse printing through the app.
Follow these instructions if you selected “No” in section1-2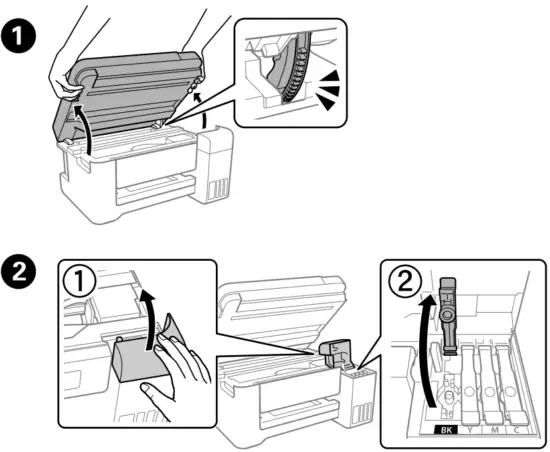
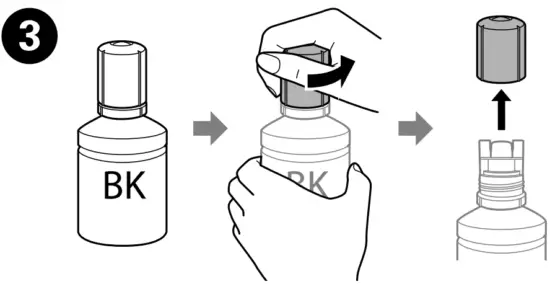
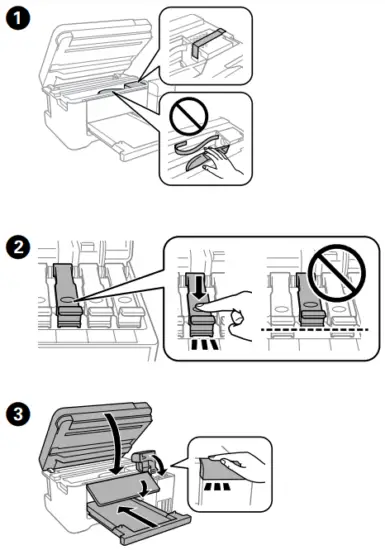
Make sure that the color of the ink tank matches the ink color that you want to fill.
- Remove the cap while keeping the ink bottle upright; otherwise ink may leak.

- Use the ink bottles that came with your product.
- Epson cannot guarantee the quality or reliability of non-genuine ink. The use of non-genuine ink may cause damage that is not covered by Epson’s warranties.
Check the upper line in the ink tank.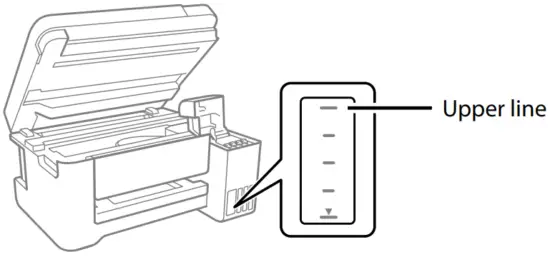
Insert the ink bottle straight into the port to fill ink to the upper line.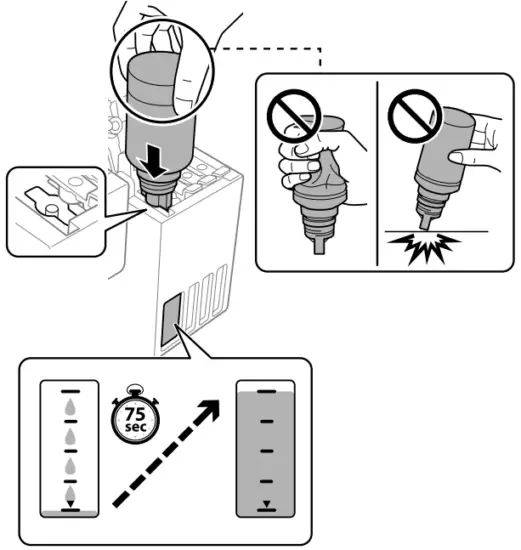
- When you insert the ink bottle into the filling port for the correct color, ink starts pouring and the flow stops automatically when the ink reaches the upper line.
- If the ink does not start flowing into the tank, remove the ink bottle and reinsert it. However, do not remove and reinsert the ink bottle when the ink has reached the upper line; otherwise ink may leak.
- Ink may remain in the bottle. The remaining ink can be used later.
- Do not leave the ink bottle inserted; otherwise the bottle may be damaged or ink may leak.
When the ink reaches the upper line of the tank, pull out the bottle.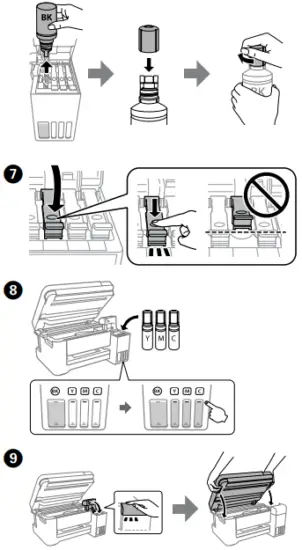
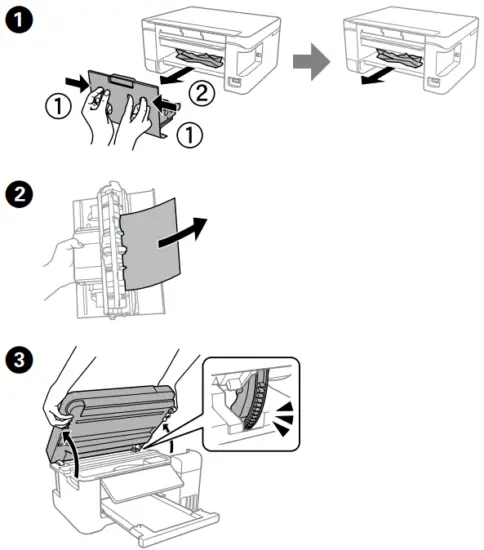
Continue to close the scanner unit even if you feel some resistance.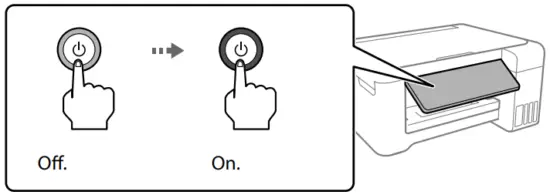
Select a language
When the message of seeing Start Here is displayed, hold down the button for 5 seconds.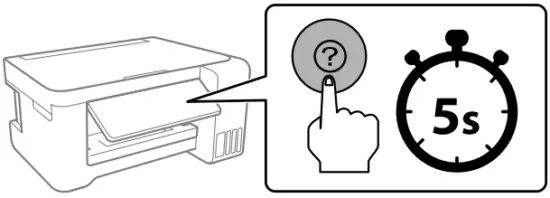
Follow the on-screen instructions, and then press the ![]() button to start charging ink. Charging ink takes about 10 minutes.
button to start charging ink. Charging ink takes about 10 minutes.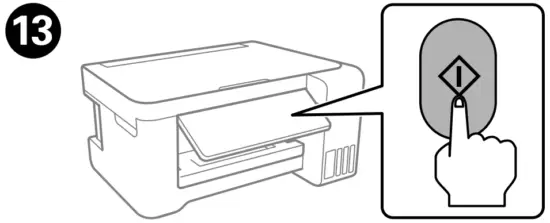
When charging ink is complete, the print quality adjustment screen is displayed. Follow the on-screen instructions to perform adjustments. When the paper loading message is displayed, see step.
Load paper in the rear paper feeder with the printable side facing up.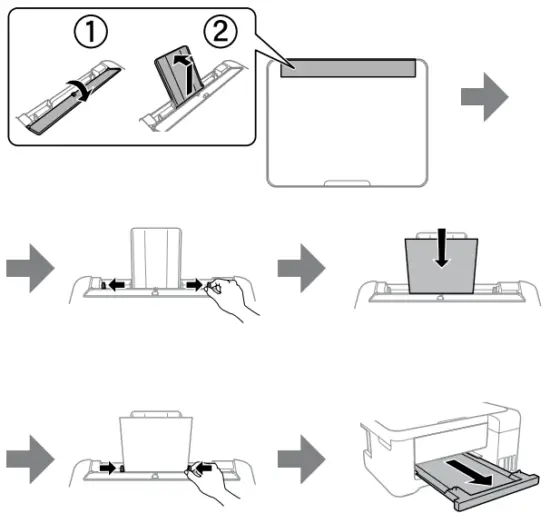
Return the remaining paper to its package. If you leave it in the printer, the paper may curl or the print quality may decline.
If there is ink remaining in each bottle, refill the ink tank. See steps 1 to 9 in section 2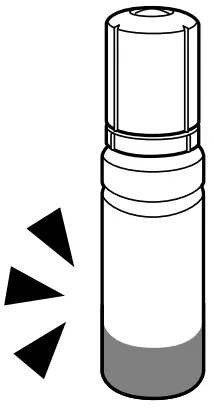
Visit the website or use the CD supplied for Windows users to install software and configure the network. When this is complete, the printer is ready for use.
http://epson.sn
Guide to Control Panel
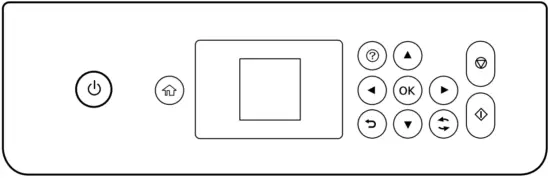
| Turns the printer on or off. | |
| Displays the home screen. | |
| Displays the solutions when you are in trouble. | |
 | Press |
 | Stops the current operation. |
| Starts the operation you selected. | |
| Applies to a variety of functions depending on the situation. | |
| Cancels/returns to the previous menu. |
Copying
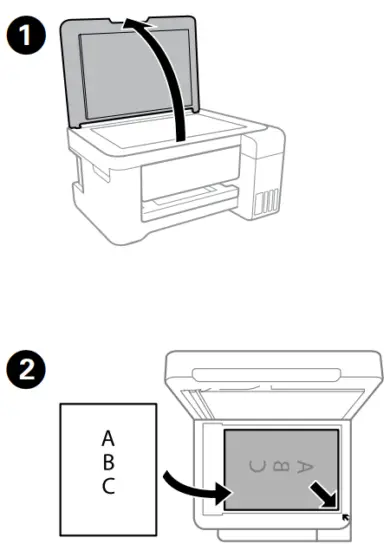
- Select Copy on the control panel.
- Select B&W or Color, and then enter the number of copies.
- Make other settings as necessary.
- Select
 to start copying
Checking Ink Levels and Refilling Ink
Check the ink levels. If any of the ink levels are below the lower line, see steps 1 to 9 in section 2 to refill the tank.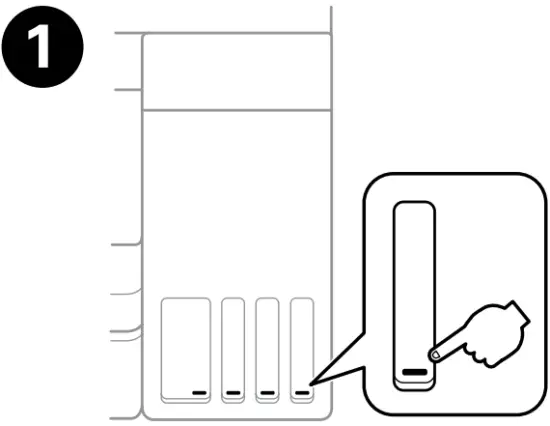
To confirm the actual ink remaining, visually check the ink levels in all of the printer’s tanks. Prolonged use of the printer when the ink level is below the lower line could damage the printer.
- Select Maintenance > Fill Ink on the control panel.
- Follow the instructions on the LCD screen to reset the ink levels
Ink Bottle Codes
For Europe
| BK | C | M | Y | |
| ET-2850 Series | 102 | |||
| L4260 Series | 101 | |||
| ET-2850U | 120 | |||
For Australia and New Zealand
| BK | C | M | Y |
| 502 | |||
For Asia
| BK | C | M | Y |
| 001 | |||
Use of genuine Epson ink other than the specified ink could cause damage that is not covered by Epson’s warranties.
Clearing Paper Jam

Troubleshooting
See the online User’s Guide for detailed information. This provides you with operating, safety, and troubleshooting instructions such as clearing paper jams or adjusting print quality. You can obtain the latest versions of all guides from the following website.

Support
For outside Europe: http://support.epson.net/
For Europe: http://www.epson.eu/support
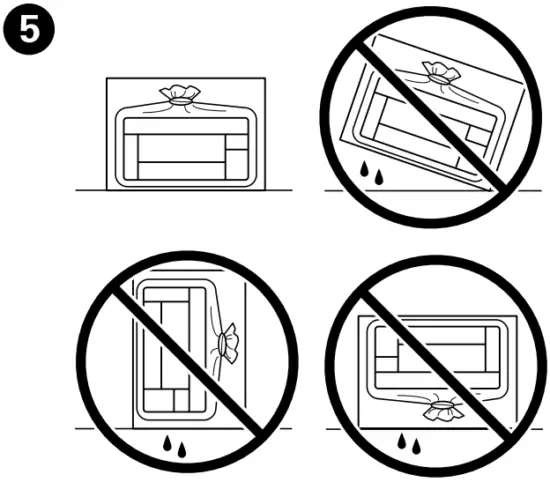
Storing and Transporting
- Be sure to keep the ink bottle upright when tightening the cap. Place the printer and the bottle in a plastic bag separately and keep the printer level as you store and transport it. Otherwise ink may leak.
- If print quality has declined the next time you print, clean and align the print head.

Windows® is a registered trademark of Microsoft Corporation.