![]() XP-2150 Series
XP-2150 Series
Inkjet Printers
Start Here
User Manual
XP-2150 Inkjet Printers
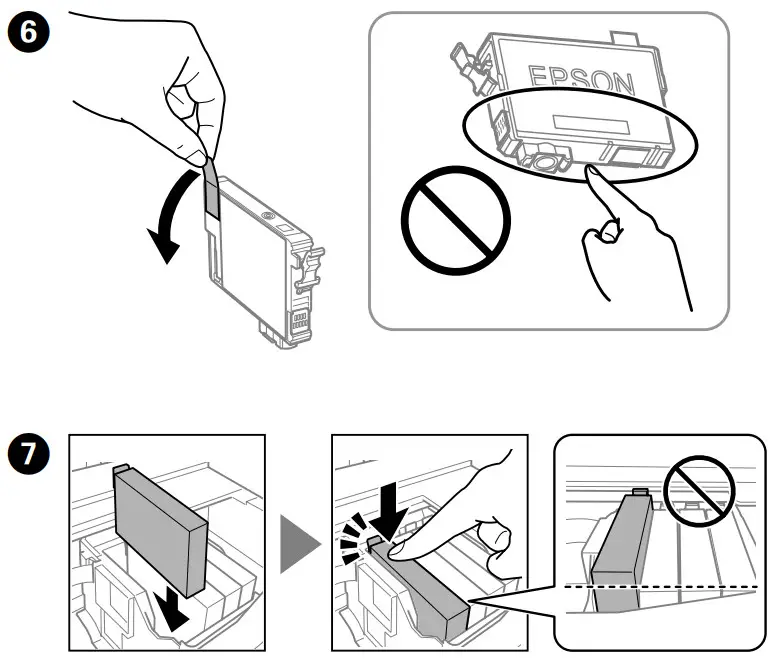
![]() Do not open the ink cartridge package until you are ready to install it in the printer. The cartridge is vacuum-packed to maintain its reliability.
Do not open the ink cartridge package until you are ready to install it in the printer. The cartridge is vacuum-packed to maintain its reliability.

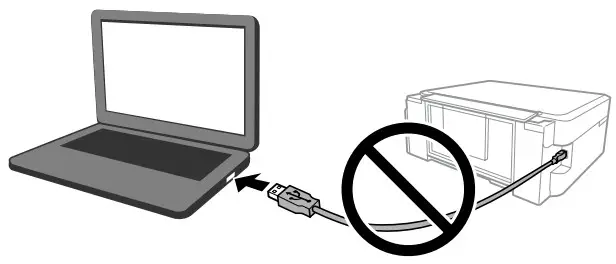
Do not connect a USB cable unless instructed to do so.
Unpacking
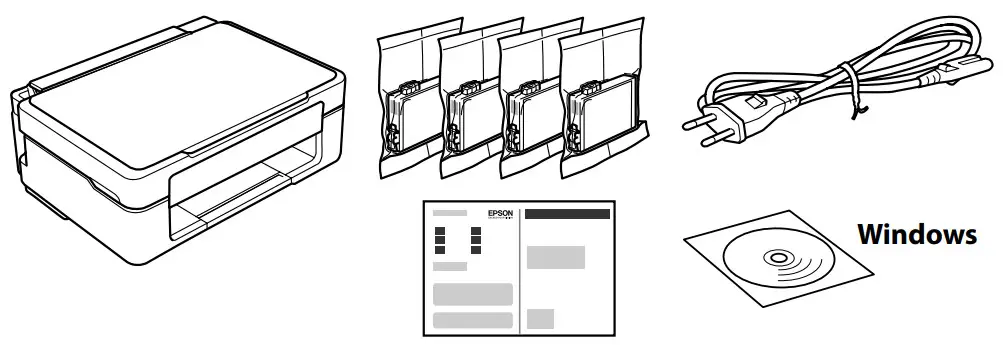
Additional items may be included depending on the location.
For the initial setup, make sure you use the ink cartridges that came with this printer. These cartridges cannot be saved for later use.
The initial ink cartridges will be partly used to charge the print head. These cartridges may print fewer pages compared to subsequent ink cartridges.
Printer Set Up
Visit the website to start the setup process, install software or Epson iPrint application, and configure network settings.

Windows users can also set up using the CD supplied.
Guide to Control Panel
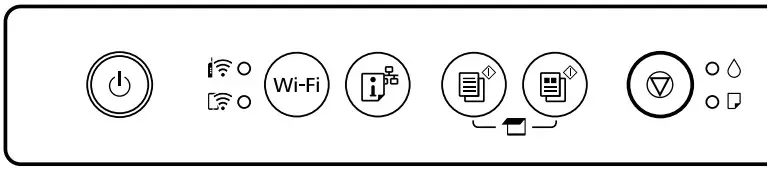
Buttons
| Turns the printer on or off. | |
| Wi-Fi | Clears a network error. Hold down for 5 seconds or more to make network settings using the WPS push button. |
| Print a network connection report to determine the causes of any network problems. To get more information, hold this button down for more than 5 seconds to print a network status sheet. | |
| Starts with monochrome or color copy. To increase the number of copies (by up to 20 copies), press this button within 1-second intervals. | |
| Stops the current operation. Press this to replace an ink cartridge when an ink cartridge is expended. |
Button Combinations
| Scan to Computer Press | |
| Copy in Draft Mode Press | |
| PIN Code Setup (WPS) Hold down Wi-Fi and | |
| Wi-Fi Direct (Simple AP) Setup Hold down Wi-Fi and | |
| Restore Default Network Settings Turn the printer on while holding it down | |
| Print Nozzle Check Pattern Turn the printer on while holding it down |
Reading the Indication Lights![]() : On
: On![]() : Flashing
: Flashing
| Normal Status | |
| The printer is connected to a wireless (Wi-Fi) network. | |
| The printer is connected to a network in Wi-Fi Direct (Simple AP) mode. | |
| Error Status | |
| A Wi-Fi connection error has occurred. Press Wi-Fi to clear the error and try again. | |
| An ink cartridge is expended, invalid, or not installed correctly. Leave an expended or low-ink-level cartridge installed until you have obtained a replacement. Otherwise, the ink remaining in the print head nozzles may dry out. In addition, ink cartridges with a low ink level cannot be used even if they are reinserted into the printer. See the “Replacing Ink Cartridges” section. | |
| An ink cartridge is nearly expended. You can print until the | |
| No paper is loaded or more than one sheet has been fed at a time. Load paper and press | |
| A paper jam has occurred. Remove the paper and press If the indicator light continues flashing, see the jammed paper section from “Solving Problems” in the User’s Guide. | |
| The printer was not turned off correctly. After clearing the error by pressing To turn off the printer, make sure you press | |
| Flashing simultaneously: An ink pad is nearing or at the end of its service life. Flashing alternately: A borderless printing ink pad is nearing or at the end of its service life. Borderless printing is not available, but printing with a border is available. To replace the ink pad or borderless printing ink pad, contact Epson or an authorized Epson service provider. | |
| The printer has started in recovery mode because the firmware update failed. For more details, see the error indicator table from “Solving Problems” in the User’s Guide. | |
| A printer error has occurred. Open the scanner unit and remove any paper inside the printer. Turn the power off and on again. If the error continues to occur after turning the power off and on again, contact Epson support. | |
Ink Cartridge Codes
 Starfish
| BK | C | M | Y |
| Black | Cyan | Magenta | Yellow |
| 603 | 603 | 603 | 603 |
| 603XL | 603XL | 603XL | 603XL |
“XL” indicates a large cartridge.
Not all cartridges are available in all regions.
For information on Epson’s ink cartridge yields, please visit the website.![]() http://www.epson.eu/pageyield
http://www.epson.eu/pageyield
Notice on Printer Information Transmission (only for Users in Europe)
By connecting your printer to the internet (directly or via a computer) you will transmit the printer identity to Epson in Japan. Epson will use this information to check if it is in any Epson-supported program and store it to avoid repeat acknowledgments. On the first occasion, an acknowledgment may be sent and printed out on your printer including information about relevant products and services.
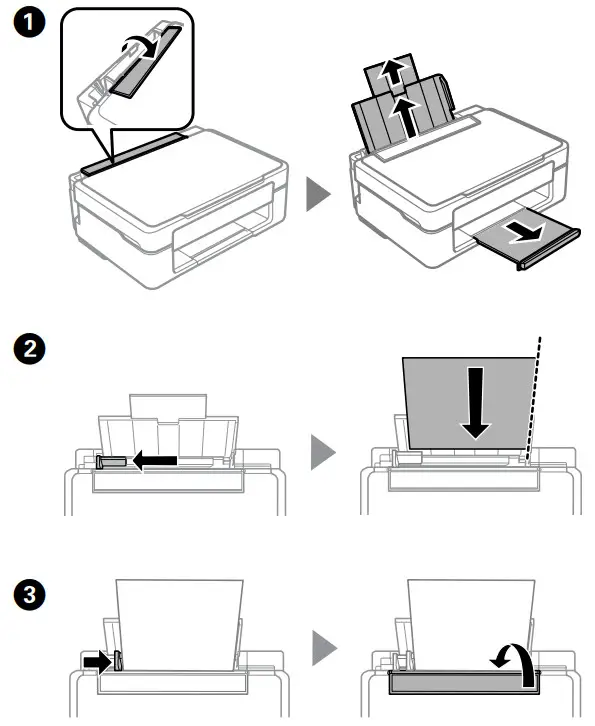
Loading Paper
Copying
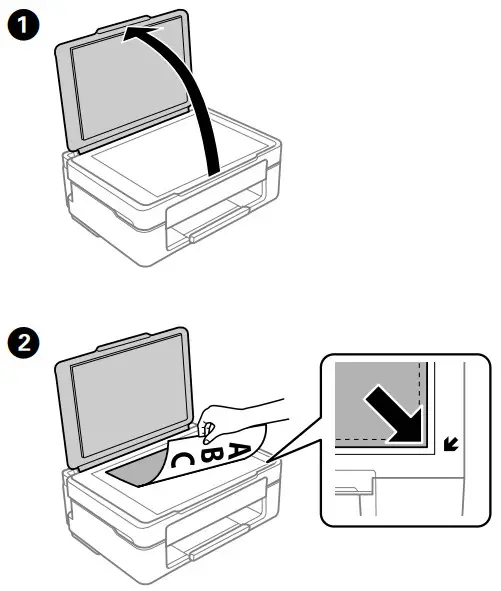 | 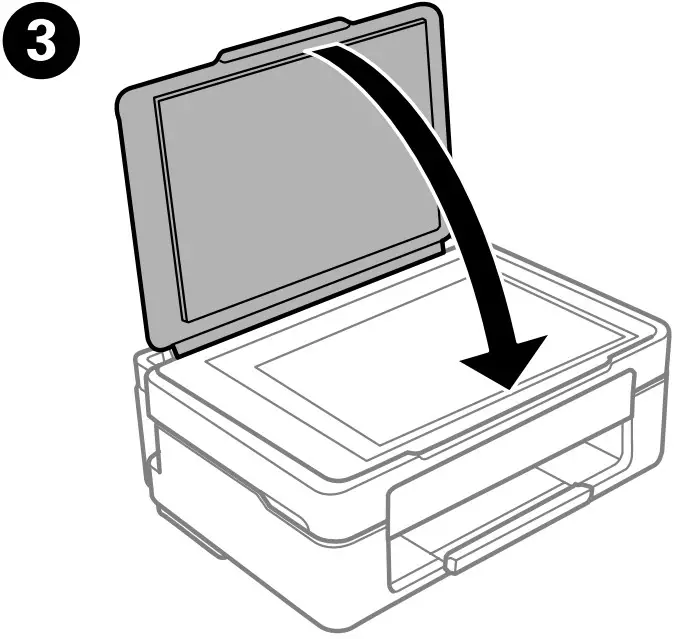 |
| 4. Press |
Replacing Ink Cartridges
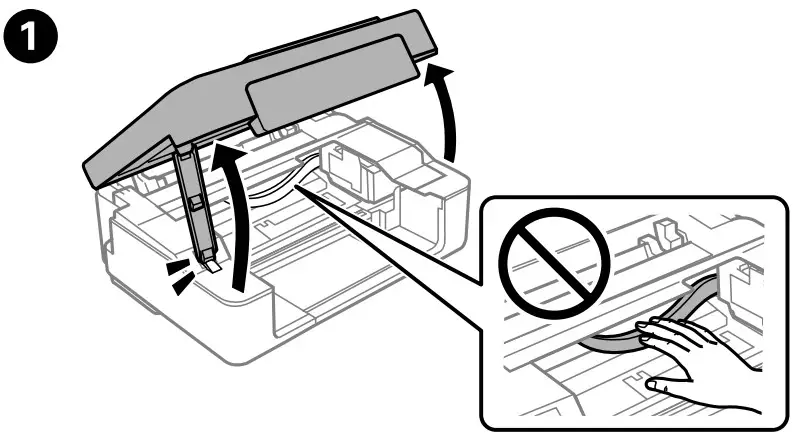
Press![]() to move the ink cartridge holder. It stops at the
to move the ink cartridge holder. It stops at the![]() mark to indicate an expended or low-ink cartridge.
mark to indicate an expended or low-ink cartridge.
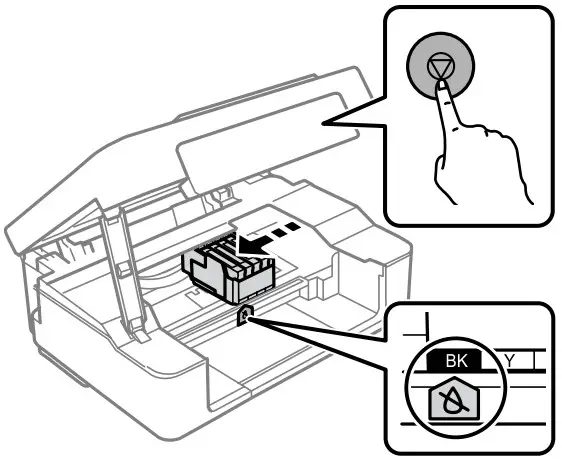
![]() Never touch the ink cartridges while the ink cartridge holder is moving.
Never touch the ink cartridges while the ink cartridge holder is moving.![]() If the ink cartridge holder does not move, hold it down
If the ink cartridge holder does not move, hold it down![]() for 10 seconds or more until it moves.
for 10 seconds or more until it moves.
3. Press![]() again to move the cartridge holder to the ink cartridge replacement position.
again to move the cartridge holder to the ink cartridge replacement position.
![]() If there is another expended or low-ink-level cartridge, the ink cartridge holder stops to indicate the cartridge with the mark. Press
If there is another expended or low-ink-level cartridge, the ink cartridge holder stops to indicate the cartridge with the mark. Press![]() repeatedly until it moves to the replacement position.
repeatedly until it moves to the replacement position.

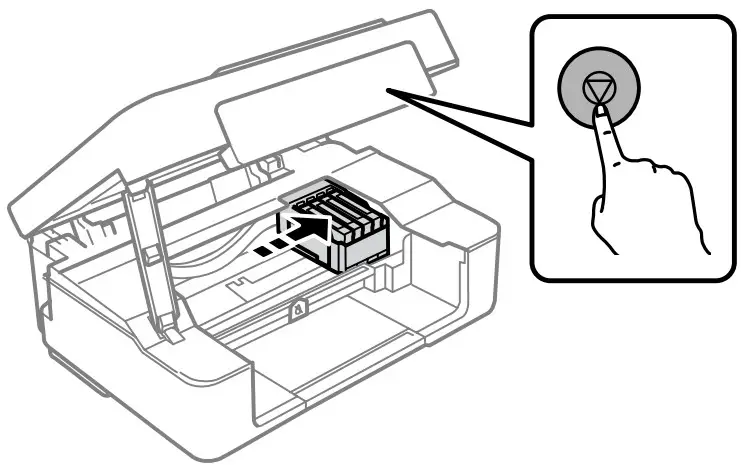
8. Close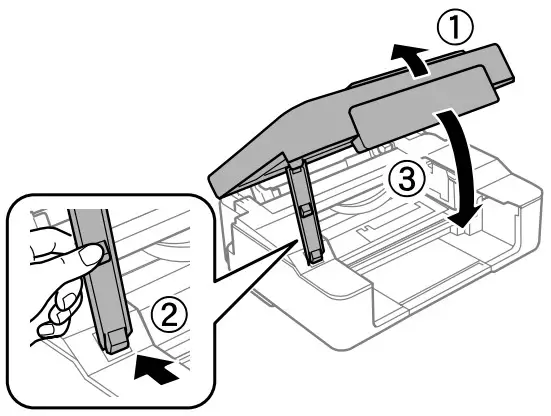
Press![]() . Ink charging starts. It takes about two minutes. Wait until the light stops flashing.
. Ink charging starts. It takes about two minutes. Wait until the light stops flashing.
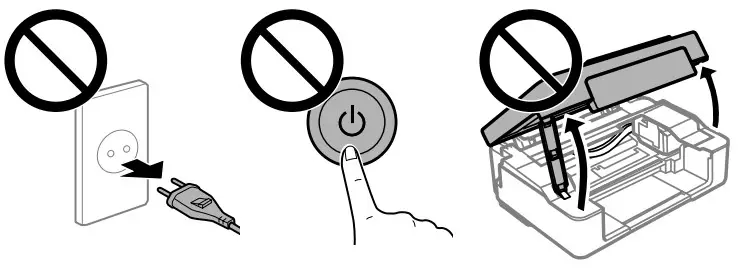
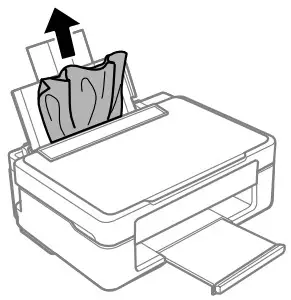
Clearing Paper Jam
Back
Inside the Printer

Print Quality Help ![]() If you see missing segments or broken lines in your printouts, print a nozzle check pattern to check if the print head nozzles are clogged.
If you see missing segments or broken lines in your printouts, print a nozzle check pattern to check if the print head nozzles are clogged.
1. Turn off the printer.
2. While holding down 1, press 2 until the power light is on or flashing. The nozzle check pattern is printed.

3. Examine the printed pattern. If you notice any missing segments or broken lines as shown in (a), go to the next step.

4. Run the print head cleaning. Hold down![]() for 5 seconds until the
for 5 seconds until the![]() light starts flashing.
light starts flashing.
Cleaning uses some ink from all cartridges, so only perform cleaning if print quality declines.
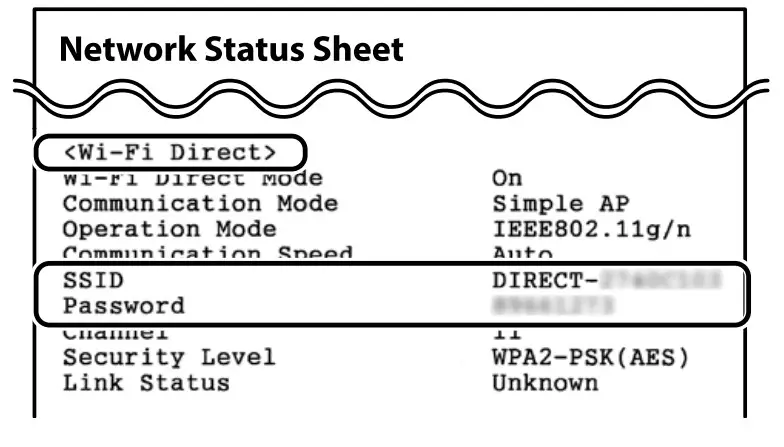
Wi-Fi Direct connection

You can connect computers or smart devices directly to the printer without a wireless router. If you are unable to connect using a Wi-Fi Direct connection, see the User’s Guide.
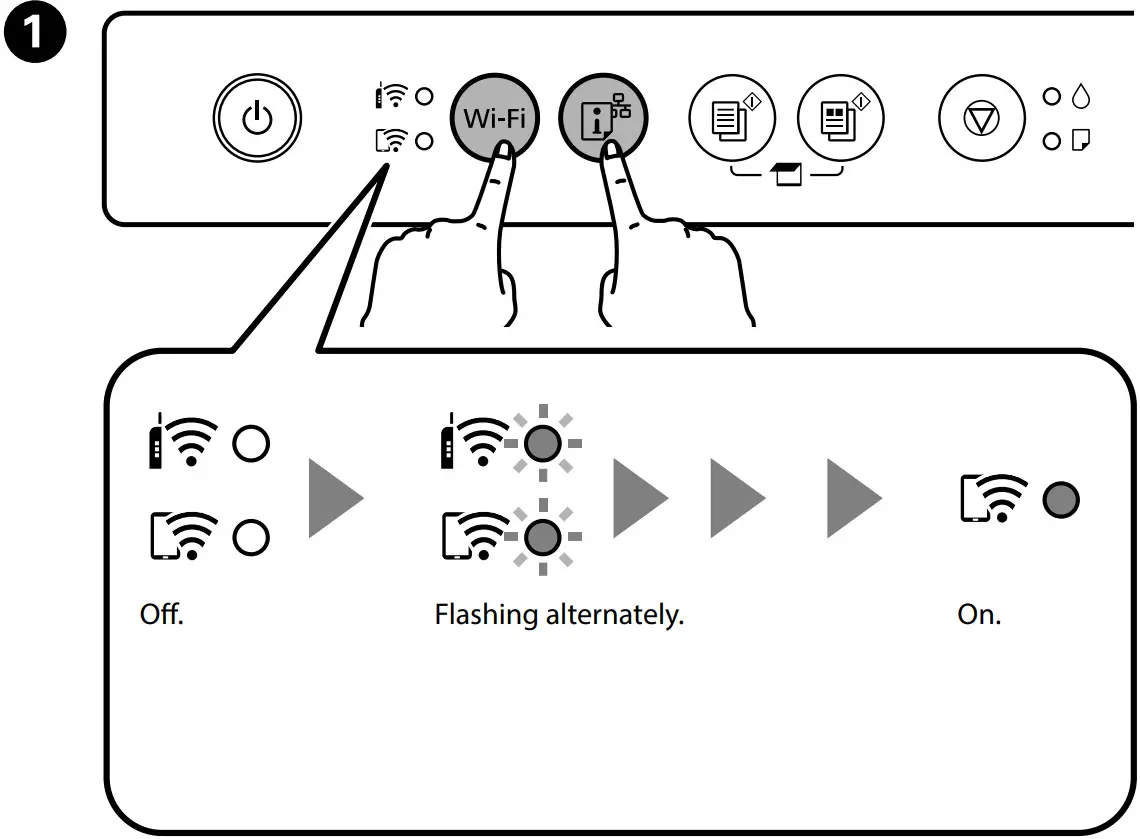
This step is not required for the second time.
3. Load 3 sheets of A4 size paper.
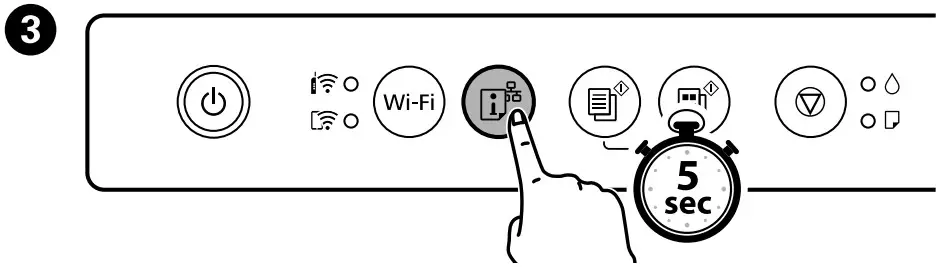
On the computer’s network connection screen or the smart device’s Wi-Fi screen, select the same SSID shown on the network status sheet to connect, and then enter the password.
 This guide includes basic information about your product and troubleshooting tips. See the User’s Guide (digital manual) for more details. You can obtain the latest versions of guides from the following website.
For outside Europe
http://supportepson.net/ For Europe http://www.epson.eu/support
Windows is a registered trademark of Microsoft Corporation.
Uretic: SEIKO EPSON CORPORATION
Address: 3-5, Owa 3-chome, Suwa-shi, Nagano-ken 392-8502 Japan
Tel: 81-266-52-3131
Web: http://www.epson.com/
The contents of this manual and the specifications of this product are subject to change without notice.
![]()