
GEONFINO G5 Smart Lock Instruction Manual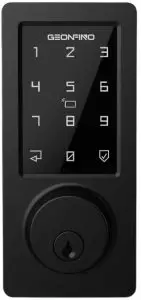
- Password

- App
- Rfid card
- Bluetooth


Please keep and read this instruction before installation, we also prepared instruction video to help on Amazon Page. If you need further assistance, please contact Customer Service by email: [email protected]
What is include
- A: Latch

- B: Keypad

- C: Battery cover

- D: Interior Assembly

- E: Mounting Plate

- F: Strike

- G: Strike

- H: Interior Assembly Screws

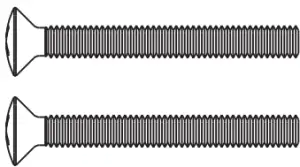
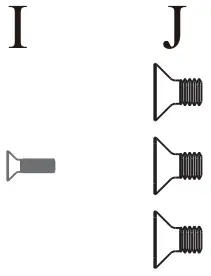
- I/J: Mounting Plate Screws

- K: Latch / Strike

- L: Rfid Card

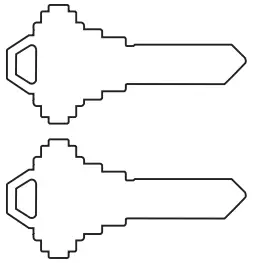
- M: Keys


Installation Guide
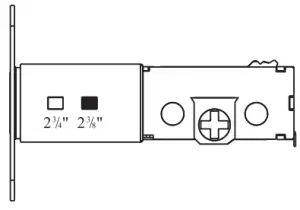
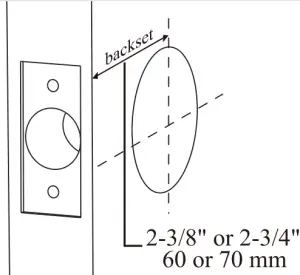
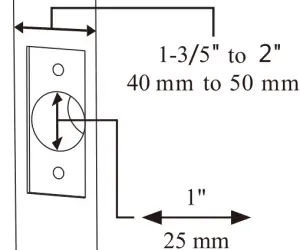
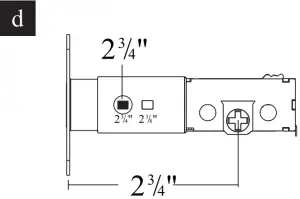
Prepare the door and check dimensions
- A: Measure to confirm that the back set is either 2-3/8″ or 2-3/4″ (60 or 70 mm).

- B: Measure to confirm that the hole in the door edge is 1″(25nun).And measure to confirm that the door is 1-3/5″ to 2″(40 mm to 50 mm)thick.

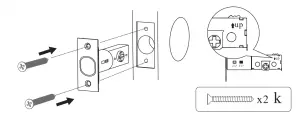
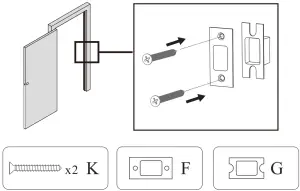
Install the latch and strike
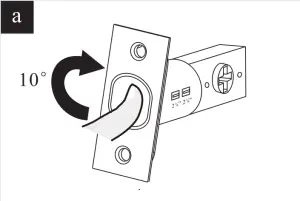
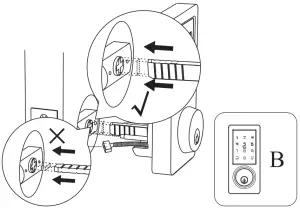
- A: Hold the latch in front of the door hole, with the latch face flush against the door edge.

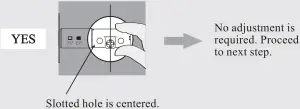
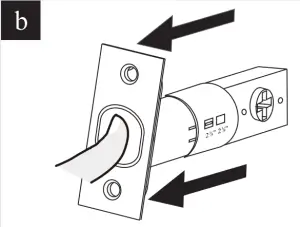
Is the slotted hole centered in the door hole?


- A: Rotate the head of latch 10°.

- B: Stretch the latch

- C: Rotate the head of latch back to right position.

- D:

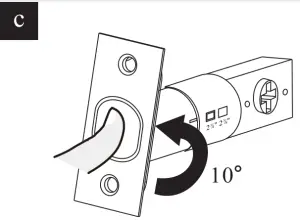
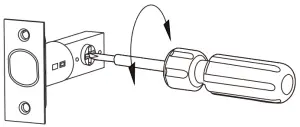
- A: Rotate the head of latch 10°.
- B: Use a screw driver to test if deadbolt works smoothly. When the screw driver turn, the deadbolt would be lock/unlock.

- C: Install strike on the door frame.
 Important: Make sure hole in door frame is drilled a minimum or 1″ (25 MM) deep.


Installation Instructions
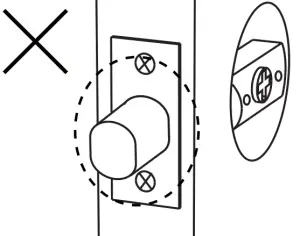
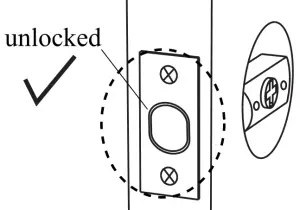
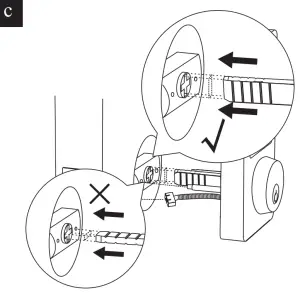
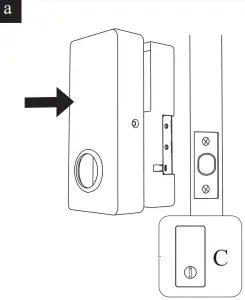
- A: Important: Before installation , make sure the latch is fully retracted (in the unlocked position).

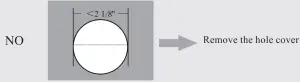
- B: If the hole is bigger than 2 1/8″ (54mm ), install the keypad directly.

No adjustment is required. proceed to next step.
Please ensure the tail bar is vertical during installation. The IC wired need to under the deadbolt.
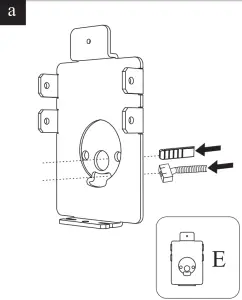
Remove the hole cover.- A: Remove screw form hole cover.

- B: Remove the hole cover.

- C: Please ensure the tail bar is vertical installation. The IC wired need to under the deadbolt.

- A: Remove screw form hole cover.
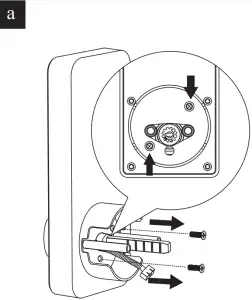
- C: Install Mounting Plate.
- A: The IC wired and tail bar go through the hole of mounting plate.

- B: Secure the mounting plate with the supplied screws.

- C: Make sure the IC wired not too long.

- A: The IC wired and tail bar go through the hole of mounting plate.
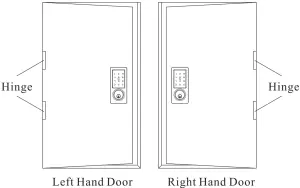
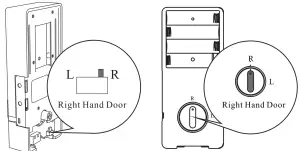
- D: Confirm the direction of the door.

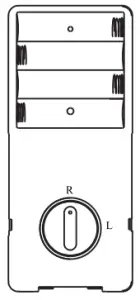
If the door is left handle.- To install the lock for left side handling, ensure the toggle button on the back assembly is set to “L”.
- Setting direction of the turn piece : Horizontal for Left handle when in unlock status.

If the door is right handle.- To install the lock for right side handing, ensure the toggle button on the back assembly is set to “R”.
- Setting direction of the turn piece : Horizontal for Right handle when in unlock status.

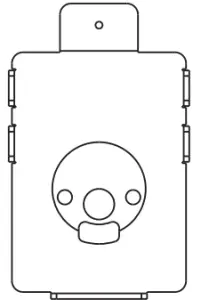
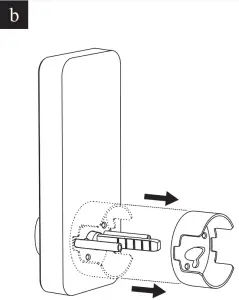
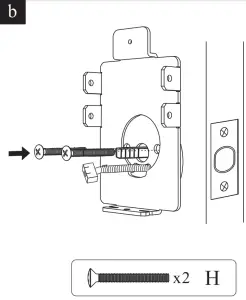
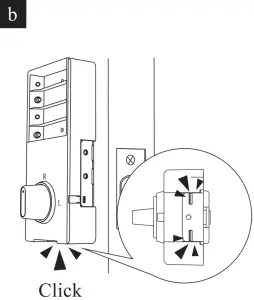
- E: Install interior Assembly.
- A: Connect the cable and ensure right cable connection. And the tail bar insert turn piece hole.

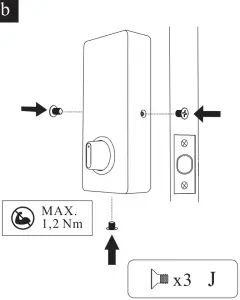
- B: Install the interior assembly on mounting plate and make sure they click on together.

- C: Secure the interior assembly with the supplied screws.

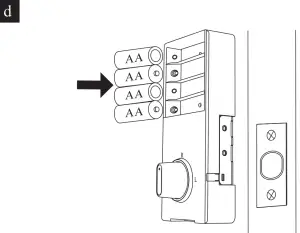
- D: Load 4 AA batteries into the interior assembly.
 IMPORTANT: For best results, use new, non-rechargeable Alkaline batteries only.
- A: Connect the cable and ensure right cable connection. And the tail bar insert turn piece hole.
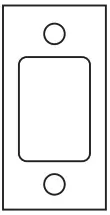
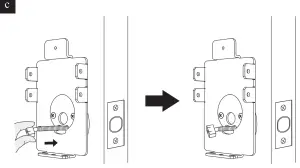
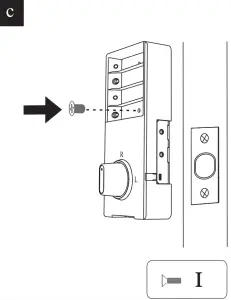
- F: Install Batter Cover
- A: Install battery cover.

- B: Secure the interior assembly with the supplied screws.

- A: Install battery cover.


How to use
Lock the door from outside
Manual Mode
Press “![]() ” key on keypad for 3 second.
” key on keypad for 3 second. 
Lock the door from inside
Manual Mode
Rotate the thumb turn to Lock position. 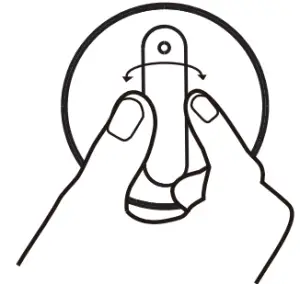
UNLOCK the door from outside
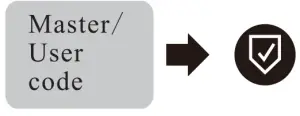
- Rfid card

- Master / User code

- Key


UNLOCK the door form inside.
Rotate the thumb turn to Unlock position.
Via APP
Long press “![]() ” to LOCK the door from outside or inside.
” to LOCK the door from outside or inside.
Click “![]() ” to UNLOCK the door from outside or inside.
” to UNLOCK the door from outside or inside.
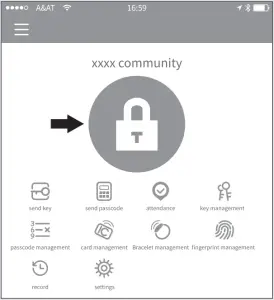
Note: Please keep your phone near the door lock within 32.8ft(10m).
Auto Re-Lock Mode
Auto Re-lock Mode can be set up in APP.(5s,10s,15s, 30s,60s,Custom) When the lock be unlocked via APP, pass code or RFID card, it will re-lock automatically in the reset time.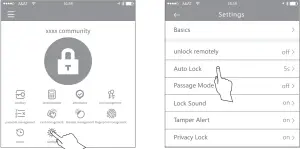
Programming Instruction
Information & Safety Warnings
- Protect your User Codes and Master Code.
- Protect your key. It is suggested to put it outside the door, such as your car.
- Restrict access to your lock’s interior assembly and routinely check your settings to ensure they have not been altered without your knowledge.
- This lock set is designed to provide the highest standard of product quality and performance. Care should be taken to ensure a long-lasting finish. When cleaning is required use a soft, damp cloth. Using lacquer thinner, caustic soaps, abrasive cleaners or polishes could damage the coating and result in tarnishing.
![]() IMPORTANT: Do not load batteries until lock is completely installed.
IMPORTANT: Do not load batteries until lock is completely installed.
Definitions
Master Code
Required for programming and feature settings. Master code can be used to unlock the door under vacation mode. The default master code needs to be changed before programming.
Property owner/manager should keep this information confidential.
- Master Code(6 to 8) digits: The default Master Code is 123456. It is required that you change it to a code of your own before programming.
- User Code(6 to 8 )digits: A total of 200 User Codes may be programmed.
Auto Lock
Automatically locks the deadbolt after unlocking. This feature is off by default. You can set the auto lock time in the app.
Wrong Entry Limit
After 5 unsuccessful attempts at entering a valid PIN code, the unit will shut down for 5 minutes.
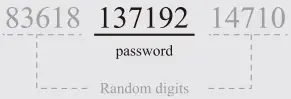
Unlock with Fake Code
User can prevent PIN code exposure from strangers by entering random digits before or after PIN code.
App Guide
- Download APP “TTLock”.


Android Mobile Phone–Search “TTLock” from Google Play.
Apple Mobile Phone–Please search “TTLock” from App Store.
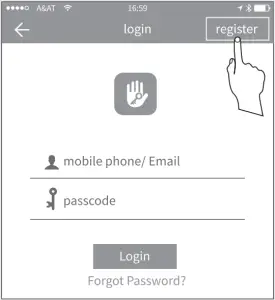
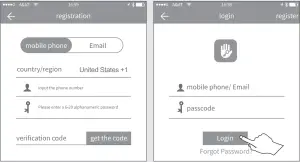
Register a new account ( phone number or email)
![]()


