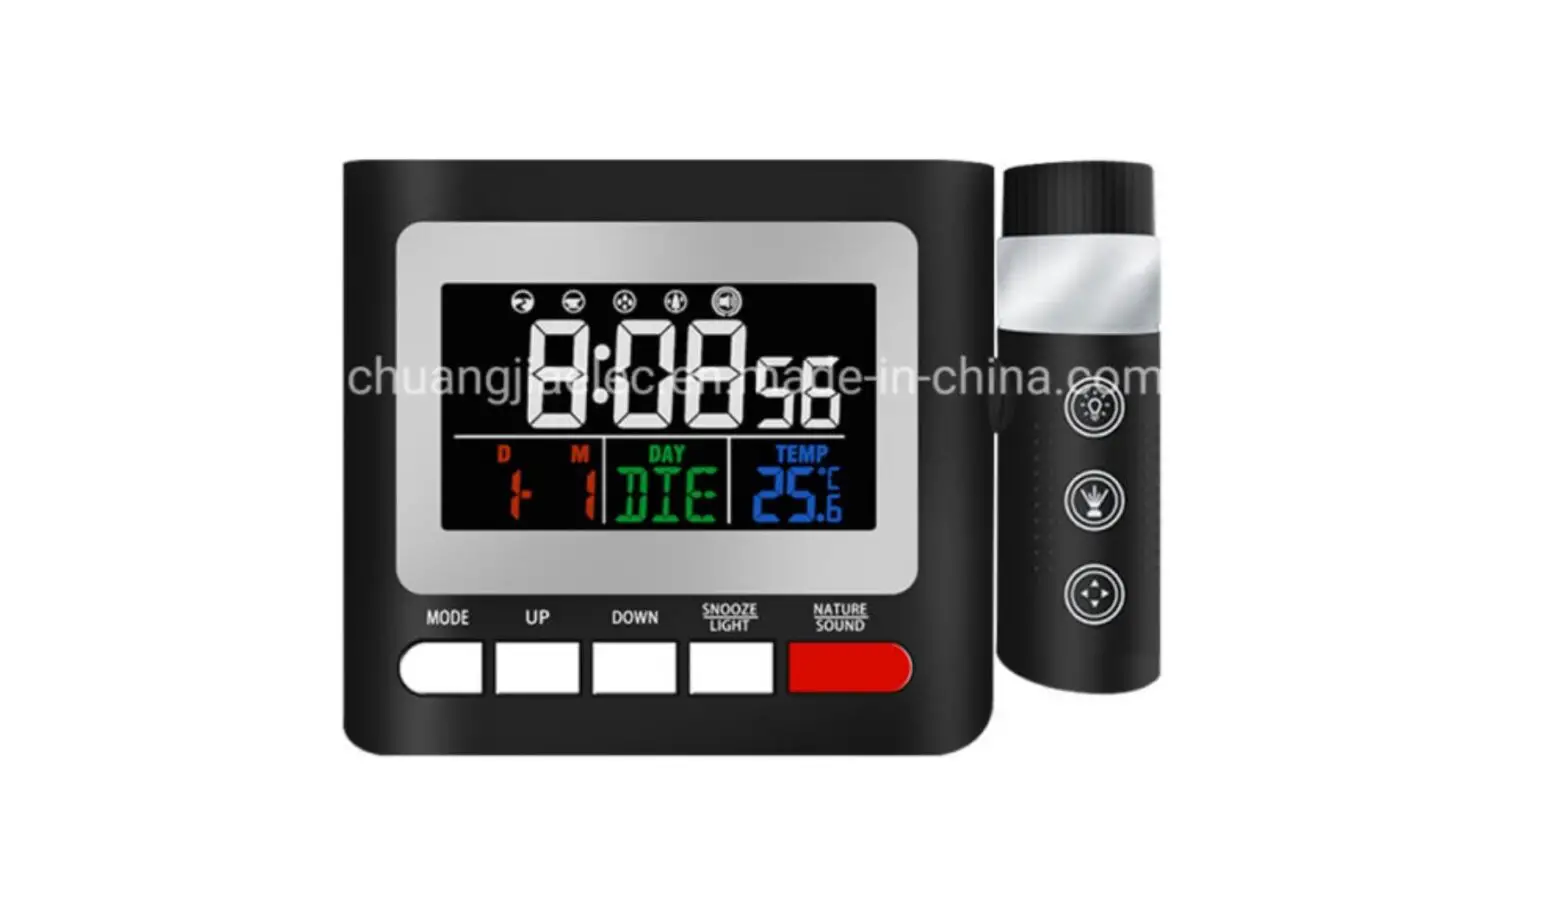
Dongguan Fuyuqian E Commerce GE798 Projection Clock User Manual
Before Use
Main Unit: This clock adapts the RF transmission vibration function on the basis of the normal clock. Under the vibration gear or vibration with BBB sound gear, the vibration signal can be transmitted by the clock and received by the vibrator.
Vibrator: When the vibrator receives the signal sent by the main unit, it will automatically turn on the clock vibration reminder. With a 3.7V built-in lithium battery, the vibrator can supply power independently. And the battery can last 3 months without external power supply.
Power On
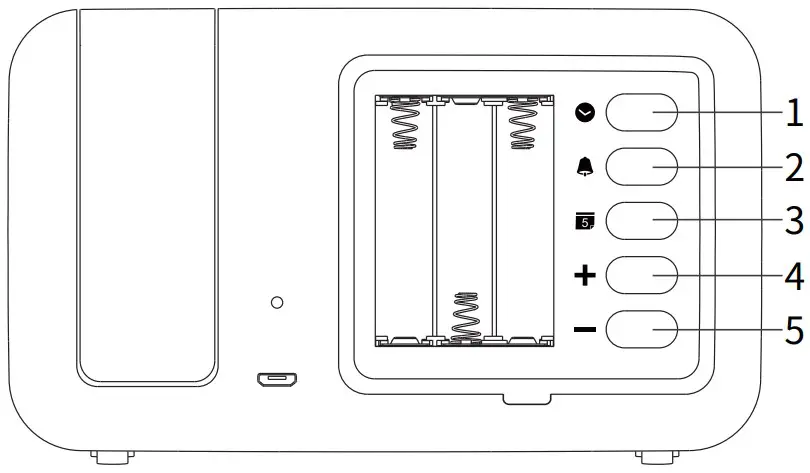
Way 1: Open the back cover of the battery, install 3 AAA batteries, the screen will display for 1 second with a sound of ‘DI’ and turn on.
Way 2: Connect the micro USB cord to the clock and an adapter under DC 5V current, and the screen will display for 1 second with a sound of ‘DI’ and turn on.
- Time Setting
- Alarm Setting
- Date Setting
- Increment/ °C/°F
- Decrement/ Weekend Mode

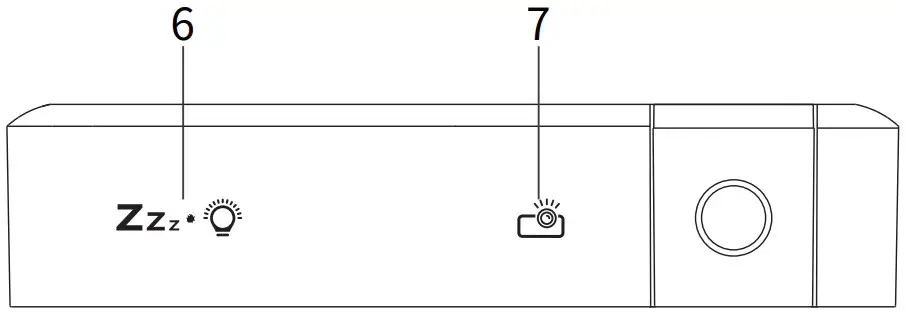
- Brightness/ Snooze Button
- Projection Button

12H/24H Format
- Press the [
 ] button to switch between 12H/24H.
press
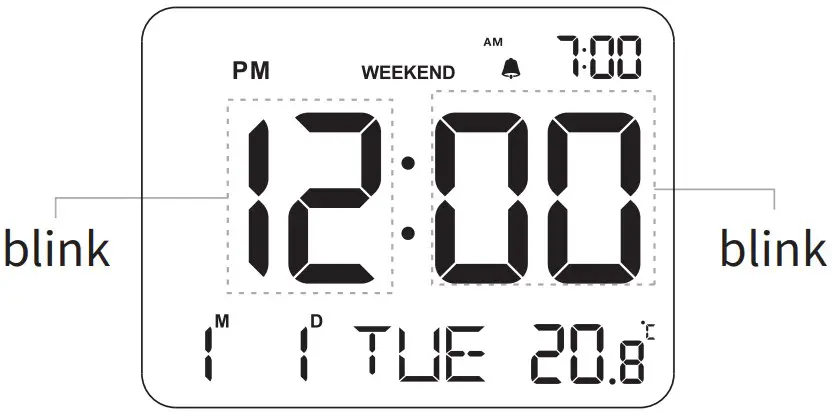
Tip 1: Under 12H format, AM is displayed in the morning and PM is displayed in the afternoon.
Tip 2: Under 24H format, AM/PM is not displayed.
Time Setting
- Long press the [ ] button to enter the time setting, and the time number starts to flash.
- Press
 for time setting, long press for quick setting.
 - After setting, press the [ ] button again to confirm.

Tip: After 20 seconds with no operation, it will automatically confirm and exit the time setting.
Date Setting
- Long press the [
 ] button to enter the date setting, and the year number starts to flash.
 - Press for date setting, long press for quick setting.
- Press the [ ] button again to confirm.

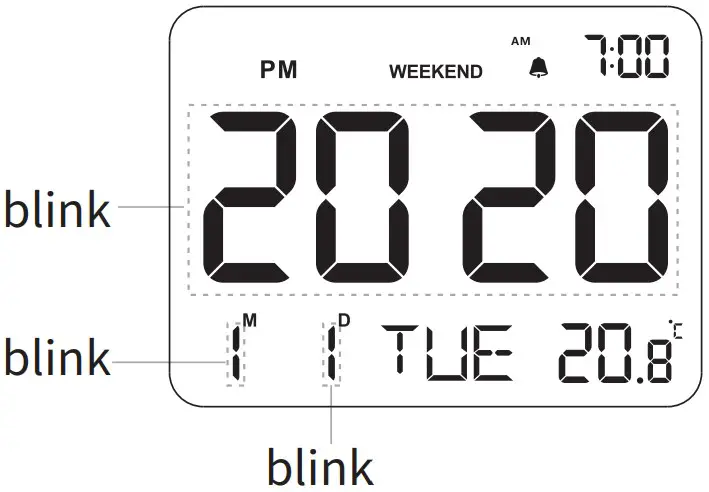
press![]()
Tip 1: The default date is 2020.1.1, and the year number will not be displayed.
Tip 2: After 20 seconds with no operation, it will automatically confirm and exit the date setting.
Alarm/Volume Setting
- Long press the [
 ] button to enter the alarm setting, the number 7:00 at the bottom right corner starts to flash.
 - Press to set the alarm time, long press for quick setting.
- After setting, press the [ ] button again to confirm the alarm time, and “L01” flashes.
- Press to select “L01” low volume and “L02” high volume.
- Press the [ ] button to confirm and exit the alarm setting.

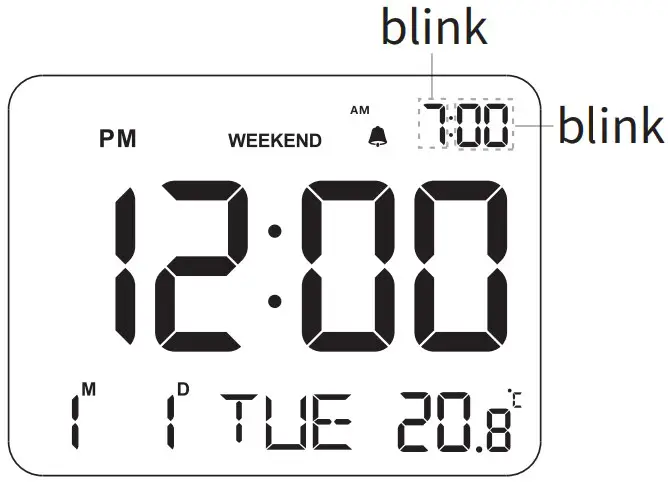
press![]()
Tip 1: After 20 seconds with no operation, it will automatically confirm.
Tip 2: The 12H/24H format will not influence the alarm clock setting.
Alarm On/Off
- Press the [ ] button to turn on/off the alarm. The alarm is ON with the“ ”pattern displaying, while OFF without the“ ”pattern.
Weekend Mode
- When the alarm function is on with the“ ”pattern, press the [ – ] button to turn on/off the weekend mode.
The weekend mode is ON with the “WEEKEND” pattern displaying above the time, while OFF without the “WEEKEND” pattern.
Snooze Setting
- When the alarm rings, touch the [ Zz
 ] button to pause ringing and snooze is ON with“ ”pattern flashing. After snoozing time (9 minutes), the alarm will ring again.
Turn Off Vibration
- Turned off by the clock
- Switch the vibrator to “OFF”
Indicator Status
- Low Battery: red light flashes 1 time per second
- Charging: red light stays on
- Full Charge: green light stays on
- Successful Connection: green light stays on for 5S, and the motor vibrates
- Lost Code Detection: green light stays on for 5S
Specification
| Working Voltage | 5-5.5V | (micro) Input Current | 500±50MA (MAX) |
| Built-in Battery | 1000mAh/3.7V lithium battery | Working Current | Current during vibration: 410mA(MAX) |
| Color | Athens black | Quiescent Current | 5uA≤ |
| Vibration Gear | OFF, Low, High from weak to strong | Battery Life | Standby time: 3 months Working time(one vibration per day): 15-18 days |
| Center Frequency | 433.9mHz | RF Transmit/ Receive Distance | > 30m |
| Size | 4*76*28mm | Sensitivity | -108dBm |
| Net Weight | 85g |
FCC Statements
This device complies with part 15 of the FCC Rules.
Operation is subject to the following two conditions:
- This device may not cause harmful interference, and
- this device must accept any interface received, included interference that may cause undesired operation.
Any changes or modifications not expressly approved by the party responsible for compliance could void the user’s authority to operate the equipment.
This equipment has been tested and found to comply with the limits for a Class B digital device,pursuant to part 15 of the FCC Rules.These limits are designed to provide reasonable protection against harmful interference in a residential installation.This equipment generates, uses and can radiate radio frequency energy and, if not installed and used in accordance with the instructions, may cause harmful interference to radio communications. However, there is no guarantee that interference will not occur in a particular installation. If this equipment does cause harmful interference to radio or television reception, which can be determined by turning the equipment off and on, the user is encouraged to try to correct the interference by one or more of the following measures:
- Reorient or relocate the receiving antenna.
- Increase the separation between the equipment and receiver
- Connect the equipment into an outlet on a circuit different from that to which the receiver is connected.
- Consult the dealer or an experienced radio/TV technician for help.
FCC Radiation Exposure Statement
This equipment complies with FCC radiation exposure limits set forth for an uncontrolled environment .
This transmitter must not be co‐located or operating in conjunction with any other antenna or transmitter.


