GLOBAL Zigbee WIFI Radiator Actuator User Manual
Many thanks for your selection of our products and services, and also for your trust and support
Search for “Smart RM” , Download the App with the following icon

After the ZigBee gateway is configured, enter the gateway to add sub-devices, and wait for the actuator to be powered on and the system self-check is completed. long press ![]() access to setting ,short press
access to setting ,short press ![]() to choose icon,short press
to choose icon,short press ![]() to enter network connected mode, then long press , flashing access network connected mode. Please refer to the gateway manual for Zigbee gateway configuration.
to enter network connected mode, then long press , flashing access network connected mode. Please refer to the gateway manual for Zigbee gateway configuration.
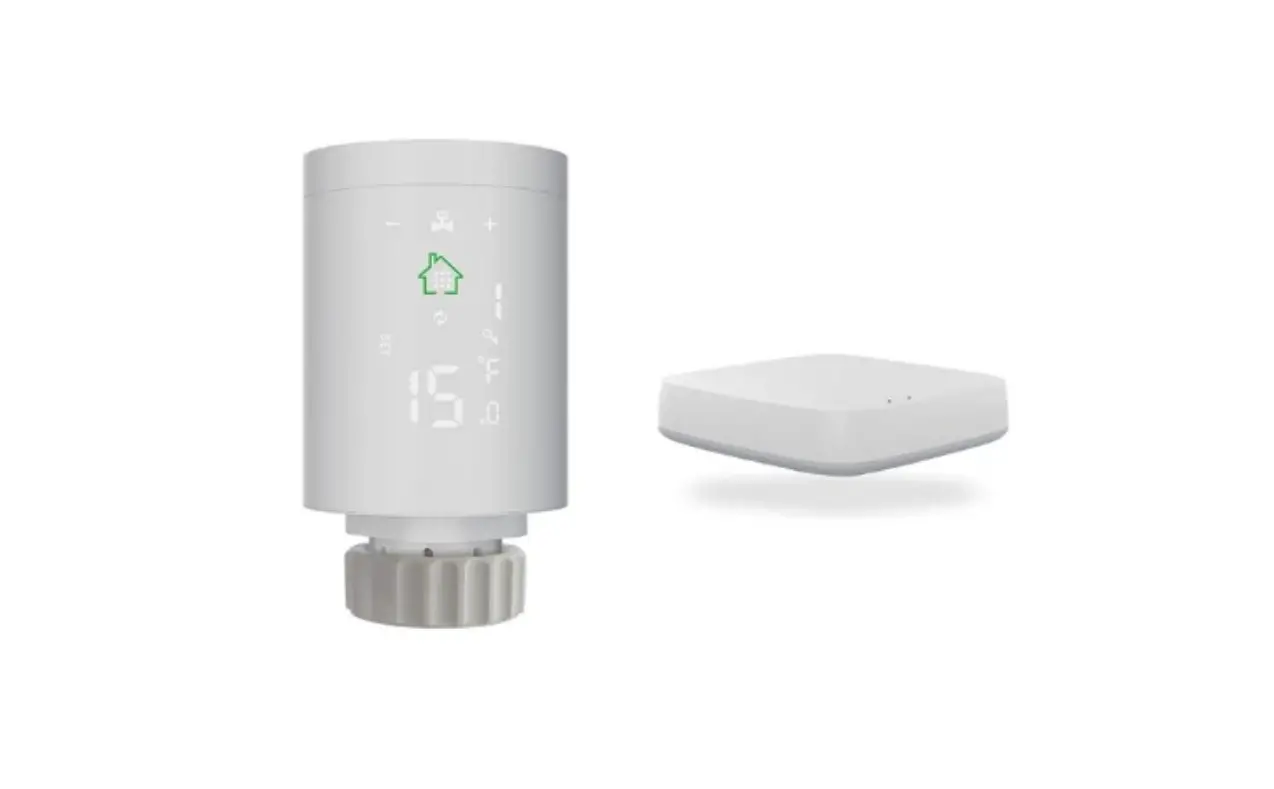
Product
Product Specifications
- Power: 2* AA alkaline batteries
- Display accuracy::0.5℃
- Probe sensor::NTC(10k)1%
- Maximum route:4.5mm
- Default range of temperature adjustment:5~35°C
- Working environment temperature::-10~60°C
- Insulating condition: 0-50℃
- Running program: Set per 1 week as a cycle
- Size(mm):53*89.5mm
- Range of temperature display::1~70°C
- Maximum current:90mA
- Thread size:M30*1.5
| No. | Icon | 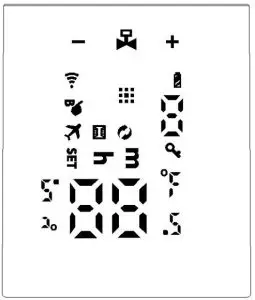 |
| A | ||
| B | ||
| C | Time setting interface: |
| Long press to access setting interfaceConfirm key | ||
| E | Decrease key Long press 3s to lock/unlock keys | |
| F | Increase Key Long press 3s access Boost function setting, Press any key during operation to exit this function and return to the original working mode |
Installation and initial commissioning
- After power on, the screen will show all for 3 seconds.

Time setting: ![]() flashing,press
flashing,press ![]() display
display ![]() hour setting,press
hour setting,press ![]() or
or ![]() to adjust value,press
to adjust value,press ![]() again display
again display ![]() minutes setting,press
minutes setting,press ![]() or
or ![]() to adjust value,press
to adjust value,press ![]() again to set week,press
again to set week,press ![]() or
or ![]() to adjust value,press
to adjust value,press ![]() to confirm setting and remember time.
to confirm setting and remember time.
Note:after actuator self-testing,under normal working status,if need to modify time,please and press ![]() 3s access to setting. And press
3s access to setting. And press ![]() to choose
to choose ![]() , short press
, short press ![]() enter time setting. the same as above method.
enter time setting. the same as above method.
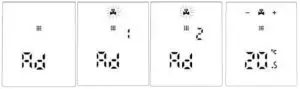
Display “AD”, press ![]() Start system self-check, when display “1”, this is the first step of system self-check. When Display “2”, this is the second step, after finish self-check, If there is no fault prompt, it will enter the normal working state. If there is a fault prompt, please handle the fault first, otherwise it will not enter the normal working state.
Start system self-check, when display “1”, this is the first step of system self-check. When Display “2”, this is the second step, after finish self-check, If there is no fault prompt, it will enter the normal working state. If there is a fault prompt, please handle the fault first, otherwise it will not enter the normal working state.
Malfunction
Error Code | Description |
| E1 | Motor fault |
E2 | Sensor fault |
Flashing show low battery |
Special Function description
Holiday mode: press ![]() 3s access to setting interface, short press
3s access to setting interface, short press ![]() to choose holiday mode
to choose holiday mode ![]() then short press
then short press ![]() enter temperature setting, short press
enter temperature setting, short press ![]() setting days setting,press
setting days setting,press ![]() or to adjust value,under holiday mode, short press
or to adjust value,under holiday mode, short press ![]() to exit holiday mode
to exit holiday mode
Open Windows Function:
- The actuator turns off the window opening function by default, if you need to use it, you can turn it on in the advanced option A2 setting [reset when changing the battery]
- When the actuator detects that the indoor temperature drops quickly to the valve closed setting value (adjustment range: 5℃-25℃), the valve will be closed for 15 minutes (adjustment range: 5-60 minutes), and it will be closed after the window opening function is completed. Return to the original operating mode, but the valve will be fully opened
Programming mode setting
Press ![]() about 3s access to setting interface,short press
about 3s access to setting interface,short press ![]() switch to
switch to ![]() , short press
, short press ![]() access to programming, short press
access to programming, short press ![]() to choose which item you want, First set the auto mode to 5 means 5+2 days, 6 means 6+1 days, 7 means 7 days), after press
to choose which item you want, First set the auto mode to 5 means 5+2 days, 6 means 6+1 days, 7 means 7 days), after press ![]() to access to hours setting, Short press access to temperature setting. press
to access to hours setting, Short press access to temperature setting. press ![]() or
or ![]() to adjust value.
to adjust value.
Automatic mode parameter setting sequence: After finish Auto modem setting(ex:5+2), press access to first period hours setting, press ![]() or
or ![]() to adjust value. press
to adjust value. press ![]() to access to first periof minute setting, press or to adjust value, press access to working days first period temperature setting, press
to access to first periof minute setting, press or to adjust value, press access to working days first period temperature setting, press ![]() or
or ![]() to adjust value, press
to adjust value, press ![]() to set second time period,third time period…… from working day to holiday, After setting, do not operate the button for 10 seconds, the setting parameters will be automatically saved and the normal working interface will be returned.
to set second time period,third time period…… from working day to holiday, After setting, do not operate the button for 10 seconds, the setting parameters will be automatically saved and the normal working interface will be returned.
period | Default period | Default temperature |
1 | 6:00-8:00 | 20℃ |
| 2 | 8:00-11:30 | 15℃ |
3 | 11:30—12:30 | 15℃ |
| 4 | 12:30—17:30 | 15℃ |
5 | 17:30—22:00 | 20℃ |
| 6 | 22:00—6:00 | 15℃ |
Advanced options
Press ![]() about 3-5s to access to setting interface, Short press
about 3-5s to access to setting interface, Short press ![]() until
until ![]() flashing, press
flashing, press ![]() to access to advanced options,press
to access to advanced options,press ![]() or
or ![]() to adjust value, after finish setting every time, short press
to adjust value, after finish setting every time, short press ![]() to set next option, after finishing all ,don’t operate, after 10s it will automatically save and exit.
to set next option, after finishing all ,don’t operate, after 10s it will automatically save and exit.
| No | Item | Setting parameters | default |
| A1 | Measuring temperature correction | -9-+9°C | 1°C accuracy correction |
| A2 | Window ventilation function:Window temperature and window function operating time |
| default of power on is |
| A3 | Automatic lock if no operation more than 10 minutes | 0:close 1:open | 0 |
| A4 | The minimum limit of the setting temperature | 1-15°C | 5°C |
| A5 | The maximum limit of the setting temperature | 16-70°C | 35°C |
| A6 | BOOST mode operating time | 100s-900s , Steps of 100 seconds | 300Seconds |
| A7 | Check valve opening | 0-99 99 mean valve open 100% 5 mean valve open 5% | |
| A8 | Heating start/stop Temperature hysteresis | 0.5-1.5 | 1 |
| A9 | Display mode | 0:vertical display 1:horizontal display | 0 |
| AA | Control type of valve | 0: PID 1:ON/OFF | 0 |
| AB | Rese | Display 88, using |


