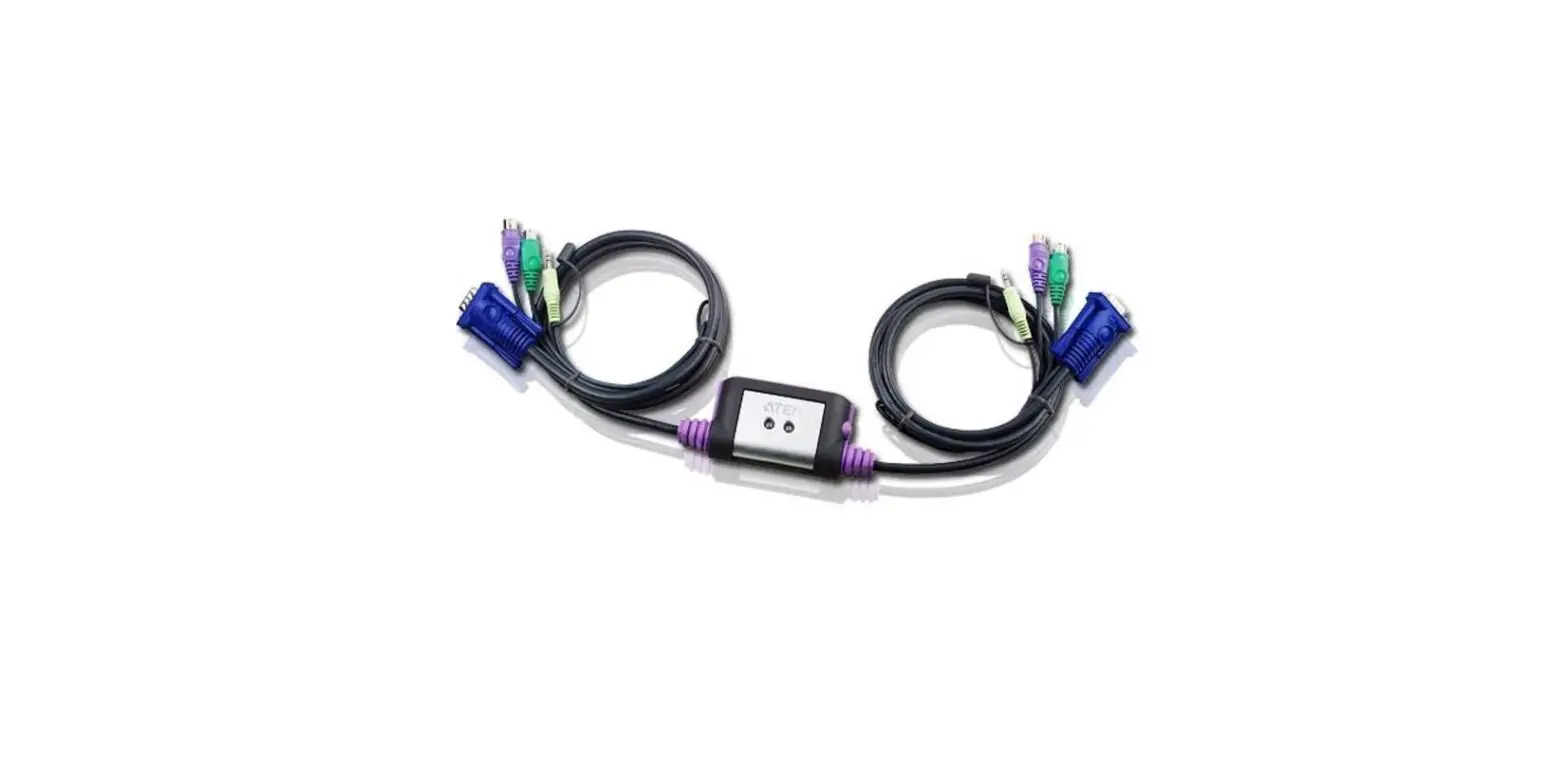
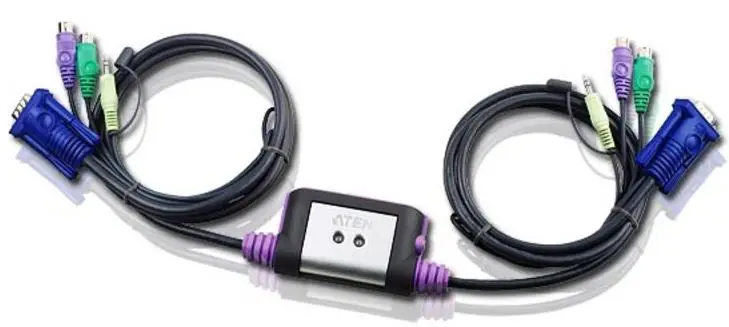
ATEN CS-62A 2-Port PS-2 VGA-Audio Cable KVM Switch (1.2m) CS62A
Hardware Review
Package Contents
- 1 CS-62A PS/2 KVM Switch with Attached Cables
- 1 User Guide

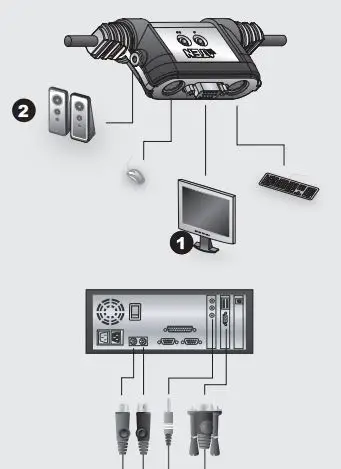
CS-62A Installation Diagram
Requirements
Console
- A VGA, SVGA, or Multisync monitor capable of the highest resolution that you will be using on any computer in the installation
- A PS/2 Mouse
- A PS/2 Keyboard
Computers
The following equipment must be installed on each computer that is to be connected to the system: - A VGA, SVGA or Multisync video port
- A 6-pin Mini-DIN (PS/2 style) mouse port
- A 6-pin Mini-DIN (PS/2 Style) keyboard port
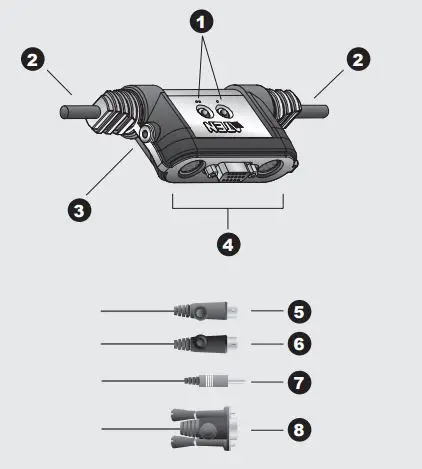
Hardware Review - Port LEDs
- KVM Cables
- . Speaker Jack
- Console Ports
- PS/2 mouse connector
- PS/2 keyboard connector
- Speaker Plug
- Video Connector
Installation
important
- Before you begin, make sure that the power to all the devices you will be connecting has been turned off. You must unplug the power cords of any computers that have the Keyboard Power On function. Otherwise, the switch will receive power from the computer.
- To prevent damage to your equipment, make sure that all the devices you will be connecting are properly grounded. Installing your new CS-62A involves the following steps:
- Plug your keyboard, monitor, and mouse into the Console ports on the CS-62A. Each port is labeled with an appropriate icon.
- Plug your speakers into the CS-62A’s speaker jack. Note: This step is optional
- Plug the attached KVM cables’ keyboard, monitor, mouse, and speaker connectors into their respective ports on the computers you are installing. After you have fi nished attaching the cables, turn on the power to the computers. Note: The CS-62A’s Power On default is to link to the fi rst computer you turn on.
Operation
Hotkey Port Selection
All hotkey port switches begin with tapping the Scroll Lock key twice. [Scroll Lock] [Scroll Lock]
Invokes Auto Scan Mode
Starts Auto Scan. Press and release the [Left Shift] key, and then press the [Right Shift] key. [Left Shift] [Right Shift]
Scan Interval
Sets the Auto Scan interval to n second intervals – where n is a number from 1 – 4. [Left shift] [Right shift] [S] [n] Note: The n stands for the number of seconds that the focus dwells on a port before switching to the other one. Replace the n with a number between 1 and 4 when entering this hotkey
Scan Interval Table
| n | Secs. |
| 1 | 3 secs. |
| 2 | 5 secs. (Default) |
| 3 | 10 secs. |
| 4 | 20 secs. |
Troubleshooting
| Symptom | Possible Cause | Action |
| Keyboard Not Responding | Keyboard needs to be reset. | Unplug the keyboard from the Console Keyboard Port, then plug it back in. |
| Switch needs to be reset. | Turn off the computers. Unplug the KVM cables. Wait five seconds; then plug the cables back in and turn the computers on. | |
| Pressing Hot Keys Gets No Response* | Hotkey sequence input incorrectly. | Resend the Hotkey command – press and release each key in the sequence individually. |
| Mouse Not Detected, or Does Not Respond Correctly* |
Mouse needs to be reset. | Unplug the mouse from the Console Mouse Port, then plug it back in. |
| Video Problems | Resolution and/or Bandwidth set too high. | Select a lower resolution and/or bandwidth. |
- Some Notebooks, notably the IBM Thinkpad and Toshiba Tecra, have trouble when their mouse and keyboard ports are used simultaneously. To avoid this, only connect the mouse port or the keyboard port. If you connect the mouse port, you will need to use the notebook’s keyboard when the notebook becomes the active computer.
Specifications
| Function | CS-62A | ||
| Computer Connections | 2 | ||
| Port Selection | Hotkey | ||
|
Connectors | Console Ports | Keyboard | 1 x 6-pin Mini-DIN Female (Purple) |
| Video | 1 x HDB-15 Female (Blue) | ||
| Mouse | 1 x 6-pin Mini-DIN Female (Green) | ||
| Speaker | 1 x Mini Stereo Jack Female (Green) | ||
| KVM Ports | Keyboard | 2 x 6-pin Mini-DIN Male (Purple) | |
| Video | 2 x HDB-15 Male (Blue) | ||
| Mouse | 2 x 6-pin Mini-DIN Male (Green) | ||
| Speaker | 2 x Mini Stereo Plug Male (Green) | ||
| LEDs | Selected | 2 (Green) | |
| Cable Length | Computers | 1.2m | |
| Emulation | Keyboard/ Mouse | PS/2 | |
| Video | 2048 x 1536; DDC2B | ||
| Scan Interval | 3, 5, 10, 20 Seconds | ||
| Environment | Operating Temp. | 0-50°C | |
| Storage Temp. | -20-60°C | ||
| Humidity | 0-80% RH, Non-condensing | ||
| Physical Properties | Housing | Plastic | |
| Weight | 0.41 kg | ||
| Dimensions (L x W x H) | 12.00 x 4.95 x 2.50 cm | ||
 User Guide")


![Aten 8/16-port Short Depth Ps/2-usb Vga Single Rail Widescreen Lcd Kvm Switch User Manual [cl3108, Cl3116]](https://static-data1.manualsee.com/1/img/90/54690/2021/01/Aten-8-16-Port-Short-Depth-PS-2-USB-VGA-Single-Rail-WideScreen-LCD-KVM-Switch-User-Manual-CL3108-CL3116.jpg "Aten 8/16-port Short Depth Ps/2-usb Vga Single Rail Widescreen Lcd Kvm Switch User Manual [cl3108, Cl3116]")
