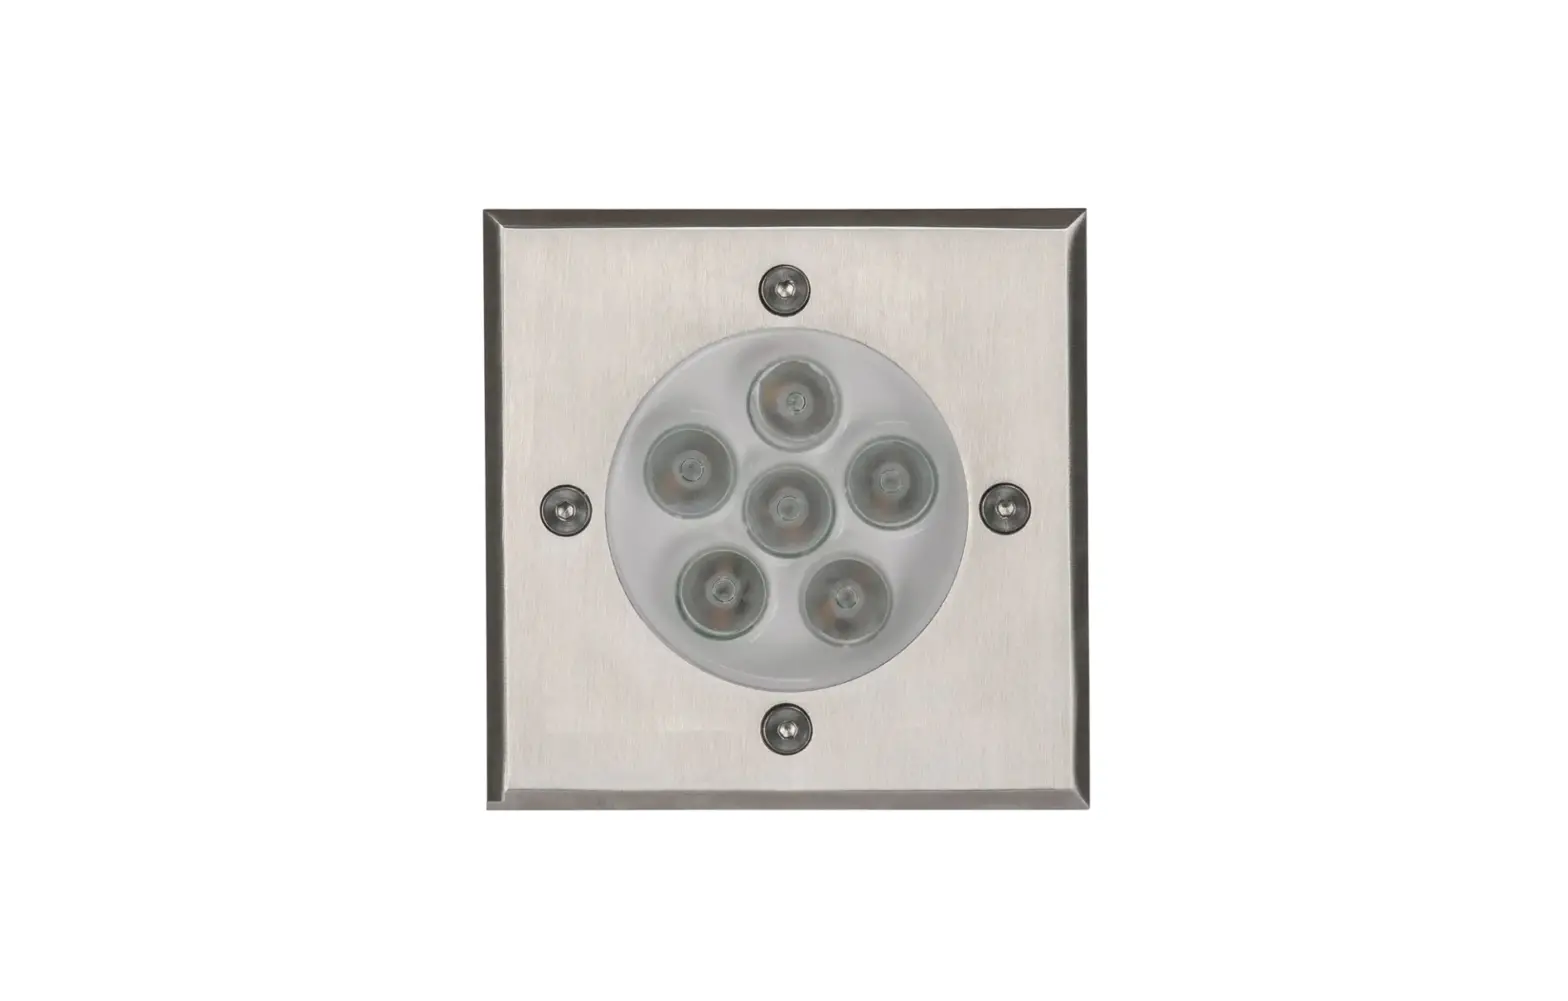
HAVIT Lightning HV1701RGBW Metro Inground Light Instruction Manual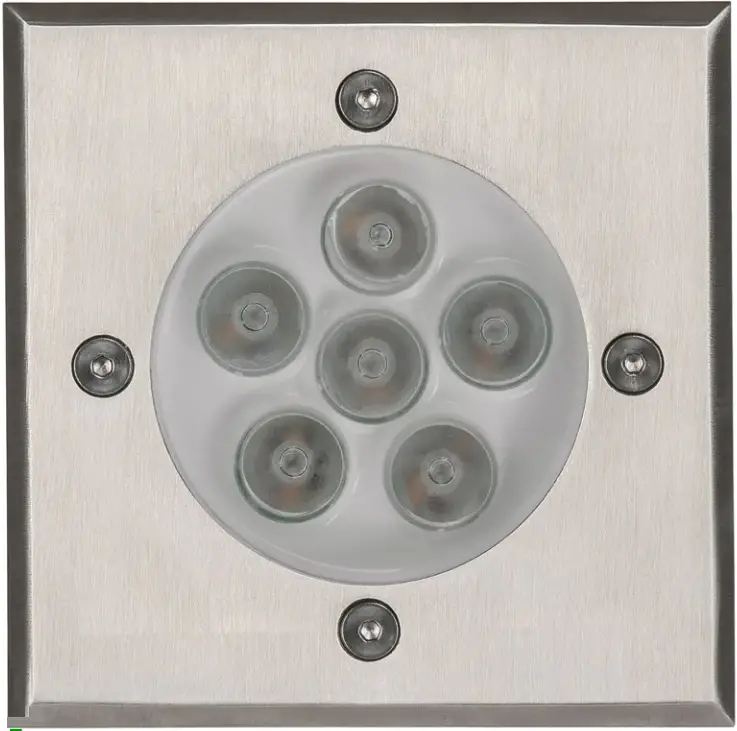
Product Specifications
| Model No. | HV1701RGBW | HV1801RGBW |
| Name | Metro | |
| Material | 316 Stainless Steel cover + Aluminium body | |
| Colour | Cover – Stainless Steel | Body – Black | |
| IP Rating | IP65 | |
| Input Voltage | 12v DC | |
| Protection Class | ||
| Lamp Base | Built in LED | |
| Lamp Wattage | 1x 5w | |
| Colour Temp | RGBW (RGB + 3000K) | |
| Lumens | 255lm (3000K) | |
| CRI | > 80 | |
| Wiring | Parallel | |
| Dimmable | Yes, With RGBW Controller | |
| Warranty | 3 Years Replacement* | |
Important Safety Issues:
- This product must be installed by a qualified electrician according to AS/NZS 3000.
- Ensure all electrical mains are disconnected before any installation.
- Modification of this product will void any warranty.
- Havit Lighting does not take responsibility for wrong installation, incorrect use, or use of installation material that does not belong to the system.
- When installing low voltage fittings, Voltage to fitting must be within +or- 5% of voltage required, if not within this allowance warranty will be voided.
- Aluminium and 304SS fittings must not be installed within 5km of any salt water environments.
- All 316 stainless steel fittings must have regular cleaning maintenance to avoid any tea staining from forming on fitting. (Warranty does not cover Tea Staining)
- All o-rings and seals must be in place correctly to maintain warranty
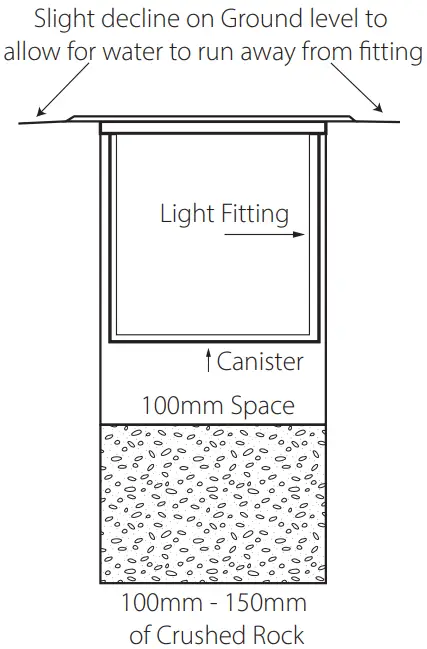
- When installing inground light fittings, Adequate drainage must be allowed to prevent fittings from sitting in water for a long period of time, if no drainage is allowed, Warranty will be voided.
(See sample adequate drainage diagram for correct installation method.) - This form may be updated at any time due to product improvements, please check online installation form for most current version.
Adequate Drainage
Dimensions
HV1701RGBW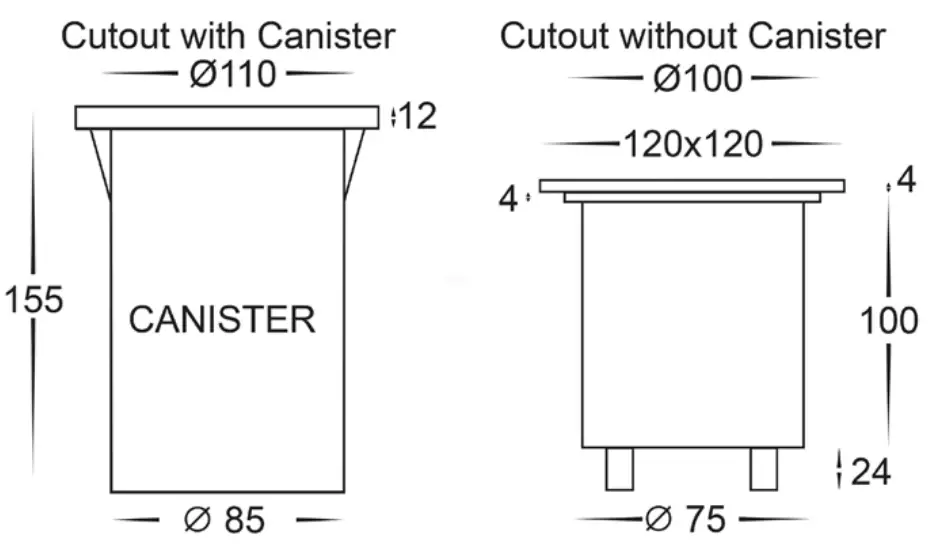
HV1801RGBW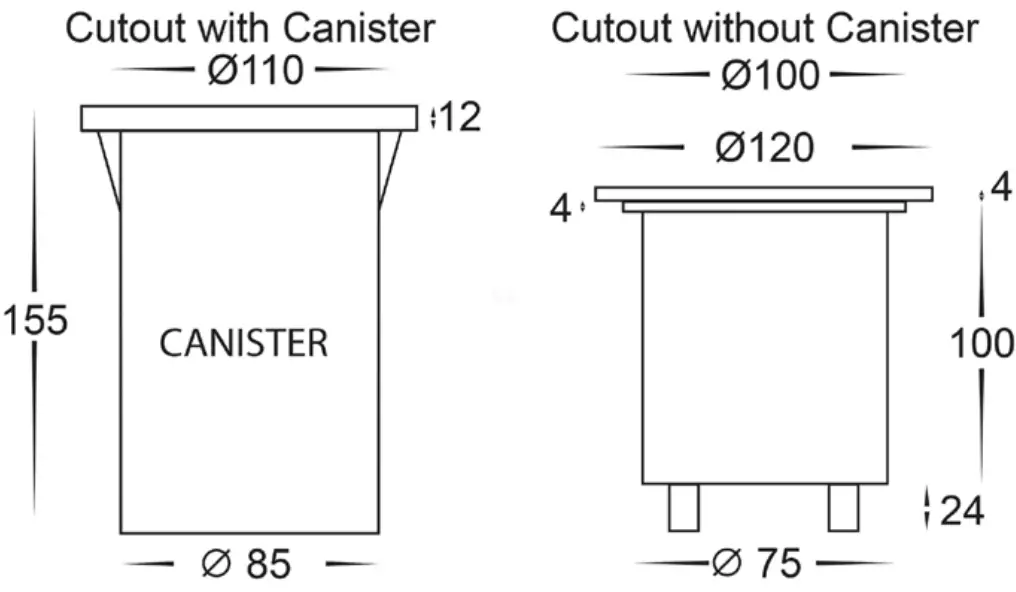
Steps for Installation:
- Make sure that the electrical circuit is free of voltage (master switch off )
- Make a hole where fitting is to be placed using dimensions provided on line drawings, making sure adequate drainage is allowed.
- Insert canister, and ensure that the top is level with ground or floor. Failure to do so will void warranty.
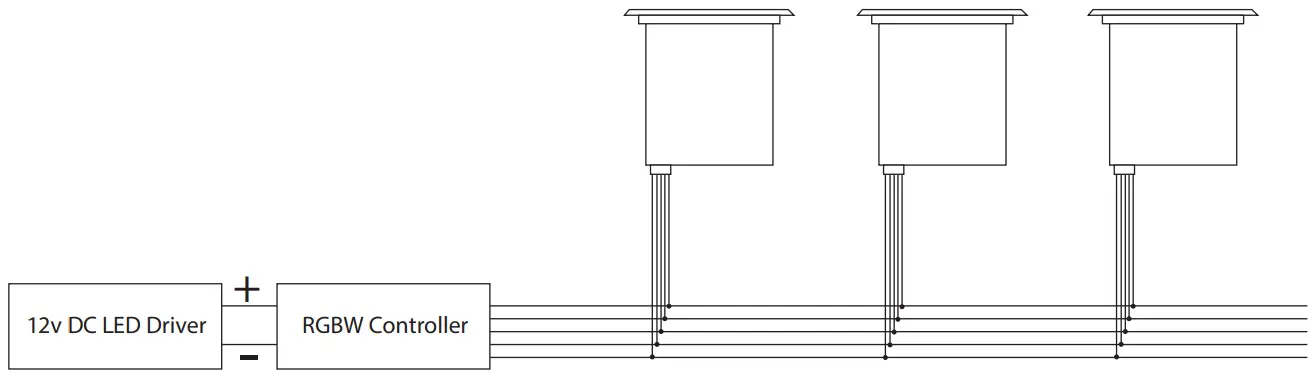
- Connect the cable –
- Use an appropriate 12v DC LED Driver and RGBW LED Controller- DO NOT CONNECT LIGHT FITTING DIRECT TO 240V
- Do this by stripping back the cable on both fitting and cable run and twist cable together making sure all colours are correctly joined to the correct colour-
- Black= Positive
- Red = Red
- Green = Green
- Blue = Blue
- White = White
- Solder all joins using solder and either a heat gun or butane gas torch.
- Cover connections using an adhesive lined heat shrink or gel cap to make connection watertight. Failure to do this will void warranty.
- Heat the heat shrink or crimp the gel cap making sure all connections are covered.
- Connect cable run to RGBW Controller.
- Connect Controller to 12v DC LED Driver.
- All connections must be carried out carefully, inspect all contacts before switching back on the electric circuit
Sample Wiring Diagram
Must be installed by a licensed electrician
Contact Details:
143 Beauchamp Road
Matraville NSW 2036
Australia
Tel: 02 9381 8300
Fax: 02 9666 8881
Email: [email protected]
Web: www.havit.com.au
Warranty Terms & Conditions* 
Additional Information