![]() PX850G PX-G Series Native Atx 3.0 Full Modular Power Supply
PX850G PX-G Series Native Atx 3.0 Full Modular Power Supply
User Manual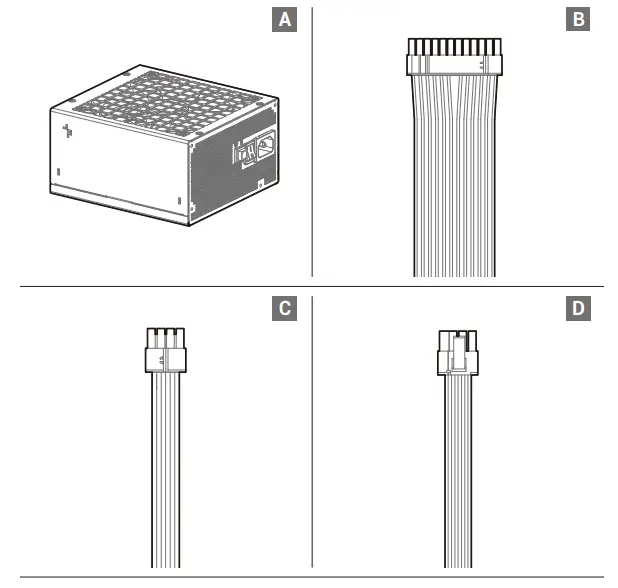
List of parts
A. Power supply unit
B. Main Power Connector (20+4)Pin×1
C. CPU8(4+4)Pin x 1
D. PCI-E(6+2)Pin x 1
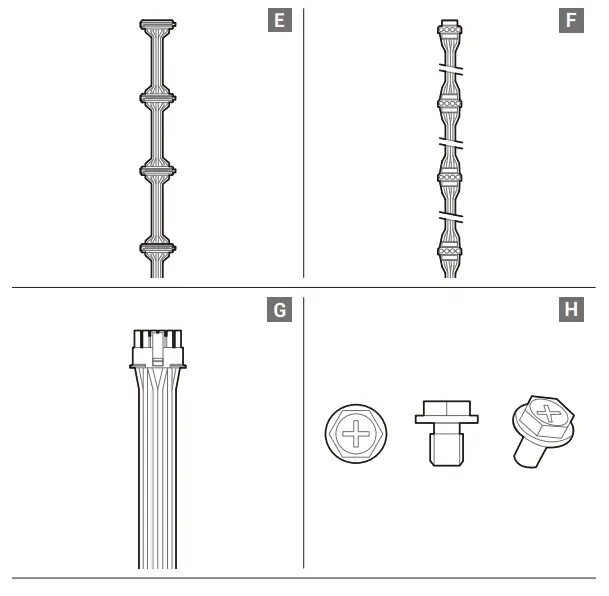
E. SATA x 4
F. 4pin Peripheral x 4
G. 12VHPWR(16Pin) x 1
H. Mounting screws
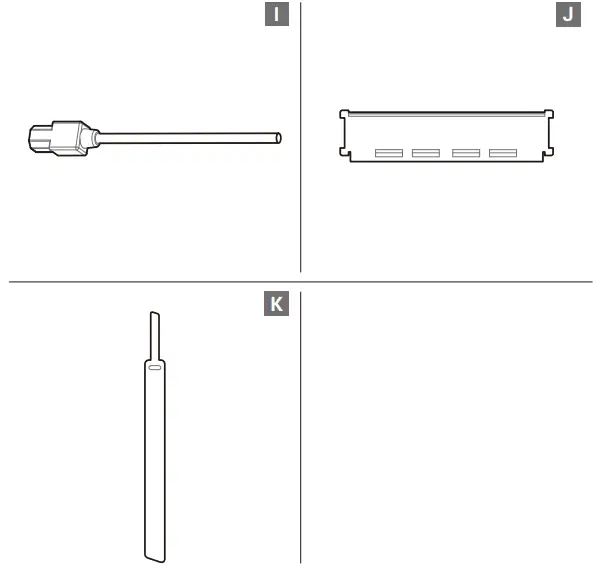
I. AC power cord
J. Tester
K. Velcro
Specification sheet
| Model No. | PX850G-FC | ||||
| AC Input | 100-240Vac 10A-5.0A 50-60Hz | ||||
| DC Output | +3.3V | +5V | +12V | -12V | +5VSB |
| Max Output Current | 22A | 22A | 70.8A | 0.3A | 3A |
| Max Combined Wattage | 120W | 849.6W | 3.6W | 15W | |
| Total Output | 850W | ||||
| PXAO0G-FC | ||||
| 100-240Vac 13A-6.5A 50-60Hz 200-240Vac 6.5A 50Hz | ||||
| +3.3V | +5V | +12V | -12V | +5VSB |
| 22A | 22A | 83.3A | 0.3A | 3A |
| 120W | 999.6W | 3.6W | 15W | |
| 1000W | ||||
| Model No. | PXCOOG-FC | ||||
| AC Input | 100-240Vac 15A-7.5A 50-60Hz 200-240Vac 7.5A 50Hz | ||||
| DC Output | +3.3V | +5V | +12V | -12V | +5VSB |
| Max Output Current | 22A | 22A | 100A | 0.3A | 3A |
| Max Combined Wattage | 120W | 1200W | 3.6W | 15W | |
| Total Output | 1200W | ||||
| Type | ATX12V V3.0 | Hold Up Time | 16ms |
| Product Dimensions 150 x 160 x 86mm (W x L x H) | Efficiency | ?90% Under Typical Load(50% Loading) | |
| Fan Size | 135mm | Protection | SCROPROTROVP,OCRUVP |
| Fan Bearing | FDB (Fluid Dynamic Bearing) | Operation Temperature | 0-40°C |
| Topology | Active PFC + Half Bridge SRC LLC + DC to DC | Erp Regulation | ErP 2014 |
| Capacitors | Full Japan Electrolytic Capacitors | MTBF | 100,000 Hours |
| Power Good Signal | 100-150ms | Warranty | 10Years |
Installation
 Ensure that the AC power cord of the power supply is not connected.
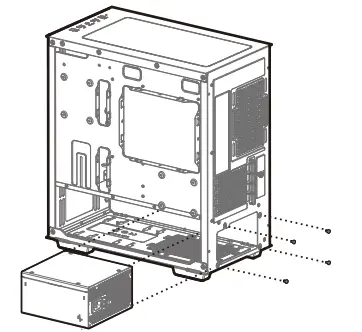 Follow the case’s manual on installation of a power supply, and install the unit with the provided mounting screws.
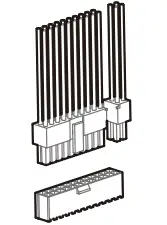 The 24Pin motherboard cable has a detachable 4Pin connector, which allows support for both 24Pin and 20Pin power sockets on the motherboard.
 Connect the CPU(4+4)Pin cable to the motherboard.
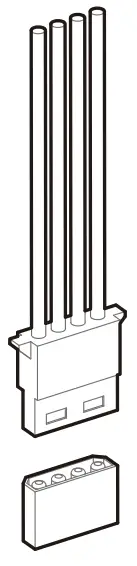 Connect the peripheral cable to the power supply socket of the hard disk and CD-ROM/DVD-ROM.
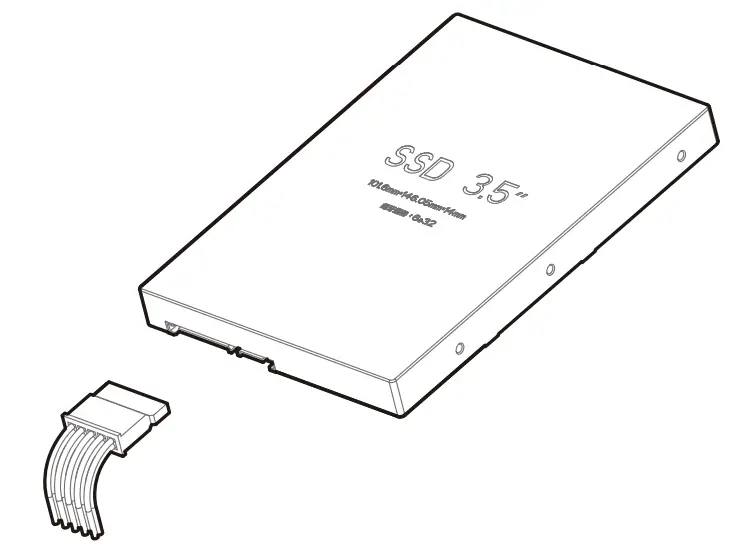 Connect the SATA cable to the power socket of the SATA SSD or hard disk.
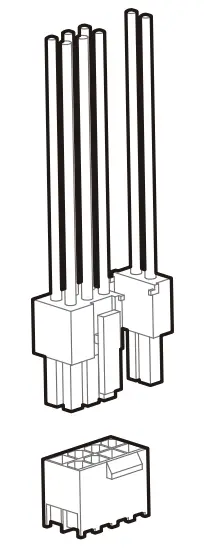 Connect the PCI-E(6+2)Pin cable to the power socket of the PCI-E graphics card (if necessary).
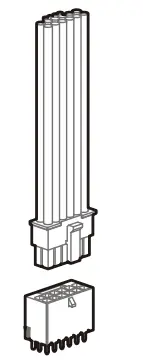 If your Graphic Card uses 12VHPWR, please prioritize using the 12VHPWR (12+4pin) cable configured in our Power Supply to connect to your Graphical Card.
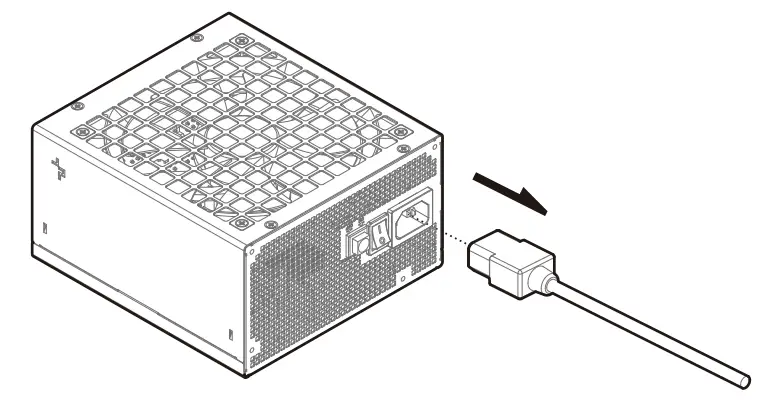
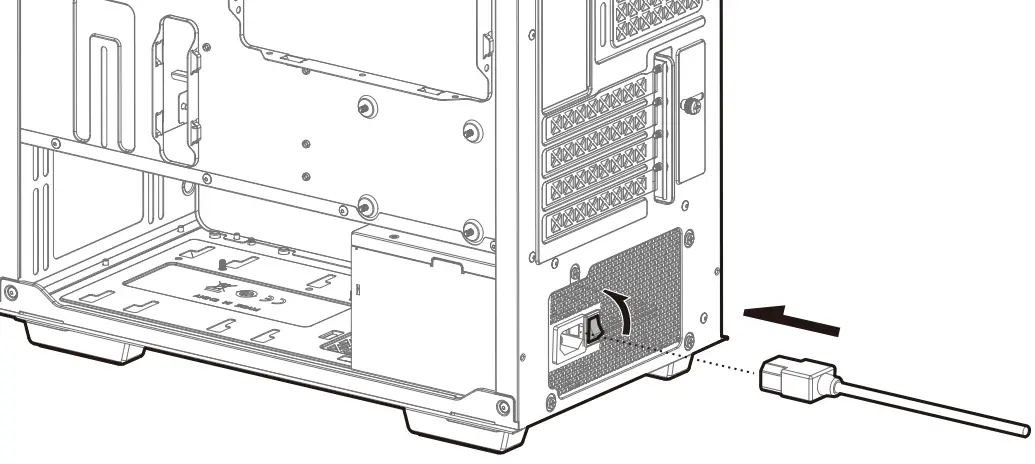 Connect the AC power cord to the power supply and turn on the power by turning the switch to the ”I” position.
For more information, please check our website at: www.deepcool.com
Deep Cool USA Inc.
11650 Mission Park Drive Suite 108., Rancho Cucamonga, CA 91730
Beijing DePaolo Industries Co., Ltd.
Building 10, No. 9 Dijon Road, Haitian District, Beijing 100095, China
© 2023 Beijing DePaolo Industries Co., Ltd. All rights reserved.
“ ”and other commercial identities are legitimate registered trademarks and commercial identities of the trademarks owner and its affiliates in China and other countries or regions. Pictures on this package are for reference only, please refer to the actual product.![]() www.deepcool.com
www.deepcool.com


